In this blog I will provide a full understanding of the steps of installing PostgreSQL from the source code and how to get it to work properly, also the installation process should make postgres ready to LOAD Apache AGE extension, and I provided resources at the end of the blog to know how to install Apache AGE.
What is Postgres?
PostgreSQL is a powerful open-source relational database (RDB) management system that uses SQL as its main query language. PostgreSQL proved to be highly reliable, stable, scalable, and secure. As it is a relational database, it provides ACID properties which stands for (Atomicity, Consistency, Isolation, and Durability).
How To Install Postgres From Source Code:
1- Requirements before Installation
To work with Apache AGE Extension you need to install Linux subsystem on your windows as Apache AGE is not supporting windows installation yet. So you will need to enable Windows Subsystem For Linux on your windows to able to install wsl, you can do that by searching for Turn Windows features on or off on the windows search bar down below, then scroll down till you find Windows Subsystem for Linux and check it. Now restart your machine and you should be ready to go.
To install wsl (this blog assumes you have Windows 10 version 2004 or higher), you will only need to open command prompt as an administrator and run the following command:
wsl --install
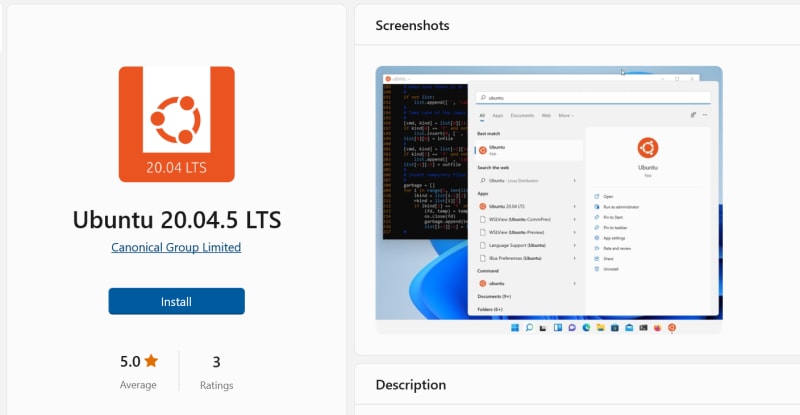
This command will download Ubuntu as the distro by default and for more information you can check here, also make sure to download linux terminal for the right distro from Windows Store, I'm using Ubuntu 20.04.5 LTS for this tutorial:
2- Installation:
Installing PostgreSQL from source code make it more customisable to fit your application needs and it also make it easier to switch between different versions, In this blog we will install PostgreSQL 12 as it is the latest version that Apache AGE extension supports for now (very soon it will support PostgreSQL 13, you can always check here), but the installation process of future supported versions will be the same.
1- Open your linux terminal as an administrator and run the following command (this will ensure you have the required git and PostgreSQL dependencies for installation):
sudo apt install git libreadline-dev zlib1g-dev bison flex build-essential
2- Before cloning the repository, to access the drives of your machine on terminal you can simply run:
cd /mnt/c
3- this will change the current directory to the root directory of C drive. Now create a directory where you will install PostgreSQL, we will name it (age_project) and then clone the PostgreSQL repo:
mkdir age_project
cd age_project
git clone https://git.postgresql.org/git/postgresql.git
4- Access postgresql directory and switch to PostgreSQL 12
cd postgresql
git checkout REL_12_STABLE
5- Now if you ls in the directory, you will find a configure script which we should be run to configure the source code for installation:
./configure --prefix=/usr/local/pgsql-12 --enable-debug
the --prefix option specifies the installation directory for PostgreSQL 12 as /usr/local/pgsql-12, /usr/local/ is where locally compiled applications install to by default, so when we compile the code it knows where to send the compiled files, note: we didn't create that directory yet, we just informed postgresql to store the executable files there after compilation (specifically after running make install command later), so we will need to create the directory in a next step. The --enable-debug is necessary to allow debugging for source code.
6- Run the make command:
make
7- Now the executable files are in the same directory but we still need to install them where we specified above, to /usr/local/pgsql-12 directory, to do that run the following command to create the folder first, change the owner and then install (make sure to replace [user] with your user name):
sudo mkdir /usr/local/pgsql-12
sudo chown [user] /usr/local/pgsql-12
make install
8- After installation we are almost done, the remaining step is to add some environment variables to be able to access the executable files in the terminal, we do this by the following command:
export PATH=/usr/local/pgsql-12/bin/:$PATH
export PGDATA=/usr/local/pgsql-12/bin/data
we exported /usr/local/pgsql-12/bin/ as it contains the executable files of PostgreSQL 12 such as pg_ctl which we will use to run postgres server.
we exported the data directory /usr/local/pgsql-12/bin/data because it is where postgres stores the data like databases data, each database created has a subdirectory there.
9- Finally it is time to work with postgres, we will first initiate the cluster (A database cluster is a collection of databases), we simply need to run initdb in the terminal (which is one of the files installed in /usr/local/pgsql-12/bin/:
initdb
10- start a server by the following command:
pg_ctl start -l logfile
in this case we named the log file logfile which will be created and it contains information about the server activity.
11- Now start postgres by running:
psql postgres
12- Congrats you are done!, you can exit psql by \q and stop the server by running:
pg_ctl stop -l logfile
With having PostgreSQL running you can successfully LOAD Apache AGE extension, you can clone it from github repo here, and for more information about how to deal with it you can visit https://age.apache.org/.


Top comments (0)