
Introduction
Working with any new technology can be both an exciting and scary experience. On one hand, you might feel excited about building with a new set of tools. But knowing how to choose the right ones, amongst all the tools available, can also be overwhelming.
Whether you're just starting to learn Web3 or are an experienced builder, you will understand this daunting experience well. Developers need to have knowledge not only of Web3-specific concepts like blockchains and smart contracts but also of an entirely new tool stack to develop on these concepts. However, with the right steps and proper tools, developers can build on Web3 technologies relatively quickly and efficiently.
In this article, we’ll give a brief overview of the steps needed to create a Web3 smart contract. At the same time, we’ll look at how you can navigate those steps successfully by writing, deploying, and testing smart contracts using a tool you already know — Visual Studio Code (VS Code) — and the Truffle for VS Code extension.
Choosing the Right Tools
After learning the foundations of blockchain and Ethereum, you probably became inspired to start applying your knowledge to build your own Web3 projects. Along the way, you may have collected a long list of tools from various projects and tutorials. Instead of getting lost in that list, let's focus on exploring the steps needed to start a new smart contract project by using one of those tools—the Truffle for VS Code extension—and exploring how it can help through some of the steps of your smart contract’s development, such as: creation, debugging, deploying, and security.
Project Creation
First, let’s look at creating your initial project.
A successful project often starts with a good setup and file structure. Since many problems can arise from not properly setting up your project, making sure your file structure is consistent and intuitive in its naming is crucial.
A nice benefit of using the Truffle for VS Code extension is that you can quickly build a new project with the correct structure from the beginning, either by creating a new folder with a templated file structure and starter files, or by simply creating a project from a Truffle Box.
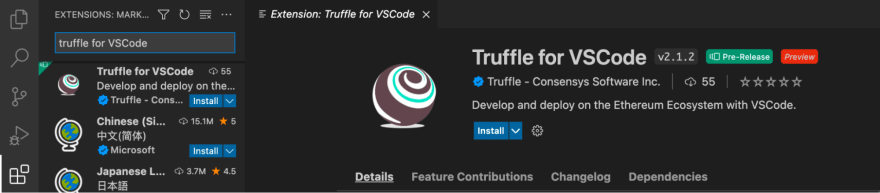
To see what a proper file structure looks like, let’s start a new project. First, you’ll need to install the Truffle for VS Code extension. For detailed installation instructions and to get even more info about its capabilities, check out this post.
Once the extension is installed, press the keys SHIFT + CTRL/CMD + P to open up the command palette. Next, type in the command Truffle New Solidity Project and select the option Create basic project. After choosing the project path, a new project will be created with the proper file structure.
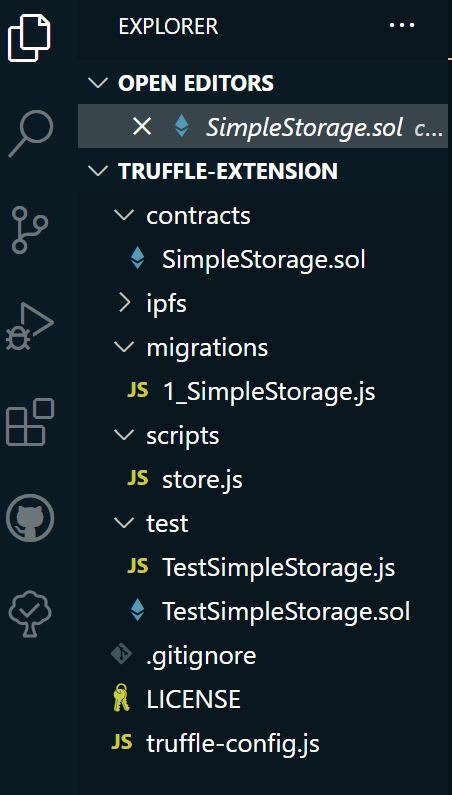
As you can see, the template project has a folder containing smart contracts, another for migrations to blockchain environments, a third folder for scripts, and yet another folder for tests. The project also includes a .gitignore for storing information you don’t want to push to a repository, an open source license agreement, and a truffle-config.js file.
This file structure keeps everything neat and organized, so importing from one file to the other or running Truffle commands is straightforward and less prone to errors.
Debugging Your Contract
Unfortunately, we don't live in a perfect world where there are no errors in our code. And when building your smart contract, you will encounter error messages you may not have seen before. Debugging these transactions can be tricky if you always need to reference a blockchain explorer like Etherscan for information.
One solution is to use the Debug Transaction feature via the Truffle for VS Code extension. To work with the debugger, open the command palette again and type Truffle Debug Transaction. From there, you can view transaction messages and work through them step by step. This is important for developers as oftentimes, there can be errors in a certain transaction that would cause the next transaction attempts to fail (like funds being unavailable in a specific wallet).

After selecting a transaction, the debugger will become available. Here you can perform typical debugging functions such as step in/out/over, view the call stack, watch windows, and so on.

Deploying Your Contract
After you have a working smart contract, it’s time to deploy. There are three avenues to approach here. The best practice is to first deploy to a local blockchain instance for testing, such as Ganache. Afterward, you would want to deploy to a testnet to verify it’s working correctly in a live environment. Then, only after all the testing is complete would you launch your project to the mainnet. All this testing will help you avoid costly and sometimes irreversible errors in your smart contracts.
Within the Truffle extension, you can deploy to all three types of networks without needing to leave VS Code. You can do this by right-clicking on the .SOL file you would like to deploy and selecting Deploy Contracts.

Local Blockchain: Using the Ganache Service is a simple way to create a local blockchain with multiple wallet addresses and test Eth that you can use to interact with your smart contract. From the extension, you can create a new Ganache network under the Truffle - Networks pane in VS Code. After creating a network, you can start/stop and restart the server as needed.

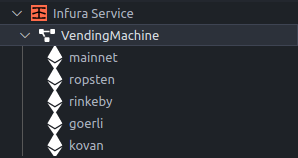
Testnets: Testnets are designed to work in a similar way to the Ethereum mainnet without the financial costs and risks of deploying directly to the mainnet. Using a testnet is a great way to get a better understanding of how your contract will function once deployed to mainnet.
There are several Ethereum testnets to choose from and they can all be connected to by using a node provider service, such as Infura. After setting up your Infura account within the extension, you have access to your existing Infura projects or you can easily create new ones.
Mainnet: If testnets are like staging servers for your smart contract code, deploying to mainnet is like pushing the code to production. The importance of testing your smart contract code cannot be stressed enough. If there are any errors or loopholes, they can and will be exploited by attackers. These mistakes can be costly for both organizations and users alike.
Let’s look at how we can secure our contract using the right tools and best practices before we deploy to mainnet.
Securing Your Contract
Security should always be a major priority when developing smart contracts. Millions of dollars are lost to hackers on what seems like a regular basis. As a Web3 developer, you need to continuously stay up to date on the latest security best practices.
Running your smart contracts through tools like Diligence Fuzzing or their open source alternative, Scribble, can help you catch many common security vulnerabilities. However, if your project aims to handle the funds of millions of users, it’s best practice to professionally audit your smart contracts.
Still, developers should be aware of common vulnerabilities while building their projects. One frequent attack vector in Web3 is when hackers use bots to scan deployed contracts for potential vulnerabilities and secret information, such as wallet private keys left in the code from testing. Using a tool like Truffle Dashboard is one way to avoid losing funds and assets from development mistakes.

Truffle Dashboard removes the need for developers to store private keys within a config file in the Solidity project. Developers can do a one-time setup process of connecting their Metamask wallet to a locally hosted dashboard on the browser. After this is done, using the dashboard keyword instead of copying and pasting keys into a config file is enough. It is compatible with other development frameworks as well, such as Hardhat.
To use the Truffle Dashboard, install the latest version of Truffle and enter the command truffle dashboard in your terminal. Now, any actions that would have required your private keys can get routed through the dashboard instead. For example, to deploy your contract, ensure the proper port is specified in your truffle-config.js file (by default this is 24012), then just right-click your contract to deploy it and select dashboard: 24012:


The Right Tools, The Right Way Forward
Building a Web3 project doesn’t have to be complicated. With the right tools, the path forward becomes clear. There are many ways to improve your workflow, but having the Truffle for VS Code Extension at your disposal will help you work efficiently from an environment you may already be familiar with. This space moves pretty fast, and new tools are created all the time. So hopefully, this article gave you an idea of an easy way to streamline the development process while navigating the Web3 tool stack.

Top comments (0)