Prologue
You may skip this section if you're aware of how a HTTPS connection works.
As developers, we need to ensure that interactive web applications can securely transmit data (HTTPS) over public network. Systems achieve this using Transport Layer Security (TLS), a successor to the widely known Secure Sockets Layer (SSL) protocol.
In crude terms, TLS (handshake) is an encryption mechanism, where participants decide on a few parameters to setup a secure connection.
So how do the actors (systems) make this decision?
They do it by using a TLS certificate.
A certificate is an integral part of spinning up a HTTPS server. Anyone can create a certificate and provision a HTTPS-complaint actor using it, but since no one is a trusted entity on the internet, using a self-signed certificate to setup a secure connection is not recommended.

To be able to serve HTTPS traffic, your server needs a TLS certificate signed by a certificate/certification authority (CA). These authorities perform the role of a trustworthy third party between two participants that don't trust each other.
In this post, we'll look at how to generate and use TLS certificates from LetsEncrypt and AWS Certificate Manager.
Pre-requisites
If you are student, check out this amazing initiative from GitHub. You should be able to setup the pre-requisites for free using the promotions available as a part of the student developer program.
-
Provision an EC2 instance
Follow this extensive documentation to create a compute resource on AWS.For our exercise, you can select
t2.nanoas the instance type (cheapest option, unless you qualify for the free tier usage) andUbuntu 18.04as the AMI.
As you configure your instance, do not forget to setup/assign a security group policy that allows inbound connections to port 22, 80 and 443,

and make sure AWS launches your instance with a public IP address (verify on EC2 dashboard).

Keep the instance IP address handy, along with the SSH key you generated/assigned.
-
Deploy an application
Refer to this document if you're not familiar with how to remotely access your EC2 instance. As an example, we will be deploying (executing) a "hello world" node(js) web application using SSH.We are using a linux-based system for our exercise.
Open a terminal and execute the following command :
ssh -i /path/to/ssh-key-name.pem ubuntu@instance-public-ip-addr

If you see something like the above screenshot, you've successfully connected to your EC2 instance. Let's run a few commands now, to deploy our example application.# Update platform package manager sudo apt-get update # Install Node Package Manager sudo apt-get install npm # Download application codebase git clone https://github.com/fhinkel/nodejs-hello-world.git # Navigate into codebase directory cd nodejs-hello-world # Download application dependencies npm install # Execute the application sudo npm start > /dev/null 2>&1 & # Terminate connection to the instance exit
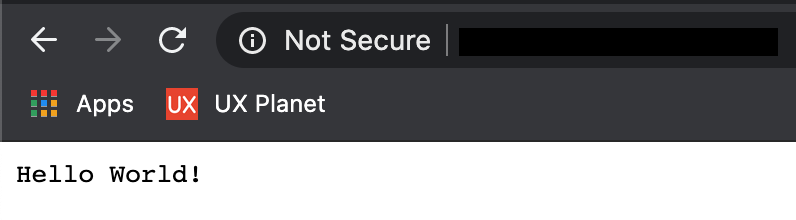
If you were successfully able to execute the above commands, go ahead and open a browser on your system. Type in your instance's public IP address and trigger a search. What do you see?
- **Get a domain name** For demonstration, we will be using [Namecheap](https://www.namecheap.com/) as our [domain name registrar](https://en.wikipedia.org/wiki/Domain_name_registrar) but feel free to purchase your domain from any other provider. Just make sure to opt-out of any hosting add-ons as AWS is already the host for your application.
## How To ([LetsEncrypt](https://letsencrypt.org/))
I'll be generating a LetsEncrypt-issued certificate for **_test.mayankbadola.com_** (managed through [Namecheap](https://www.namecheap.com/)) and use it to interact with our application over HTTPS. You can follow similar steps for your domain.
### Point your domain to the EC2 instance
> You might have to wait for upto one hour, as DNS entries takes time to propagate
- Get to domain management page

- Open DNS settings

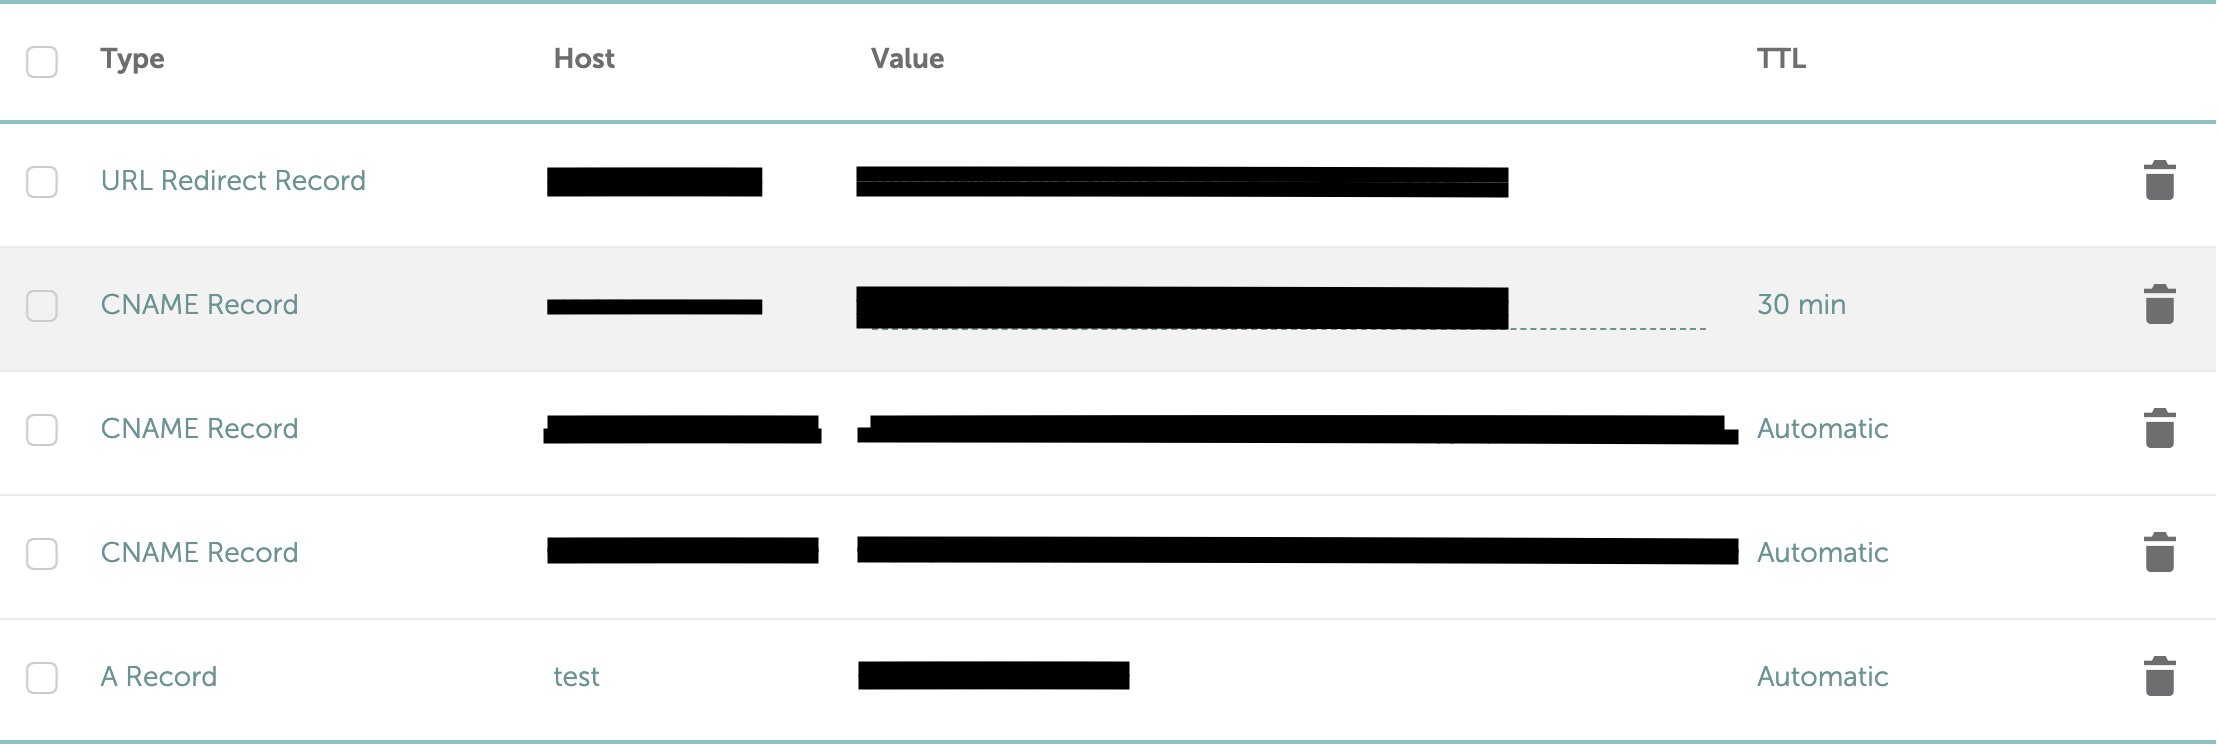
- Add a type "A" record with the value as the public IP address of your EC2 instance. The host field maps to the sub-domain, so I've put "test" there. If you're mapping the instance to your apex domain, put a "@" instead (or whatever your registrar interprets as the apex domain).
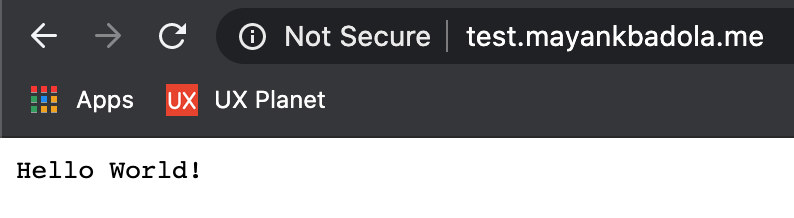
- Visit your URL
### Setup [Nginx](https://www.nginx.com/)
Nginx will serve as a reverse proxy, so we'll have to stop our application for a bit (as it is currently listening on port 80) and update it to start listening on port 8080.
Log into your instance using SSH and leverage the following commands to achieve the above.
Stop the application using the PID of your application
ps -aux | grep node
root 8217 0.0 5.9 922544 29228 ? Sl 09:26 0:00 node index.js
sudo kill -9 [application_pid]
Use vim to update port (from 80 to 8080) for your application
You can choose any port which is not accessible from outside the instance
Navigate to your codebase directory first
vim index.js
Restart the application
sudo npm start > /dev/null 2>&1 &
Install and start nginx
sudo apt-get install nginx
### Provision (and Install) the Certificate
We will use [Certbot](https://certbot.eff.org/) to issue certificates signed by LetsEncrypt.
Add certbot PPA
sudo apt-get install software-properties-common
sudo add-apt-repository ppa:certbot/certbot
sudo apt-get update
Install certbot
sudo apt-get install certbot python3-certbot-nginx
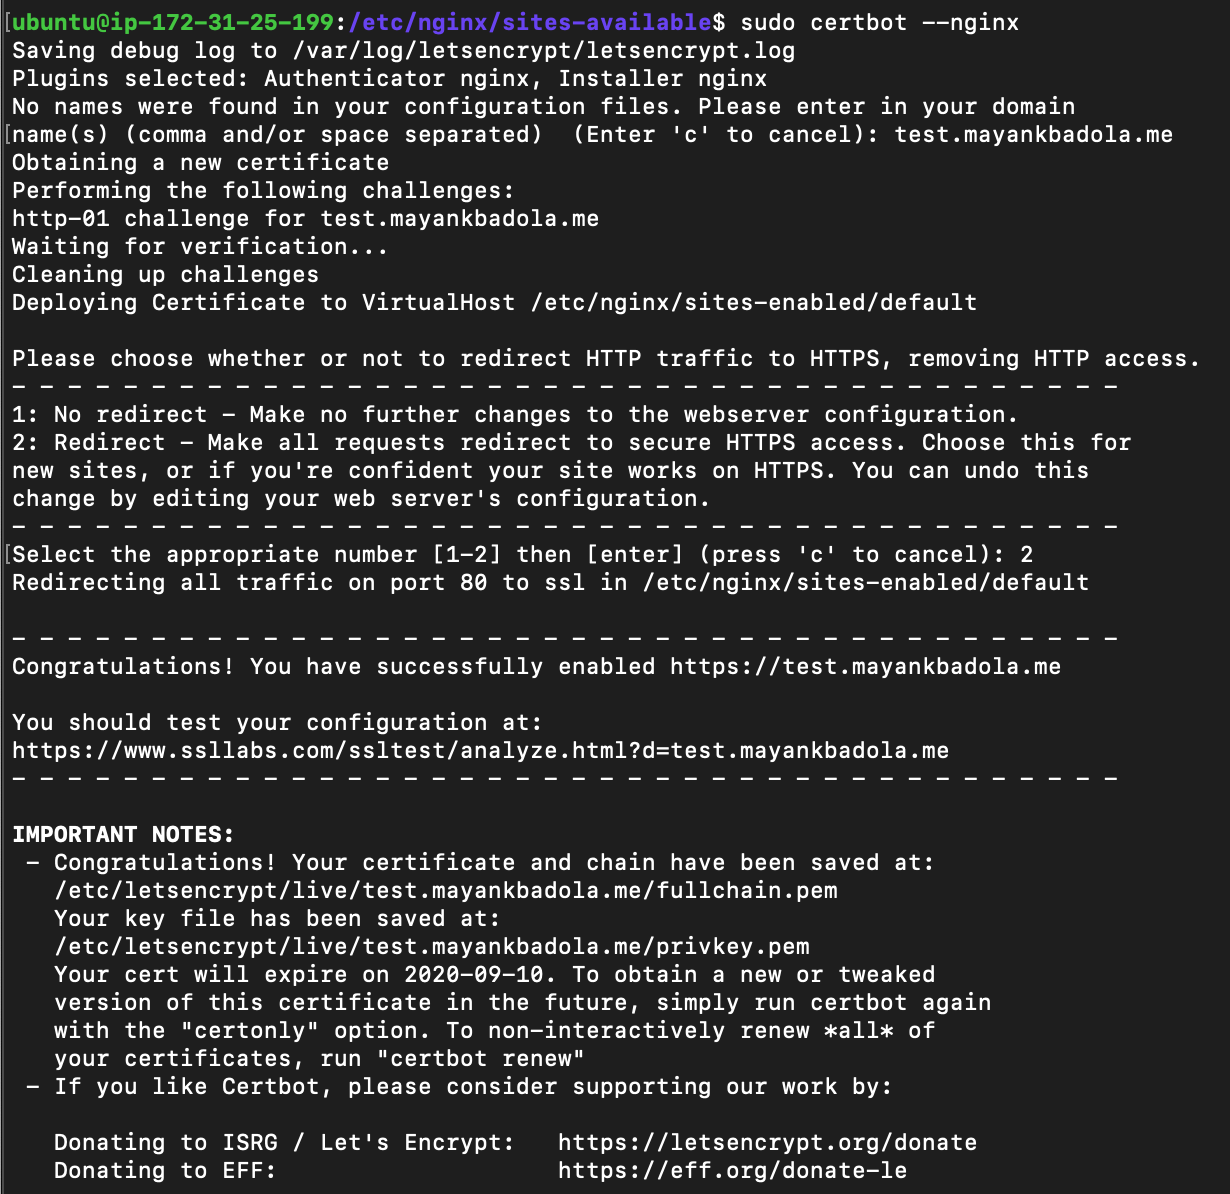
Get certificates and setup for use with nginx
When prompted, setup redirection of port 80 to 443
that will upgrade HTTP request to HTTPS
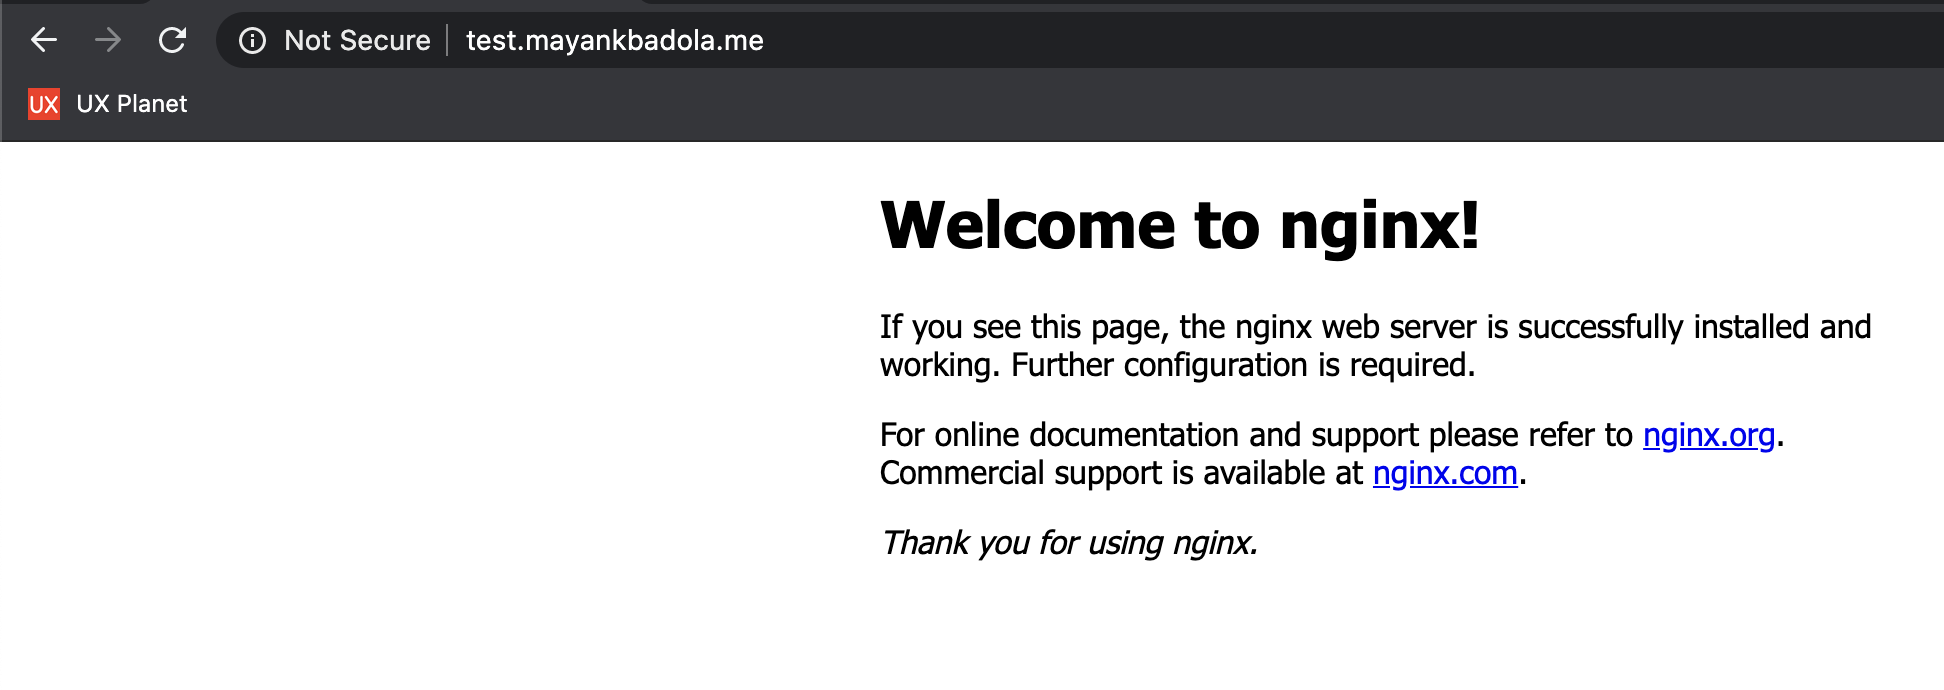
sudo certbot --nginx
Nginx should now be serving its static page over HTTPS, but we want to serve our application instead, so let's add a routing rule for that.
Open nginx configuration
`sudo vim /etc/nginx/sites-available/default`
and replace existing settings within the "location /" section of the port 443 listener, with the following :
proxy_pass http://localhost:8080;
proxy_http_version 1.1;
proxy_set_header Upgrade $http_upgrade;
proxy_set_header Connection 'upgrade';
proxy_set_header Host $host;
proxy_cache_bypass $http_upgrade;
Save this file and restart nginx.
`sudo systemctl restart nginx`
At this point, you've installed a TLS certificate on nginx, added a redirection for port 80 traffic to port 443 and are forwarding port 443 traffic to port 8080.
Time to visit your secure application. Don't forget the _https://_ prefix!

### Retrospection
* Generating certificates using LetsEncrypt is hosting agnostic. If you have a public IP address, a domain and SSH access to your deployment environment, you can generate a TLS certificate for your application.
* We were using nginx because of the certbot nginx setup which renews certificates automatically and reloads nginx configuration. You can run a "https" server as well but then you'd miss out on the automated renewed certificate reload.
* This example works for a "hack" as having nginx on the same instance as your application is not a scalable setup. If you want to scale, better to provision an instance which uses nginx to do load balancing as well for your application stack.
* We had to do instance bootstrapping (run scripts) in order to enable HTTPS connectivity. There will be effort involved to automate all of those steps.
## How To ([AWS Certificate Manager](https://aws.amazon.com/certificate-manager/))
In this exercise, we'll be generating an Amazon-issued certificate for **_*.mayankbadola.me_** (managed through [Namecheap](https://www.namecheap.com/)) and use it to interact with our application through **_https://test.mayankbadola.me_**. The (\*) implies that the certificate can be used to identify all of the sub-domains of **_mayankbadola.me_**. So, we can re-use this same certificate across multiple applications, as long as they are fronted by **_(\*.)mayankbadola.me_**.
### Provision Certificate
Visit [ACM dashboard](https://us-west-2.console.aws.amazon.com/acm/home?region=us-west-2#/) and "Request a certificate".
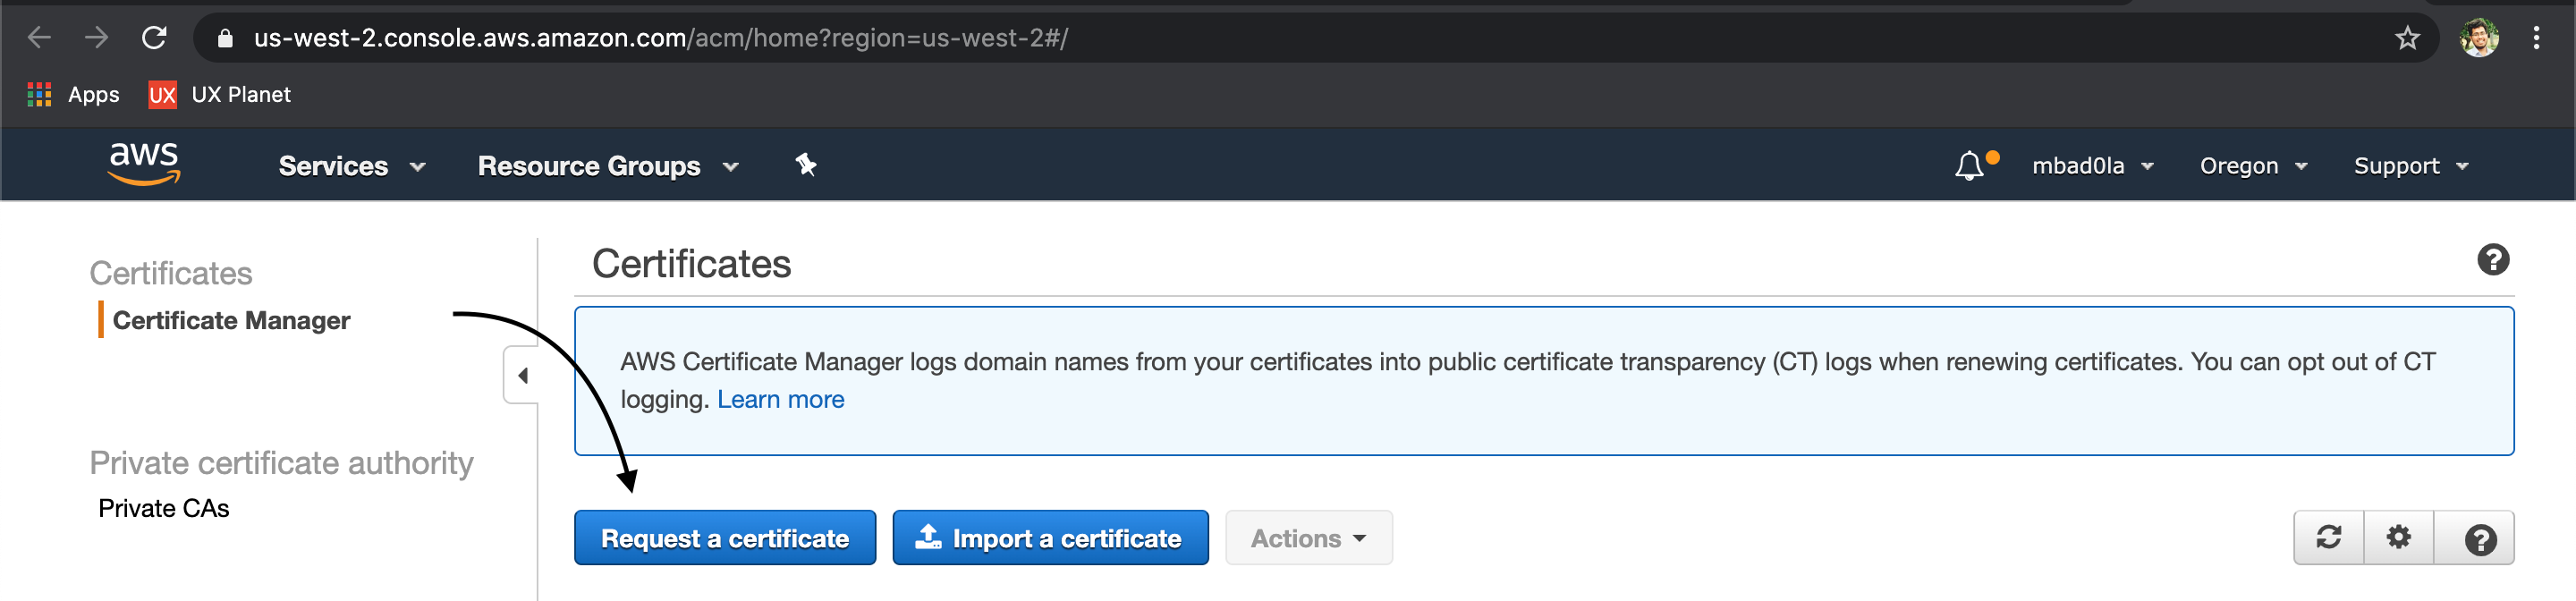
By default, you'll be provisioning a public certificate, which is what we want.
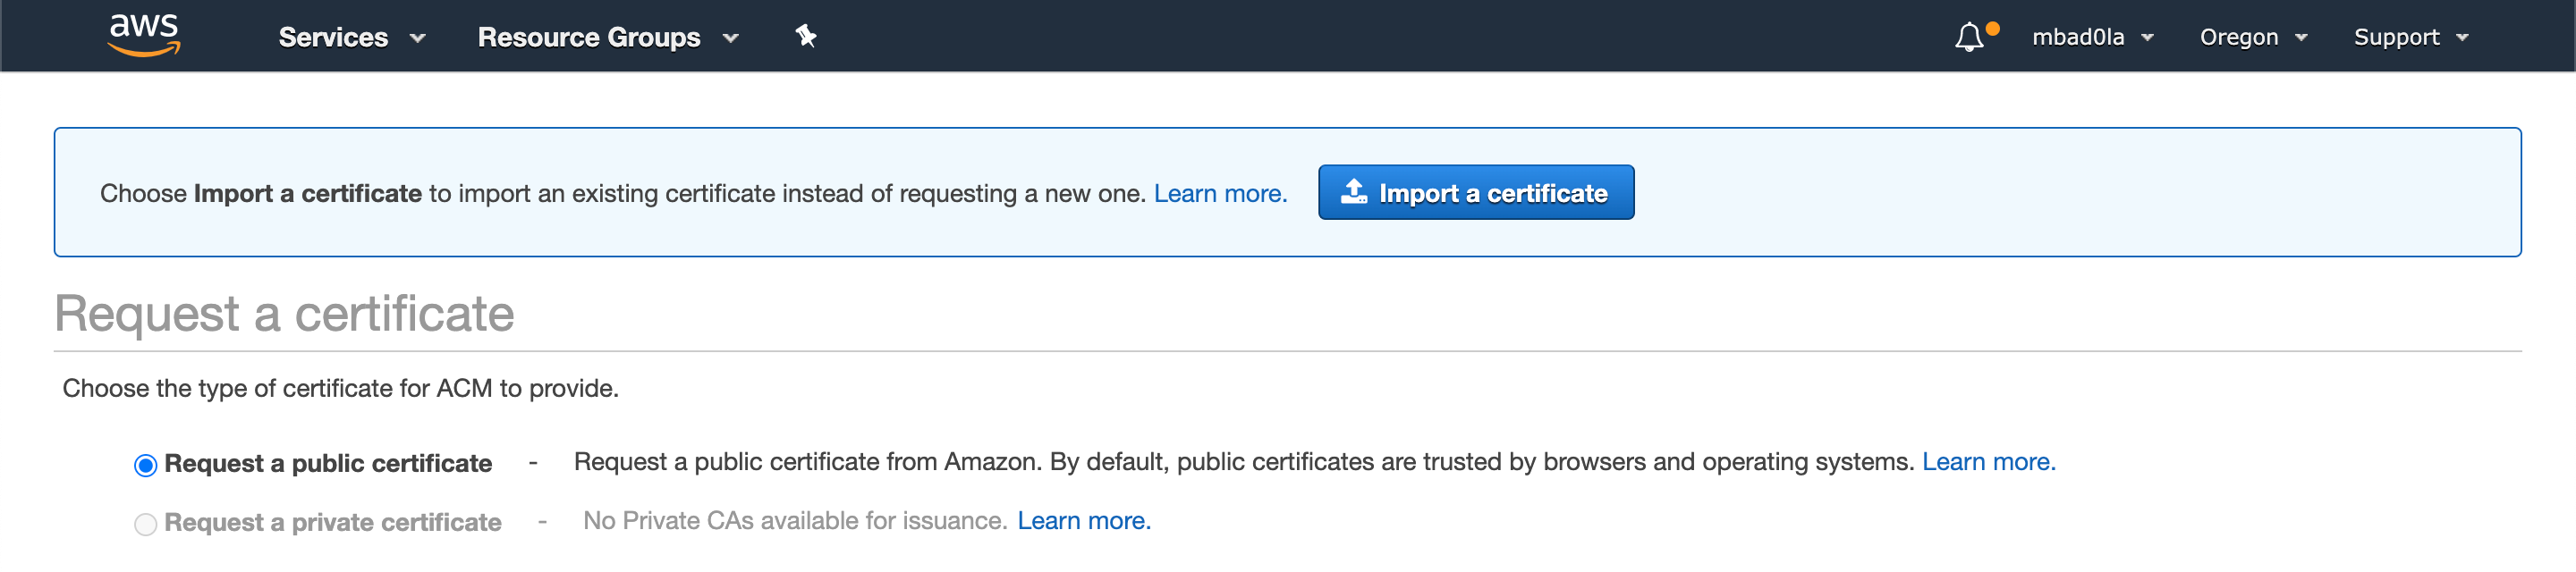
**Step 1**
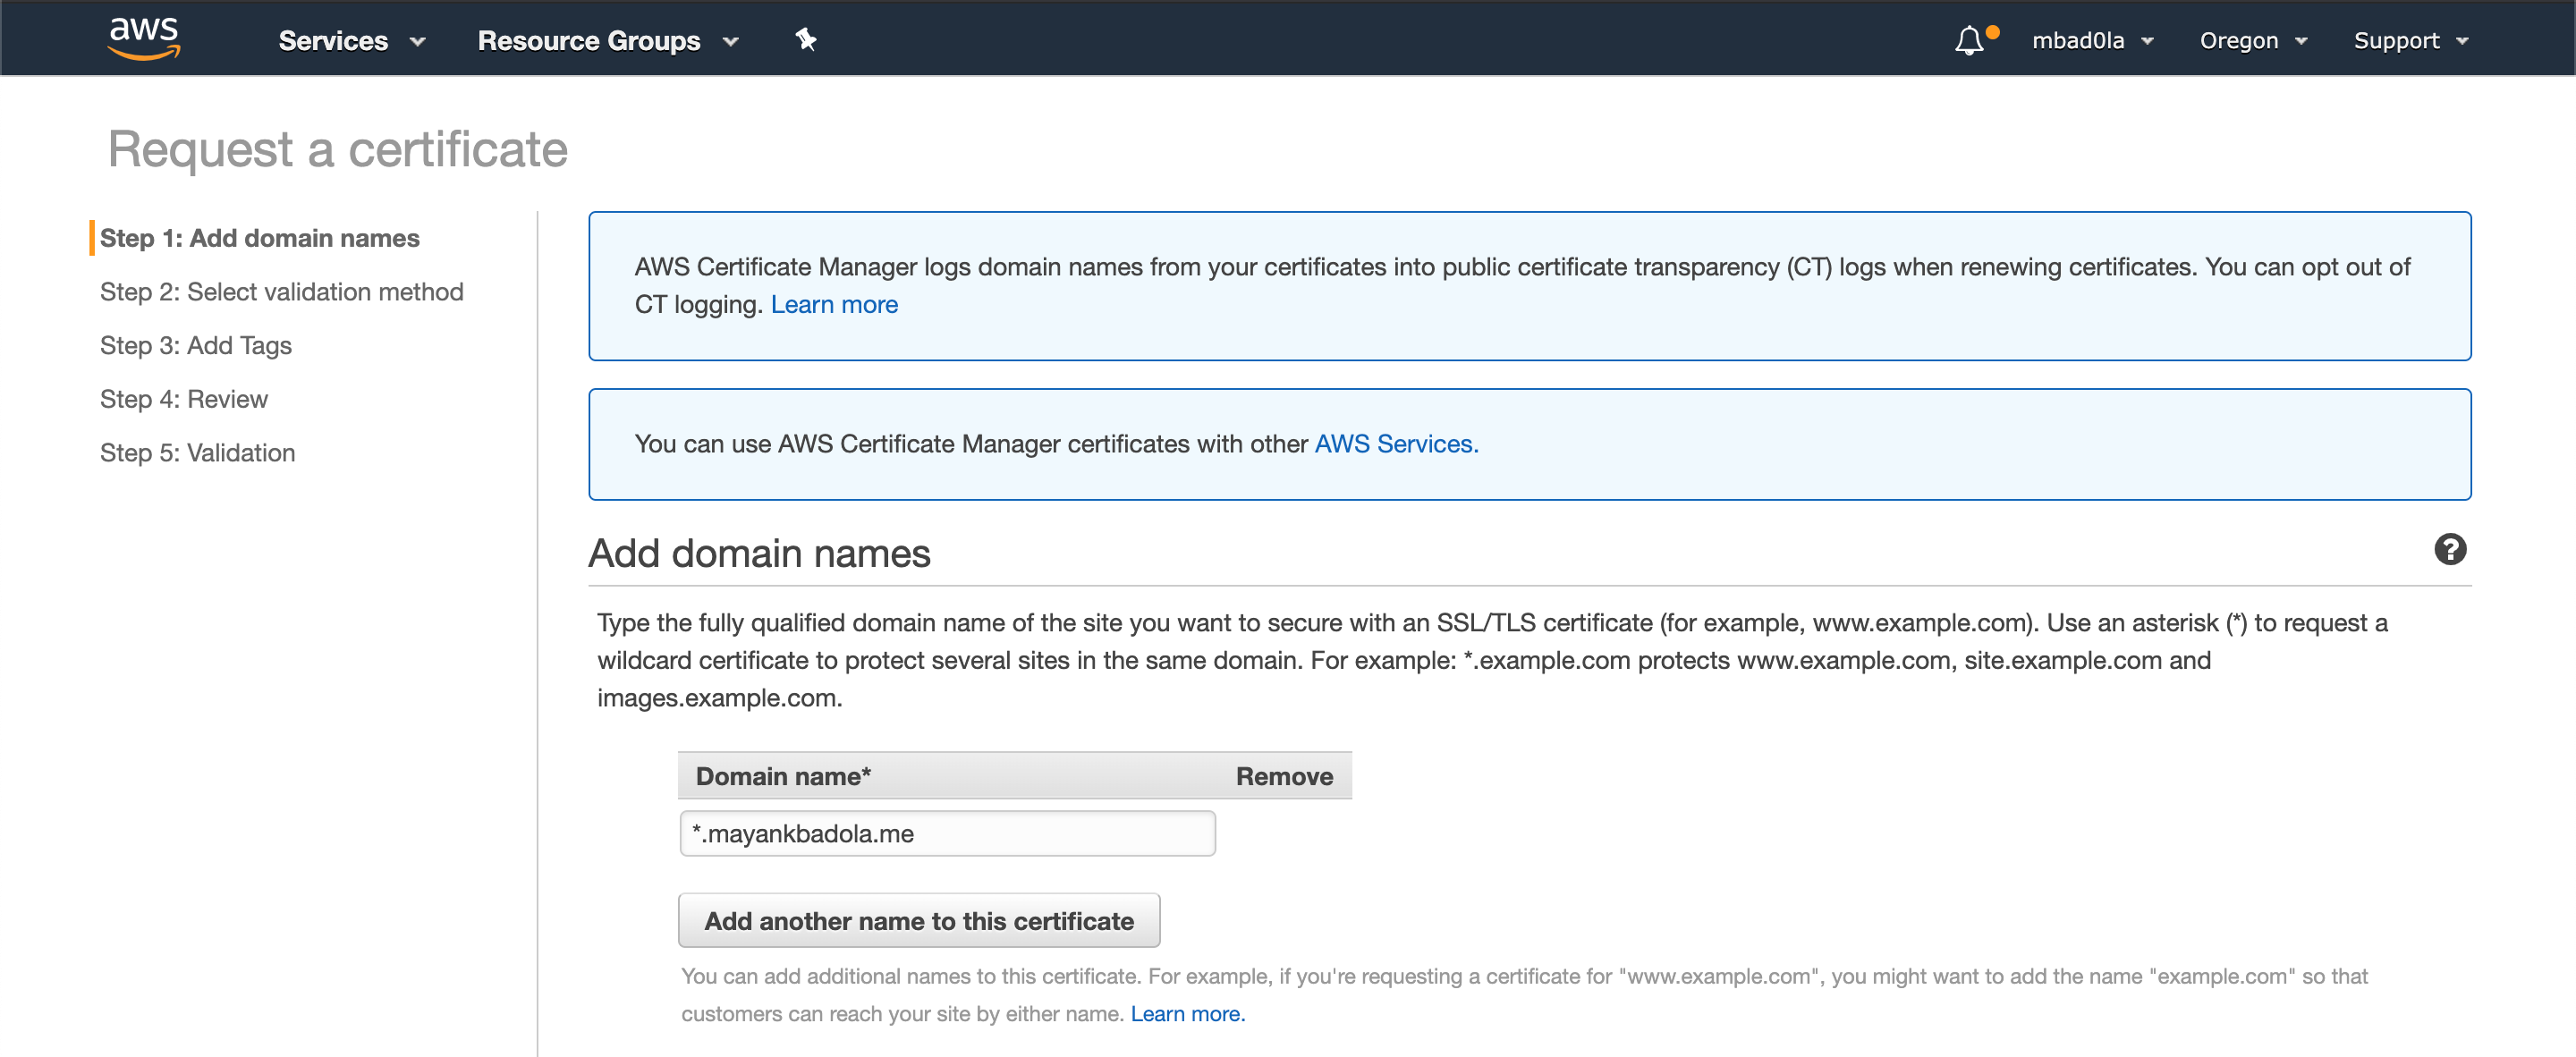
**Step 2**
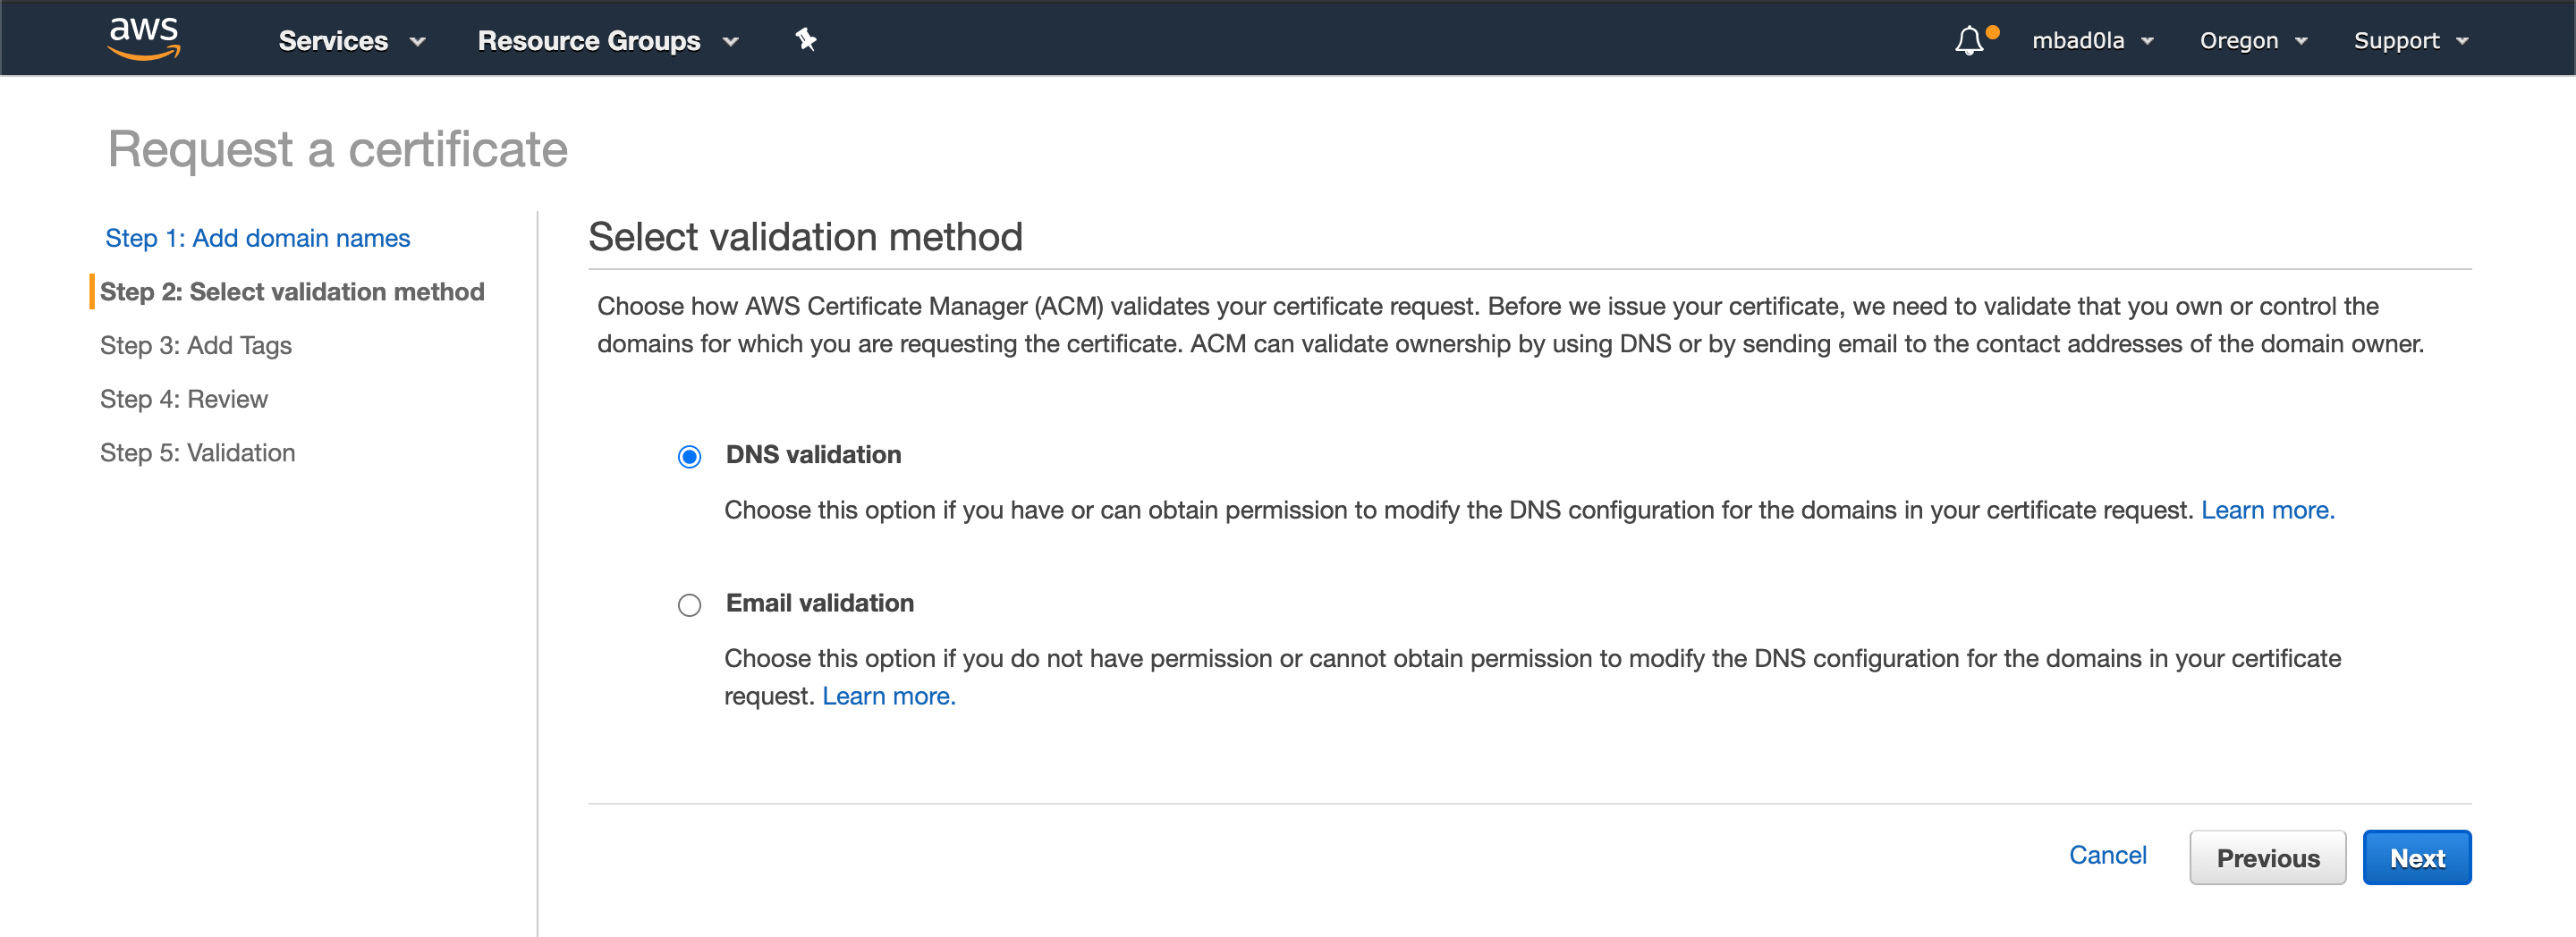
Finish the rest of the steps (fast-forward to Step 5), where ACM will provide you a "CNAME" record that needs to be added to your domain's DNS configuration.

Visit your domain's DNS settings page and add the "CNAME" entry requested by ACM.
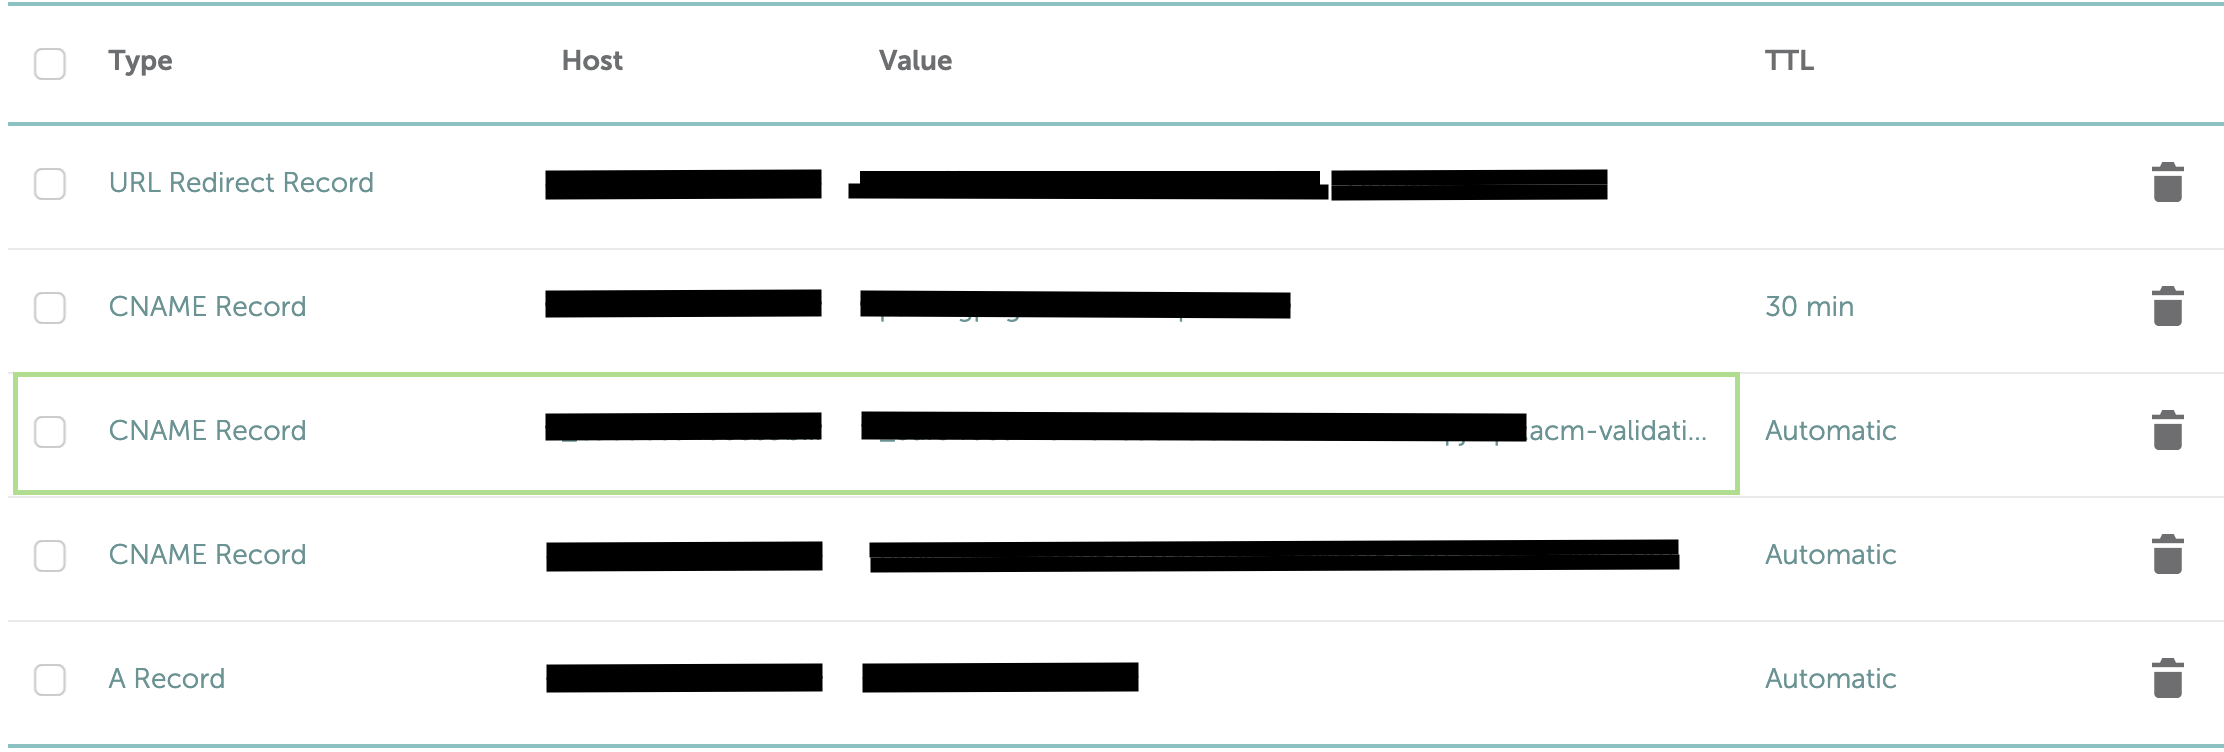
The "Name" provided by AWS is actually a sub-domain ACM will use to verify that you own the domain you've requested the certificate for. As my domain (_mayankbadola.me_) is managed through Namecheap, while adding the CNAME record, I will take out the sub-domain prefix from the "Name" field (everything before ".mayankbadola.me.") to insert into the "Host" entry. The "Value" field will be copied over as-is.
Wait for the usual DNS propagation delays for the certificate status to change from Pending to Issued.
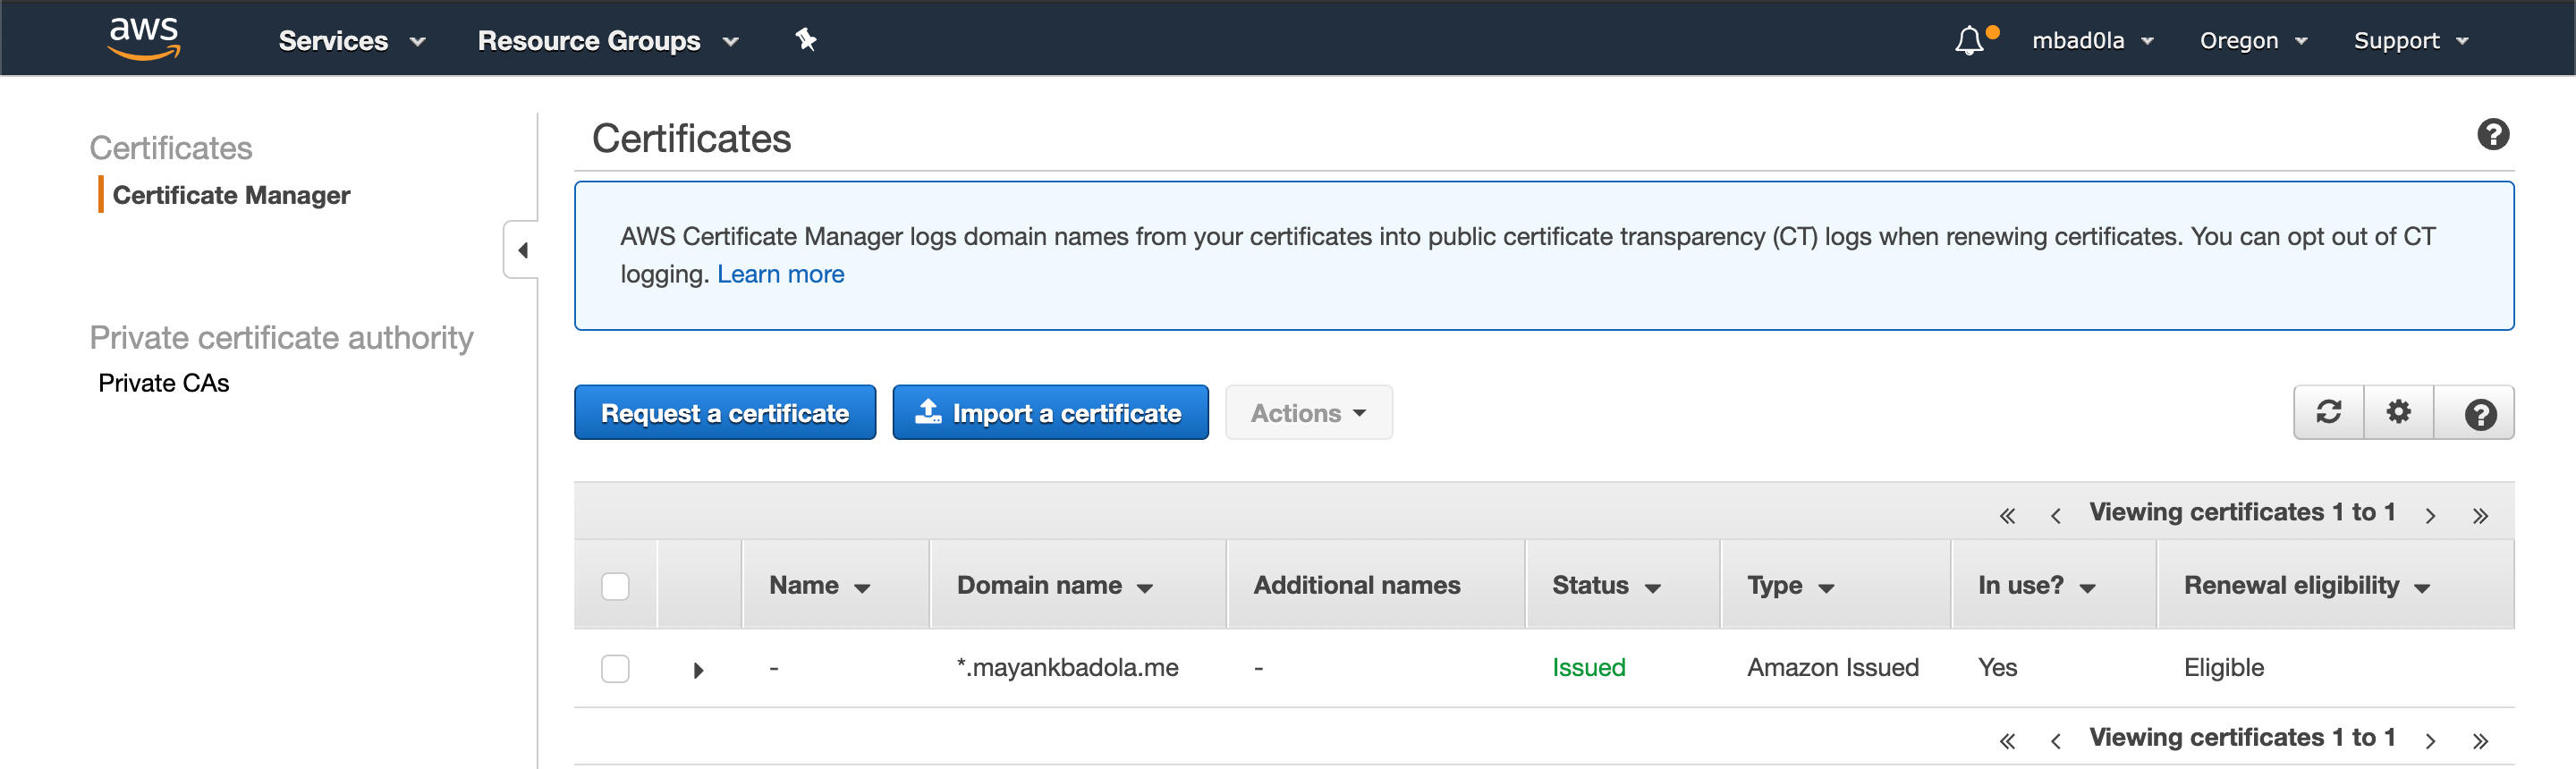
We will now install this certificate for use with your application.
### Create a Load Balancer and attach our EC2 instance to it
Let's [provision a load balancer](https://us-west-2.console.aws.amazon.com/ec2/v2/home?region=us-west-2#LoadBalancers:sort=loadBalancerName) which will take care of managing a secure connection on behalf of our application and forward HTTP requests to our EC2 instance.

For our exercise, we will create a classic load balancer.
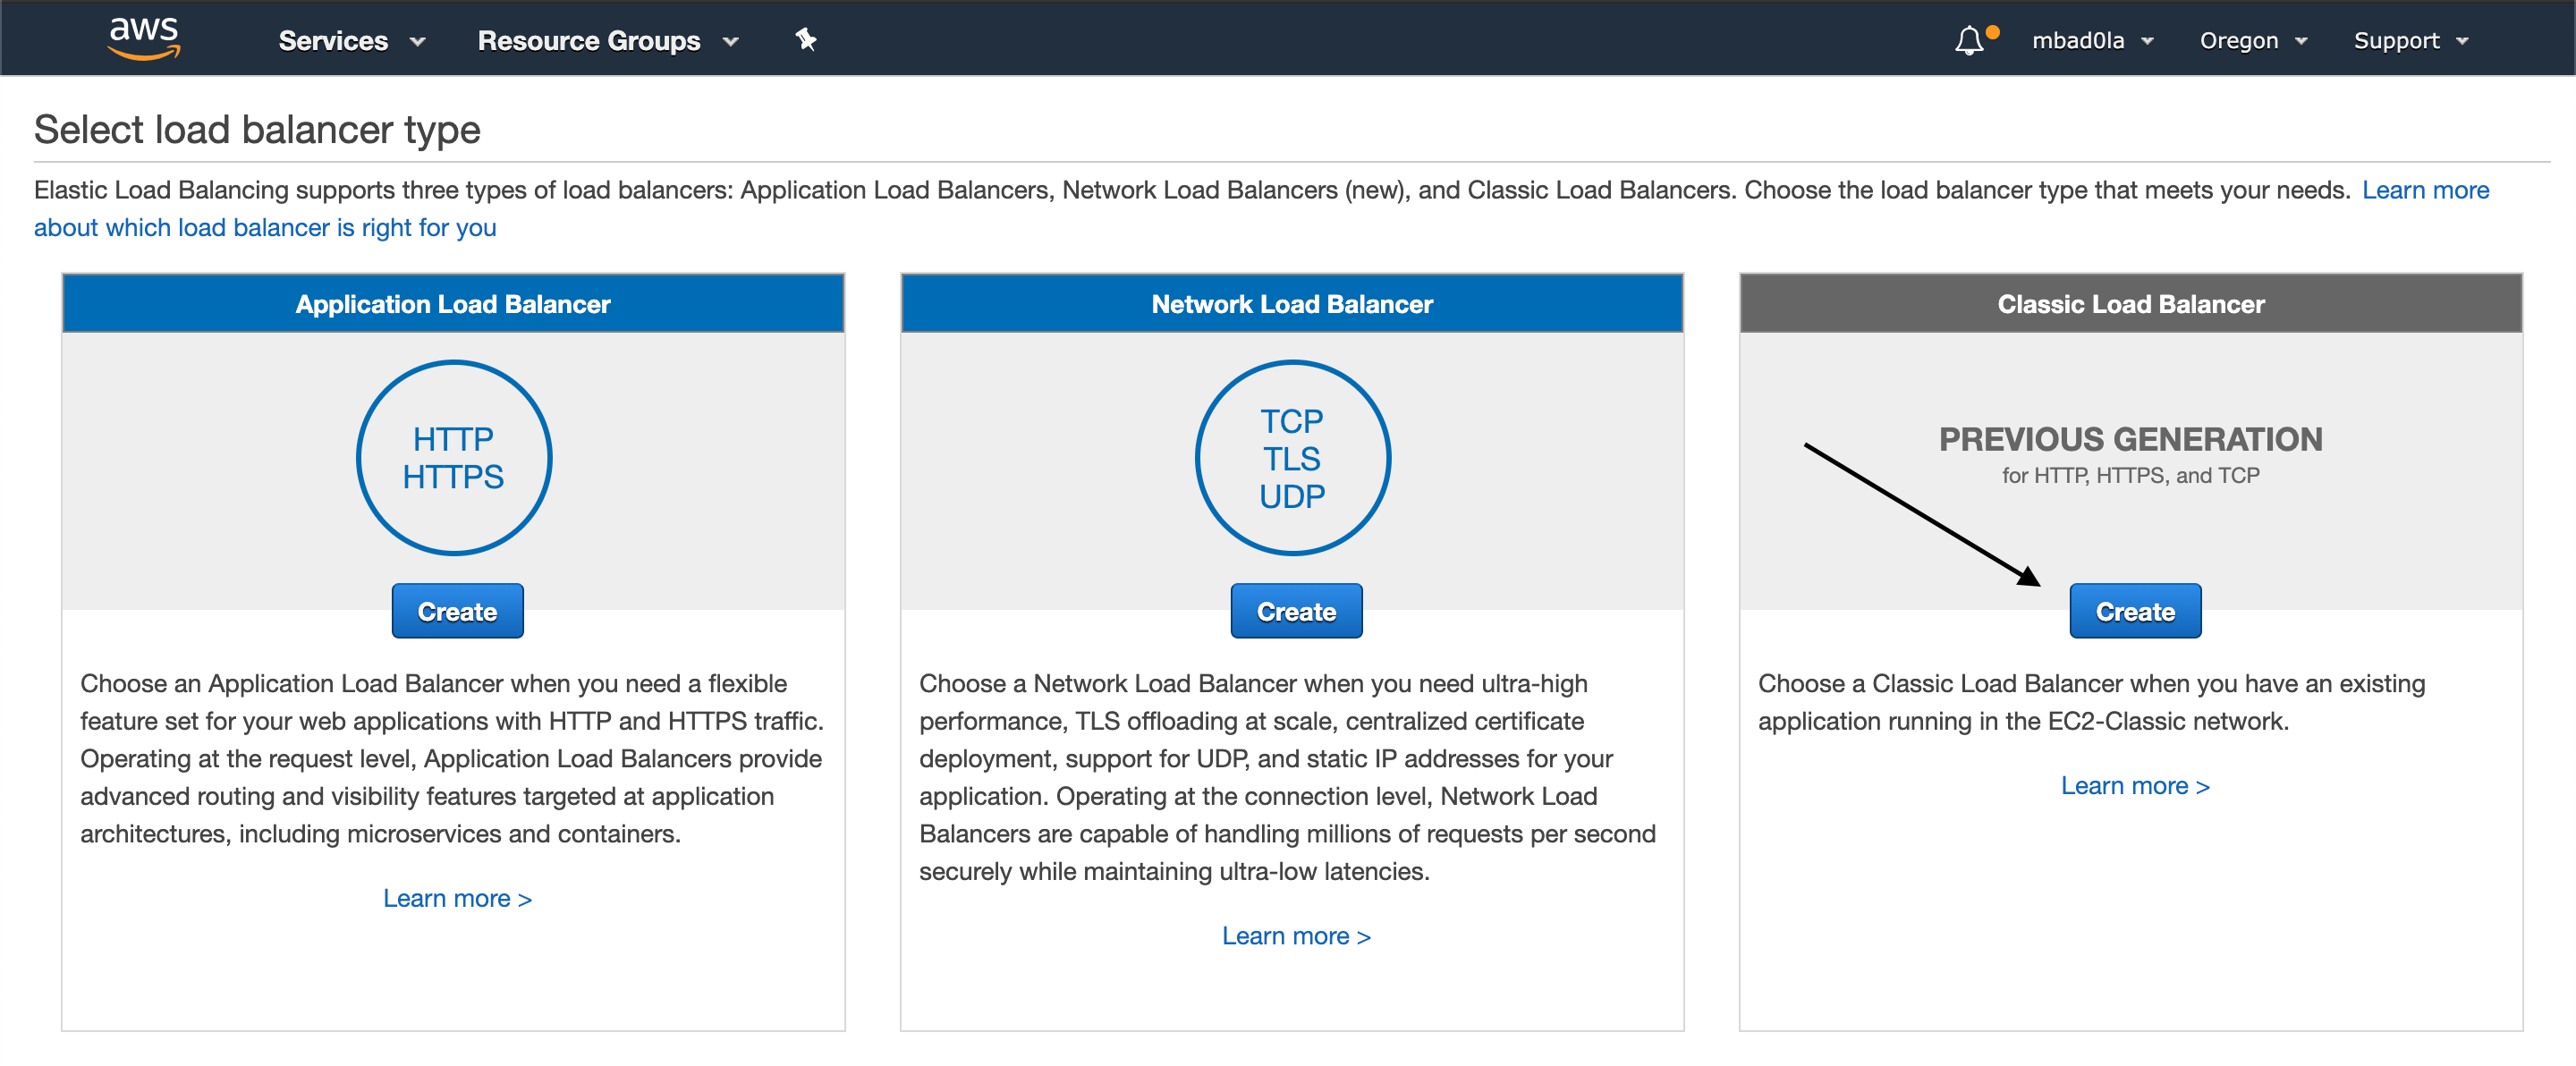
**Step 1**
Assign a name to your load balancer and update the incoming load balancer protocol (HTTPS) and the instance protocol (HTTP).

**Step 2**
Add a security group which allows inbound connections to port 443 (HTTPS) and outbound connections to port 80 (HTTP).
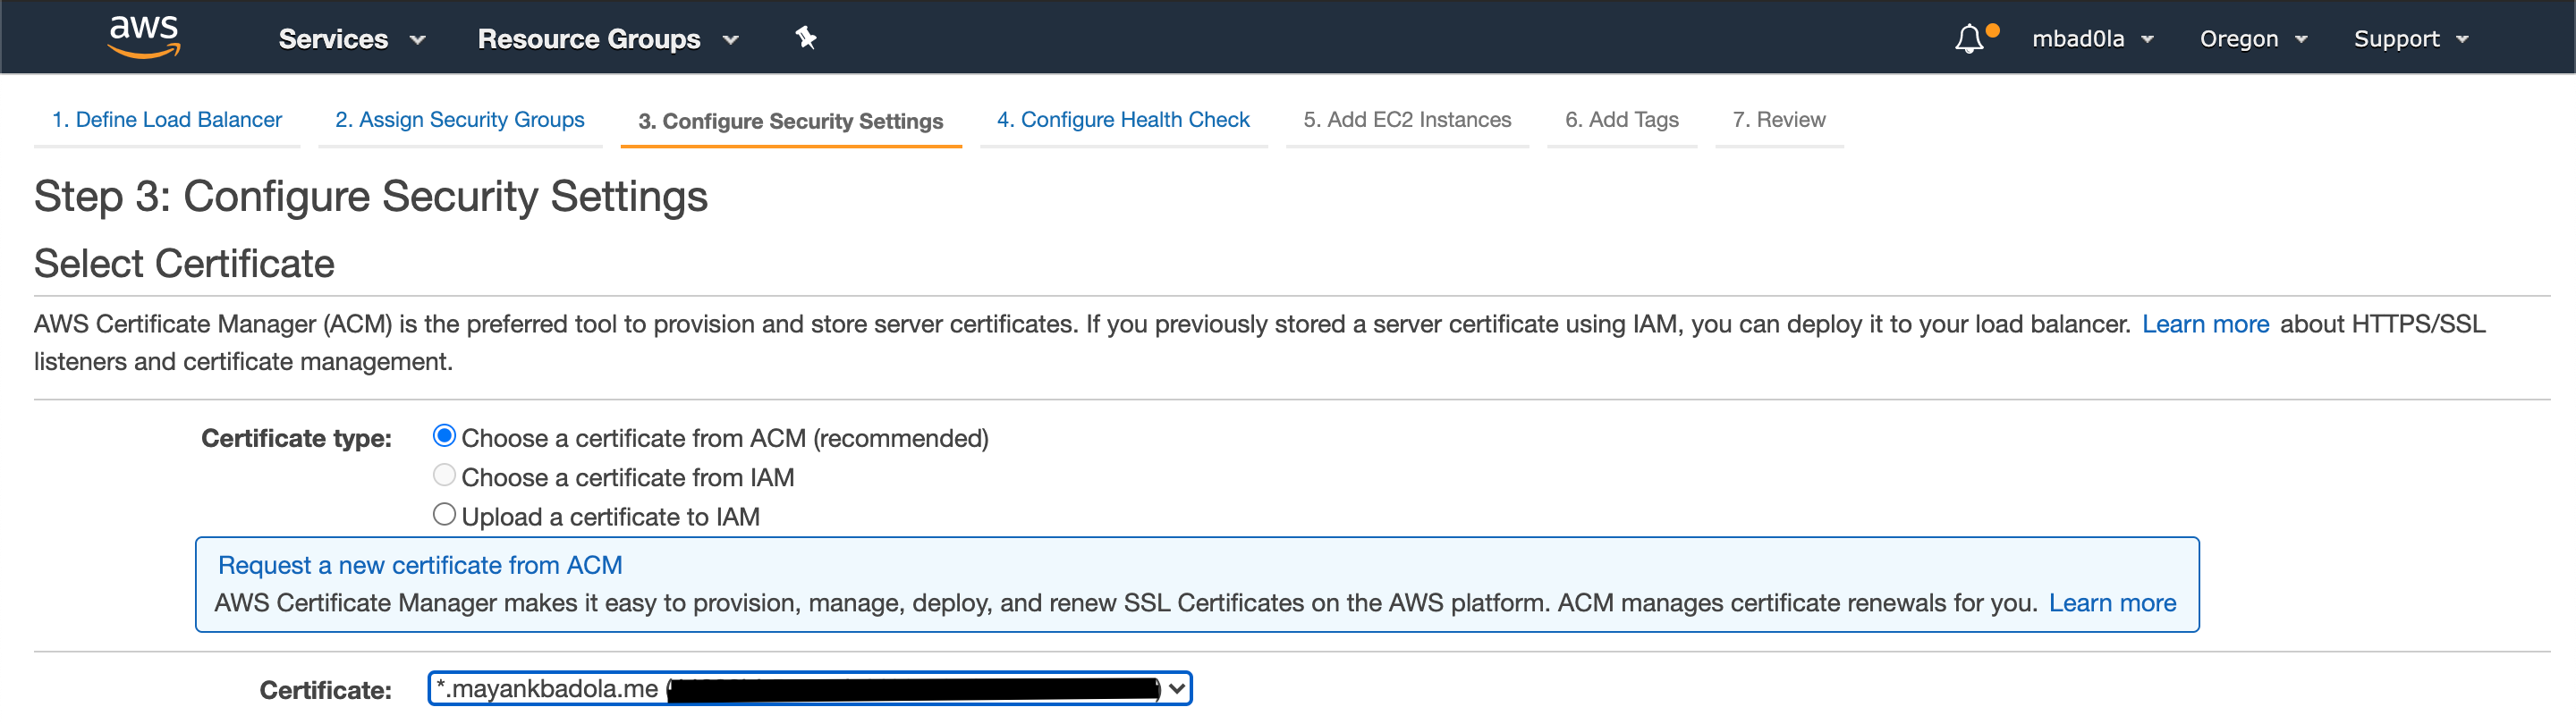
**Step 3**
Select "Choose a certificate from ACM" and assign the certificate we provisioned using ACM. For now, you can ignore cipher settings.
**Step 4**
Just update the ping path to "/" and continue to the next step.
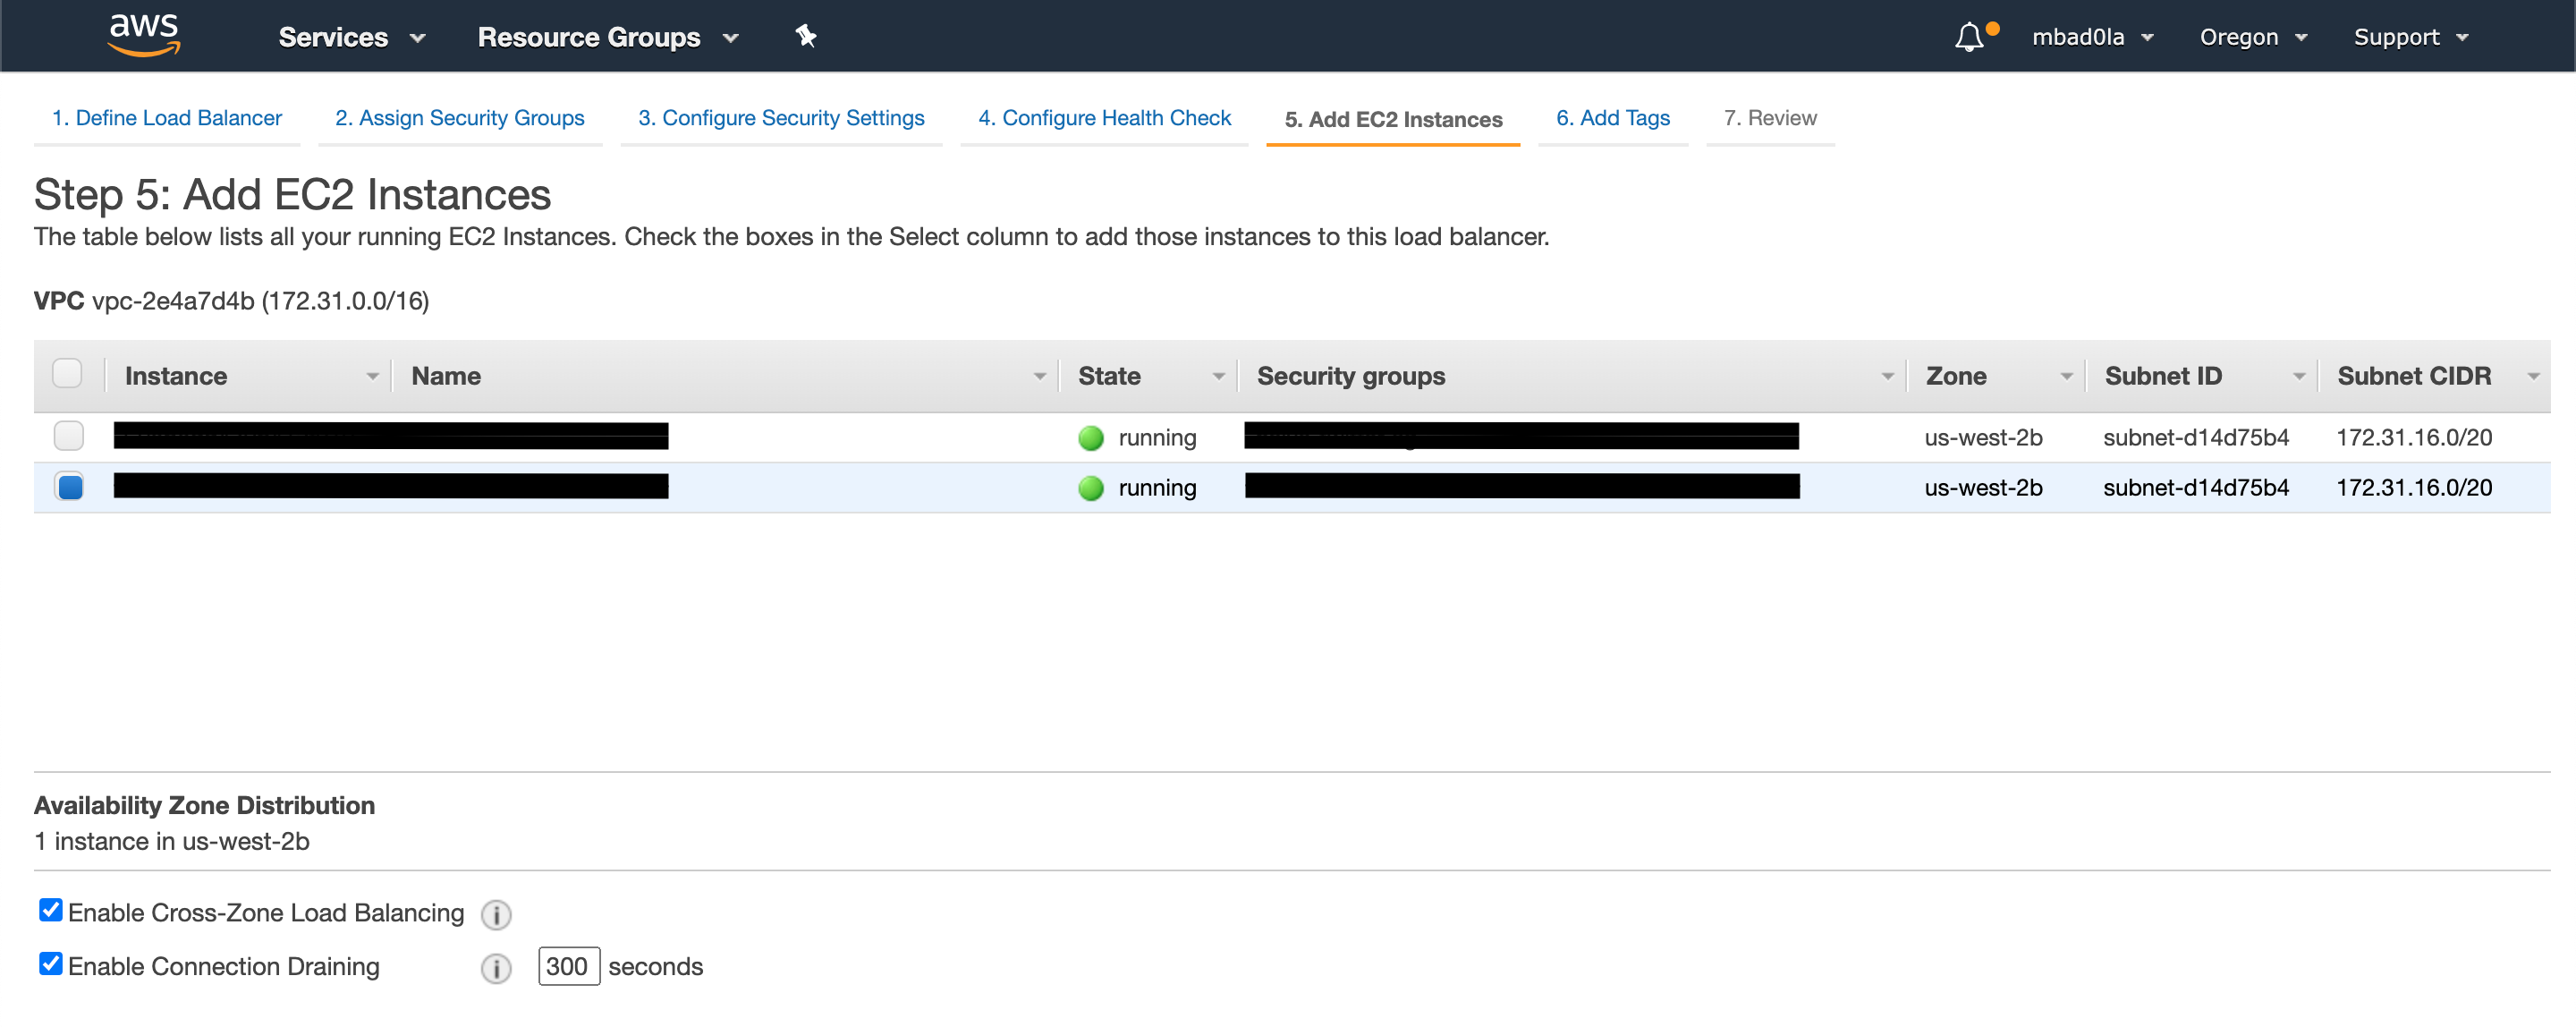
**Step 5**
Select the EC2 instance where your application is running.
Skip through the rest of the steps and submit the LB creation request. In a few seconds, you should have the load balancer ready.

We now have to map our domain name to the load balancer's DNS name. You can find the DNS name within the description section for the load balancer.
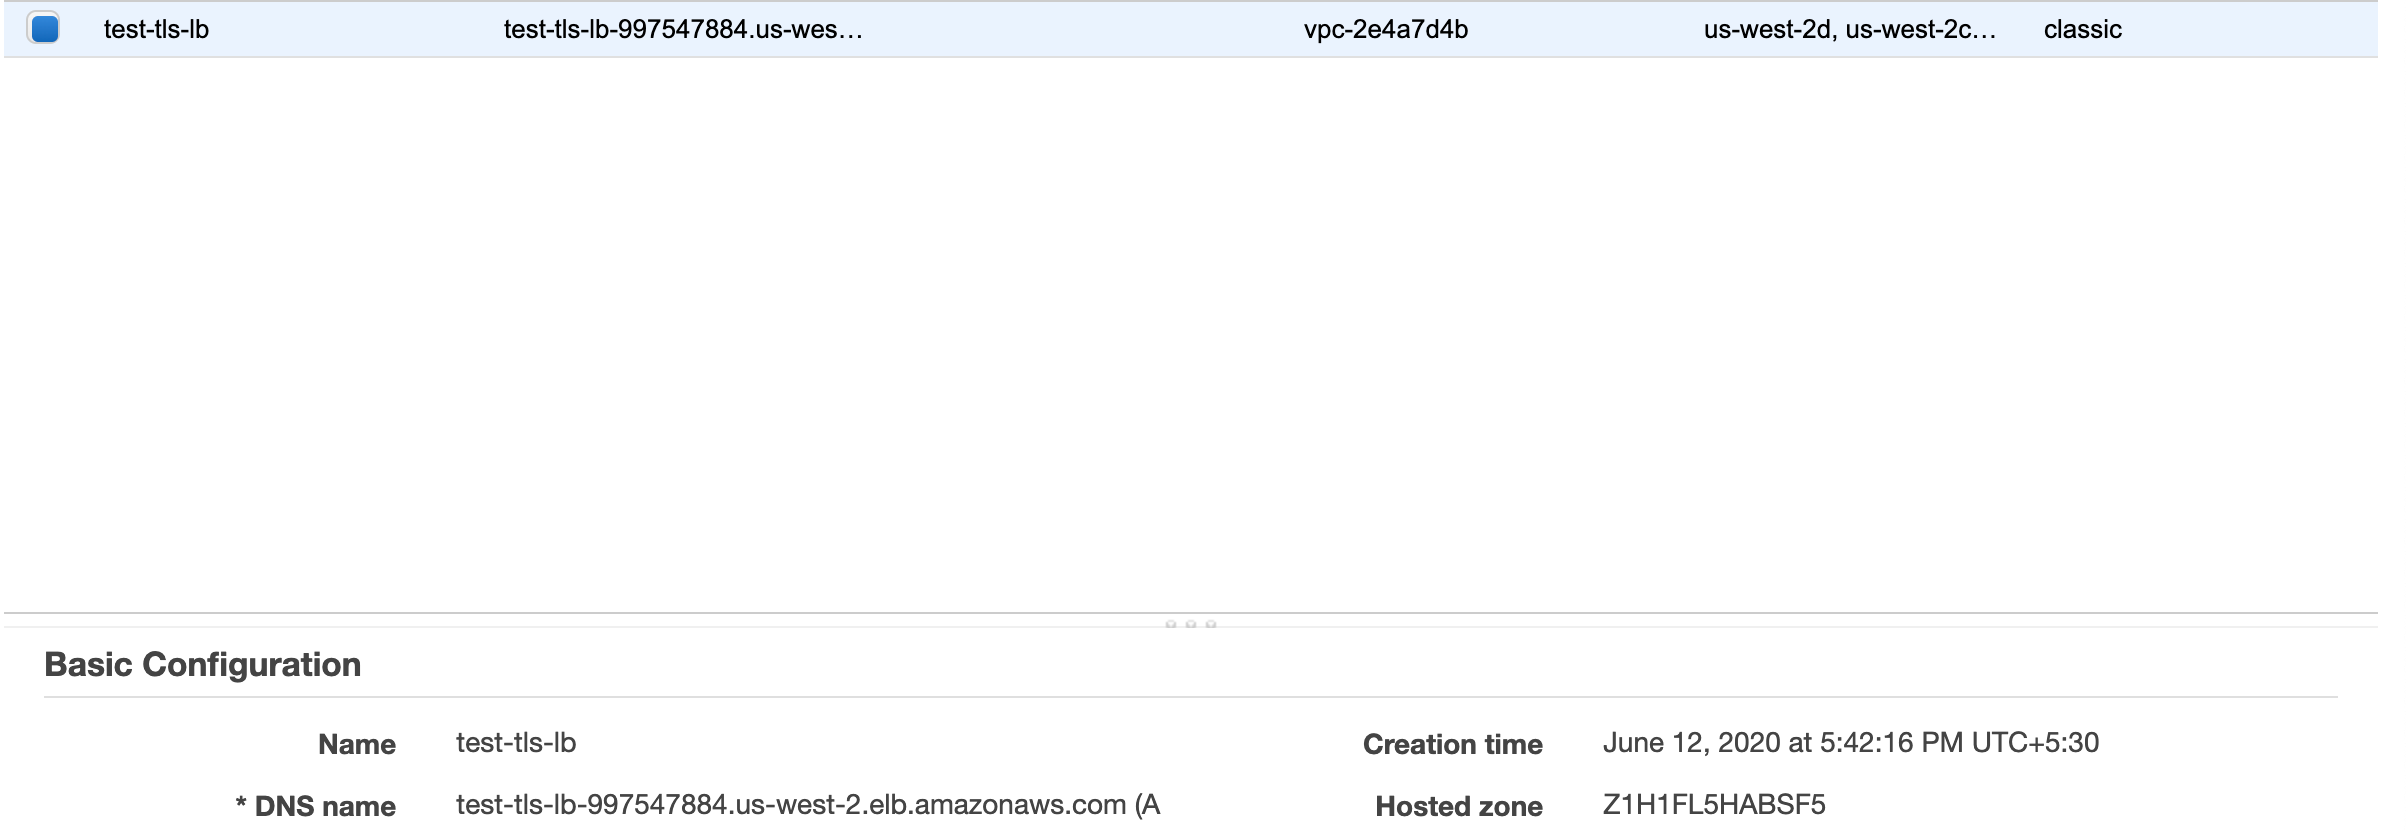
Create a CNAME record on your domain's DNS settings page mapping a domain entry to the load balancer's DNS name.
> I'm adding an entry for test.mayankbadola.me

That's it! We've successfully setup a secure connection to our application using AWS Certificate Manager.

### Retrospection
* ACM automatically renews certificates.
* Generating certificates using ACM is pretty straight-forward and doesn't need any bootstrapping effort. As ACM is free and it integrates well with AWS, I would recommend you to use ACM if AWS is your infrastructure provider.
* In our example, we've exposed our instance to internet traffic on port 80, which means that it is possible to by-pass our secure connection. Ideally, you have to make sure that the instances are not accessible from the outside world. That way, only the load-balancer will be the ingress point for public traffic for our application.
* You can automate all of these steps quite easily if your domain is managed through [Route53](https://aws.amazon.com/route53/).
## Conclusion
I hope this post was able to explain briefly how "HTTPS" works and what does it take to enable it for your applications, although, be careful with using the exact setups shared in this post for your production applications.
Alternatively, if this is too much of an infrastructure hassle and you're a frontend developer, I recently got acquainted to [NextJS](https://nextjs.org/), which just might be the answer you need.
Thanks for your time and interest!
---


Top comments (4)
@mayank , thank you so much for the write up!
I'm looking to use a classic load balancer with my single EC2, but initial requests are ~1.5 minutes. Then for the next 300 seconds, requests are fast and responsive.
Is it required to have my EC2 in more than one subnet?
Thanks
Thanks, Ben.
As for your question, to my knowledge, the problem you're facing happens during releases or fresh deployment of the load balancers. CLBs have a warm-up time where the EC2 instances gets attached to the load balancer and pass health checks.
What about the underlying application? Does it lazy load data? What's the idle timeout configured on your load balancers?
You gotta give these things a lookover too ...
Good article Mayank! Nice that you provide multiple solutions for TLS cert issuance. Keep up the good work!
Wanted to share my learnings with the community! Thanks, David :)