Introduction
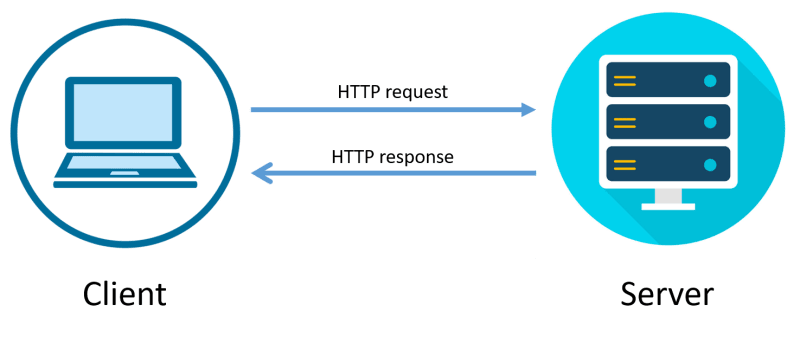
Everyone is familiar with HTTP, whether they know it or not. As web developers, we understand that it is an internet protocol used to send and receive requests from a client to a server. A typical exchange looks something like this :
But sometimes, we want real-time interaction with others. For example, users on Discord or Slack don't manually refresh their applications to get new messages, they are simply received. To facilitate this need for real-time updates, we can use WebSockets.
Put simply, WebSocket is an alternative internet protocol that allows for dynamic two-way communication between a client and server. Instead of a user requesting new information (like refreshing a page to load new posts), the user will receive data as it is broadcasted.
In this post, I will be walking you through how to set up a basic Chatroom using Rails ActionCable and a React Frontend.
Configuration
First we'll run through the basic application configuration.
Create a new Rails API in a directory.
rails new chat_app --api
Navigate to the newly created directory and create your React Client
#/chat_app
npx create-react-app client
Install @rails/actioncable to your React client
#/chat_app
npm i @rails/actioncable --prefix client
In the Gemfile, uncomment "rack-cors"
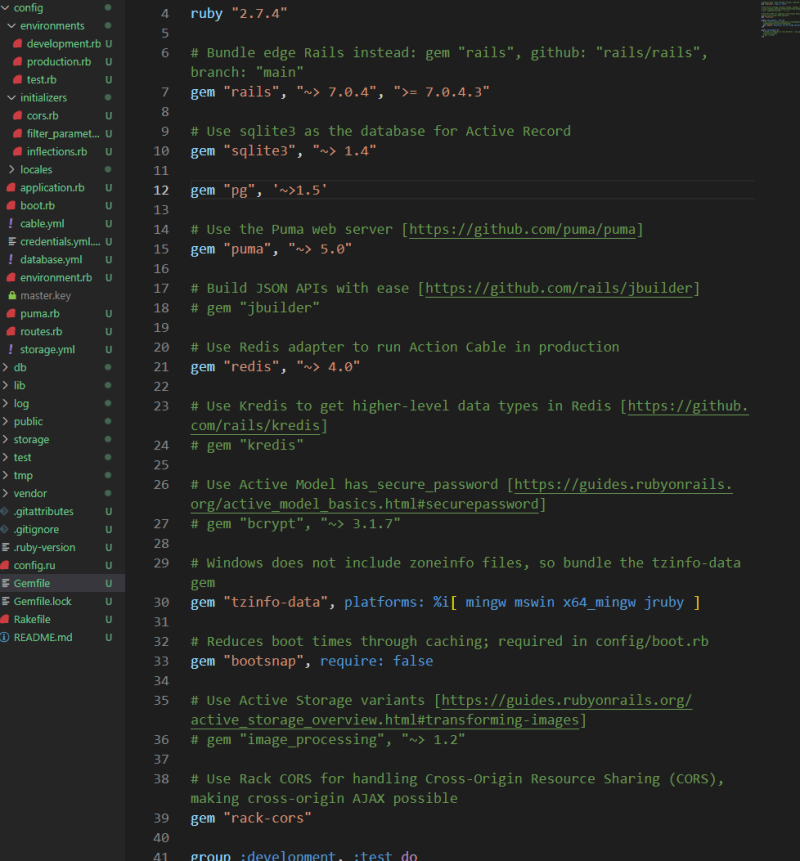
This post won't go into deployment, but if you plan on doing so, uncomment "redis" and add the "pg" PostgreSQL gems and change your database adapters as required. This example won't go into deployment so you can leave the "sqlite3" gem and the default settings.
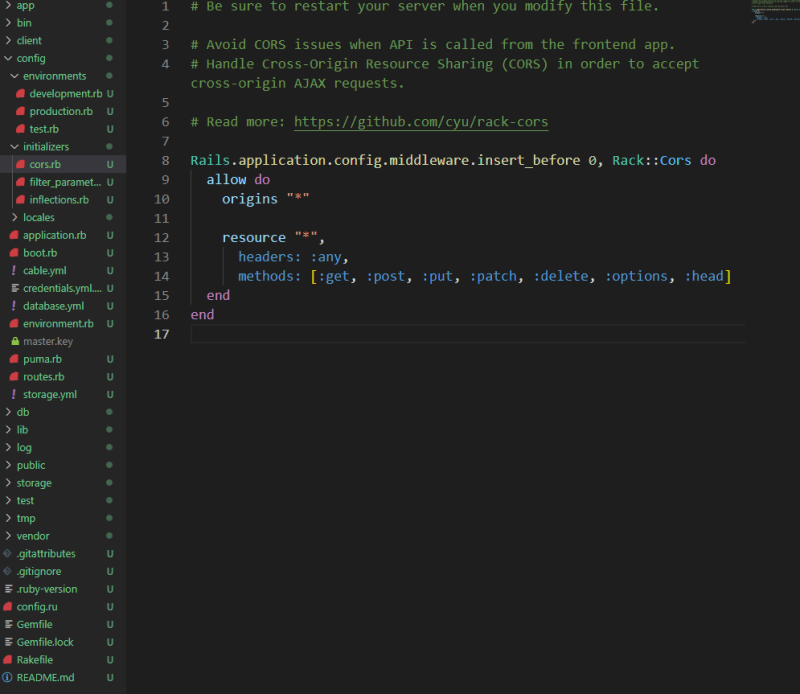
Uncomment this middleware and change origins to "*" for development purposes. Note you would have to change the origin to your application domain if you were deploying.
Finally, install your gems and client dependencies.
#/chat_app
bundle install
npm install --prefix client
Rails
To setup a WebSocket connection, we need to configure both our front and backend to create a 'handshake' or connection. We'll start with establishing the backend.
In Rails, let's generate a scaffold for a Message model. We'll keep things simple and only have a content attribute for our model.
rails g scaffold Message content
#Don't forget to migrate
rails db:migrate
Moving to /app/config/routes.rb, we can see that Rails has generated resources for our messages already. But we will also need to declare the endpoint for our ActionCable WebSocket server.
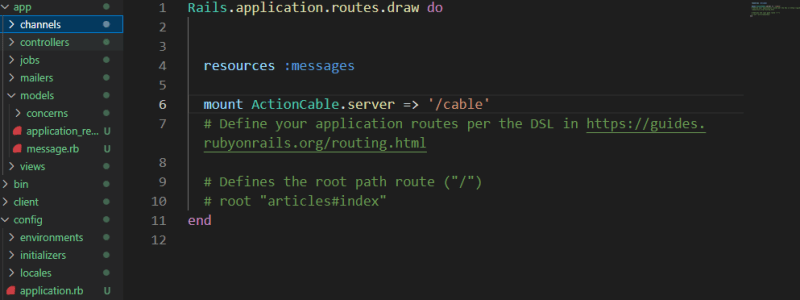
We have a model, it's controller and a server endpoint 'localhost:3000/cable'. Next we need something manage our connections and requests: a Channel.
Like the controller in MVC, a channel acts as a unit that takes requests and processes those request with respect to the defined actions it receives.
rails g channel Chat
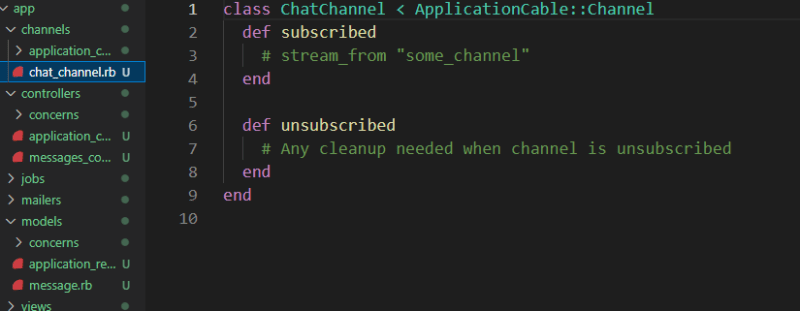
In app/channels/chat_channel.rb, you will see our ChatChannel with two default actions: subscribed and unsubscribed. When a user attempts to make a WebSocket connection with our server, it will state what kind of request it is and to what channel. We could do different things to process a request such as adding authentication tokens, but we'll focus on the main function of the channel: streaming.
You can declare a stream from either a specific string, a dynamic interpolated string, or even from an instance of a model. In all cases, the user requests a subscription the ChatChannel and the ChatChannel will in return establish a connection and stream from the specified source.
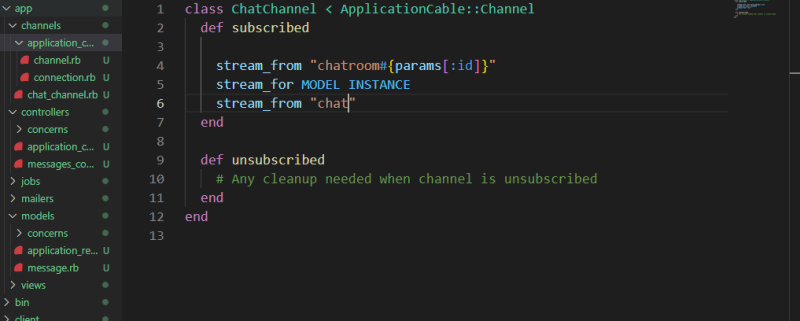
This project will proceed using the stream_from "chat" configuration so we'll comment out the other examples.
Now that we've established a way for users to connect to our WebSocket server, we need to define when our server actually broadcasts information to our users.
In general, we're going to want to broadcast data to our channel when users create new messages.
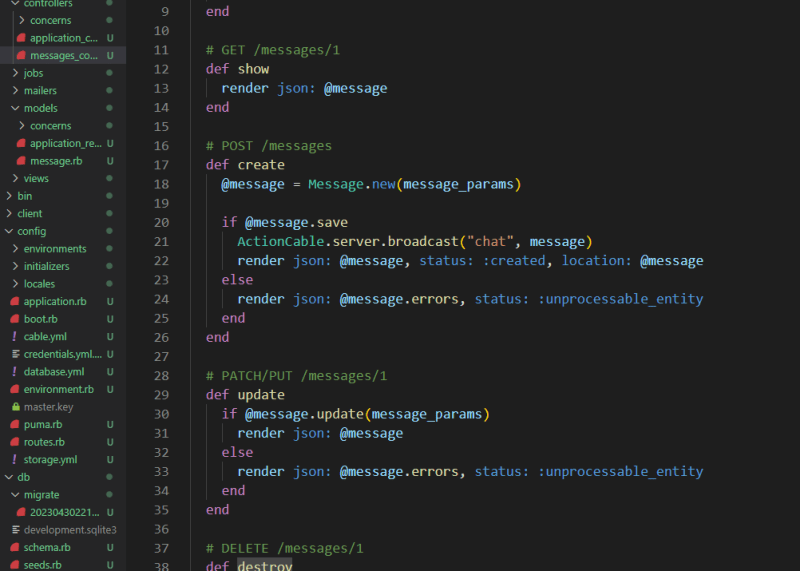
ActionCable.server.broadcast("chat", @message) tells our server to broadcast our @message to the stream "chat". If you broadcast from a model, you will need to use different syntax, refer to https://guides.rubyonrails.org/action_cable_overview.html.
React
For brevity, I will only cover setting up WebSockets on the frontend.
In /app/client/src create a new file cable.js. This will manage the creation of our client-side 'consumer'.
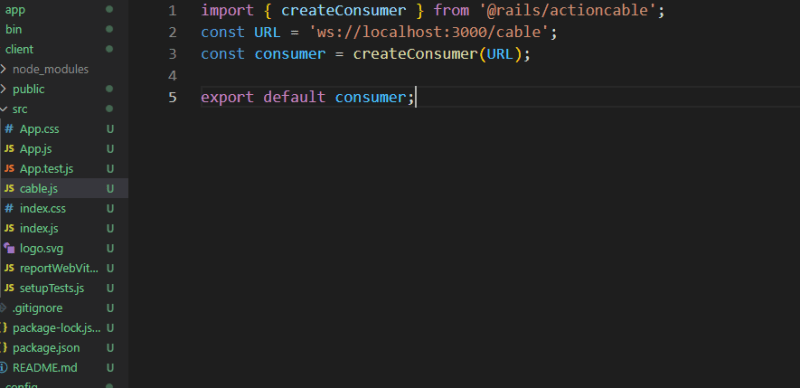
Note that the protocol of our URL is now 'ws' not 'http'. This will tell our server that the user is attempting to establish a WebSocket.
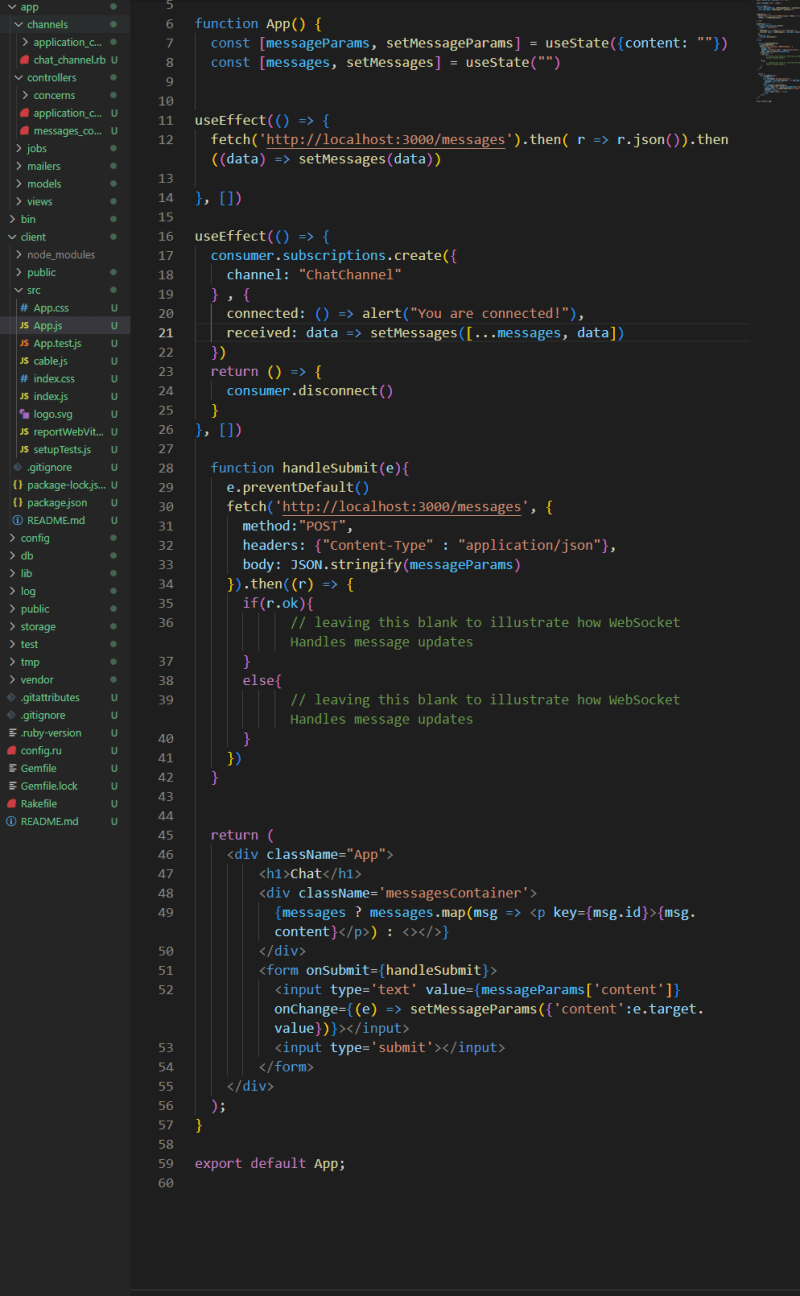
In App.js, we want the client to make a subscription request to our ChatChannel. Thanks to @rails/actioncable we can also describe what we want to happen when we are connected, and when we receive data (if our connection is established).
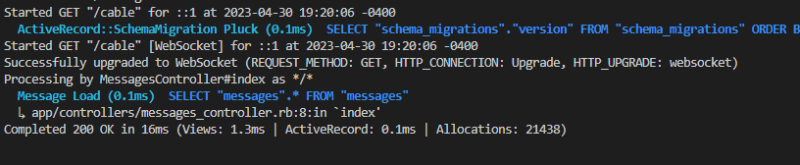
From our backend we can see if a request is successful by viewing our terminal.
When we make a post request to our backend, our Messages Controller broadcasts our message to the "chat" stream.
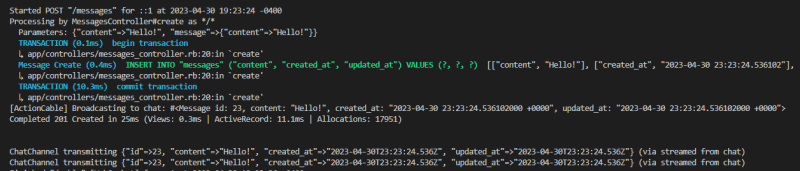
When it broadcasts, our clients are set up to setMessages using that received information.
You can view realtime updates by opening the application an in incognito window. You will notice that both will update whenever the other sends a message.
Conclusion
WebSocket is a great tool to allow for interactive communication for users. It was difficult for me at first to really get a grasp on some of the examples out there, so I hope this provides a very basic illustration of how to set up ActionCable with a React Frontend application. I didn't cover management of connection requests or illustrate the use of multiple streams, but I think this shows the very basics on how to get a chatroom going. Let me know if there's anything I missed or anything you'd want me to cover!

Top comments (0)