💡Tech Stack: Vite 4 + React 18 + TypeScript + WordPress REST API
Environment Tool: ServBay (Multi-PHP Version Management)
WordPress is an open-source content management system (CMS) powering over 43% of global websites. Its plugin architecture allows extending functionality via PHP and JavaScript, though traditional development often relies on jQuery and outdated toolchains, leading to slow builds and debugging complexity.Vite, developed by the creator of Vue.js, is a modern frontend build tool .
Challenges in Traditional WordPress Plugin Development
❌ Slow Build Process: Legacy tools like Webpack or Gulp are slow to start up and require manual page refreshes during debugging.
❌Lack of Hot Reloading: Traditional setups lack hot module replacement (HMR), requiring page reloads every time the code changes.
❌Limited Tech Stack: It’s difficult to integrate modern front-end frameworks like React or Vue with traditional WordPress plugin development.
Advantages of Integrating Vite
✅Fast HMR: Vite provides near-instant updates, preserving component state and boosting developer efficiency.
✅ Native ES Modules: Development with ES modules, no need for complex bundling.
✅Modern Ecosystem: Vite comes with built-in support for TypeScript, CSS preprocessors, dynamic imports, and more.
👉Objectives
1、Development Environment: Enable fast hot-reloading and integration with WordPress REST API.
2、Production Build: Automate static asset optimization and path adjustments for production.
3、Multi-PHP Version Testing: Ensure plugin compatibility with multiple PHP versions.
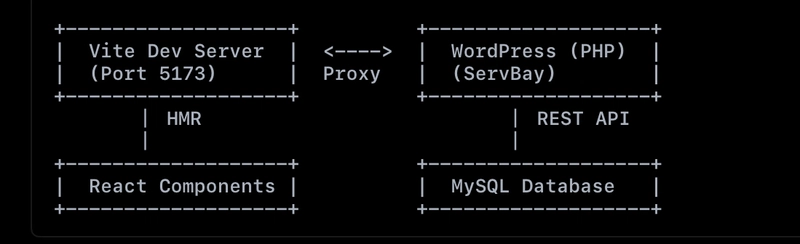
Solution Architecture👇
Architecture Diagram
Environment Setup
1.Local WordPress Environment
Here I take ServBay as an example. (ServBay is an all-in-one web programing environment manager that supports Golang, PHP, and Node.js while integrating Nginx, MySQL, PostgreSQL, and Redis for seamless environment switching.)
Use ServBay to create an environment with:
PHP 8.2 + 7.4 (Multiple PHP versions)、MySQL 8.0、Auto-generated HTTPS certificate (*.test domain)
Initialization command:

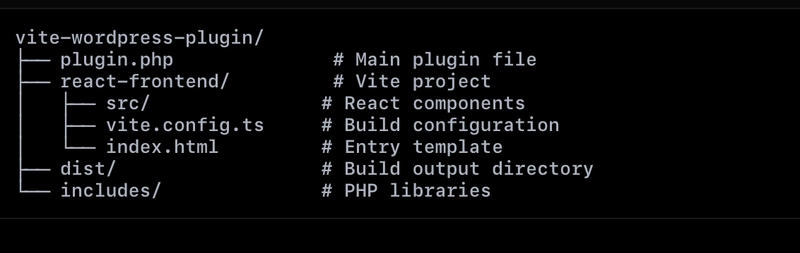
2.Project Directory Structure
Implementation Steps
1.Setting Up the Vite Project
Initialize a React + TypeScript project:

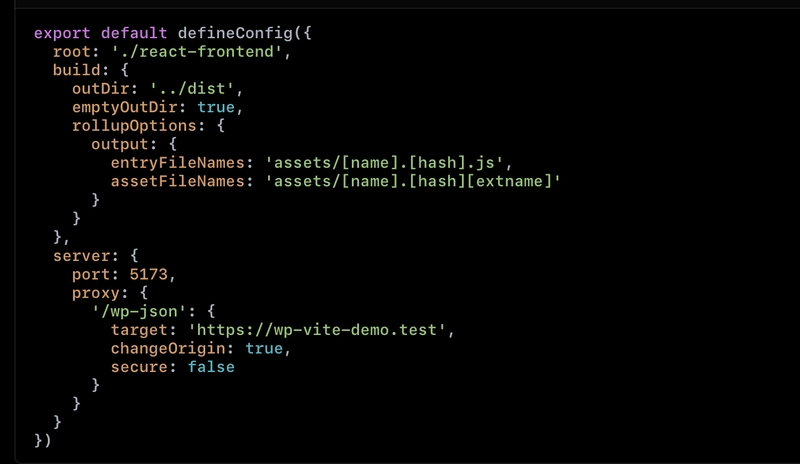
Key configuration (in vite.config.ts):
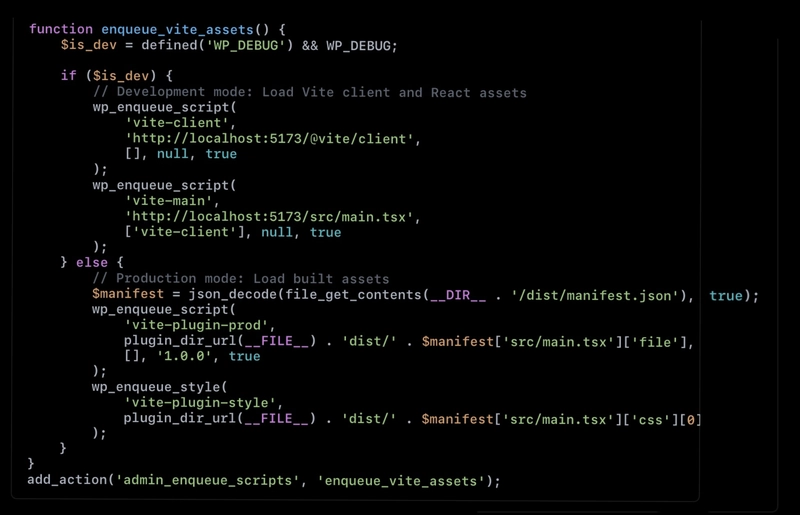
2.Dynamically Load Assets
In plugin.php, implement environment checks:
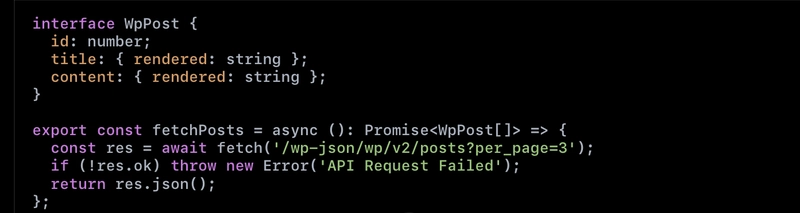
3.REST API Interaction Example
Wrap API requests in a utility (in src/lib/wp-api.ts):
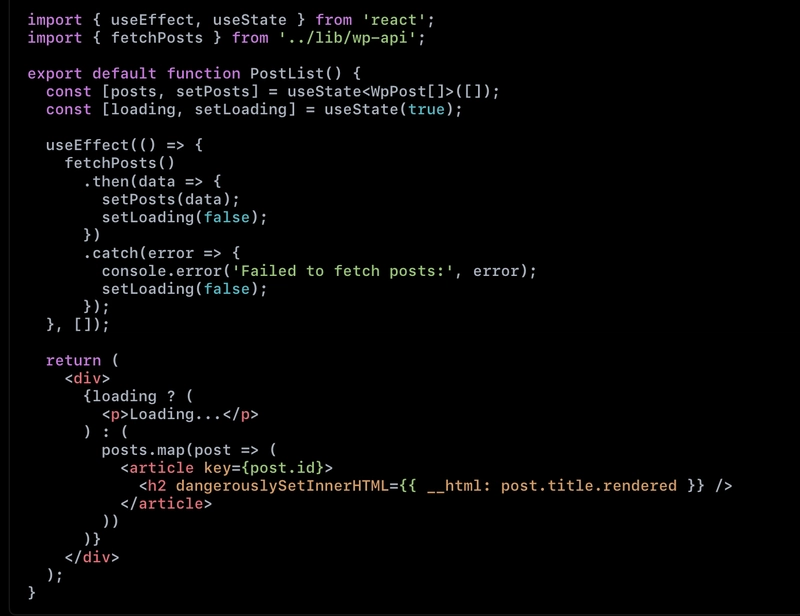
React component calling the API (in src/components/PostList.tsx):
Production Environment Optimizations
Build Configuration
Generated static assets include:Hashed filenames for cache control、Code minification (Terser + CSSNano) 、Code splitting
Deployment Considerations
- File Path Issues: Check the dist/manifest.json file paths to ensure all assets are correctly loaded.
- HTTPS & Mixed Content Warnings: Ensure all production resources are loaded over HTTPS to avoid browser warnings.
- PHP Version Compatibility Testing: Use ServBay snapshots to test plugin compatibility across different PHP versions:

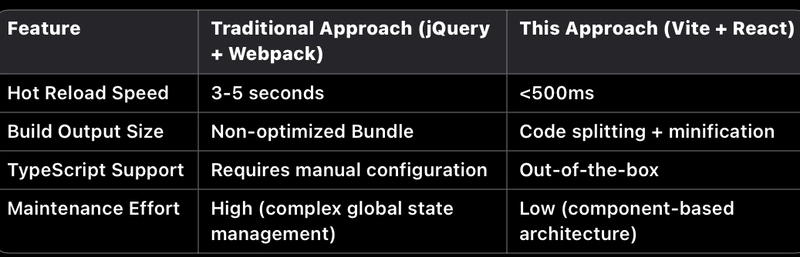
Comparison of Technical Solutions
Best Practices
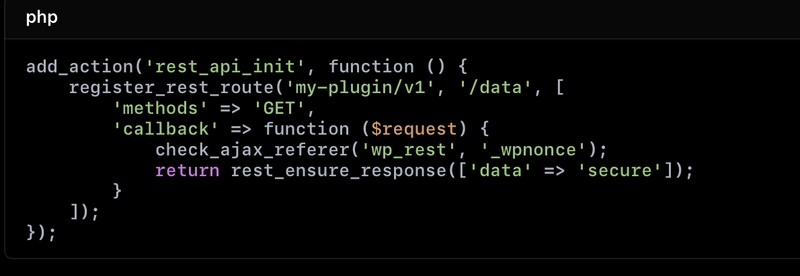
1.API Security
When registering custom REST API endpoints in WordPress, add Nonce validation:
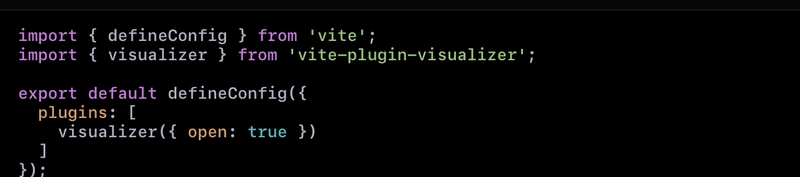
2.Performance Monitoring
Use vite-plugin-bundle-analyzer to analyze your build size:

Top comments (3)
This is very useful to me, thank you for sharing.
This is very friendly for beginners and it is clearly explained.
Điều này rất hữu ích cho những người mới bắt đầu