
Bringing trust to digital products is becoming more and more important. One way to do this is via an identity verification solution like Passbase. You can verify the true identity of users and seamlessly integrate Passbase with other apps and services through Zapier This article will show you how you can build automated workflows for identity verification, (with features like biometric authentication and ID verification) that integrate into spreasheets and tables, databases, communication tools and CRMs. This is a no-code / low-code solution that can be implemented by both developers and people without a technical background.
In the Zapier ecosystem, Passbase can currently be integrated with:
Spreadsheets and Tables
- Google Sheets
- Airtable
Databases
- Firebase
- PostgreSQL
Communication Tools
- Discord
- Gmail
- Sendgrid
- Mailchimp
CRMs
- Hubspot
- Salesforce
- Pipedrive
This tutorial will walk you through how to set up the Passbase and Zapier integration.
Preparation before we start:
- You need a Passbase Developer account. If you don't have one, navigate and create one here
- You should have at least one completed verification in your dashboard, in order to trigger some actions. If you don't have one, finish one via your hosted link from the integration section
- A Zapier Account

Setting up the Passbase Zapier App
After you have a fully setup your Passbase developer account and have at least one verification, you can navigate to Zapier in order to create your Zap. If you don't have an account there, please also create one. They have a free plan to try out all the features.

Receive Webhooks in Zapier
Click on Make a Zap
Start Searching in the search Bar for Passbase and select our App

Choose New Webhook Event as Trigger Event. This means, every time Passbase sends a webhook event to Zapier, this Zap will trigger.

Next you have to authenticate your Zap with Passbase. To do this, please add your account with your secret API key. A popup will open, asking for your secret key.
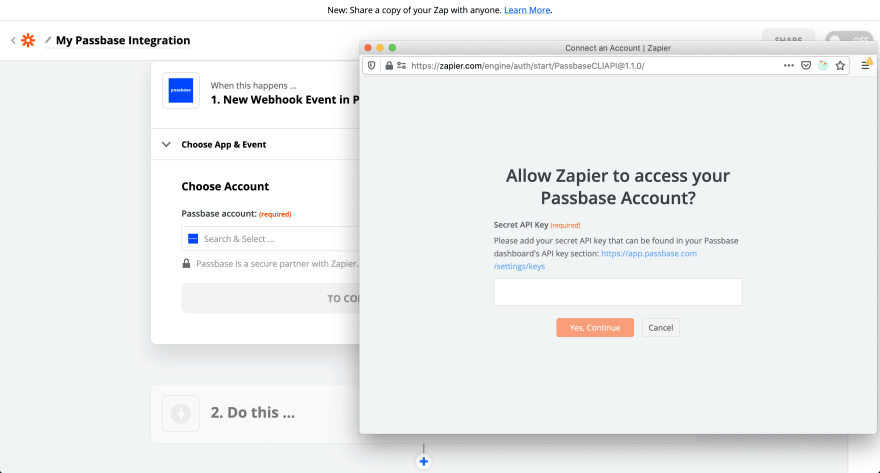
This key can be found in your Passbase account in the API Key section. Click on the copy button in order to grab your secret API key.

Then paste it into the Zapier popup window and click Yes, Continue to connect your account.
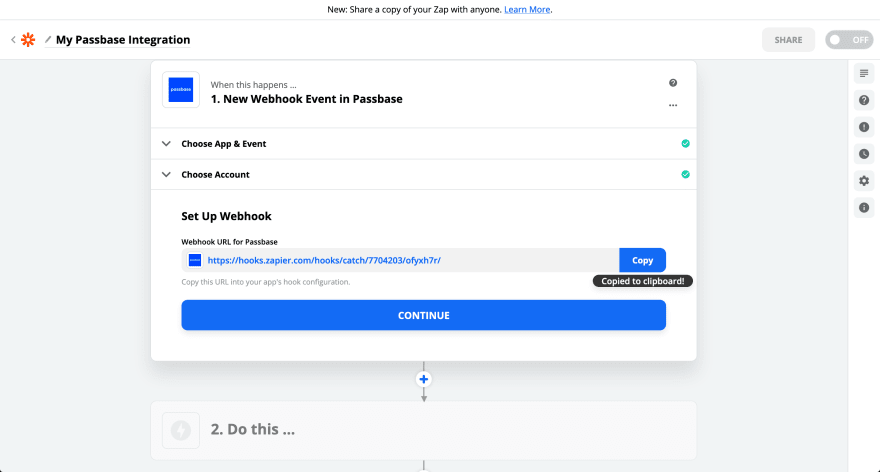
Next you will receive a custom Webhook URL from Zapier that you need to copy to the Passbase dashboard in order to connect Zapier with Passbase. Click on the Copy button.
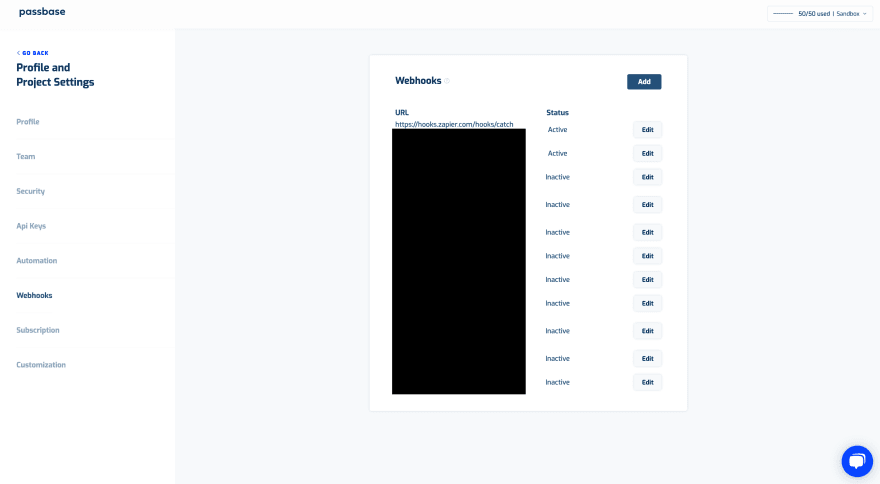
Navigate to the Webhook section in your Passbase dashboard. Here all your webhooks are listed. And click Add. Then a popup should open up.

Here you can select which events should be sent to Zapier. We offer 2 events so far:
-
Authentication Processed:An Authentication has been processed and is ready to be reviewed. -
Authentication Reviewed:The Authentication has been approved or rejected in your dashboard.
We want to only listen to the Authentication Reviewed event, so please select this and paste your Zapier URL into the POST field. Finally click Save and ensure the webhook is listed as active in the table.
Navigate back to the Zapier Zap and press continue.

Now you are ready to test the trigger. Navigate to the Passbase dashboard section and select your testing authentication and open it by pressing the Check button.

Now either approve or reject this authentication, to trigger the Authentication Reviewed event.

This will lead to Zapier receiving an event. You should now be able to see the result by clicking the Test Trigger Button.

Get details for an authentication
Next we want to get the details about the just finished authentication. For this, you need to create an Action in Zapier next.
Search again for Passbase, select the App and choose Find Authentication Details by Key as action.

We need to select the same account that we already connected Passbase and Zapier with. This is an easy step.

Now we need to select the authentication_key that we just received via the webhook.

Afterwards press Continue.
We have to approve again which data is sent (our key).
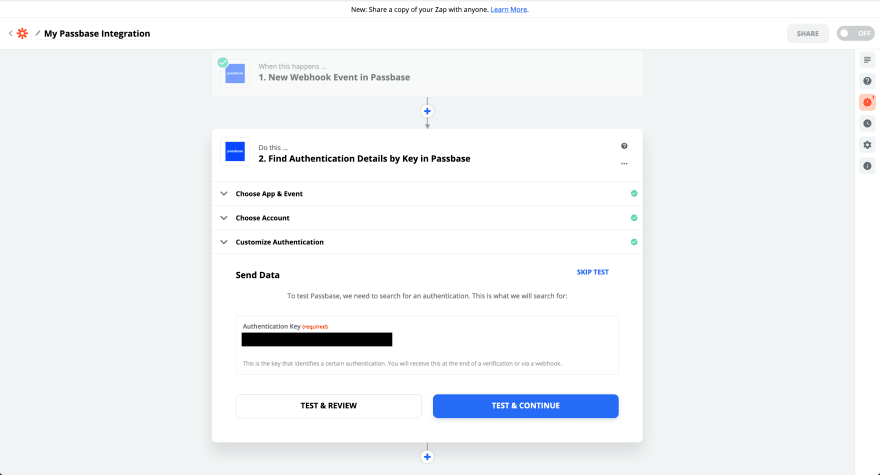
This should work now and you can see the details from a Passbase authentication.

🎉That's it. Our possibilities are endless from here. We can now integrate and send this data to all kinds of other applications via Zapier.

Passbase is an identity verification solution that has a 14-day free trial for developers to see how verification can fit into their product or service. Passbase has web and mobile client-side SDKs, web hooks, and API integrations. You can check out the developer docs here.


Top comments (0)