A Git repository helps an individual and organizations to store a collection of files of various different versions of a Project. These files are usually imported from the repository into the local server of the user for update and modifications. Git is also used for coordinating work among programmers collaboratively developing source code during software development.
As an inexperienced newcomer, new to an organization, working with git command can be very overwhelming. This article is a guide to help a newbie make their first contribution in an existing organization Git repository. It can also be used by an expert as a reference guide. Let's get into it.
Prerequisites
- Git installed in your computer
- GitHub account or any other software repository
NOTE: For the purpose of this blog we will be working with this repository: https://github.com/MalonzaElkanah/To-Do-Flask on a Linux distro PC.
Step 1: Initialize the project folder
The first step is to create a folder for the project and give it the same name as the project. For example, I will open the terminal and create a folder called ‘to-do app’. I use the command ‘mkdir’ to create a folder in Ubuntu OS. After creating the folder, use the ‘cd’ command to navigate into the folder.
We need to turn the new folder to a local repository for the project. Using the ‘git init’ command, we will create an empty Git repository. This command will create a .git directory with sub-directories for objects , refs/heads , refs/tags , and template files.
Step 2: Connect the local repo to the remote repo
So far your local repository is not linked to the remote project repository. To connect to the project remote repository, use the ‘git remote add’ command on the terminal of your local repository. The git remote add command takes two arguments:
- A remote name, for example, origin
- A remote URL, for example, https://github.com/user/repo.git
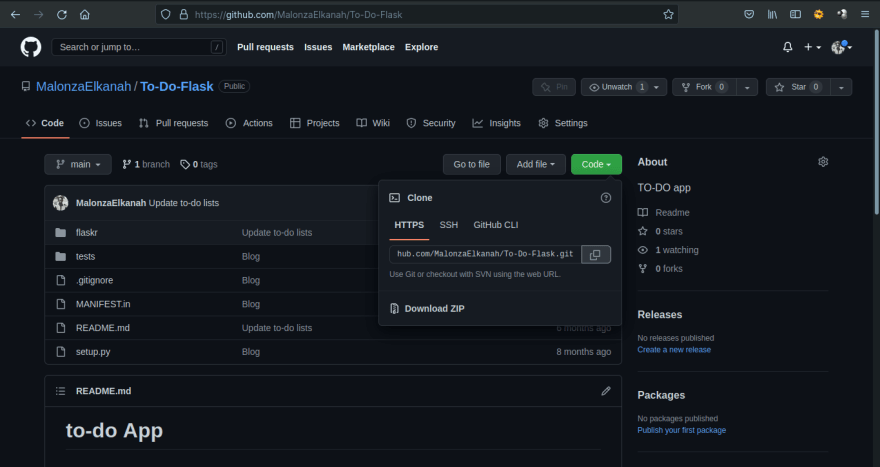
The easiest way to get the remote-url is to add ‘.git’ to the remote repository link, For Example: [https://github.com/MalonzaElkanah/To-Do-Flask] repo, add ‘.git’ at the end to create the remote url, [https://github.com/MalonzaElkanah/To-Do-Flask.git ].
You can also get the remote-url from the repo page:
After using the ‘git remote add’ command, use the ‘git remote -v’ command to verify the remote repo connection:
Step 3: Get the files from remote repo
We need to download the remote repository files in order to start making contributions. The ‘git fetch --all’ command is a primary command used to download all contents from a remote repository.
The files have been downloaded to the local repository and stored in the .git folder. The files are not available in our project folder because we have not selected any remote branch. Assuming the remote repository you will be working in contains a couple of branches, you can switch between these branches using ‘git checkout’ command.
For instance, currently the to-do app has one branch, ’main’ branch, so the command to switch to that branch will be: git checkout main
Now all the files that belong to the main branch are available in your local project folder.
To find out what branches are available in your local repository and what the current branch name is, execute ‘git branch’ command.
Step 4: Updating Remote repo from local repo changes
If you have made modifications to the content of the project file and/or added new files to the project folder, you can update the changes to the remote repository. To view the modified files use the ‘git status’ command. For example, I have modified the README.md file and added requirements.txt file.
To push the changes:
- Use the ‘
git add .’ command to make all new files(in this case, requirements.txt) to be tracked by git. To add a specific file/folder use ‘git add <file/folder-name>’, for instance, in our example we will use:git add requirements.txt -
Then, use the ‘
git commit’ to 'stage' changes to the project that will be stored in a commit. That is, the command captures a snapshot of the project's currently staged changes. The command has several option- -a option for committing a snapshot of all changes in the working directory.
- -m option for passing a commit message.
-
--amend option for modifying the last commit. Instead of creating a new commit, staged changes will be added to the previous commit.
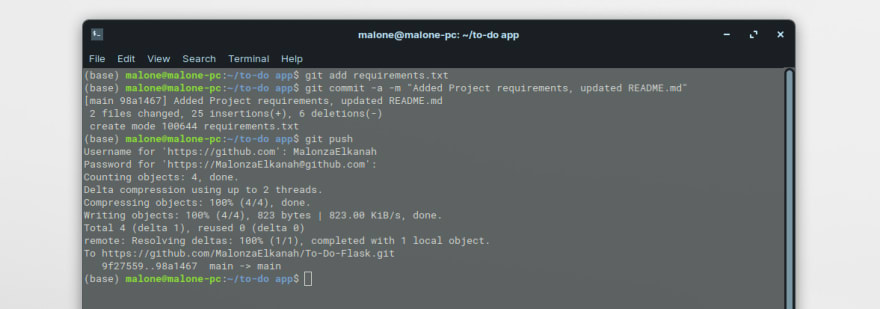
For instance, the commit statement for our to-do app will be:
git commit -a -m "Added Project requirements, updated README.md"
‘
git push’ command will upload local repository content to a remote repository. It will transfer all commits from your local repository to a remote repository.
For instance, to push our to-do app local changes:
Step 5: update the local repo to match remote repo content
When different people are working on the same project or you are working on the same project from multiple PCs, sometimes the remote repository is ahead in terms of commits in comparison to local repository.
The ‘git pull’ command is used to fetch and download content from a remote repository and immediately update the local repository to match that content.
Step 6: Creating remote branches
In a Collaboration project, programmers don’t usually work on the main branch. When a programmer wants to add a new feature or fix a bug, no matter how big or how small, they spawn a new branch to encapsulate the changes. When the features are complete or bugs fixed they merge the branch to the main.
In order to create a new branch locally, use the ‘git checkout -b’ command. To create a branch from another branch using git checkout, use the following syntax: git checkout -b <new_branch> <old_branch>
In our project I will create a ‘sqlalchemy_orm’ branch from the main branch.
For now the new branch only exists in the local repository. To update the remote repository about the new branch, use the ‘git push –set-upstream origin <new_branch>’ command.
Every change you commit will be pushed to the new branch unless you merge the branch with another or you switch to another branch.
End Note
The objective of this article was to give step by step instruction to contribute to an existing repository for a beginner. There are other git commands not mentioned above that were irrelevant to the guide but are as much important. It's wise to know at least what they do just in case you get any conflict when working with above git commands.
HAPPY CODING!


Top comments (1)
Thank you for sharing the code. It really helped me understand Git better. However, I have encountered a challenge. When I try to push the code using the following command:
$ git push --set-upstream origin sqlalchemy_orm
remote: Permission to MalonzaElkanah/To-Do-Flask.git denied to ahmadu2305.
fatal: unable to access 'github.com/MalonzaElkanah/To-Do-Fl... The requested URL returned error: 403
Could you please help me identify where I went wrong?