According to Internal, one of the leading Internal Tools providers, IT and engineering teams spend 40% of their time building and maintaining internally-facing applications and workflows utilized within their organization. It has led to organizations having dedicated software engineering teams or leveraging internal tooling platforms to cater for their organization's needs.
In this article, we will explore what Internal Tool is and how we can leverage Uniform as an Internal tool to build a News timeline application in Flutter.
What are Internal Tools?
Internal Tools are any internal-facing software developed and utilized by a company to support internal operations. Based on the company’s needs, the decision about Internal Tooling usually boils down to building it internally (flexible and with no vendor lock-ins) or purchasing it as a service. The following are some of the advantages:
- Cost-effective
- Improved security
- Time-saving
- More control and increased productivity
- Automate repetitive task
The most common internal tools help companies serve customer queries, analyze users’ behaviour, manage content, and manage APIs and requests.
Despite its offering, Internal Tools also comes with its baggage. Beyond the learning curve, the cost of subscription and maintenance, among others. It is especially difficult for small organizations with limited resources to either dedicate software engineering teams or subscribe to an Internal Tooling platform to help support internal operations.
Exploring Uniform and its offering
Uniform is a digital experience platform that allows companies or individuals to frictionlessly adopt traditional and headless technologies without the associated overheads. It allows businesses to deliver built-in high-performance testing and personalization orchestration. Beyond it being a digital experience platform for composing experience, it offers some unique functionalities that small to large companies can leverage as an internal tool.
Multiple integration support
Uniform supports more than 40 integrations ranging from Content Delivery Networks, Headless Content Management Systems, Analytic tools, Email Management and Media Management. The platform makes integration easy by eliminating the need for manual connections.
No-code solution
The platform provides an intuitive user experience that developers, marketers, content developers, and other practitioners need to cater for business operations with little to no IT and ops involvement.
Source of truth
Uniform provides a truly composable digital experience with support for multiple stacks ranging from Commerce, CMS, Data, CDNs, etc. It delivers it as a single source of truth through its secure and fast API.
Best-in-class User Experience
Beyond the intuitive User Interface, Uniform also caters for developers by providing best-in-class developer documentation, SDKs, and libraries.
Building the News timeline with Flutter and Uniform
Now that we understand what Internal tools are and how we can leverage Uniform functionalities as one, let’s now build a News timeline with Flutter and Uniform.
Prerequisites
To fully grasp the concepts presented in this tutorial, the following are required:
- Basic understanding of Dart and Flutter
- Flutter SDK installed
- Cloudinary account (create a free account here)
- Uniform account (create a free account here)
- Either iOS Simulator, Android Studio, or Chrome web browser to run the application
Getting started
To get started, we need to clone the project by navigating to the desired directory and running the command below:
git clone https://github.com/Mr-Malomz/news_mobile && cd news_mobile
Running the project
First, we need to install the project dependencies by running the command below:
flutter pub get
Then, run the project using the following command:
flutter run
The command above will run the application on the selected device.
Image Sourcing and Upload to Cloudinary
To start building our application, we must upload sample images for our News timeline application.
Sample data
| News title | Image URL |
|---|---|
| You’re Using ChatGPT Wrong! Here’s How to Be Ahead of 99% of ChatGPT Users | https://bit.ly/3zBNZYG |
| Web3 crash course: The essentials | https://bit.ly/3UiOKzm |
| How to write and design good API documentation | https://bit.ly/3GqxjqZ |
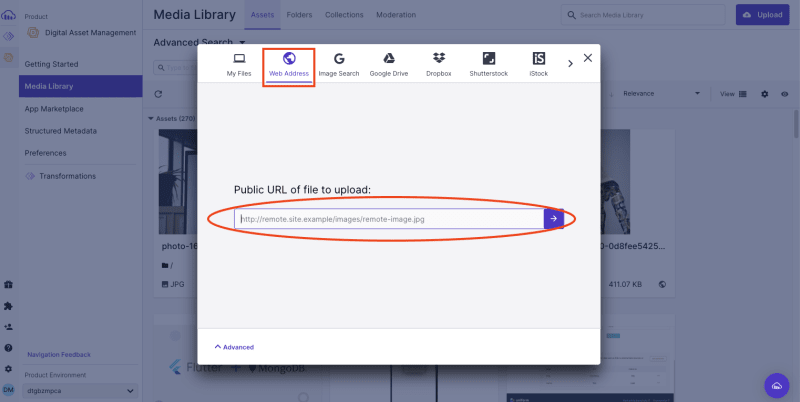
In our Cloudinary dashboard, we uploaded the images by clicking on the Media Library tab, clicking on Upload, selecting the Web Address option, inputting the URL, and clicking on the Arrow Button to upload.
After uploading the image, we will see it displayed on the console.
Putting it all together on Uniform
With that done, we can start creating component libraries on Uniform. To do this, we must sign up and fill in the required information.
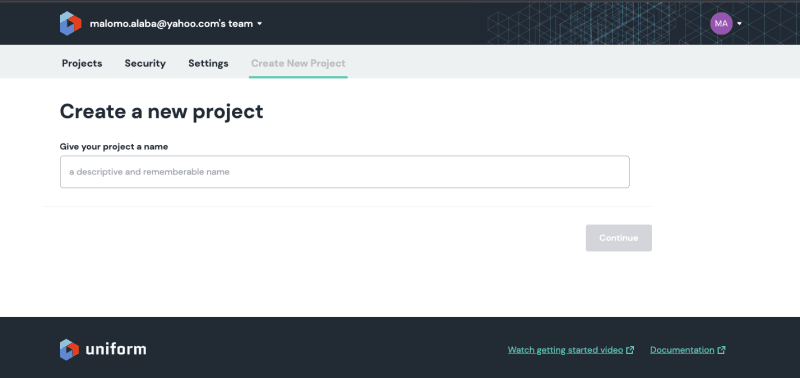
Next, input desired project name and click Continue.
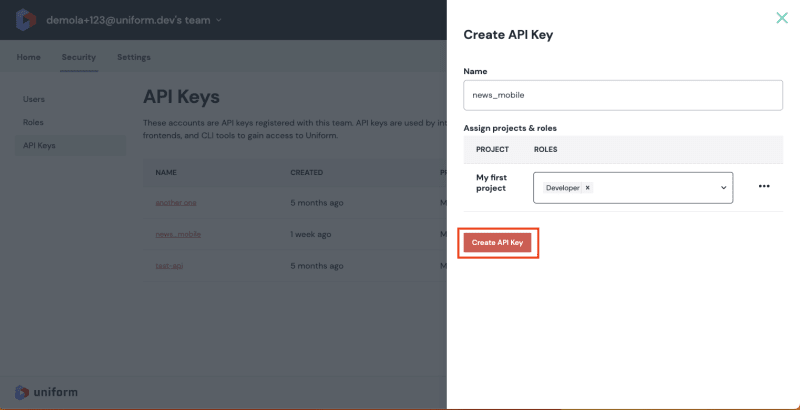
Next, navigate to the Security tab, select API Keys, and click on the Add API key button to create one. Input news_mobile as the API name, select Developer as the Role and click the Create API Key button to create the API key.
With this done, we should see a screen containing our API Key and Project ID. We need to copy these values as they will come in handy when building our application with Flutter.
How modelling works in Uniform
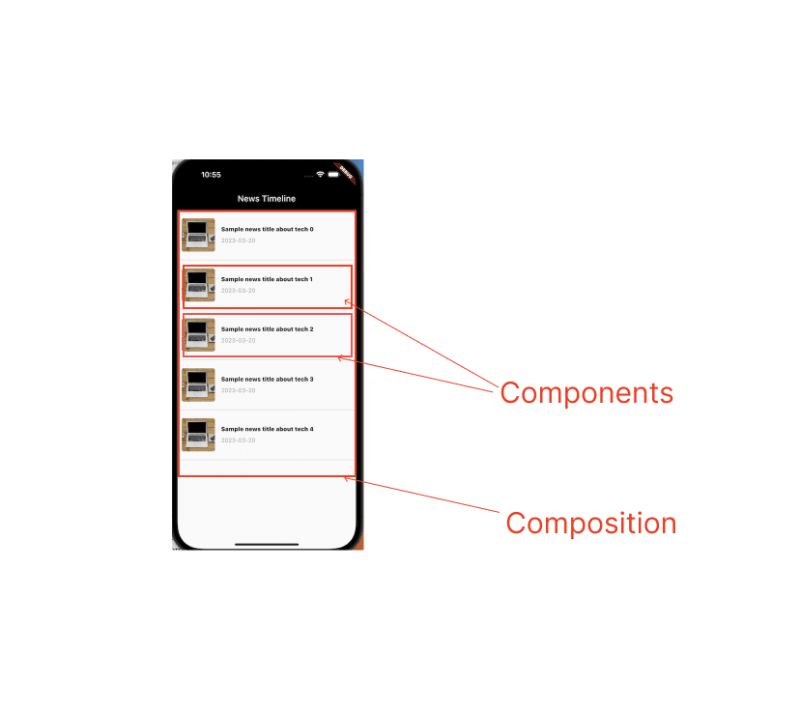
Uniform uses the concept of Components and Compositions to model application needs. Components in Uniform application work similarly to those in software development; it lets us break our application into smaller reusable building blocks with properties, while a Composition is the combination of one or more components.
Add Cloudinary integration support
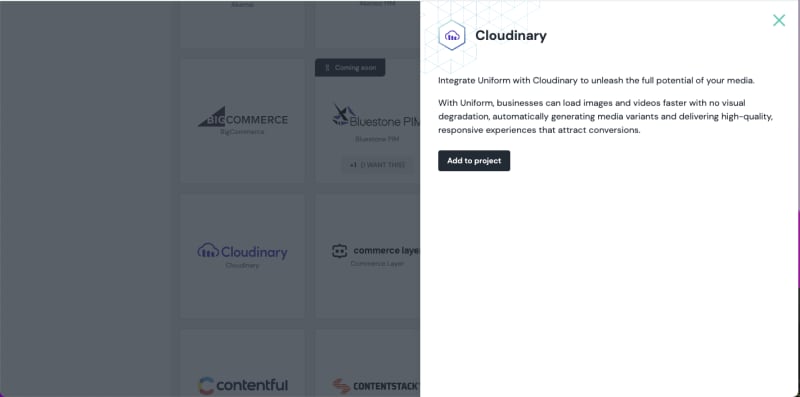
Uniform improves the product’s digital experience through integration with an existing system. To connect Cloudinary to our project, we need to navigate to the Home tab, click on the project, and navigate to the Integrations tab.
Search or browse through the available integrations, select the Cloudinary integration, click on the Add to project button, input the Cloudname, API Key, Test and Save.
We can get our Cloud Name and API Key from our Cloudinary dashboard.
Create components
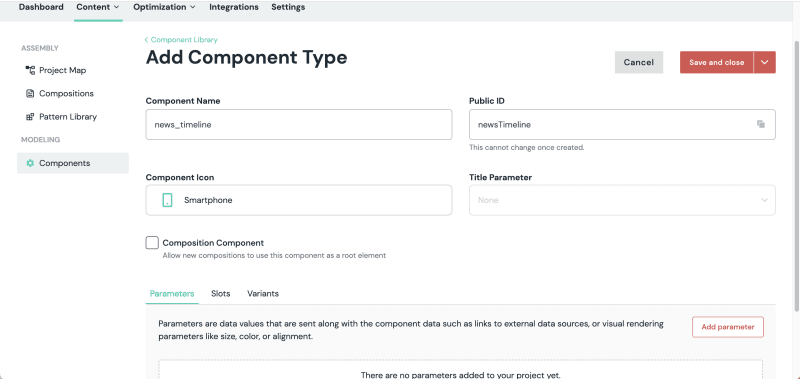
To get started, navigate to the Home tab and click on the project. Then click on the Content menu, select the Components, and click the Add component button.
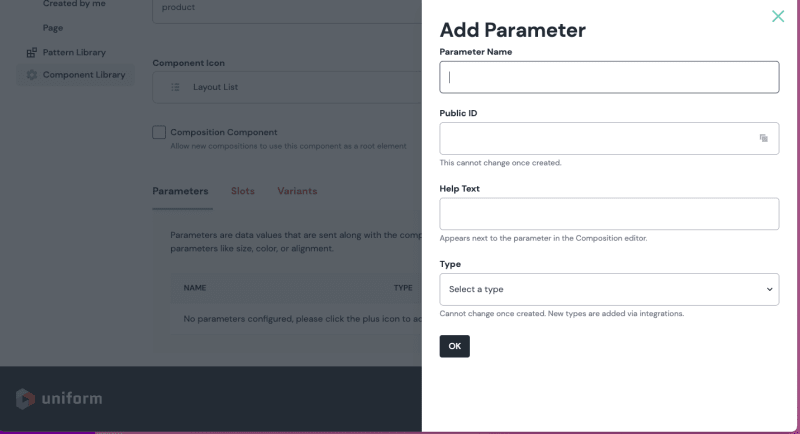
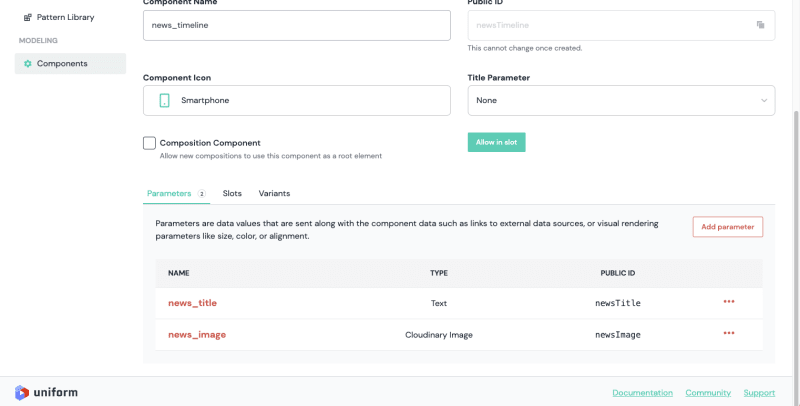
| Parameter Name | Help Text | Type | required |
|---|---|---|---|
| news_title | news title | text | YES |
| news_image | news image | Cloudinary Image | YES |
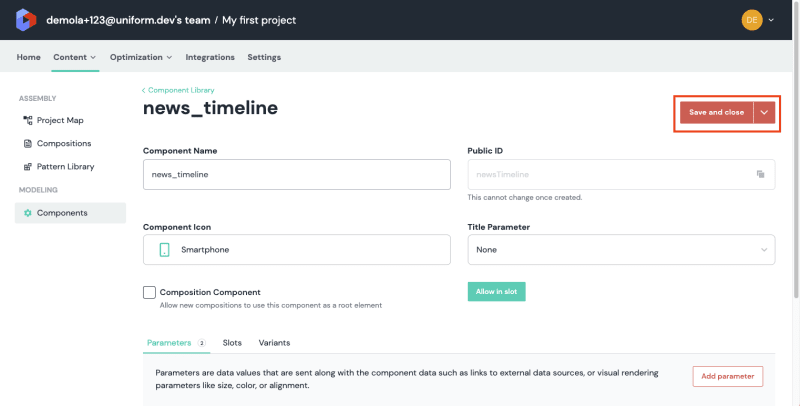
Input news_timeline as the component name, select smartphone as the icon, add properties of news_title, and news_image as shown above, and then click OK.
Then click on the Save and Close button.
Now that we have created the news_timeline, it will serve as a blueprint/building block for creating our News timeline application.
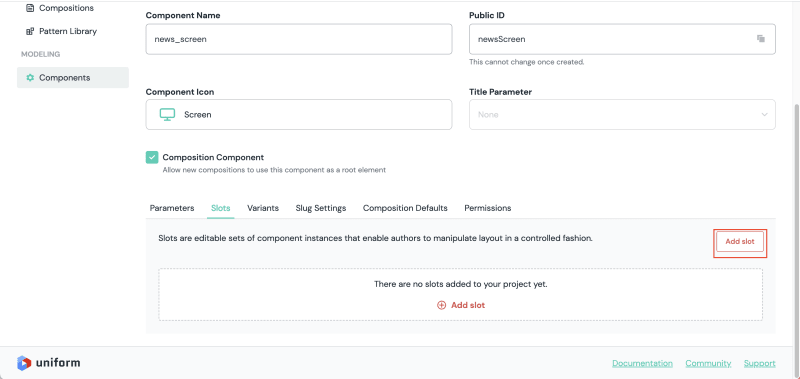
To start, navigate to the Component screen, click the Add component button, input news_screen as the component name, and check the Composition Component. Then navigate to the Slots section, and click the Add slot to create a slot.
PS: Slots help us create instances of our component and allow them to accept data dynamically.*
Input news_screen as the Slot Name and click OK.
Then click on the Save and Close button.
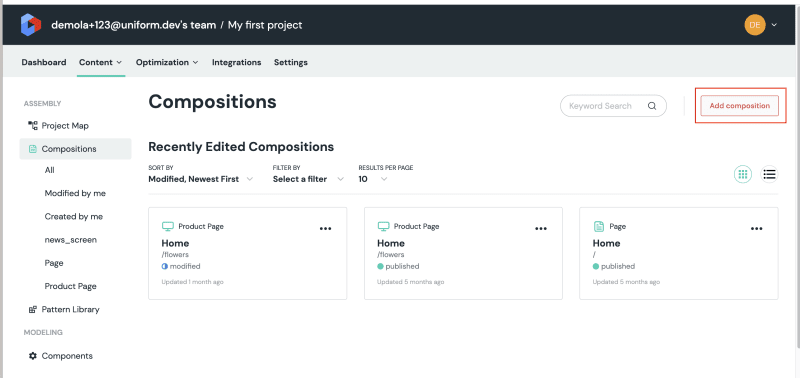
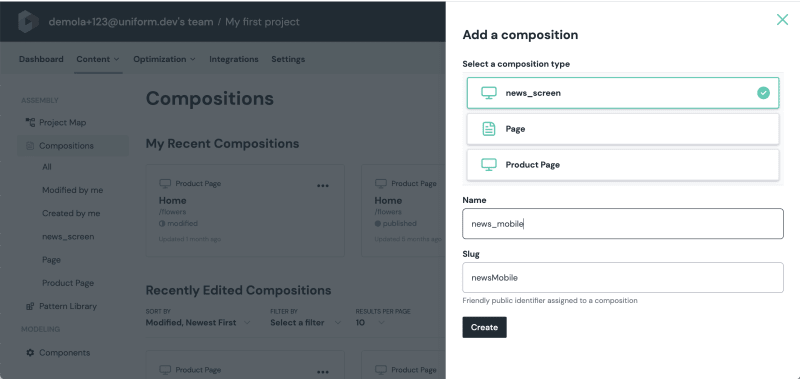
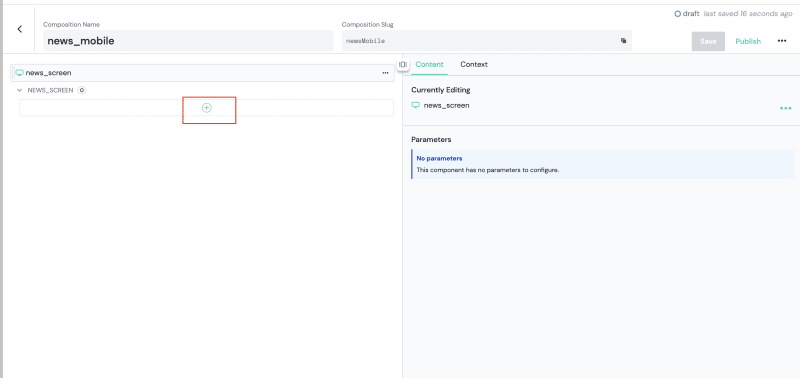
With that done, we can start using the news_screen component to compose our News timeline application. To get started, navigate to the Composition tab, select the news_screen as the composition type, input news_mobile as the name, and Create.
Next, click on the Plus Icon to add a component to the composition.
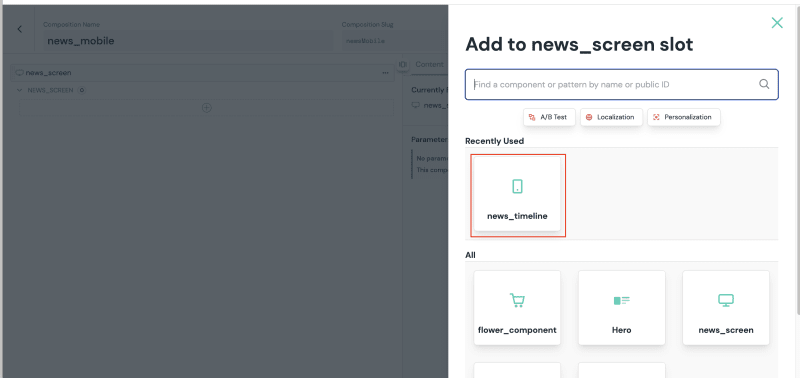
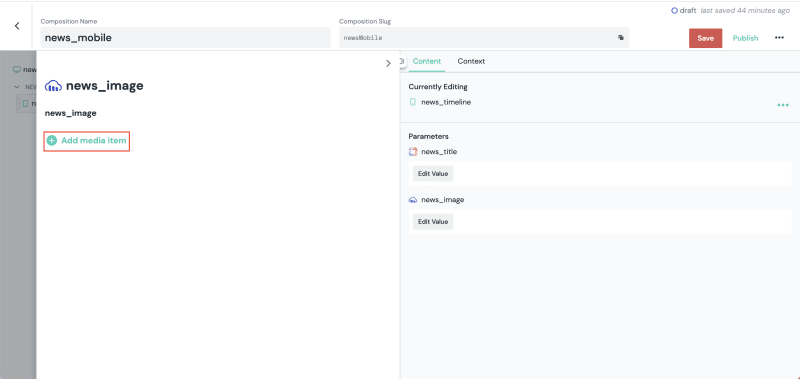
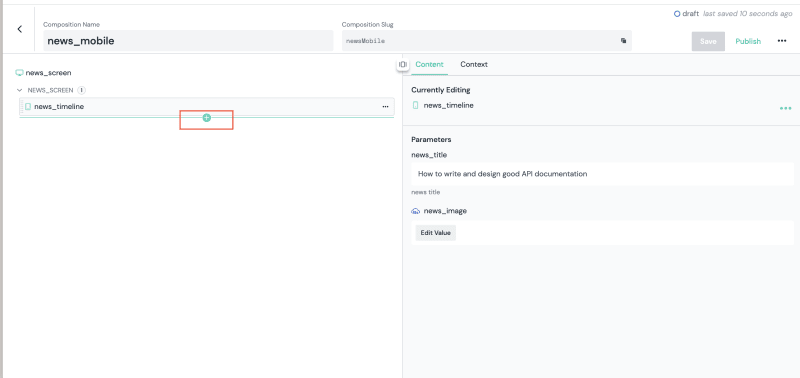
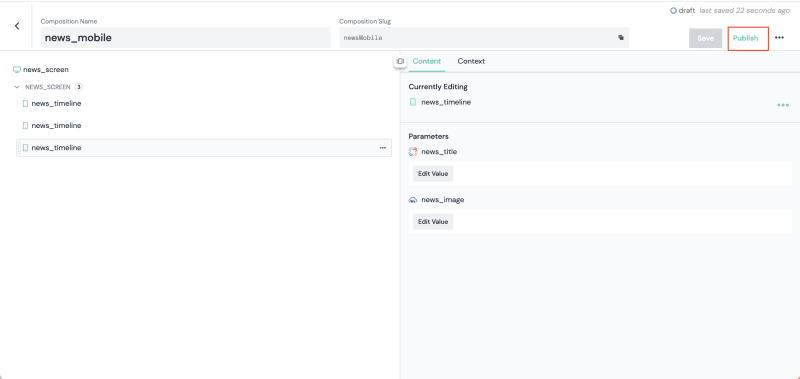
Select the news_timeline, add the corresponding name and image for the component.
We need to repeat the steps above to add the remaining news_timeline data. Then click on Publish. This makes our composition available to third-party applications.
We also need to note the composition slug; it will be useful when querying Uniform for our News data.
Integrating Uniform with Flutter
With that done, we can start building the user interface and use Uniform to deliver the list of news seamlessly.
Creating Application Model
Uniform ships with a language-agnostic Platform API for managing and composing experience. We can test the API by filling in the API Key, Project ID, and Slug.
With that in mind, we need to create a model to convert the response sent from Uniform to a Dart object. The model will also cater to JSON serialization. To do this, create an utils.dart file inside the libs folder and add the snippet below:
class RootComposition {
  Composition composition;
  String created;
  RootComposition({required this.composition, required this.created});
  factory RootComposition.fromJson(Map<String, dynamic> json) {
    return RootComposition(
      composition: Composition.fromJson(json['composition']),
      created: json['created'],
    );
  }
}

class Composition {
  Slots slots;
  Composition({required this.slots});
  factory Composition.fromJson(Map<String, dynamic> json) {
    return Composition(
      slots: Slots.fromJson(json['slots']),
    );
  }
}

class Slots {
  List<NewsScreen> news;
  Slots({required this.news});
  factory Slots.fromJson(Map<String, dynamic> json) {
    var data = json['newsScreen'] as List;
    return Slots(
      news: data.map((news) => NewsScreen.fromJson(news)).toList(),
    );
  }
}

class NewsScreen {
  Parameters parameters;
  NewsScreen({required this.parameters});
  factory NewsScreen.fromJson(Map<String, dynamic> json) {
    return NewsScreen(
      parameters: Parameters.fromJson(json['parameters']),
    );
  }
}

class Parameters {
  NewsImage newsImage;
  NewsTitle newsTitle;
  Parameters({required this.newsImage, required this.newsTitle});
  factory Parameters.fromJson(Map<String, dynamic> json) {
    return Parameters(
      newsImage: NewsImage.fromJson(json['newsImage']),
      newsTitle: NewsTitle.fromJson(json['newsTitle']),
    );
  }
}

class NewsImage {
  Value value;
  NewsImage({required this.value});
  factory NewsImage.fromJson(Map<String, dynamic> json) {
    return NewsImage(
      value: Value.fromJson(json\['value'\][0]),
    );
  }
}

class Value {
  String url;
  Value({required this.url});
  factory Value.fromJson(Map<String, dynamic> json) {
    return Value(
      url: json['url'],
    );
  }
}

class NewsTitle {
  String value;
  NewsTitle({required this.value});
  factory NewsTitle.fromJson(Map<String, dynamic> json) {
    return NewsTitle(
      value: json['value'],
    );
  }
}
Next, we must create a service file to separate the application core logic from the UI. To do this, create a uniform_service.dart file inside the lib directory. Then, add the snippet below:
import 'package:dio/dio.dart';
import 'package:news_mobile/utils.dart';

class UniformService {
  final dio = Dio();
  static const _apiKey = "REPLACE WITH API KEY";
  static const _projectID = "REPLACE WITH PROJECT ID";
  static const _slug = "newsMobile";

  var headers = {
    "content-type": "application/json",
    "x-api-key": _apiKey,
  };

  Future<RootComposition> getNews() async {
    var response = await dio.get(
      "https://uniform.app/api/v1/canvas?limit=100&projectId=$_projectID&slug=$_slug",
      options: Options(headers: headers),
    );

    if (response.statusCode == 200) {
      var resp = response.data;
      var news = RootComposition.fromJson(resp);
      return news;
    } else {
      throw Exception('Error getting news');
    }
  }
}
The snippet above does the following:
- Imports the required dependencies
- Creates a
UniformServiceclass with_apiKey,_projectID,_slugandheadersproperties. - Creates the
getNewsmethod that uses theDiopackage to configure permissions and make secure HTTPS request to the Uniform API and returns the appropriate responses
Consuming the service
With that done, we can use the service to perform the required operation. To do this, we need to modify the home.dart file in the screens directory as shown below:
import 'package:flutter/material.dart';
import 'package:news_mobile/uniform_service.dart';
import 'package:news_mobile/utils.dart';

class Home extends StatefulWidget {
  const Home({super.key});

  @override
  State<Home> createState() => _HomeState();
}

class _HomeState extends State<Home> {
  late RootComposition news;
  bool _isLoading = false;
  bool _isError = false;

  @override
  void initState() {
    _getNews();
    super.initState();
  }
  _getNews() {
    setState(() {
      _isLoading = true;
    });

    UniformService().getNews().then((value) {
      setState(() {
        news = value;
        _isLoading = false;
      });
    }).catchError((onError) {
      setState(() {
        _isLoading = false;
        _isError = true;
      });
    });
  }

  @override
  Widget build(BuildContext context) {
    return _isLoading
        ? const Center(
            child: CircularProgressIndicator(
            color: Colors.blue,
          ))
        : _isError
            ? const Center(
                child: Text(
                  'Error getting news',
                  style: TextStyle(
                    color: Colors.red,
                    fontWeight: FontWeight.bold,
                  ),
                ),
              )
            : Scaffold(
                appBar: AppBar(
                  title: const Text('News Timeline'),
                  backgroundColor: Colors.black,
                ),
                body: ListView.builder(
                  itemCount: news.composition.slots.news.length,
                  itemBuilder: (context, index) {
                    return Container(
                      decoration: const BoxDecoration(
                        border: Border(
                          bottom: BorderSide(width: .5, color: Colors.grey),
                        ),
                      ),
                      padding: const EdgeInsets.fromLTRB(10, 20, 10, 20),
                      child: Row(
                        children: [
                          ClipRRect(
                            borderRadius: BorderRadius.circular(5.0),
                            child: Image.network(
                              news.composition.slots.news[index].parameters
                                  .newsImage.value.url,
                              height: 80.0,
                              width: 80.0,
                            ),
                          ),
                          const SizedBox(width: 15.0),
                          Expanded(
                            child: Column(
                              crossAxisAlignment: CrossAxisAlignment.start,
                              children: [
                                Text(
                                  news.composition.slots.news[index].parameters
                                      .newsTitle.value,
                                  style: TextStyle(
                                      color: Colors.black,
                                      fontWeight: FontWeight.w800),
                                ),
                                SizedBox(height: 10.0),
                                Text(
                                  news.created.substring(0, 10),
                                  style: TextStyle(
                                    color: Colors.grey,
                                  ),
                                )
                              ],
                            ),
                          ),
                        ],
                      ),
                    );
                  },
                ),
              );
  }
}
The snippet above does the following:
- Imports the required dependencies
- Lines 13-15: Create the
news,_isLoading, and_isErrorproperties to manage the application state - Lines 17-39: Create a
_getNewsmethod to get the list of news from Uniform using theUniformService().getNewsand set states accordingly - Modifies the UI to use the states and method created to get the news list
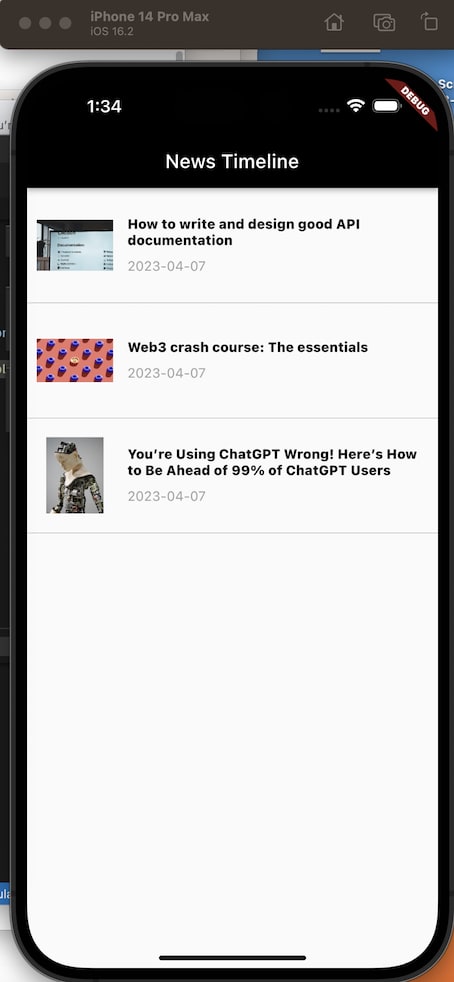
With that done, we restart the application using the code editor or run the command below:
flutter run
Conclusion
This post discussed what Internal Tools are, Uniform’s uniqueness, and how to build a News timeline with Flutter. Beyond what was discussed above, Uniform also caters for marketers' and content strategies' operational needs with little or no IT and engineering team involvement.
These resources might be helpful:














Top comments (0)