
Introduction
This article is directed to people that never seen anything about android source code and want to start to clone the first repo or maybe create or unique android version😁.
What is AOSP?
AOSP is the open-source common base for the Android operating system developed and maintained by Google. Aside from the open-source base, Google also licenses additional services and software that add functionality and enable connectivity to the Google ecosystem, which comes with additional certification requirements, recommendations, and guidelines to be followed. The additional services and software licensed by Google, culminate in the branded Android and Android TV platform OS variants. By selecting AOSP as the platform-OS for an operator Pay-TV device, several advantages may be realized.

Dowloding and compiling the source code
First of all, I have to say that compiling and downloading the source code for the first time takes a lot of time and computational power I recommend at least an at least 16GB and disk space around 256GB for a complete compilation and must on Linux NO VIRTUAL MACHINES or u can use Google Cloud platform if you don't have the best machine at disposition.
Downloading and using Repo
To manage the hundreds of Git repositories existing in AOSP, Google created a tool called repo. Get More Information here
Create a directory called bin on your home and enter this directory:
$ cd ~
$ mkdir bin
$ cd bin
Download the tool with the command below:
$ wget https://storage.googleapis.com/git-repo-downloads/repo -O repo
Modify permissions for all ~/bin/repo files:
$ chmod a+x ~/bin/repo
Finally, add to your PATH environment variable the path to the directory.
bin:
$ export PATH=~/bin:$PATH
Awesome now you have installed the Repo tool 😍😍
In this tool, who governs which repositories will make up the AOSP is a file called manifest.xml. Including, one of the first steps of customization of manufacturers that ship Android in their products is to filter which repositories should and should not compose the desired AOSP base.
Now here is a thing you can download the last version from AOSP but right now the emulator on the new version is not working to do that u just need to :
https://android.googlesource.com/platform/manifest
To solve this you can download the 11 versions by doing :
$ repo init -u https://android.googlesource.com/platform/manifest \
-b android-11.0.0_r39
List of version right here
And you can check out new information by the community right here
After this you just need to sync
repo sync
In the end, u should see something like that
$ ls
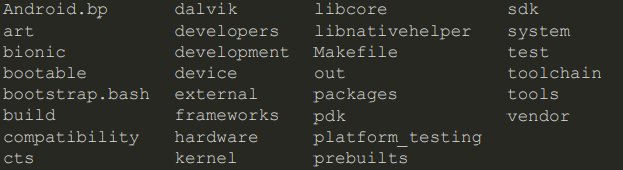
Build that takes an eternity 🥶
The first step in using the Android build system is to run the script from build/envsetup.sh environment configuration:
$ source build/envsetup.sh
This script will change the current terminal configuration, defining some commands,
environment variables, and macros that will be used during the process of compilation. Do this all the times that you start to work
Next it's necessary to choose the type of android that we will work with for this tutorial we will be using the X86_64-eng version which is more complete.
To do this just do the code below
lunch
and will appear something like that
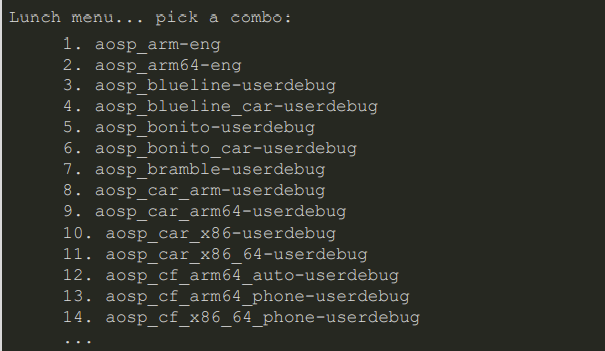
choice the X86_64-eng version that is probably the 30.
Or just do this:
$ lunch aosp_x86_64-eng
Now, this is very important the next step will be the compiling of the source code and in the first time will take probably 8 to 12 hours depending on your machine so take your time and be patient that is very important.
m -j4 or m -j6
the number after the -j is the number of partitions that you will use I recommend using m-j4.
Running the emulator
You just need to run
$adb start-server
$emulator
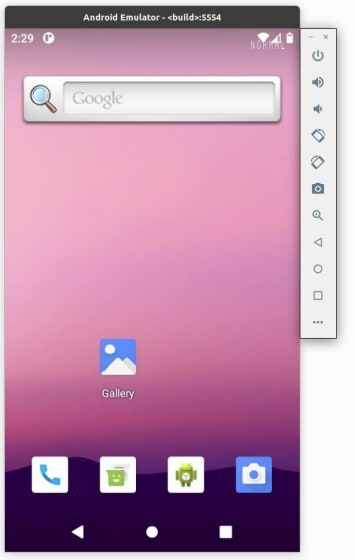
Congratulations you just downloaded your run AOSP for the first time 💖💖.
ADB
to run the Android debug bridge that is like the serial port from Android it will be necessary to run another terminal and run :
adb shell
Module
All AOSP software component (native application, Java application, library, etc) is called a module by the Android build system.
Instructions for compiling a module can be defined in a makefile
(Android.mk) or in a Blueprint file (Android.bp).
The use of makefiles is being discontinued in the latest versions of Android, and the Blueprint files have become the default.
Anyway, in this section of the training, we will study the two formats of compilation files.
Makefile
Android is able to compile modules through makefiles.
To do this, just create a file called Android.mk with the parameters of compilation into the module's source code root.
It is not necessary to define compilation commands in this file, just variables
which will be used to parameterize the module compilation.
The kati tool will be responsible for processing Android.mk and generating a file .ninjade compilation.
An (outdated) documentation for Android.mk is available in the Android source code
LOCAL_PATH := $(call my-dir)
include $(CLEAR_VARS)
LOCAL_VARIABLE_1 := value_1
LOCAL_VARIABLE_2 := value_2
...
include $(BUILD_MODULE_TYPE)
Blueprint
Currently, Blueprint files are the default compilation mechanism for modules on Android.
To compile a module with Blueprint, just create a file called
Android.bp na source code root with module build parameters.
This file is simple and has a declarative syntax similar to JSON.
The Soong build system will use the Blueprint tool to process Android.bp and generate the compilation .ninjade file.
cc_binary {
name: "HelloWorld",
srcs: ["helloworld.c"],
tags: ["optional"],
}
Products
A product defines all the information necessary to build a
Android image (hardware architecture, supported peripherals, set of applications, device-specific settings, etc).
By default, AOSP already comes with some products defined, including the latest ones.
Google devices (Pixel), some reference boards (DragonBoard, HiKey, etc), and emulators for various hardware architectures.
Since Android customizations are made to the product, creating a product is one of the first tasks to port Android to a hardware platform.
Creating a project
To create a product, the first step is to create a directory in device// where all the product definition and customization files will be.
$ mkdir -p device/labworks/superdroid/
And then implement a file called AndroidProducts.mk, which should include the Makefile of your product through the PRODUCT_MAKEFILES variable:
PRODUCT_MAKEFILES := \
$(LOCAL_DIR)/superdroid.mk
The next step is to implement the product makefile (in our example, it will call superdroid).
This is a minimal definition of this makefile:
$(call inherit-product, $(SRC_TARGET_DIR)/product/aosp_x86_64.mk)
PRODUCT_NAME := superdroid
PRODUCT_DEVICE := superdroid
PRODUCT_BRAND := Android
PRODUCT_MODEL := AOSP Superdroid Emulator
Create Bord Config
In addition to the product makefile, it is also necessary to implement the board makefile BoardConfig.mk. This file contains specific information about the hardware (CPU architecture, bootloader, kernel, hardware features, etc).
There is no complete documentation on the variables that can be set in this file, and most of the time it is necessary to study the system source code of the build to understand how it works.
See a complete example of this file in the Android source code at
device/google/sunfish/sunfish/BoardConfig.mk.👇👇👇👇👇
TARGET_ARCH := arm64
TARGET_ARCH_VARIANT := armv8-a
TARGET_CPU_ABI := arm64-v8a
TARGET_CPU_ABI2 :=
TARGET_CPU_VARIANT := generic
TARGET_CPU_VARIANT_RUNTIME := cortex-a76
BOARD_KERNEL_CMDLINE += console=ttyMSM0,115200n8 androidboot.console=ttyMSM0 printk.devkmsg=on

BOARD_PRODUCTIMAGE_FILE_SYSTEM_TYPE := ext4

BOARD_SYSTEM_EXTIMAGE_FILE_SYSTEM_TYPE := ext4
TARGET_USERIMAGES_USE_F2FS := true

BOARD_HAVE_BLUETOOTH_QCOM := true
TARGET_USES_HARDWARE_QCOM_GPS := false
USE_SENSOR_MULTI_HAL := true
BOARD_WLAN_DEVICE := qcwcn
BOARD_WPA_SUPPLICANT_DRIVER := NL80211

TARGET_SCREEN_DENSITY := 440
Now we have to add the product on AndroidProducts.mk
PRODUCT_MAKEFILES := \
    $(LOCAL_DIR)/droidpantoja.mk

COMMON_LUNCH_CHOICES := \
    superdroid-eng \
    superdroid-userdebug
Now you just have to compile again , Don't worry it will only make the interactions between the new files so it will not take too long.
The result should look like that:
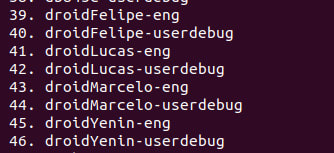
but will be superdroid-eng and superdroid-debug.😊
Creating executables
To start inside of device/generic/goldfish that its the folder that the emulator uses.
Create a new folder with the name new_hello_world
$mkdir new_hello_world
Now create Android.bp:
cc_binary {
    name: "new_hello_world",
    vendor: true,
    srcs: ["new_hello_world.c",],
}
#include <stdio.h>

int main(void)
{
    printf("\r\nHello world\n");
    printf("\r\nEsta eh minha primeira aplicacao em C nativa para Android!!!\n");
    return 0;
}
to finish inside generic/goldfish/vendor.mk its necessary to put the name of the executable:
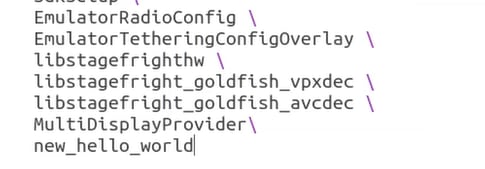
_Now just compile with:
m -j4
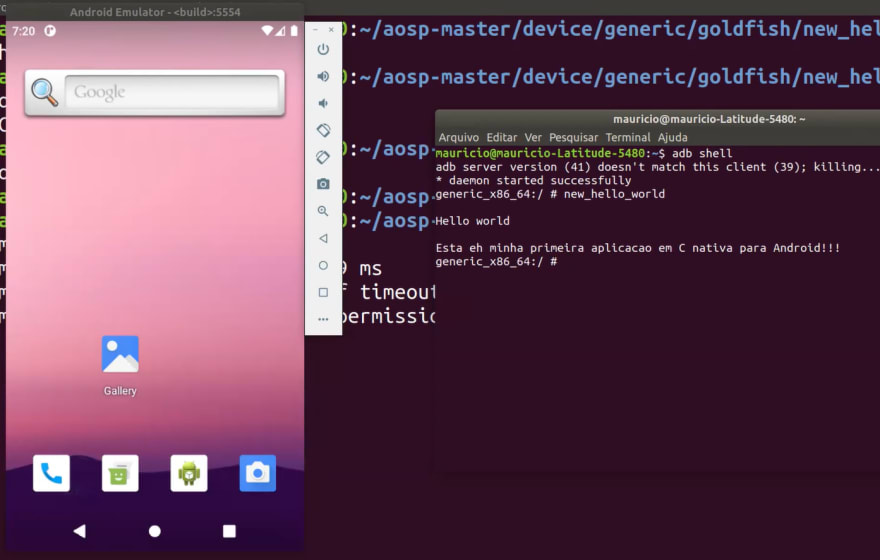
For testing run your emulator:
emulator
and in another terminal run your ADB shell
adb shell
The end result should be like that:👇
Android application creation with system permissions
This one is truly the best thing that you can make using AOSP probably the best use from this tutorial:
Set up the environment
Type the command below into your terminal:
$ source build/envsetup.sh
Building a simple app
Now we want to add an app and build it inside AOSP.
Create a directory inside the goldfish folder for the new application:
$ mkdir device/generic/product/goldfish/HelloAosp
The folder must have the following structure:
- Android.bp
- AndroidManifest.xml
  + res
    + valores
      - strings.xml
+ src
  + com
   + exemplo
    + helloaosp
     - HelloAosp.java
Now create the Android.bp:
android_app {
    name: "HelloAosp",
    vendor: true,
    srcs: ["src/**/*.java"],
    sdk_version: "current",
    optimize: {
        enabled: false,
    },
    certificate: "platform",
    privileged: true,
}
Second create the AndroidManifest.xml:
<?xml version="1.0" encoding="utf-8"?>
<manifest xmlns:android="http://schemas.android.com/apk/res/android"
      package="com.example.helloaosp"
      coreApp="true"
     android:sharedUserId="android.uid.system"
      android:versionCode="1"
      android:versionName="1.0">
    <uses-sdk android:minSdkVersion="3" />
    <application android:label="@string/app_name"
                 android:debuggable="true">
        <activity android:name=".HelloAosp"
                  android:label="@string/app_name">
            <intent-filter>
                <action android:name="android.intent.action.MAIN" />
                <category android:name="android.intent.category.LAUNCHER" />
            </intent-filter>
        </activity>
    </application>
</manifest>

-Strings.xml:
<resources>
    <string name="app_name">HelloAosp</string>
</resources>
To finish we need to create the HelloAosp.java:
package com.example.helloaosp;

import android.app.Activity;
import android.widget.TextView;
import android.os.Bundle;


public class HelloAosp extends Activity
{
    /** Called when the activity is first created. */
    @Override
    public void onCreate(Bundle savedInstanceState)
    {
        super.onCreate(savedInstanceState);

        TextView  tv = new TextView(this);
        tv.setText( "Hello AOSP!" );
        setContentView(tv);
    }
}
Now we need to tell our build system that we want to include this app in AOSP so that we can see it after running the system image in the emulator.
To do this, open the vendor.mk file and add HelloAosp to the end of the line for PRODUCT_PACKAGES.
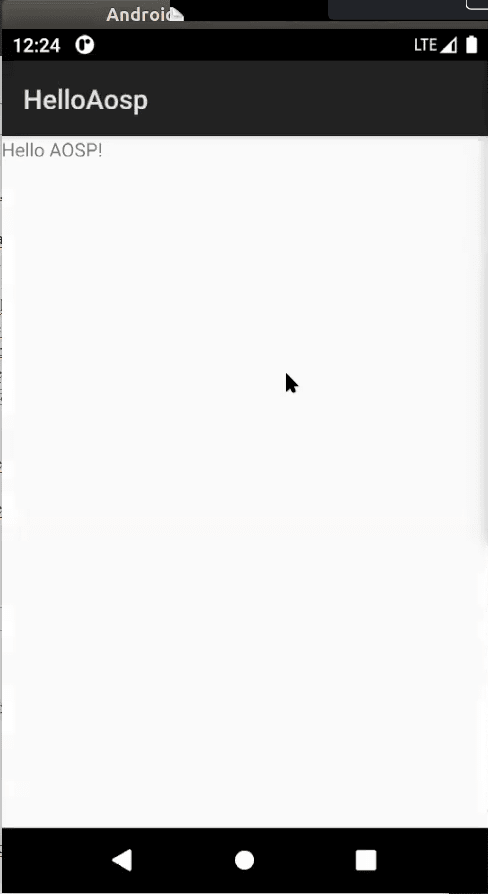
Now is the right time to build an android open source project with your app and deploy it to the emulator, just do it.
$ m
and after successful build 💖💖💖💖.
$ emulator
should look like that 👇.
Thanks
I would like to thank the Eldorado team for having done the incredible Eldorado Tech training for Embedded Android 💖😊 and the teachers especially Professor Mauricio for the material that was used as the basis.

Top comments (0)