
In an increasingly advanced front-end ecosystem, with an ever-richer selection of frameworks and increasingly demanding tooling, one can sometimes find oneself in a not so comical situation: how to handle a reliable and effective deployment? A case study with Create React App, let’s go!

Lexical Note
This guide will take place in two environments:
- Local: run these commands on your local development environment (likely: your laptop).
- Server: on your hosting account. With alwaysdata, you can connect over SSH to run these commands.
For an account on alwaysdata, mentions of <account> in paths/URLs/etc. refer to your account name (i.e. if your account name is superman, replace <account> with superman).
Create React App, what’s that?
Whether you missed the last few years of front-end development or you’re a bit lost in your first steps with React, a quick reminder: React is a JS/TypeScript framework that provides a development environment for your websites and applications. I want to emphasize the front-end aspect of this topic: even though it’s possible to use React with server-side rendering, its primary use case is to generate front-end assets: HTML, CSS, and JavaScript. Nothing more.
Since a React app is just a set of static files, there’s no need for a complex back-end architecture to serve your front end. No Node.js server or anything. A simple HTTP web server is enough. As stated in the Create React App deployment documentation:
Set up your favorite HTTP server so that a visitor to your site is served
index.html, and requests to static paths like/static/js/main.<hash>.jsare served with the contents of the/static/js/main.<hash>.jsfile.
I’ll take this opportunity to mention Create React App. If React is a framework dedicated to designing Web applications, setting up all of its toolings can be complex. Tools that encapsulate all of this logic have appeared to make things easier for you.
Development vs. Production
Let’s start our tutorial by creating a new React-based application using Create React App. In your local environment, run the command:
$ npx create-react-app my-app
$ cd my-app
Congratulations! Here is your first functional React application (without having coded anything!). Create React App has generated the basic files and installed the various modules necessary for the development and compilation of your project.
Compilation? Yes! Your front-end application will not be served directly to your clients but will have to be transpiled into JavaScript. Create React App has equipped your project with two commands:
npm start: this is your development mode command; it will launch a web server on your machine to allow you to work on your application comfortably (with hot-reloading, etc.)npm run build: this is the command dedicated to transpiling, the one that will produce the static assets that you will then need to deploy on the server side.
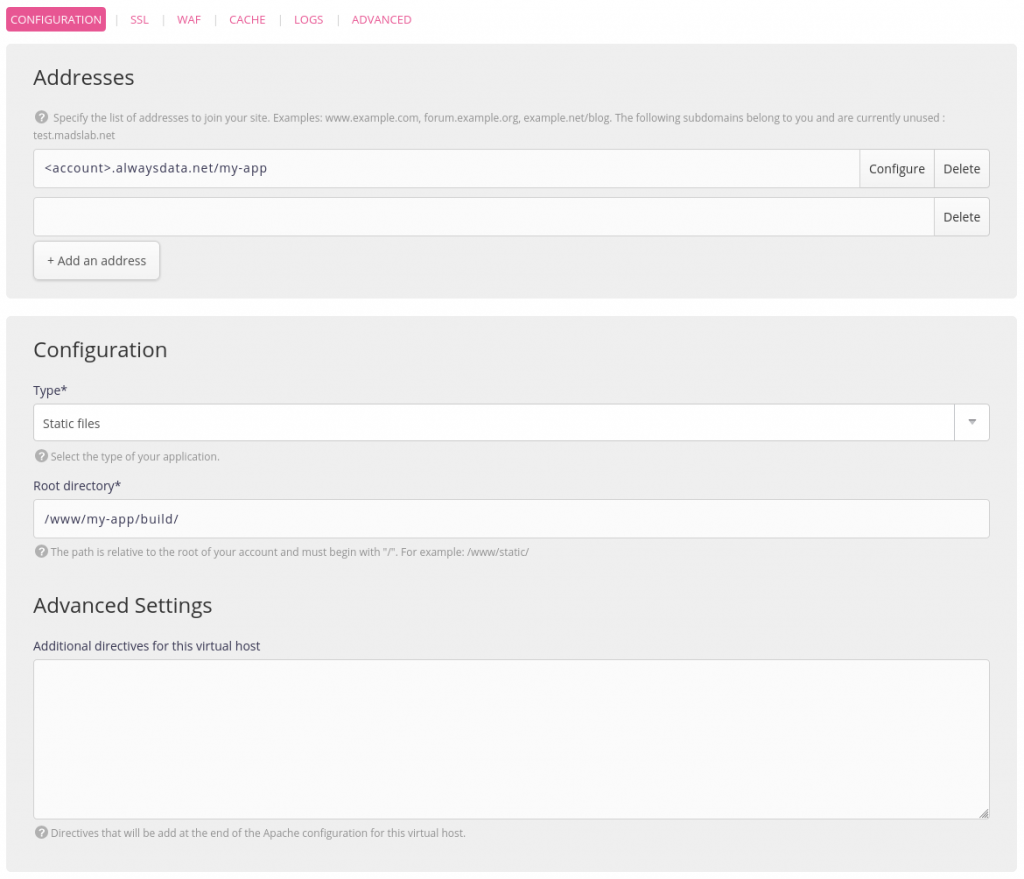
On the server side now: in your alwaysdata administration interface, create a new site of type Static files, with the following information:
- address :
<account>.alwaysdata.net/my-app - root directory: /
www/my-app/build
Creating the “Static Files” website
As this directory does not exist yet, create it from your local environment over SSH:
$ ssh <account>@ssh-<account>.alwaysdata.net mkdir -p www/my-app/build
Manual Deployment: The Simple and Quick Option
Everything is ready on the server side to receive your React site! Let’s move on to deployment.
You first need to indicate the final URL of your project in the package.json file to allow the build task to generate the assets with the correct file paths. Add the following entry:
"homepage": "<account>.alwaysdata.net/my-app"
Still from your local environment, launch the build task:
$ npm run build
You get a build directory that contains your static assets. To deploy them, use rsync via SSH:
$ rsync -rz build <account>@ssh-<account>.alwaysdata.net:www/my-app
You can go to your site’s address and admire the first production release of your application!
Automated Deployment from Github: Be Professional
This manual deployment works perfectly, but it puts a burden on your shoulders. Each time you want to deploy your project, you will have to launch the build task and then deploy the files via rsync/SSH.
Let’s move on to the DevOps part by automating the process using GitHub Webhooks!

Webhooks, the magic bond
With Webhooks, GitHub will be on duty to notify your site that a new version is available every time you push new commits to the main branch.
To do so, you will need to equip your alwaysdata account with a webhook service that will execute the deployment task for you. The adnanh/webhook project will do the trick. Connect to your account with SSH and install it:
$ mkdir webhook
$ wget -O- https://github.com/adnanh/webhook/releases/download/2.8.0/webhook-linux-amd64.tar.gz \
  | tar -xz --strip-components=1 -C webhook
Create a new site in your alwaysdata admin interface of type User Program with the following information:
- address:
<account>.alwaysdata.net/webhook - root directory:
webhook - command:
./webhook -port $PORT -hooks ./hooks.yaml -logfile webhook.log - remember to also check the Force HTTPS usage and Trim path checkboxes


GitHub, The Central Perk
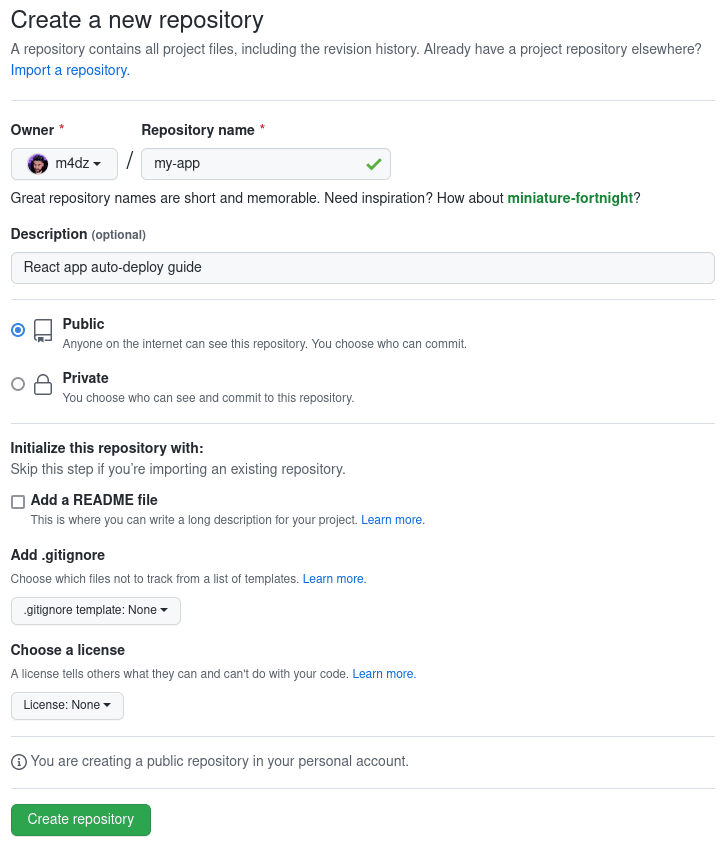
On the GitHub side now, we’re going to set up a new repository for our project. Create it as usual by giving it the name of your project.
Then go to the Settings section to add a new Webhook to your server:
- payload URL :
https://<account>.alwaysdata.net/webhook/hooks/deploy - secret : a random password
- content-type :
application/json

Call me WALL·E
Our GitHub repository is configured, it will now trigger requests to your webhook server for new events, such as git push. All that’s left is to automate the deployment.
Connect with SSH and create the webhook configuration file by editing the webhook/hooks.yaml:
- id: deploy
  execute-command: /home/<account>/webhook/deploy.sh
  command-working-directory: /home/<account>
  pass-arguments-to-command:
    - source: payload
      name: repository.name
    - source: payload
      name: repository.clone_url
    - source: payload
      name: head_commit.id
  trigger-rule:
    and:
      - match:
          type: payload-hmac-sha1
          secret: <github_webhook_secret>
          parameter:
            source: header
            name: X-Hub-Signature
      - match:
          type: value
          value: refs/heads/main
          parameter:
            source: payload
            name: ref
Remember to replace the values of <account> and <github_webhook_secret> in this configuration, and restart the webhook site in the administration interface once done.
This deploy webhook defines the action to run when a GitHub notification is received. It will call the script webhook/deploy.sh with several parameters, but only when the event is a push to the main branch.
All that remains is the deployment script itself, which will be executed by the webhook server when a notification is received. It will be responsible of the following tasks:
- Clone the repository in a temporary directory.
- Retrieve the latest version specified by GitHub in its payload.
- Perform the build task.
- Clean up after itself.
Still, using SSH, add the script webhook/deploy.sh to your server account:
#!/bin/bash

NAME=$1
URL=$2
COMMIT=$3

CLONE_DIR=$(mktemp -d)
DEST_DIR=${HOME}/www/${NAME}

mkdir -p ${DEST_DIR}

git clone --bare ${URL} ${CLONE_DIR}
git --work-tree ${DEST_DIR} --git-dir=${CLONE_DIR} checkout --force ${COMMIT}
npm --prefix=${DEST_DIR} install
npm --prefix=${DEST_DIR} run build
rm -rf ${CLONE_DIR}
Remember to make the file executable with the command chmod +x webhook/deploy.sh.
You’re all set! Now just let everything run its course. Go back to your local environment and add the GitHub repository to your project before pushing the main branch:
$ git remote add origin https://github.com/<gh_name>/my-app.git
$ git push -u origin main
This push will trigger the notification through the Webhooks. Once notified, the alwaysdata side server will run the deployment script, and your site will be updated. You can check the progress by consulting the webhook/webhook.log file on the server side.

Make changes to your site, push to GitHub, reload your site at http://<account>.alwaysdata.net/my-app, and admire! You no longer have anything to do to manage your deployments.
The best PaaS is the one that suits you
You don’t need solutions like Netlify, Heroku, or others to manage the DevOps part of your deployments. Even though these platforms offer many practical tools to make your deployments easier (like atomic deployments, etc.), they’re not mandatory.
We have set up a simple solution here to automate the deployment of static front-end applications on your alwaysdata account without using third-party tools. Our deployment tool is independent of the application itself, so you can now use it to deploy other projects: in another GitHub repository, configure a webhook pointing to the same endpoint with the same secret, and watch your deployments happening on their own in your www directory.
It is now up to you to adapt the solution to more complex cases, integrating migration tasks, updating databases, and atomic builds to prevent service interruptions during redeployment… the list is far from its end. Happy deployment 🤓 !

Latest comments (0)