UPDATE 2020-06-21 1: The backup has finally finished! ^w^ That took way longer than I expected.
UPDATE 2020-06-21: Time Machine did not continue back up while the machine is asleep, so the first back up is still not finished. Also apparently there are some serious problems with Time Machine in Catalina:
- Time Machine 12: Backups that never complete – The Eclectic Light Company
- Time Machine in Catalina 10.15.3 has serious bugs – The Eclectic Light Company
To aid my filling up Macbook Pro, I decided to get a Samsung T5 SSD, following recommendation by Wirecutter. The plan is as follows:
- Set up encryption with Samsung software
- Partition the disk into two 1TB partitions, one for data and one for Time Machine
- Set up Time Machine
Only when it comes have I realized this little beast is the size of my palm, but can contain 2TB of data. Impressive.

The drive itself has a USB-C socket, and comes with a USB-C to USB-C cable as well as a USB-C to USB-A cable. Of course, only the C-to-C cable can take advantage of the speed of the SSD via the fast USB 3.1 Gen 2 transfer speed, and that's the whole point of this thing.
The drive by default uses Master Boot Record (MBR), with one partition of exFAT format, for compatibility with most devices. It contains a copy of the Samsung encryption software, but mine is signed with an expired certificate, so I went to the official website to download the latest.
As planned, I set up the software first, which on macOS installs a kernel extension and a SamsungPortableSSD.app. On Catalina, I am notified that the kernel extension is a legacy one, but it works for now. I updated the firmware of the disk from the app, and set up a password to enable Security Mode. In this mode, every time the disk is plugged in, the app will ask for the password to decrypt the disk. No later operations have affected this. I suppose the app communicates with the controller directly via the kernel extension for full disk encryption, including the partition table.
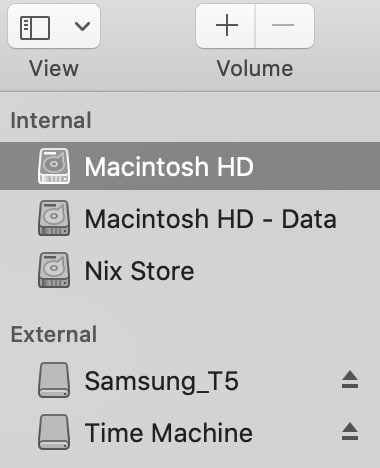
The second step of the plan was temporarily thwarted by the Disk Utility app GUI because by default it does not list the disks, only the partitions, which I cannot partition further.
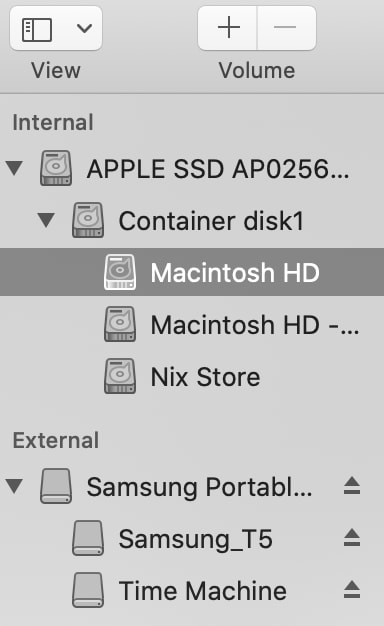
To show the disks, we need to change the "View" to "Show All Devices":

After which you can see the disks as well.
But I didn't discover the above until after I have done my partitioning. How did I do it then? If not GUI, command line of course! diskutil is the command with all the same features as the Disk Utility app. To partition the disk as I have planned, I used the following command:
diskutil partitiondisk /dev/disk2 MBR exfat Samsung_T5 50% hfs+ "Time Machine" 50%
diskutil is the main command, with the feature we are using partitiondisk, as the first argument. I then specify /dev/disk2 as the target drive. Yours may be different. After which I specify MBR as the partition table format.
After the partition table format is a list of partitions, each with a file system, a name, and a size. In the command above I have two partitions: 1) exfat as file system, Samsung_T5 as name, and 50% as size, as a cross-operating-system data disk; 2) hfs+ as file system as required by Time Machine, "Time Machine" as name, and 50% as size.
Finally I set up Time Machine in System Preferences to back up to the "Time Machine" partition. Because I have used MBR to partition the disk, Time Machine cannot encrypt the back up, but this disk is under full disk encryption anyway.
My first backup is almost 200 GB, but my Time Machine is chugging it at only on average 20 MB per second, not taking advantage of the speed at all. Meanwhile I can still copy over a 700 MB concert recording within a second. Clearly macOS is deliberately limiting Time Machine, which is nice for maintenance, but frustrating for the initial backup. This limiting behavior apparently can be disabled with the following command:
sudo sysctl debug.lowpri_throttle_enabled=0
But in my case it did not help but slowed down the backup, because Spotlight indexing is also running for some reason and it was competing with the backup and winning.
There is renice for adjusting the priority, but nothing similar for viewing the priority, so I have written one with C myself. I can use it like this:
./getpriority 15670
Where 15670 is the Process ID of the Time Machine process, backupd. It turns out the priority of backupd is 0, the same as most other processes, so it is not clear whether disabling low priority throttling actually speeds up backup.
Anyway, I used renice to increase the priority of backupd to 1.
sudo renice 1 -p 15670
Using renice to increase the priority of backupd to 1 did not lead to significant speed up either. On the other hand, decreasing the priority to -1 immediately stopped the backup. This is the opposite of what's documented in the manpage of renice ("lower values cause more favorable scheduling") so I am pretty confused. I decided to just set the priority back to 0 and wait it out. If you know how to speed up Time Machine backup, please let me know in the comments.
The C code for getpriority
#include <stdio.h>
#include <stdlib.h>
#include <string.h>
#include <sys/errno.h>
#include <sys/resource.h>

// int
// getpriority(int which, id_t who);

int main(int argc, char** argv)
{
    if (argc < 2) {
        printf("Usage: %s pid\n", argv[0]);
        return 1;
    }
    char* pid_s = argv[1];
    if (strcmp(pid_s, "0") == 0) {
        printf("Cannot check priority of PID 0\n");
    }
    int pid = atoi(pid_s);
    if (pid == 0) {
        printf("Invalid format: cannot convert input to integer\n");
    }
    int prio = getpriority(PRIO_PROCESS, pid);
    if (errno == EINVAL) {
        printf("PID not valid\n");
    }
    if (errno == ESRCH) {
        printf("PID not found\n");
    }
    printf("%d\n", prio);
}
At first the program didn't print any output, confusing me for a while. Then I realized I forgot to add \n at the end of printf template strings, therefore without \n the standard output buffer never flushed, and the print out never reached the screen.
- "Encryption is not available if you are using a disk directly connected to your Mac that is formatted using an Apple Partition Map (APM) or Master Boot Record (MBR) partition and the disk has more than one partition." -- Apple Support
If you like this post, please press the like button to let me know. Please also comment to let me know what I can improve.
If you'd like to donate, please donate to Wikimedia Foundation, to which I owe infinitely.

Oldest comments (0)