
Cover Photo by Jamie Street on Unsplash
Your users are definitely not going to be on your app for 24 hours every day. However, you might want to remind them to check your app, or notify them of new things happening in your app even when it's closed. You use Push Notifications to achieve this. And contrary to popular belief, they're really easy to implement with Flutter and OneSignal.
Let's get started
Requirements
- A OneSignal Account
Step One
Setup your firebase project
Go to https://firebase.google.com to get started.

You should have something like this on the console.
On the next page, you could choose to enable or disable analytics. Your project should take a few seconds to be created depending on your internet connection
Step Two
Setup your flutter project.
-create flutter project
run flutter create push_notifications_demo in your command line interface(command prompt).
-add your app to the firebase project
For Android
Click the android button as shown in the image below.

Add your app credentials and download the config file.

Note
Your android package name is the "applicationId" in your app-level build.gradle file(android/app/build.gradle).
Be sure to add the googleservices.json file to your project and set up the Firebase SDK as instructed in the process.
Once you've followed the instructions correctly, you should see an android app in your project.
-setup Onesignal for your app
- Log into OneSignal and create a new app. You could choose to use the default organization or an organization of your own. No worries, you can always change it later. .
Add your firebase server key and sender ID.
You can find these keys here.

Select the Android platform and Flutter as the SDK.
You should now be able to see your application ID.-
Add firebase_core and one_signal_flutter plugin to your app.
dependencies:
flutter:
sdk: flutter
cupertino_icons: ^1.0.2
onesignal_flutter: ^2.6.3
firebase_core: ^1.1.0
5. In your project level(android/build.gradle) build.gradle file, add the following line of code:
repositories {
jcenter()
maven { url 'https://plugins.gradle.org/m2/' } //add this line
}
dependencies {
classpath 'gradle.plugin.com.onesignal:onesignal-gradle-plugin:[0.12.6, 0.99.99]'
...
}
In your app level(android/app/build.gradle) build.gradle file, add the following line of code:
apply plugin: 'com.android.application' //this already exits
//add this line
apply plugin: 'com.onesignal.androidsdk.onesignal-gradle-plugin'
...
Great! You're all set up on Android.

**For iOS**

Requirements
1. An apple developer account with an Admin role.
2. A Macbook with XCode 11+

Steps
1. Generate an iOS Push Certificate.
You can easily generate one using the [OneSignal provisioning tool ](https://onesignal.com/provisionatorhttps://onesignal.com/provisionatorhttps://onesignal.com/provisionator) here

2. Enable iOS push capability and extension service following the instructions on the [Official OneSignal documentation here](https://documentation.onesignal.com/docs/flutter-sdk-setup#step-4---enable-ios-push-capability-in-xcode-ios-apps-only)

We're done setting up!

Now, let's practice sending a push notification.

In the main.dart file of your project, we need to initialize the OneSignal plugin.
import 'package:firebase_core/firebase_core.dart';
import 'package:flutter/material.dart';
import 'package:onesignal_flutter/onesignal_flutter.dart';
void main() {
WidgetsFlutterBinding.ensureInitialized();
Firebase.initializeApp();
OneSignal.shared.init("YOUR ONESIGNAL APP ID", iOSSettings: {
OSiOSSettings.autoPrompt: false,
OSiOSSettings.inAppLaunchUrl: false
});
runApp(MyApp());
}
Run your app to initialize the plugin.
Next, on the Dashboard section of your application's OneSignal account, do the following:
1. Click on the "New Push" button shown below.

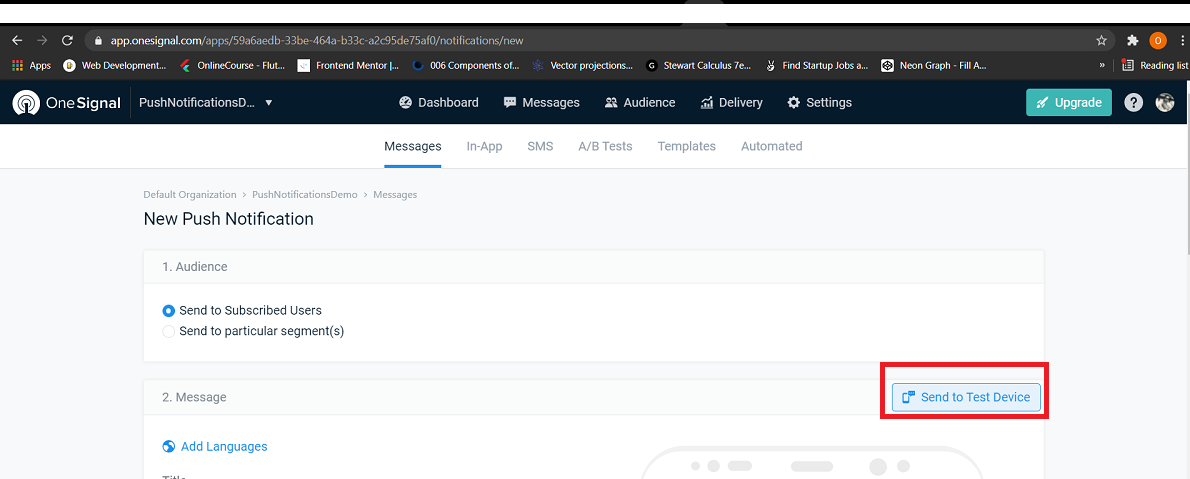
2. Enter the title and message of your notification.
3. Click send to test device.
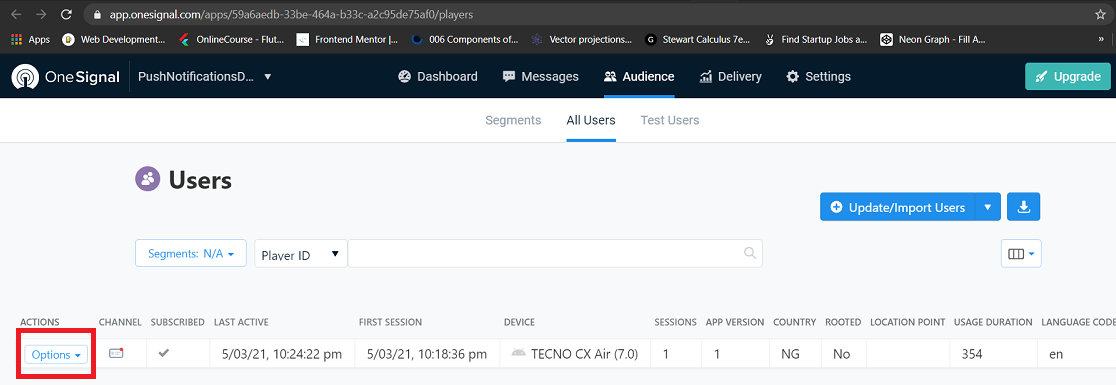
You should be redirected to a page of all users so you can add a test user.
4. You should find your device there. If you don't, run the app again. Click on options and add your device as a test user.
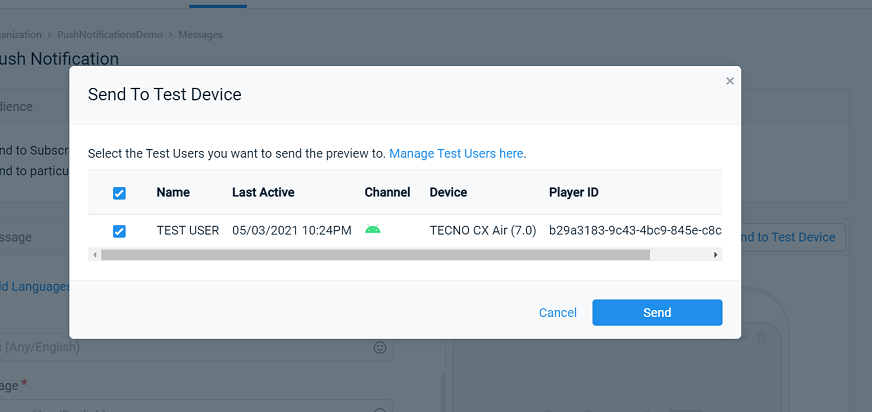
5. Go back and click on Send To Test Device. Select your device and send.
You've successfully sent your first notification!
Tip: Add handlers to your notifications to run functions at specific events.
To handle callbacks once notifications are received:
OneSignal.shared.setNotificationReceivedHandler((OSNotification notification) {
//This will be called whenever a notification is received
});
To handle callbacks when notifications are opened:
OneSignal.shared.setNotificationOpenedHandler((OSNotificationOpenedResult result) {
// This will be called whenever a notification is opened.
});
And with this, you can send your users push notifications anytime you want!

[OneSignal's documentation](https://documentation.onesignal.com/docs/flutter-sdk) is very rich and easy to read. You can get more detail on features and methods available on the SDK.

Top comments (0)