A while ago, I stumbled upon the term "Serverless Databases" and got to know about Fauna. Out of curiosity, I decided to try it out and I was honestly impressed by its simplicity and the whole concept of serverless databases. I loved that Fauna had a library that made it compatible with the Python programming language, along with libraries for several other languages too.
The purpose of this article is to introduce the reader to the world of serverless databases with Fauna, and explore its CRUD functionalities by building a Telegram Bot with Python to help track our everyday tasks (more or less a todo list bot).
So we will be creating bot users in Fauna, adding tasks, retrieving tasks, updating tasks and deleting tasks.
What is a Serverless Database?
A serverless database is one where all maintenance and operational responsibility is outside of a developer or application’s concern, and all traffic/CRUD is accommodated with on-demand scaling. This reduces the load and effort put into managing the database resources, especially when the application begins to scale to support a large number of users.
There are a lot of advantages of picking a serverless database for your application aside from reducing work in managing database resources. They include:
- Database operational cost reduction
- Real-time database access
- Increase in productivity (since the burden of database management is removed)
- Infinite scalability
- Improved database security
A Brief Introduction to Fauna
Of course, we now know Fauna is a serverless database, but how does it store and handle data? At its core, Fauna is a document database that offers two interfaces, GraphQL and the Fauna Query Language (FQL). Databases can store collections, indexes, and even other databases (yay multi-tenancy!). Within collections are documents, which by default, don’t have strict schema requirements. Fauna is capable of handling a variety of data types (e.g. temporal) but is particularly impressive for having first-class support for relational data. We’ll be exploring most of this together momentarily, but if you’re eager to learn even more, check out the Fauna documentation!
Getting Started with Fauna
The first thing you need to get started with Fauna is to create an account on the official website. You can do that using either your email address or your github or netlify account here: https://dashboard.fauna.com/accounts/register
Creating a Fauna Database
The first thing we’ll do on Fauna is create an actual database, which the application will interact with and where the data will be stored. To do this click on the “NEW DATABASE” button and you will be presented with a screen similar to the one below.

On this screen, you will be asked for the database name, whether you want to pre-populate the database and there’s a tip for you if you are migrating from another database to Fauna. For now, we will just enter the database name and press the “SAVE” button. Then you will be presented with a screen like the one below.

Creating a Fauna Collection
Fauna organizes its data into collections and uses indexes to browse its data. A collection is similar to SQL tables that contain data with similar characteristics e.g users collection that contain information about users in the database. Before we can start storing actual data in the Fauna database, we need to first create a collection. This is done by pressing the “NEW COLLECTION” button.

You will then be provided with a form to fill in details about the collection. You will be asked for the collection name (we will be using “users” for this example) then you will be asked for History Days and TTL. The History Days is used to define the number of days Fauna should retain a historical record of any data in that particular collection while the TTL serves as an expiry date for data in the collection. For example, if the TTL is set to 7, any data stored in that collection will be automatically deleted 7 days after its last modified date.

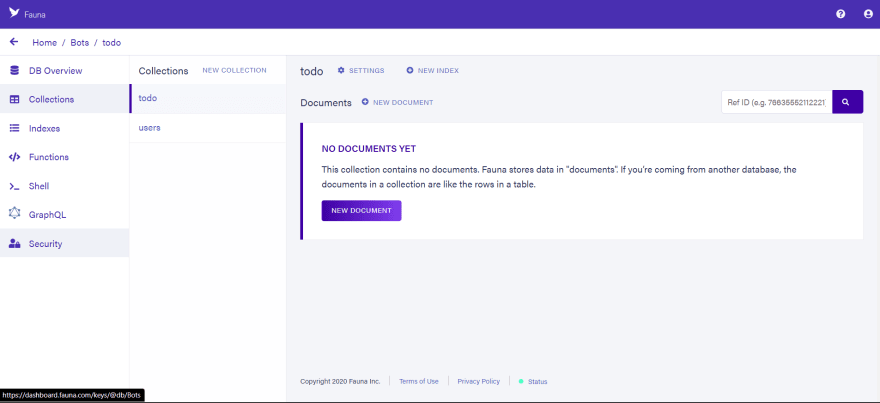
After entering the name of the collection and hitting the save button, you will be presented with a screen like the one above. In Fauna, data in a collection are referred to as documents. Documents are similar to table rows in SQL based databases.
Creating a Fauna Index
We also need to create an index that will allow us to browse through data that is stored in our database. To create one, navigate to the DB Overview tab on the Fauna sidebar (left side of the screen) then click the “NEW INDEX” button.

You will be presented with a form where you will be asked to select the collection to link the index to and provide a name. Also, specify the Terms for the index, these are specific data the index is allowed to browse. For our example, we will be using “id”. Once you’ve filled this click the “SAVE” button.
Integrating Fauna with Python
Creating a Fauna Database API key
Before we begin building a Python app that uses Fauna, we need to create an API key that would allow our application to easily communicate with our database. To create an API key, we need to navigate to the security tab on the Fauna sidebar (on the left side of the screen).

You will be presented with a screen similar to the one above, proceed to generate a key by clicking the “NEW KEY” button.

You will then be asked for the database to associate the key with, the role of the key, and an optional name for your API key. Once you’ve filled in this information hit the “SAVE” button.

Once you have done this, you will be presented with your API key (hidden here for privacy reasons). The key should be copied as soon as it is generated then stored somewhere you can easily retrieve.
Communicating to Fauna with Python
Now, we want to install the Python driver for Fauna. Luckily it’s available via the Python package manager (pip) and that saves us a lot of stress instead of having to build it via the Github repo.
$ pip install faunadb
After this is installed, we are going to run the sample code provided in Fauna Python driver docs https://docs.fauna.com/fauna/current/drivers/python.html
from faunadb import query as q
from faunadb.objects import Ref
from faunadb.client import FaunaClient

client = FaunaClient(secret="your-secret-here")

indexes = client.query(q.paginate(q.indexes()))

print(indexes)
Building a Telegram Bot with Python
What is Telegram?
Telegram is one of the top social media platforms for messaging. It’s core functionalities include sending messages to other Telegram users, creating group chats, calling contacts, and sending files and stickers. You can learn more about Telegram here https://telegram.org
What is a Telegram Bot?
Telegram Bots are accounts that are operated by software and not actual people. They can do anything from teaching, playing games, acting as search engines, broadcasting messages, serving as reminders, connecting and integrating with other services, or even pass commands to Internet Of Things (IOT) devices. @GroupButler_bot is a very popular Telegram Bot for managing Telegram groups.

Getting Started
Step 1: Having a Conversation with BotFather
Sign In to your Telegram account then search for @botfather and start a conversation with the account. PS: BotFather is also a Telegram Bot


Step 2: Creating the Telegram Bot Interface with BotFather
We will now use the /newbot command to create a new Telegram Bot. Creating the Telegram Bot with BotFather means you give it a name and assign a username to it.


After supplying the name and username for your Telegram Bot, BotFather will give you the API token that will be used to interact with the Bot account via the Telegram API.

Step 3: Powering Our Bot with Python
The first thing we will do is install the required Python libraries for building Telegram Bots. Of course, we can use the Telegram API directly following the official docs but Python already simplifies this by providing libraries we can easily integrate.
$ pip install telegram
$ pip install python_telegram_bot
The next thing we want to do is write a script that receives any message sent to our bot.
import telegram
from telegram.ext import Updater
from telegram.ext import CommandHandler

telegram_bot_token = "your-telegram-token"

updater = Updater(token=telegram_bot_token, use_context=True)
dispatcher = updater.dispatcher


def start(update, context):
    print("Hello World!")


dispatcher.add_handler(CommandHandler("start", start))
updater.start_polling()
Also, we need to create an updater and dispatcher for our Telegram Bot using the telegram python module. The updater class tracks and monitors messages sent to the bot and delivers it to the dispatcher, while the dispatcher handles and processes the received message.
The next thing we need to do is set a command handler for our dispatcher, a command handler is a function that is called when a certain command is used in our bot. A Telegram Bot command is any message that starts with “/” such as: /start /help /info. There are other kinds of handlers to add to the dispatcher such as image handler, text handler, regex handler and many more. We are starting with a command handler because that is the first thing every user enters into a Telegram Bot.
When a command handler is triggered, the updater passes two parameters (update, context) which contain all the information about the message request. We want our handler for the start command to print the text “Hello World!” in our console whenever it is triggered.
After setting our handlers, we would then initiate our updater to start monitoring messages coming from Telegram and triggering the dispatcher using the start_polling() method. Let’s save our file as bot.py and start monitoring messages from Telegram.
$ python bot.py
After running our script, let’s send a message to our bot and see if “Hello World!” is printed in the console.
If you haven’t already done this, we need to search for our Telegram bot with the same username supplied to BotFather earlier.


Our command handler was triggered successfully and we got our hello message, let’s tweak this a little to send the user the text “Hello World” instead of printing on our console.
def start(update, context):
   chat_id = update.effective_chat.id
   context.bot.send_message(chat_id=chat_id, text="Hello World")
To send messages from our bot back to the user, we need to use the send_message method of the context.bot class which takes in a parameter called chat_id. Telegram assigns a unique identifier to every user accessible with the name chat_id which can be used by bots to send messages or make references.
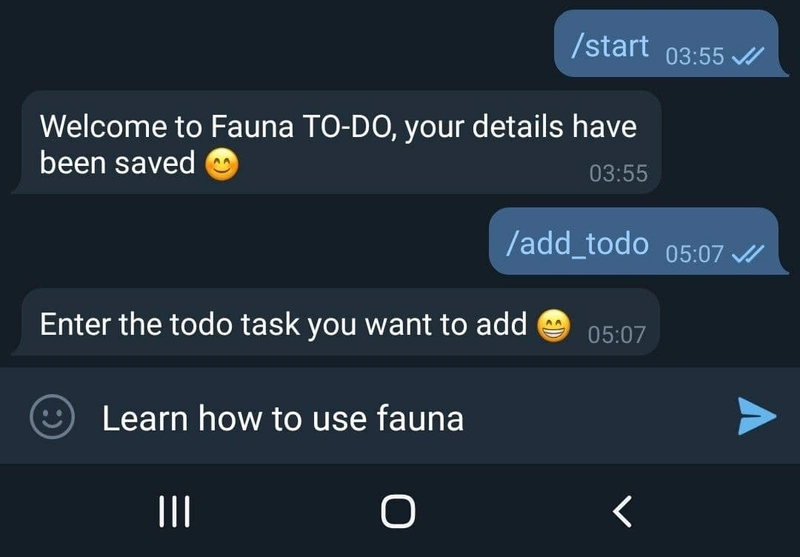
When we run the script again with our updates and send the start message again we should get a response something similar to the image below.

Making Queries to Fauna
Saving data with Fauna
Now let’s move on to integrating our Telegram Bot with Fauna, the first thing we want to experiment with is saving the details of users who start our Telegram Bot.
Next thing we do is import the necessary libraries needed for Fauna to operate and merge with our existing code.
import telegram
from telegram.ext import Updater
from telegram.ext import CommandHandler
from faunadb import query as q
from faunadb.objects import Ref
from faunadb.client import FaunaClient

telegram_bot_token = "your-telegram-token"
fauna_secret = "your-secret-here"

updater = Updater(token=telegram_bot_token, use_context=True)
dispatcher = updater.dispatcher
client = FaunaClient(secret=fauna_secret)


def start(update, context):
    chat_id = update.effective_chat.id
    context.bot.send_message(chat_id=chat_id, text="Hello World")


dispatcher.add_handler(CommandHandler("start", start))
updater.start_polling()
The next thing we want to do is store all necessary information about users who start a conversation with the Telegram Bot.
import pytz
from datetime import datetime
We are going to be importing the datetime and pytz libraries so we can save timestamps to the database we created earlier as Fauna only accepts offset-aware datetimes.
def start(update, context):
    chat_id = update.effective_chat.id
    first_name = update["message"]["chat"]["first_name"]
    username = update["message"]["chat"]["username"]

    user = client.query(q.create(q.collection("users"), {
        "data": {
            "id": chat_id,
            "first_name": first_name,
            "username": username,
            "last_command": "",
            "date": datetime.now(pytz.UTC)
        }
    }))
    context.bot.send_message(chat_id=chat_id, text="Welcome to Fauna TO-DO, your details have been saved 😊")
Next, we are making some changes to our start handler, once it is triggered we will first extract the user’s first name and Telegram username. Then we make a query to our users collection we created earlier and save our users’ details. Then round it up by sending the user a welcome message.
We should also add some checks to our users’ registration so we don’t register a user more than once. Before we save the user details we should check if they are already registered in the database and only save their details if they don’t.
def start(update, context):
    chat_id = update.effective_chat.id
    first_name = update["message"]["chat"]["first_name"]
    username = update["message"]["chat"]["username"]

    try:
        client.query(q.get(q.match(q.index("users"), chat_id)))
    except:
        user = client.query(q.create(q.collection("users"), {
            "data": {
                "id": chat_id,
                "first_name": first_name,
                "username": username,
                "last_command": "",
                "date": datetime.now(pytz.UTC)
            }
        }))
    context.bot.send_message(chat_id=chat_id, text="Welcome to Fauna TO-DO, your details have been saved 😊")
We have updated our start command handler to first query the database if our user exists, if it does - send the greeting message immediately, if it doesn't save the user and send the greeting. Let’s move forward and add a command for adding items to our todo list.
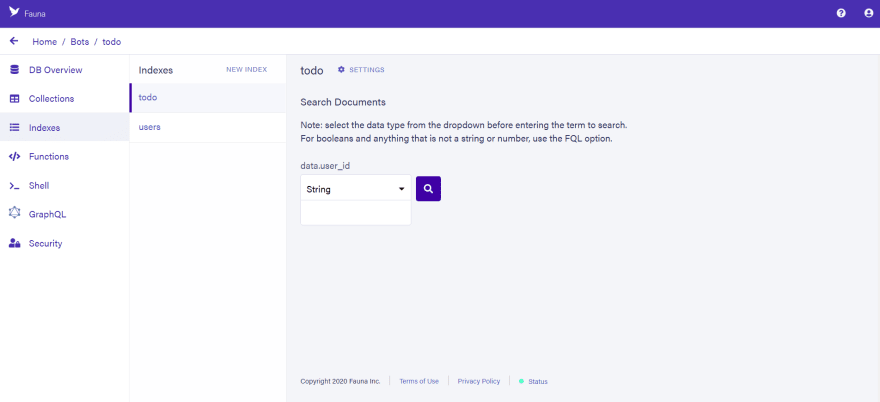
Before writing code, we need to create an index to browse the data in the collection we created earlier.

After this step, let’s write a new command handler for adding todo tasks and include it in our dispatcher.
def add_todo(update, context):
    chat_id = update.effective_chat.id

    user = client.query(q.get(q.match(q.index("users"), chat_id)))
    client.query(q.update(q.ref(q.collection("users"), user["ref"].id()), {"data": {"last_command": "add_todo"}}))
    context.bot.send_message(chat_id=chat_id, text="Enter the todo task you want to add 😁")


dispatcher.add_handler(CommandHandler("add_todo", add_todo))
What I did here was to set the value of the last_command to add_todo then send the user a message telling them to write what they want to add.
The next thing we will need to do is add a message handler to the bot. A message handler is a kind of Telegram dispatcher handler for processing text-based messages. To create a message handler we need to import the required classes.
from telegram.ext import Updater
from telegram.ext import CommandHandler
from telegram.ext import MessageHandler, Filters
Then we define the actual message handler that saves our todo task into Fauna.
def echo(update, context):
    chat_id = update.effective_chat.id
    message = update.message.text

    user = client.query(q.get(q.match(q.index("users"), chat_id)))
    last_command = user["data"]["last_command"]

    if last_command == "add_todo":
        todo = client.query(q.create(q.collection("todo"), {
            "data": {
                "user_id": chat_id,
                "todo": message,
                "completed": False,
                "date": datetime.now(pytz.UTC)
            }
        }))
        client.query(q.update(q.ref(q.collection("users"), user["ref"].id()), {"data": {"last_command": ""}}))
        context.bot.send_message(chat_id=chat_id, text="Successfully added todo task 👍")
Let’s not forget to add the message handler to the dispatcher too.
dispatcher.add_handler(MessageHandler(Filters.text, echo))
updater.start_polling()
Restarting our bot and sending a message should let the bot respond to me with a success message. We can also monitor our database from our Fauna dashboard.


Reading data from Fauna
Now we should add a command that retrieves all our todo tasks along with its status and display to the user.
def list_todo(update, context):
   chat_id = update.effective_chat.id

   task_message = ""
   tasks = client.query(q.paginate(q.match(q.index("todo"), chat_id)))
   for i in tasks["data"]:
       task = client.query(q.get(q.ref(q.collection("todo"), i.id())))
       if task["data"]["completed"]:
           task_status = "Completed"
       else:
           task_status = "Not Completed"
       task_message += "{}\nStatus: {}\n\n".format(task["data"]["todo"], task_status)
   if task_message == "":
       task_message = "You have not added any task, do that with /add_todo 😇"
   context.bot.send_message(chat_id=chat_id, text=task_message)
Then add this to our dispatcher
dispatcher.add_handler(CommandHandler("list_todo", list_todo))
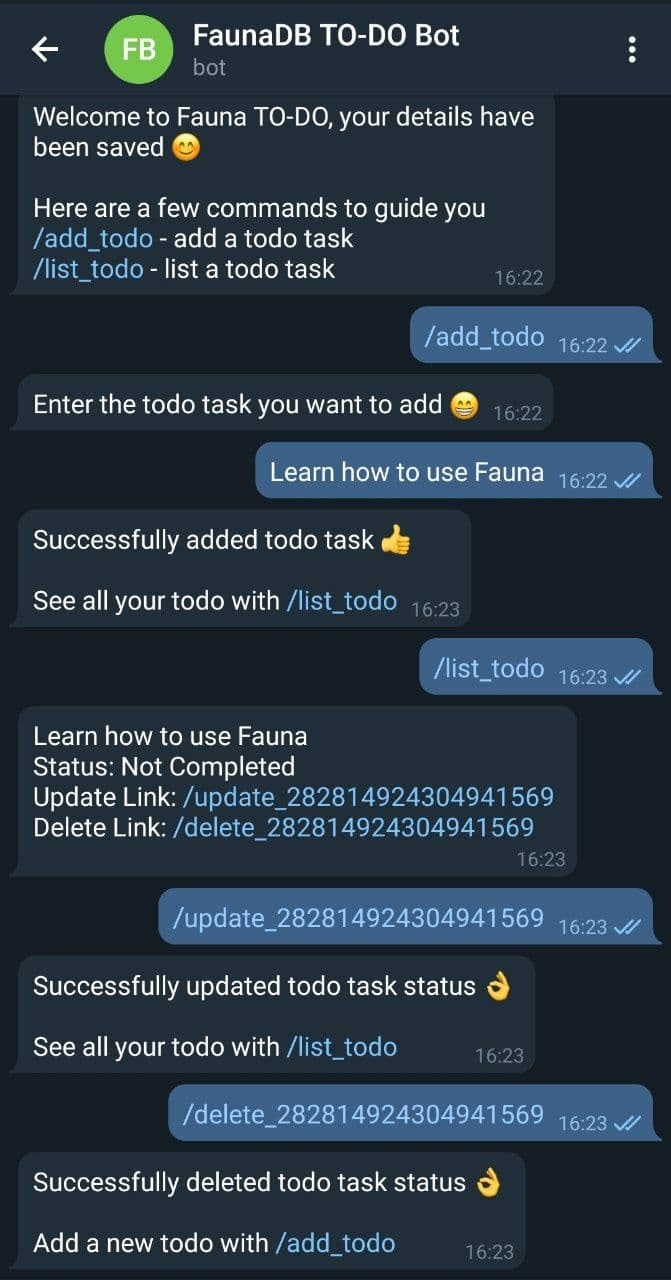
After restarting our script and triggering the /list_todo command on Telegram we should get a response similar to the image below.

Updating data in Fauna
Now would be a good time to add a function that updates our todo data, updating, in this case, would be changing a task status from not completed to completed and vice versa. We would be using the Ref ID of our todo tasks to track which task to update. To make this a little easier for the user, let’s create a command text that will be included in our /list_todo message.
def list_todo(update, context):
   chat_id = update.effective_chat.id

   task_message = ""
   tasks = client.query(q.paginate(q.match(q.index("todo"), chat_id)))
   for i in tasks["data"]:
       task = client.query(q.get(q.ref(q.collection("todo"), i.id())))
       if task["data"]["completed"]:
           task_status = "Completed"
       else:
           task_status = "Not Completed"
       task_message += "{}\nStatus: {}\nUpdate Link: /update_{}\n\n".format(task["data"]["todo"], task_status, i.id())
   if task_message == "":
       task_message = "You have not added any task, do that with /add_todo 😇"
   context.bot.send_message(chat_id=chat_id, text=task_message)
Now when we trigger the /list_todo command we get a response similar to the image below.

After this, we need to create a function called update_todo which would use regex to find any text that starts with /update_{todo ID} then update it.
dispatcher.add_handler(MessageHandler(Filters.regex("/update_[0-9]*"), update_todo))
dispatcher.add_handler(MessageHandler(Filters.text, echo))
We used the same message handler from before but with a regex handler this time around. The regex string /update_[0-9]* will return true if a string starts with /update_ then is followed by numbers of any given length. PS: I noticed the regex handler won't be triggered if you place it below the echo handler that accepts the text filter.
def update_todo(update, context):
   chat_id = update.effective_chat.id
   message = update.message.text
   todo_id = message.split("_")[1]

   task = client.query(q.get(q.ref(q.collection("todo"), todo_id)))
   if task["data"]["completed"]:
       new_status = False
   else:
       new_status = True
   client.query(q.update(q.ref(q.collection("todo"), todo_id), {"data": {"completed": new_status}}))
   context.bot.send_message(chat_id=chat_id, text="Successfully updated todo task status 👌")
In our update_todo function, we first extracted the chat_id of our user and the todo_id of the task they want to update, then we checked the status of the task and it changed to completed - if it’s not and vice versa. The full user flow should resemble the image below.

Deleting data from Fauna
We also need functionality to delete tasks from our database, what’s a CRUD app without the D anyway. Fauna provides APIs for this so let’s jump into the code. We would be using the same style from our update function for deleting too.
task_message += "{}\nStatus: {}\nUpdate Link: /update_{}\nDelete Link: /delete_{}\n\n".format(task["data"]["todo"], task_status, i.id(), i.id())
First, we add the delete command to our list_todo rendering so we get a response similar to the one below.

Then we define a regex handler to track messages that begin with /delete_ and is followed by our to-do ID. Don’t forget to place this above the echo handler.
dispatcher.add_handler(MessageHandler(Filters.regex("/delete_[0-9]*"), delete_todo))
dispatcher.add_handler(MessageHandler(Filters.text, echo))
Then we create our delete_todo function with the same style as our update but with deleting functionality.
def delete_todo(update, context):
   chat_id = update.effective_chat.id
   message = update.message.text
   todo_id = message.split("_")[1]

   client.query(q.delete(q.ref(q.collection("todo"), todo_id)))
   context.bot.send_message(chat_id=chat_id, text="Successfully deleted todo task status 👌")

Now that wraps up our todo app in the form of a Telegram Bot with Python and Fauna. The user flow of the entire app should look like the image below. I also made some changes to the bot messages, the python source code is available at the end of the tutorial.
Conclusion
By integrating Fauna with Python, we were able to build a todo app using the Telegram Bot API with minimal effort. We also saw how easy it was to create and manage serverless databases with Fauna.
The full source code of the app can be found here on github. Trying out Fauna was very interesting and I can’t wait to see the amazing things you build with it. If you have any questions, don't hesitate to hit me up on Twitter: @LordGhostX

Top comments (7)
Hello @lordghostx it was a very nice blog!! I am following all the steps of setting up the bot but I confuse in creating a FaunaDb database collection!! please right me if I am wrong
please right me if I am wrong!!
Yes you're right, our app has 2 collections which are "users" and "todo"
The users collection stores information about our user such as their chat_id and username while the todo collection stores tasks created by users.
In Fauna, we need to create different collections and an index for each that's why we have different ones.
Ok @lordghostx , so I have created two collections one for users and another for todo, and also created their respective index,
and in the todo index, I have added data.user_id in terms Is it right? because it is giving me connection aborted error when I execute [/add_todo] cmd and rest all cmd are working fine.
Please correct me if it is wrong I think I am wrongly create database :(
Hi, I had to clone the repository and setup Fauna all over but I was unable to recreate your error.
I want to ask, when you were creating the first index did you set the name of the index to
usersand it's terms toidas shown here@lordghostx I am uploading the images of both collection and index please take a look and correct it if it is wrong!!
The cmd /start and /list_todo are working fine.
Problem is with /add_todo
The error I am getting:
Collections
Indexs
Code is the same as you have in your git repo!!
Hi,
From the look of things I can see the error occurs when you are trying to fetch the current user saved in your database and it seems the Fauna API is not giving you a response.
You're setting up the database well and the code runs fine. Can you delete and create a new Fauna API key then try running the code again, also don't forget a user account needs to be created first using
/startif you haven't done that already. If the problem persists send me a message on Twitter so we don't fill up the comment section with back and forth messages. ThanksThanks for this, very helpful