
What is HarperDB?
HarperDB is an easy database solution that helps collect, distribute, and analyze data throughout your organization. It provides unmatched flexibility, speed, security, and value for every data use case your organization and project require.
Benefits of Using HarperDB in Your Next Project
- Seamless integration into any project and tool using a straightforward REST API. It also comes with support for multiple languages via various drivers and plugins.
- HarperDB provides the ability to run your database anywhere, ranging from edge to cloud and anywhere in between.
- Support for executing complex, performant, ACID-compliant SQL queries on JSON with no data duplication.
- Functionality to search databases with JSON filters and SQL queries without the need of an ORM.
- You enjoy the flexibility of a NoSQL database with the security, consistency, and durability of an RDBMS by leveraging a dynamic schema with attribute level and role-based security in a single storage engine.
- HarperDB Studio offers a sleek and intuitive management UI that allows you to browse, query, and manage data all in one place, with no coding required.
Getting Started with HarperDB
Creating the HarperDB Database Instance
We need to create a database for the contact manager. If you have not created an account on HarperDB before now, create one on HarperDB’s website.
In the dashboard, click on Create New HarperDB Cloud Instance as shown in the image below.

Then, select a database instance type. A HarperDB instance is where you host your database. It can either be local (user-installed instance) or configured and managed on HarperDB servers (cloud instance). In this tutorial, we will be using the cloud instance.

You will need to provide information about your cloud instance, like name and authentication credentials. Click on the Instance Details button after supplying this information.

Note: Store the credentials somewhere secure and easily retrievable as we will need them in later parts of this tutorial.
You are also required to provide the specification of the cloud instance. HarperDB allows you to choose the RAM, storage size, and region your instance should have.

Once you have provided all the configuration details for the cloud instance, click on the Confirm Instance Details button, then finalize everything to create it.
NOTE: Cloud instances take several minutes to create. You’ll need to wait throughout this process. HarperDB also sends notifications via email on the instance creation status.

Creating the Database Schemas
Let’s set up the necessary database schema for our application. A schema is a collection of tables in HarperDB, analogous to a database in SQL. Without schemas, you cannot store data in the database.
To create a schema, first select the cloud instance in your dashboard, navigate to the schemas section by the left, and then provide a name for it. In this tutorial, we will be using the name contacts_repo as displayed in the image below:


Creating the Schema Tables
Let’s set up tables in our database schema. A table is analogous to tables in SQL databases like MySQL and collections in NoSQL databases like MongoDB.
To create a table. First, navigate to the tables section by the left side of your dashboard, then provide a name and hash_attribute for it. A hash_attribute identifies every record in the database uniquely, and it is synonymous with Primary Keys in a relational database.
Here, we will set the name to contacts and hash_attribute to contact_id as shown in the image below:


Setting Up the Demo Application
Cloning the Contact Manager Repository
For the sake of convenience, I have written the user interface of the contact manager (with Flask and Bootstrap) that we will use in this article. To get started, you will need to clone my repository and initialize the app like so:
git clone https://github.com/LordGhostX/harperdb-contact-manager
cd harperdb-contact-manager

The user-interface directory contains only the user interface of the contact manager. In contrast, the full-application directory contains the entire application (HarperDB + Python + Flask) that we will build in this tutorial.
Installing the Project’s Requirements
You need to install the contact manager’s requirements before you can run it. In your terminal, type:
cd user-interface
pip install -r requirements.txt
Run the application to make sure it’s working. In your terminal, type:

To view the user interface of our application, head to your browser and open the URL http://127.0.0.1:5000, you should get a response similar to the image below:

Integrating HarperDB with Python and Flask
Now that we have set up the base application and database schemas, let’s move to communicating with the database using Python, as shown in the SDK documentation.
Installing HarperDB Python SDK
We need to get the Python SDK for HarperDB. It provides functionalities that allow an application to make queries to the HarperDB database instance. It’s available on pip, making it installable with a single command in the terminal.
In the terminal, type:
pip install harperdb
Configuring HarperDB Python SDK
We need to import the HarperDB SDK into our Flask application to use it. To do this, add the following code to the app.py file:
import harperdb
We also have to initialize the Python SDK client with the database instance authentication credentials we saved earlier. Add the following code to the app.py file right after initializing the Flask app.
app.config["SECRET_KEY"] = "SECRET_KEY"
db = harperdb.HarperDB(
    url="HARPERDB_URL",
    username="HARPERDB_USERNAME",
    password="HARPERDB_PASSWORD"
)
Note: Don’t forget to replace the credentials placeholders with the appropriate values for your application.
The HARPERDB_URL is present in the HarperDB dashboard, where all the database instances are displayed.

Testing the HarperDB Database Connection
To test our HarperDB cloud instance and credentials, we will be querying our database for its description. To do this, add the block of code below right before running the application in the app.py file.
print(db.describe_all())
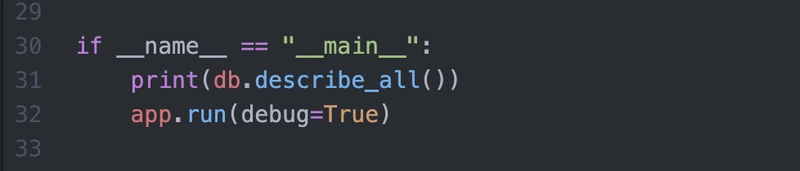
Run the app.py file. If you get a response like an image below, the configuration is correct. If you don’t, check if your credentials are valid and correct.

Making Queries to HarperDB
Creating New Documents in HarperDB
To create new documents in our HarperDB schema, we need to run an INSERT query in the database via the Python SDK. HarperDB provides two methods to do this:
- The SQL way: This involves running a SQL query to insert data into the database.
- The NoSQL way: This involves using the
insertmethod of the Python SDK to insert data into the database.
Here is sample Python code to demonstrate both methods:
# SQL way
db.sql("INSERT INTO contacts_repo.contacts (name, email) VALUES ('LordGhostX', 'lordghostx@email.com')")

# NoSQL way
result = db.insert("contacts_repo", "contacts", [{"name": "LordGhostX", "email": "lordghostx@email.com"}])
NOTE: If you omit the
hash_attributemetadata when executing anINSERTquery, HarperDB will automatically generate one for you and store it.
The code above executes an INSERT query to your HarperDB cloud database. It creates a document in the contacts table, in the contacts_repo schema with the name and email metadata.
We can integrate this into our contact manager by updating the contacts route with the code below:
@app.route("/contacts/", methods=["GET", "POST"])
def contacts():
    if request.method == "POST":
        action = request.form.get("action")
        contact_data = {
            "name": request.form.get("name", "").strip(),
            "job": request.form.get("job", "").strip(),
            "email": request.form.get("email", "").strip(),
            "phone": request.form.get("phone", "").strip()
        }

        if action == "addContact":
            db.insert("contacts_repo", "contacts", [contact_data])
            flash("Successfully added new contact", "success")

        return redirect(url_for("contacts"))

    return render_template("contacts.html")

Reading Documents from HarperDB
To read documents from our HarperDB tables, we need to run a SELECT or SEARCH query in the database via the Python SDK. HarperDB provides two methods to do this:
- The SQL way: This involves running a SQL query to select the data from the database.
- The NoSQL way: This involves using either the
search_by_hashorsearch_by_valuemethods of the Python SDK to select data from the database.
Here is sample Python code to demonstrate both methods:
# SQL way
db.sql("SELECT * FROM contacts_repo.contacts")

# NoSQL way
db.search_by_hash("contacts_repo", "contacts", ["hash_attribute"]) # returns all documents with the specified hash attributes

db.search_by_value("contacts_repo", "contacts", "name", "LordGhostX") # returns all documents with the specified values
The code above executes a SELECT and SEARCH query to your HarperDB cloud database. It fetches all the documents in the contacts table, in the contacts_repo schema with the specified hash attributes or values.
We can integrate this into our contact manager by updating the rendering of the contacts route in the app.py file with the code below:
contacts_data = db.sql(
    "SELECT * FROM contacts_repo.contacts ORDER BY name")
return render_template("contacts.html", contacts_data=contacts_data)

We also need to update the contacts page to render the data fetched from the HarperDB request. Update the contacts table body <tbody> in the contacts.html file with the code below:
<tbody>
  {% for contact in contacts_data %}
  <tr>
    <td id="contactName-{{ contact.contact_id }}">{{ contact.name }}</td>
    <td id="contactEmail-{{ contact.contact_id }}">{{ contact.email }}</td>
    <td id="contactPhone-{{ contact.contact_id }}">{{ contact.phone }}</td>
    <td id="contactJob-{{ contact.contact_id }}">{{ contact.job }}</td>
    <td>
      <button class="btn btn-primary" data-toggle="modal" data-target="#contactModal" onclick="displayContactInfo('{{ contact.contact_id }}')">View Details</button>
    </td>
  </tr>
  {% endfor %}
</tbody>

Updating Documents in HarperDB
To update documents in our HarperDB tables, we need to run an UPDATE query in the database via the Python SDK. HarperDB provides two methods to do this:
- The SQL way: This involves running a SQL query to update the data in the database.
- The NoSQL way: This involves using the
updatemethod of the Python SDK to update data in the database.
Here is sample Python code to demonstrate both methods:
# SQL way
db.sql("UPDATE contacts_repo.contacts SET email='lordghostx@newemail.com' WHERE contact_id='sample_hash_attribute'")

# NoSQL way
db.update("contacts_repo", "contacts", [{"contact_id": "sample_hash_attribute", "email": "lordghostx@newemail.com"}])
The code above executes an UPDATE query to your HarperDB cloud database. It updates the document in the contacts table, in the contacts_repo schema with the specified hash attributes with the new values supplied.
We can integrate this into our contact manager by updating the action handling in the contacts route with the code below:
if action == "updateContact":
    contact_data["contact_id"] = request.form.get("contactID")
    db.update("contacts_repo", "contacts", [contact_data])
    flash("Successfully updated contact information", "success")


Deleting Documents from HarperDB
To delete documents from our HarperDB tables, we need to run a DELETE query in the database via the Python SDK. HarperDB provides two methods to do this:
- The SQL way: This involves running a SQL query to delete the data from the database.
- The NoSQL way: This involves using the
deletemethod of the Python SDK to delete data from the database.
Here is sample Python code to demonstrate both methods:
# SQL way
db.sql("DELETE FROM contacts_repo.contacts WHERE name='LordGhostX'")

# NoSQL way
db.delete("contacts_repo", "contacts", ["sample_hash_attribute"])
The code above executes a DELETE query to your HarperDB cloud database. It deletes the document in the contacts table, in the contacts_repo schema with the specified hash_attribute, or has the value LordGhostX in the name column.
We can integrate this into our contact manager by updating the logout route with the code below:
@app.route("/contacts/delete/<string:contact_id>")
def delete_contact(contact_id):
    db.delete("contacts_repo", "contacts", [contact_id])
    flash("Successfully deleted contact information", "success")
    return redirect(url_for("contacts"))

Conclusion
By integrating HarperDB with Python and Flask, we built a contact manager with CRUD functionalities with minimal effort. We saw how to create cloud databases, manage them, and execute queries using HarperDB.
The source code of the contact manager is available on GitHub. It was exciting integrating HarperDB into a Flask application, and I can’t wait to see the amazing things you create with it!
If you have any questions, don't hesitate to contact me on Twitter: @LordGhostX

Top comments (5)
This is awesome, lordGhostX
Thank you very much😊
Great piece as always❤️
Thank you very much 😊
Amazing!