
Written by Manu Ustenko
✏️
Building hybrid applications provides a powerful and flexible solution for developers looking to create applications that can run seamlessly on both web and native platforms. By leveraging the strengths of React for UI development and Strada for bridging the gap between web and native functionalities, developers can create robust and efficient hybrid applications that offer a consistent user experience across various devices.
This tutorial will guide you through using React's UI development features and Strada's web-native integration to build applications that deliver a consistent, high-quality user experience across multiple platforms.
Developing a React application
Let’s build a straightforward React web application designed for running on iOS devices. First, open your terminal and make a folder to store all our code:
mkdir hybrid-app
cd hybrid-app
Our React app will consist of two pages: a homepage and a user page. On the user page, we'll fetch user data from the https://jsonplaceholder.typicode.com/users endpoint.
We'll use create-react-app to set up a new application:
npx create-react-app hybrid-web-app
After setup is complete, navigate to the new directory, install the necessary dependencies, and run the application:
cd hybrid-web-app

npm i @hotwired/stimulus @hotwired/strada @hotwired/turbo axios react-router-dom

npm start
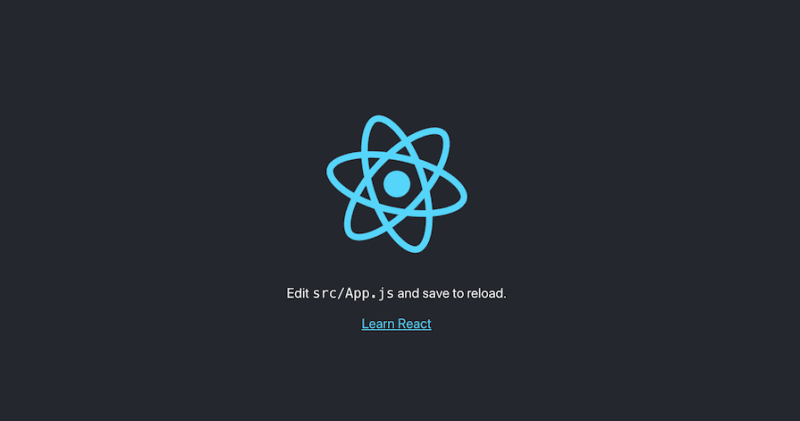
You should see a basic React page:
Next, let's make a Users component:
touch src/Users.js
Add the following contents:
import React, {useState} from 'react';
import axios from 'axios';

function UserList() {
    const [users, setUsers] = useState([]);
    const [loading, setLoading] = useState(false);

    const getUsers = async () => {
        setLoading(true);
        try {
            const response = await axios.get('https://jsonplaceholder.typicode.com/users');
            setUsers(response.data);
        } catch (error) {
            console.error('Error fetching users:', error);
        } finally {
            setLoading(false);
        }
    };

    return (
        <div style={{textAlign: 'center', marginTop: '50px'}}>
            <h1>User List</h1>
            <button onClick={getUsers} disabled={loading}>
                {loading ? 'Loading...' : 'Get Users'}
            </button>

            {users.length > 0 && (
                <ul style={{listStyle: 'none', padding: 0}}>
                    {users.map((user) => (
                        <li key={user.id} style={{marginBottom: '10px'}}>
                            {user.name} - {user.email}
                        </li>
                    ))}
                </ul>
            )}
        </div>
    );
}

export default UserList;
Update App.js with this code:
import React from 'react';
import {BrowserRouter as Router, Link, Route, Routes} from 'react-router-dom';
import Users from './Users';

function App() {
    return (
        <Router>
            <div style={{textAlign: 'center', marginTop: '50px'}}>
                <nav>
                    <ul style={{listStyle: 'none', padding: 0}}>
                        <li style={{display: 'inline', marginRight: '20px'}}>
                            <Link to="/">Home</Link>
                        </li>
                        <li style={{display: 'inline'}}>
                            <Link to="/users">Users</Link>
                        </li>
                    </ul>
                </nav>

                <Routes>
                    <Route path="/users" element={<Users/>}/>
                    <Route path="/" element={<h1 style={{color: '#3498db'}}>Hello, World!</h1>}/>
                </Routes>
            </div>
        </Router>
    );
}

export default App;
Now, run the application:
npm start
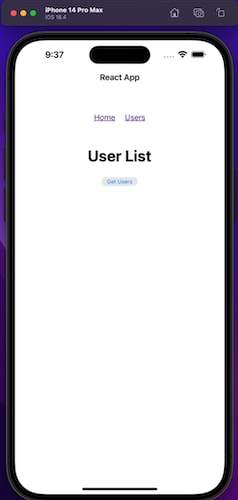
You should see two pages — Home and Users:


Clicking the Get Users button should fetch the list of users:  That's it! We've completed our basic React application.
Building an iOS app
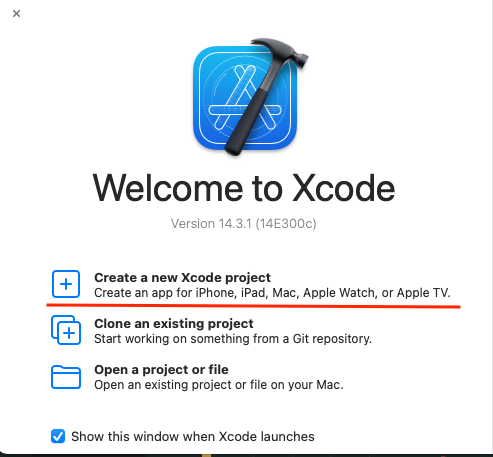
To create an iOS app, you'll need Xcode. Open your Xcode and click Create a new Xcode project:
Select iOS and App and click Next:

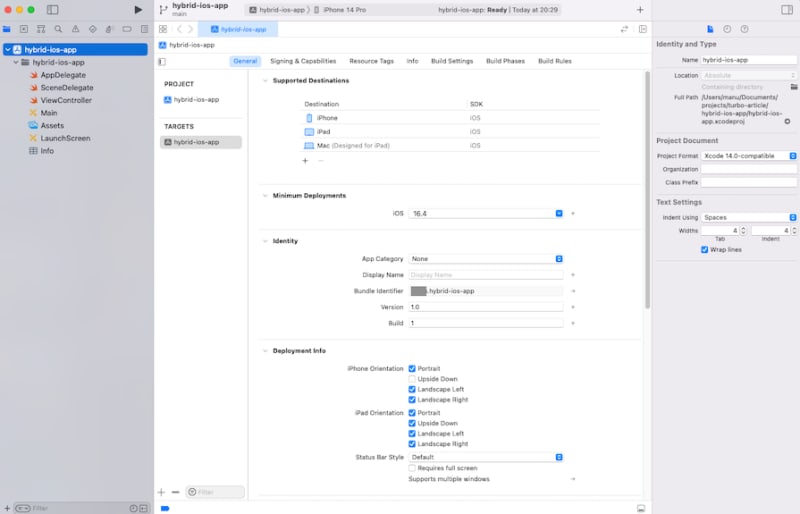
Name your application hybrid-ios-app. Select Storyboard for your interface, and Swift for your language. Then, click Next.
On the following page, locate your main folder hybrid-app, and create your project. Once the app is created, you should see the image below:
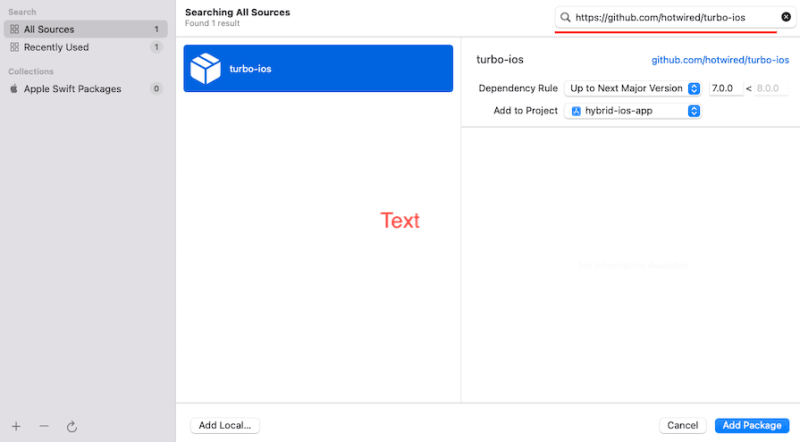
Now, let's include the Turbo dependency. Go to hybrid-ios-app/Package Dependencies and click the plus icon:
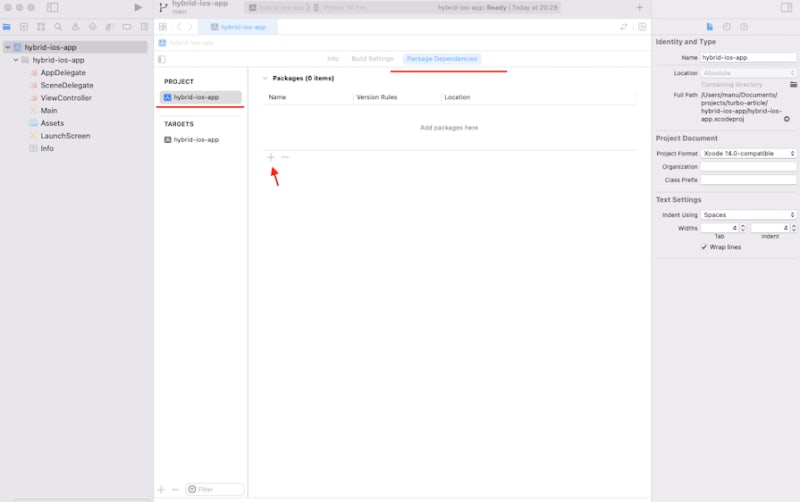
In the Search or Enter Package URL, type “https://github.com/hotwired/turbo-ios” and add the turbo-ios package:
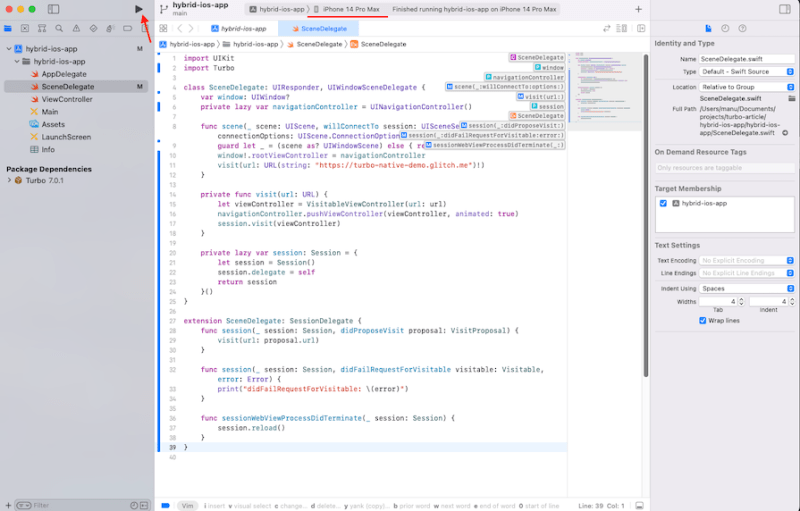
Next, replace the contents of the SceneDelegate.swift file with the provided code:
import UIKit
import Turbo

class SceneDelegate: UIResponder, UIWindowSceneDelegate {
    var window: UIWindow?
    private lazy var navigationController = UINavigationController()

    func scene(_ scene: UIScene, willConnectTo session: UISceneSession, options connectionOptions: UIScene.ConnectionOptions) {
        guard let _ = (scene as? UIWindowScene) else { return }
        window!.rootViewController = navigationController
        visit(url: URL(string: "https://turbo-native-demo.glitch.me")!)
    }

    private func visit(url: URL) {
        let viewController = VisitableViewController(url: url)
        navigationController.pushViewController(viewController, animated: true)
        session.visit(viewController)
    }

    private lazy var session: Session = {
        let session = Session()
        session.delegate = self
        return session
    }()
}

extension SceneDelegate: SessionDelegate {
    func session(_ session: Session, didProposeVisit proposal: VisitProposal) {
        visit(url: proposal.url)
    }

    func session(_ session: Session, didFailRequestForVisitable visitable: Visitable, error: Error) {
        print("didFailRequestForVisitable: \(error)")
    }

    func sessionWebViewProcessDidTerminate(_ session: Session) {
        session.reload()
    }
}
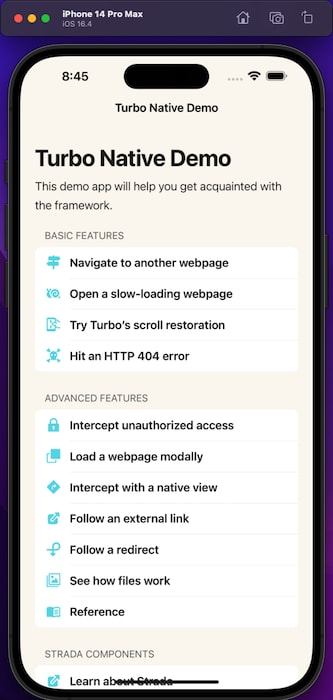
Choose your preferred device, build, and run the application:
After the build is complete, you should see the content displayed on the https://turbo-native-demo.glitch.me webpage:
Linking React and iOS applications
Now, let's establish a connection between our React and iOS applications. You might think just changing the URL on line 11 in the SceneDelegate.swift file is all you need. But that won't work. Strada makes it easy for web and app parts to talk to each other. It acts like a bridge, helping your web code and app code understand each other better.
Here's the basic idea: web parts send messages to their matching app parts. The app parts receive these messages, use the info to show things on the app, and update them with the message details. If app parts need to tell web parts about a user's action or a change in status, they reply to the original messages. Web parts get these replies and use callbacks to update based on the reply details.
Strada uses a framework called Stimulus to make your web parts more powerful. The main BridgeComponent class is a type of Stimulus Controller, so knowing a bit about Stimulus is handy when working with Strada parts. But we will keep it out of the scope of our article.
Let’s get our hands dirty. Return to your hybrid-web-app folder and make a new folder. Put an index file inside it:
mkdir src/controllers
touch src/controllers/index.js
Then, insert the following code inside:
import "@hotwired/turbo";
import { Application } from "@hotwired/stimulus";
import "@hotwired/strada";

const Stimulus = window.Stimulus = Application.start();
// You can register controllers like this. Check out the documentation at https://strada.hotwired.dev/handbook/how-it-works.
// import "./BridgeFormController";
// Stimulus.register("bridge--form", BridgeFormController);
Import this file in App.js and run the web application:
import './controllers';
import React from 'react';
…
npm start
Now, you can switch the URL in the scene function within the SceneDelegate class:
    func scene(_ scene: UIScene, willConnectTo session: UISceneSession, options connectionOptions: UIScene.ConnectionOptions) {
        guard let _ = (scene as? UIWindowScene) else { return }
        window!.rootViewController = navigationController
        visit(url: URL(string: "http://127.0.0.1:3000")!)
    }
Ensure you're using the local IP address instead of "localhost." Now, rebuild your iOS app, and you should see the contents of the web application:


Conclusion
Combining the powers of React with Strada to build hybrid web and mobile apps is a clever move. Strada acts like a friendly connector, making it a breeze for web and mobile parts to communicate. This duo streamlines development, creating apps that shine on various platforms. Strada's two-way talk lets web and mobile parts share info easily. The neat structure and easy controller setup make development smoother.
By blending React and Strada, you can craft apps that flex and respond well. This method nails what users want today and sets the stage for cool hybrid app developments in the future. It's a win for developers aiming for adaptable and user-friendly apps.
Get set up with LogRocket's modern React error tracking in minutes:
- Visit https://logrocket.com/signup/ to get an app ID.
- Install LogRocket via NPM or script tag.
LogRocket.init()must be called client-side, not server-side.
NPM:
$ npm i --save logrocket

// Code:

import LogRocket from 'logrocket';
LogRocket.init('app/id');
Script Tag:
Add to your HTML:

<script src="https://cdn.lr-ingest.com/LogRocket.min.js"></script>
<script>window.LogRocket && window.LogRocket.init('app/id');</script>
3.(Optional) Install plugins for deeper integrations with your stack:
- Redux middleware
- ngrx middleware
- Vuex plugin


Top comments (0)