
Written by David Omotayo✏️
One of Next.js' competitive advantages when it was released in 2016 was its built-in routing system. It supported both client-side and server-side rendering, so developers didn't have to configure a third-party routing library like React Router DOM. Next.js' router was also file-system based, which meant that the routes in an application were determined by how the files and folders were organized. This made it more appealing to most developers.
The team at Vercel has been improving the routing system with each new release. Next.js 9 introduced API routes, which let developers create serverless functions that handle specific API endpoints. Next.js 13 introduced the App Router, a new routing convention that lets you render client and server-side React components in the same application.
The App Router has many features, including layouts, dynamic routes, nested routes, and a new set of routing conventions called parallel and intersecting routes. These features can be used to create advanced routing patterns.
In this article, we'll explore what parallel and intersecting routes are, compare them to the existing routing options, understand their conventions, and demonstrate how to use them.
Prerequisite
Having prior knowledge of Next.js will be helpful to follow along with this article, but it's not required if you have a solid understanding of React.
What are parallel routes?
Parallel routes are a new and advanced routing convention in Next.js. According to the documentation:
“Parallel routes are a Next.js route paradigm that allows you to simultaneously or conditionally render one or more pages in the same layout that can be navigated independently.”
In other words, parallel routes allow you to render multiple pages in the same view.
Parallel routes are most useful when rendering complex, dynamic sections of an application, such as in a dashboard with multiple independent sections or a modal.
The image below is an illustration of a dashboard page from the Next documentation that demonstrates the intricacies of parallel routes:  In this context, the
 @team and @analytics routes are simultaneously rendered as sections of the dashboard layout using parallel routes.
How to use parallel routes
Parallel routes are defined using the @folder convention, which is also known as a "slot,” which is essentially a folder with the @ symbol prefixed to its name: 
Slots are defined within a route segment and serve as a container for diverse types of dynamic contents. Once defined, they become readily accessible as props in the layout.tsx file within the corresponding route segment.
For example, say we have a dashboard page and want to organize its contents modularly using parallel routes. The first step would be to define named slots within the app/dashboard directory. Considering it is a dashboard, we could define parallel routes for team, analytics, and revenue sections: 
For simplicity, we will include placeholder contents within the slots as follows:
// app/dashboard/@team/page.tsx

export default function Team() {
  return (
    <h2>Team slot</h2>
    <svg>...</svg>
  )
}
// app/dashboard/@revenue/page.tsx

export default function Revenue() {
  return (
    <h2>Revenue slot</h2>
    <svg>...</svg>
  )
}
// app/dashboard/@analytics/page.tsx

export default function Analytics() {
  return (
    <h2>Analytics slot</h2>
    <svg>...</svg>
  )
}
With the slots defined, the layout.tsx file within the dashboard route segment now accepts the @analytics, @revenue, and @team slots as props. This replaces the conventional approach of importing them.
Therefore if we go to the layout.tsx file and log the props object to the console, we will get the following result:
{
  analytics: {
      ...
    },
  },
  revenue: {
      ...
    },
  },
  teams: {
      ...
    },
  },
  children: {
      ...
  }
}
The next step involves accessing the slots as properties of the props object and dynamically rendering them within the layout, as demonstrated below:
import React from "react";

interface ISlots {
  children: React.ReactNode;
  analytics: React.ReactNode;
  team: React.ReactNode;
  revenue: React.ReactNode;
}

export default function DashboardLayout(props: ISlots) {

  return (
    <div>
      <h1>{props.children}</h1>
      <div>{props.analytics}</div>
      <div>{props.team}</div>
      <div >{props.revenue}</div>
    </div>
  );
}
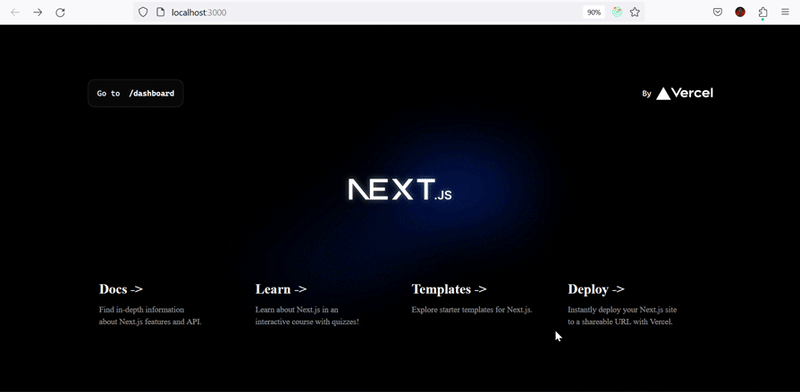
When you navigate to localhost:3000/dashboard, you should see the dashboard layout rendered with the parallel routes:  Note: To simplify the example, we have omitted the inline styles. You can find the source code in my GitHub repo. There are a few additional details to note from this example.
First, the children slot defined alongside the team, analytics, and revenue slots, serves as an implicit slot specifically designed to render the contents of the page.tsx file within the /dashboard route segment. As such, it does not need to be mapped to a folder: This means that dashboard/page.tsx is equivalent to dashboard/@children/page.tsx.
Secondly, it might be tempting to assume that the analytics, team, and revenue slots function as route segments because they are structured similarly. However, they do not impact the URL structure, and a file path like app/dashboard/@team/members remains accessible at localhost:3000/dashboard/members.
Why use parallel routes?
The clear advantage of parallel routes over the traditional approach is the ability to render completely independent code on the same URL and within the same view, using slots.
Conventionally, developers faced limitations in dynamically rendering contents on a page, as traditional routing mechanisms only supported linear rendering—meaning one URL per view.
This is why component composition development has been embraced over the years. It enables the rendering of modular and reusable components that can be combined and composed to construct intricate user interfaces.
If we were to use the component composition method in our dashboard example, the @analytics, @team, and @revenue slots would be defined as components and arranged in the dashboard layout like so:
import UserAnalytics from "@/components/Team";
import RevenueMetrics from "@/components/Analytics";
import Notifications from "@/components/Revenue";

export default function DashboardLayout({
  children,
}: {
  children: React.ReactNode;
}) {
  return (
    <>
      <div>{children}</div>
      <UserAnalytics />
      <Revenue />
      <Team />
    </>
  );
}
While this approach is effective and helps to make your code more manageable, especially when multiple teams are working on the project, it is possible to achieve the same result using parallel routes, with the added benefit of independent streaming and sub-navigation.
Independent route stream
Each parallel route is streamed independently to the layout, allowing for individual loading and error states, completely isolated from other parts of the layout.
For instance, if a section like analytics takes longer to load than other dashboard sections, a loading indicator can be displayed for that section alone, while the remaining sections remain fully interactive.
We can achieve this by defining loading.tsx and error.tsx files within each slot, as demonstrated in the illustration below: 
Then, we add the corresponding contents for the states. For example, we can add a loading spinner for the loading state and a custom interface for the error state. But for the sake of simplicity, we can simply add a text:
export default function Loading() {
  return <div>Loading...</div>;
}
We can observe this feature in action if we add varying delays to the slot’s load time as follows:
 // wait function to add varying load time

 export function wait(time: number) {
  return new Promise((resolve) => {
    setTimeout(resolve, time);
  });
}

// app/dashboard/@team/page.tsx

export default async function Team() {
  Await wait(1000)
  return (
    <h2>Team slot</h2>
    <svg>...</svg>
  )
}
// app/dashboard/@revenue/page.tsx

export default async function Revenue() {
  Await wait(2000)
  return (
    <h2>Revenue slot</h2>
    <svg>...</svg>
  )
}
// app/dashboard/@analytics/page.tsx

export default async function Analytics() {
  Await wait(3000)
  return (
    <h2>Analytics slot</h2>
    <svg>...</svg>
  )
}
We'll get the following result:
Note that for this feature to work properly, you have to also define a loading.tsx file for the children slot, i.e., within the root of the /dashboard path: 
Sub-navigation
The independent attribute of a slot extends beyond the loading and error state. Each route operates as a standalone entity, complete with its own state management and navigation, thus making each section of the user interface (in this context, the dashboard) operate as a standalone application.
This implies that we can create sub-folders that are associated with the dashboard/@folder/sub-folder file path within the slots and navigate back and forth without altering the state or rendition of the other sections on the dashboard.
For example, if we wish to implement sub-navigation within the @team slot, we can create a subfolder as follows: 
Then, we feature a link in the @team slot: localhost:3000/dashboard/members, which navigates to the members subfolder, and another link in the members subfolder: localhost:3000/dashboard, which navigates back to the team default view:
import React from "react";
import Card from "@/components/card/card";
import { wait } from "@/lib/wait/page";
import Link from "next/link";

// app/dashboard/@team

export default async function Team() {
  return (
    <>
      <h2>Teams slot</h2>
      <svg>...</svg>
      <Link href="/dashboard/members">
        <p>
          Got to `/members` page </p> </Link> </> ); } // app/dashboard/@team/members export default function Members() { return ( <> <h1>Members page</h1> <Link href="/dashboard"> <p> Got back to `/teams` page </p> </Link> </> ); }
 Note that in certain cases, you may encounter a black screen when attempting to navigate back to the default view, i.e.,
 /dashboard. This is only a problem in development mode; if you build your project and run the production version of the project, everything should function as expected.
On the topic of default views, it is important to consider the behavior of other parts of the dashboard during this process. We will explore this in the following section.
Unmatched routes
An unmatched route occurs when the contents within a slot don’t match the current URL. This occurs when sub-navigating, as demonstrated in the previous section, and only one section of the dashboard or a layout matches the new route.
To put it more simply, by default, every slot aligns with the file path for the route segment they are defined in. In the case of our dashboard, this is /dashboard.
However, during client-side navigation, similar to what we did in the previous section, the file path changes to dashboard/members, matching only the @teams slot. Consequently, the @analytics and @revenue slots become unmatched.
This occurs because, during a page reload, Next.js attempts to render a default.tsx file within the unmatched slots. If the file is absent, Next.js throws a 404 error; otherwise, it renders the file's contents.
The default.tsx file serves as a fallback for unmatched slots, allowing us to render alternate contents when Next.js cannot retrieve the active state of a slot.
To prevent Next.js from throwing a 404 error when accessing the /dashboard/members route within the @team slot, we simply need to add a default.tsx file for each slot within the route segment, including the children slot: 
Now, when we engage in a hard navigation to the dashboard/members route, the page will load correctly and render the default view for unmatched routes: 
Conditional routes
Parallel routes can also be conditionally rendered based on certain conditions. For example, if we want only authenticated users to have access to the dashboard, we can use the authentication state to render the dashboard if the user is authenticated or render a login slot if otherwise:
interface ISlots {
  children: React.ReactNode;
  analytics: React.ReactNode;
  team: React.ReactNode;
  revenue: React.ReactNode;
  login: React.ReactNode
}

export default function DashboardLayout(props: ISlots) {
  const isLoggedIn = true; // Simulates auth state

  if (!isLoggedIn) return props.login;

  return(
    <>
      {children}
      {users}
      {revenue}
      {notifications}
    </>
  );
}
What are intercepting routes?
The intercepting route is a Next.js route paradigm that allows us to load a route from another part of our application within the current context or layout.
The concept of an intercepting route is simple; it essentially functions as middleware, which enables us to intercept routing requests before actual navigation takes place.
Consider a login modal or a photo feed. Traditionally, clicking on a login link in a navigation bar or an image in a photo feed would direct you to a dedicated page where the login component or image is fully rendered.
However, with intercepting routes, we can alter this behavior. By intercepting the route, masking it, and overlaying it on the current URL, we can render it as a modal that overlays the layout without switching context: 
Once a route has been intercepted, Next.js preserves the intercepted route, making it shareable. However, in the event of a hard navigation (e.g., browser refresh) or access via the shareable URL, Next.js renders the entire page instead of a modal. In this case, no route interception takes place.
How to create intercepting routes
Intercepting routes follow a convention similar to parallel routes, using a (.)folder convention. This convention involves adding a (.) prefix to a folder's name to match an existing route segment on the same level.
For instance, say we have a app/products route segment with a nested dynamic route: /[item], accessible at the localhost:3000/products/itemId:  We can intercept navigation from
 localhost:3000/products to localhost:3000/products/itemId by creating a (.)[item] directory within the products segment, as depicted in the image below:  Then, we define the contents we intend to render when the route is intercepted, such as the following:
interface IimageProps {
  params: {
    item: string;
  };
}

export default async function Page({ params: { item } }: IimageProps) {
  const res = await getImage(item);
  const image = await res.json();

  return (
    <>
      <div>
        <div>
          <div>
            <Image
              src={image.urls.regular}
              alt={image.alt_description}
              priority
              fill
              style={{ borderRadius: "10px" }}
            />
          </div>
        </div>
        <p>{image.alt_description}</p>
      </div>
    </>
  );
}
Presently, if an attempt is made to access the individual page of any of the items via the /products route, the URL is updated to localhost:3000/products/itemId, and the contents of the /products/(.)[item] intercepted route are rendered, replacing the intended item's contents:  There are two things to note from the example above. Firstly, the item's page is rendered following a page reload, and secondly, the intercepting route is rendered as a standalone page rather than a modal.
Intercepting routes are partially rendered by default. So, in the event of a page reload or direct access to the localhost:3000/products/itemId URL, the contents of the /products/[item] get rendered.
Although it may appear as though the intersecting route is being rendered as a standalone page, it is not the case, as the context remains unchanged; it only changes after a page reload, as previously explained.
To ensure the route renders properly as a modal, complete with a backdrop and the necessary characteristics, we need to define the intercepting route in a parallel route. To do this, we'll begin by creating a slot within the /products route and move the (.)[item] intercepting route into it: 
Next, we will proceed to add a layout.tsx file to the /products directory and a default.tsx file within the @modal slot with the following code:
// app/products/layout.tsx

import React from "react";

export default function layout({
  children,
  modal,
}: {
  children: React.ReactNode;
  modal: React.ReactNode;
}) {
  return (
    <div>
      {children}
      {modal}
    </div>
  );
}

// app/products/@modal/default.tsx

Export const Default = () => {
  return null;
};
We defined the default.tsx file to prevent Next.js from throwing a 404 error when the modal is not active, and because we don't want to display anything when it is not active, we're returning null.
Now with proper styling, the modal should render properly after interception:  Find the source code, including a link to the live site, in my GitHub repo.
Backward navigation closes the modal by default, but if you wish to add an icon or a button that does that to the modal, you can use the router.back() as shown in the code below:
'use client'
import { useRouter } from 'next/navigation'

export default function Page() {
  const router = useRouter()
  return (
    <div>
      <span onClick={() => router.back()}>Close modal</span>
      ...
    </div>
  )
}
Intercepting patterns
The intercepting route convention works similarly to the relative path convention ../, which means we can define intercepting routes using different levels:
-
(..)matches segments on the same level -
(..)(..)matches segments two levels above -
(...)matches segments on the root level
With these patterns, we can intercept routes anywhere in our application.
Conclusion
Parallel and intercepting routes are advanced routing mechanisms in Next.js that individually provide enhanced flexibility and an improved user experience when building web applications. However, when combined, they offer even more advanced features, as demonstrated in this article.
While their conventions may initially require some dedicated effort to fully understand and there may be occasional minor bugs, these routing mechanisms have the potential to significantly change how developers manage routing functionalities within their applications.
LogRocket: Full visibility into production Next.js apps
Debugging Next applications can be difficult, especially when users experience issues that are difficult to reproduce. If you’re interested in monitoring and tracking state, automatically surfacing JavaScript errors, and tracking slow network requests and component load time, try LogRocket.

LogRocket is like a DVR for web and mobile apps, recording literally everything that happens on your Next.js app. Instead of guessing why problems happen, you can aggregate and report on what state your application was in when an issue occurred. LogRocket also monitors your app's performance, reporting with metrics like client CPU load, client memory usage, and more.
The LogRocket Redux middleware package adds an extra layer of visibility into your user sessions. LogRocket logs all actions and state from your Redux stores.
Modernize how you debug your Next.js apps — start monitoring for free.


Top comments (0)