
Written by Clara Ekekenta✏️
Aspect is a new development tool that allows you to create React components virtually in your browser. It eliminates the stress of creating and setting up a React project for applications.
Aspect saves on development time by providing a dashboard with HTML drag-and-drop functionality that greatly simplifies the process of creating React components. Aspect also syncs your designs to your codebase and provides an option to export them as a zip file.
Lots of additional, cool features are promised in a future version, like support for libraries such as MaterialUI and Tailwind CSS, as well as Sketch and AdobeXD.
In this tutorial, we'll demonstrate how to use Aspect to build a reusable component faster. We’ll build the simple product page shown below:
 Jump ahead:
Getting started
To get started with Aspect, sign up here.
Then, install the Aspect CLI globally using the following command:
npm install @metacode-inc/aspect -g
Once you’re signed up, Aspect will create a new project with an empty view to get you started.
Project UI overview
Before we go any further, let's take a quick look at the Aspect project’s UI to become more familiar with how to navigate and use the tool.

Here’s a summary of the different sections of Aspect’s user interface:
- Project: View a list of your project’s details, such as the product ID; you can also generate, view, and sync your codebase using your project's API key from here
- VIEWS: Create different views for your projects; double-click on a view to change its default name
- PROPERTIES: Define the custom properties of your project
- STATES: Create custom states and set conditions for the elements in your project
- ELEMENTS: Manage the elements in your project and define their hierarchy
- CSS: Define your project’s styling; use the quick layout to organize your elements; the CSS section is visible when the ELEMENTS section is expanded
- + INSERT: Add a filter and add elements to your projects
Now that we have more familiarity with Aspect’s features, let’s work on building our product page.
Creating a view
We already have a view created by Aspect. To create a new view, click on the + symbol on the VIEWS tab. Then, double click on View2 and rename it “Product”. 
Adding elements
Now, let's add some elements to the view.
Creating the parent layout
We'll start by adding a parent div by clicking on + INSERT and selecting div from the dropdown. When you hover on the view, you should see a + symbol appear. This indicates that an element has been selected. Right click on the element and drag it to enlarge the element to the desired size. 
Creating the navbar
Now that we have a parent layout, let’s add another div for the navbar. Repeat the same steps you followed to add the parent div. Then, go to the CSS tab and set the width to 100% and the min-height to 63.
 The resulting layout should look like this:
Next, let's use a ul element to add some navbar lists to the project. Click on INSERT, select ul, and add it to the parent div, div-0, by dropping it on it.
Now, add three li list item elements in the ul element. In the li elements, add p elements and “Home", "About", and "Products" to the text property in the PROPERTIES tab.
Add the text to the p elements, then click on the first layout in the CSS > QUICK LAYOUT tab to add styling. Select the first layout to display the contents inline.

To remove the bullet symbols, change the list-style property in the ul element to none. Add a black background by specifying background-color of #42a7f5 for the div-0.
Next, align the elements and change the font to white by adding a margin-right of 7px and a color of #fff to each li element. 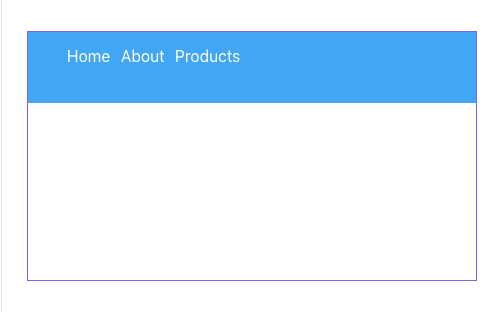
Creating products
Now, let’s make a layout for the products. We’ll use a p element for the product description. Then, we’ll create a child layout for the products.
Insert a div, and inside of that insert another div and a p inside div-1. Now, change the text property of p-2 to "Products".
To style the child layout, click on div-1 and go to the CSS > QUICK LAYOUT tab. Select the second layout, and change the width property of div-2 to 100%. Your project should look like this: 
Next, insert another div inside div-2 to hold the product details. Inside the div-3 insert two p, one img, and one button. Change the text property of the p-3 element to “Techno m16”, and change the text property of the p-4 ** element to **Price: $200. Next, add a p to the button and set the text property to “Add to cart”.
Now, change the font-size properties of all the p elements in div-3 to 12px and set the align properties to center.
Set the image’s src property to https://tslnigeria.tv/wp-content/uploads/2021/05/mobile-phone.jpg.
Next, click on div-3, and press Ctrl + D to duplicate the div and create div-4. Go ahead and change the text and the src properties of each element in div-4.
Now, click on div-2, go to CSS > QUICK LAYOUT, and select the first layout.
You should have output similar to this: 
Exporting components
We’ve finished creating our component UI using the Aspect UI builder, Now, let’s fetch the design and sync it with our codebase using the following command:
aspect fetch --project <projectId> --out <outputDirectory> --key <apiKey>
You can get the project ID and API key by clicking on the project name in the Project dropdown. 
N.B., the <apiKey> is not generated by default, you'll need to click on the Generate new API key button
After the design is successfully fetched and synced, you should see the following output: ![]()
Aspect will generate a component.tsx and components.css file. Now, you can import and use the view in your projects.
Conclusion
In this tutorial, we demonstrated how to use Aspect to reduce the development time associated with creating reusable React components.
Feel free to follow the steps outlined in this tutorial to add more features to the application.
Full visibility into production React apps
Debugging React applications can be difficult, especially when users experience issues that are hard to reproduce. If you’re interested in monitoring and tracking Redux state, automatically surfacing JavaScript errors, and tracking slow network requests and component load time, try LogRocket.

LogRocket is like a DVR for web and mobile apps, recording literally everything that happens on your React app. Instead of guessing why problems happen, you can aggregate and report on what state your application was in when an issue occurred. LogRocket also monitors your app's performance, reporting with metrics like client CPU load, client memory usage, and more.
The LogRocket Redux middleware package adds an extra layer of visibility into your user sessions. LogRocket logs all actions and state from your Redux stores.


Top comments (0)