
Written by Clara Ekekenta✏️
The seamless integration of frontend and backend technologies is a perpetual challenge for developers. This often involves not only making the technologies work together, but also setting up an environment that is scalable, maintainable, and efficient.
Goxygen was built to help developers efficiently scaffold a full-stack Go application without getting entangled in an intricate web of setup and configuration. With just a single command, Goxygen eliminates hours of tedious setup, letting you dive straight into crafting your application's unique features. In this tutorial, we'll demonstrate how to use Goxgen to scaffold a full-stack React application. We’ll show how to integrate React with Go and provide insights into how to modify Goxygen to suit your project requirements.
Without further ado, let's set sail on this exciting journey!
Prerequisites
For the tutorial portion of this article, you’ll need the following:
- Prior experience with React and Go
- Go, Node.js, Docker, and Docker Compose installed and running on your local dev environment
The code for this tutorial is available on GitHub. Feel free to clone it to follow along.
What is Goxygen?
Goxygen is a groundbreaking tool designed specifically for developers who aim to harness the power of Go in their web projects. Its primary purpose is to scaffold full-stack web applications, eliminating the complexities of initial setup and configuration. At its core, Goxygen auto-generates boilerplate code that bridges Go-based backends with leading frontend frameworks, such as React, Vue, and Angular.
The brilliance of Goxygen lies in its efficiency. Instead of going through the tedious task of manually integrating the frontend and backend, developers can leverage Goxygen to get a jumpstart. This allows them to invest their time and creativity more productively, such as by building distinctive features and refining an application's functionality.
Also, Goxygen inherently supports Docker, offering inbuilt containerization. This ensures applications are not just built but are also ready for deployment in diverse environments with inbuilt database integrations. Goxygen facilitates seamless interactions with prominent relational databases like MySQL, PostgreSQL, and SQLite.
Goxygen vs. Buffalo
Buffalo is a popular Go-based web application scaffolding tool that offers some distinctive features and capabilities compared to Goxygen. Let’s compare both tools to see how they differ and to learn how to determine which aligns best with your project's requirements.
Goxygen was primarily designed to quickly auto-generate boilerplate code for full-stack web applications. It champions the integration of Go-based backends with prevalent frontend frameworks like React, Vue, and Angular.
One of Goxygen's standout features is that it accelerates the initial phases of a project by handling the intricacies of setup and configuration. With inbuilt Docker support and integrations with leading relational databases, Goxygen emphasizes quick deployment and seamless data interactions.
Buffalo pitches itself as a holistic web development ecosystem for Go. Inspired by Ruby on Rails, this tool takes a very comprehensive approach to web application development.
Buffalo doesn't just scaffold applications, it provides an entire framework geared toward building web applications efficiently. Buffalo incorporates features like hot reloading, database migrations, and session management, ensuring that developers have a suite of tools at their disposal throughout the application's lifecycle.
Both tools offer unique advantages; the choice between Goxygen and Buffalo often boils down to the project's scope and the developer's preferences. If you're looking for a quick way to jumpstart a full-stack application with Go and a modern frontend framework, Goxygen may be the best option. However, if you’d prefer a comprehensive framework that offers an array of inbuilt features, Buffalo may be the more compelling choice.
Scaffolding the project
To see Goxygen in action, let’s use it to build a full-stack application with Go. As a first step, scaffold the full-stack app using the command below:
go run github.com/shpota/goxygen@latest init --frontend react --db postgres my-blog
Here we specify the --frontend flag, allowing us to specify the frontend tool we wish to use. We selected react, but the value could also be vue or angular.
We use the --db flag to specify the database management system to store records in the application. For this tutorial, we’ll use the Postgres database.
The above command will scaffold a full-stack React application with a Go server backend and the following folder structures:
my-blog
├── server  → The Go server backend
│ ├── db → Postgres configuration and services
│ ├── model → Postgres models structs
│ ├── web →  Go server, REST APIs endpoint, tests
│ ├── server.go → Go server configuration
│ └── go.mod → Go server dependencies
├── webapp -> The React frontend folder
│ ├── public  → App icons, static files, and index.html
│ ├── src - React entry file, styles and App components
│ │ ├── App.js
│ │ ├── App.css
│ │ ├── index.js
│ │ └── index.css
│ ├── package.json -> Frontend project dependencies
│ ├── .env.development -> Dev environment variables
│ └── .env.production -> Prod environment variables
├── Dockerfile -> Backend and frontend build configurations
├── docker-compose.yml -> Prod environment deployment configurations
├── docker-compose-dev.yml -> Dev environment deployment configurations
├── init-db.js # SQL Queries to Postgres tables and test data
├── .dockerignore
├── .gitignore
└── README.md -> A guide to help you run your project
Now, cd into the project folder use the below command to run the project:
cd my-blog
docker-compose up
This will start the project on localhost:8080:  Once the project is scaffolded using Goxygen, we simply modify the React frontend and the Go server to suit our project needs and requirements. For this tutorial, we’ll modify the scaffolded project to create a blog application.
Creating a blog model
To set up a blog model for the Go server backend, start by opening the project in your preferred text editor. Navigate to the server/model directory and create a new file named blog.go. Then, add the following code snippet:
package model
type Blog struct {
    ID       int    `json:"id"`
    Title    string `json:"title"`
    CoverURL string `json:"coverURL"`
    Body     string `json:"body"`
}
Here we define a Blog data structure (struct) with four fields: ID, Title, CoverURL, and Body. These fields are annotated with json tags, indicating how they should be represented when the struct is converted to or from JSON format.
Creating Postgres services
Next, let’s update the db/db.go file to create CRUD services to communicate with our Postgres database to create, read, and delete records. First, let’s modify the DB interface and define the custom methods we'll define for the CRUD operations and their return types, the PostgresDB type, and the NewDB function:
//...
type DB interface {
    GetBlogs() ([]*model.Blog, error)
    CreateBlog(blog *model.Blog) error
    UpdateBlog(id int, blog *model.Blog) error
    DeleteBlog(id int)  error
    GetBlog(id int )(*model.Blog, error)
}
type PostgresDB struct {
    db *sql.DB
}
func NewDB(db *sql.DB) DB {
    return PostgresDB{db: db}
}
//...
In the above code snippet, we update the DB interface to outline methods for the database operations related to the blogs table. We also modify the postgresDB type which embeds a pointer to an sql.DB instance to create a connection to a PostgreSQL database. The NewDB function initializes and returns an instance of PostgresDB, linking the SQL connection to our custom methods.
Now, create the CreateBlog, GetBlogs, GetBlog, UpdateBlog, DeleteBlog services, like so:
//...
func (d PostgresDB) CreateBlog(blog *model.Blog) error {
    query := `INSERT INTO blogs (title, body, coverURL) VALUES ($1, $2, $3) RETURNING id`
    return d.db.QueryRow(query, blog.Title, blog.Body, blog.CoverURL).Scan(&blog.ID)
}
func (d PostgresDB) GetBlogs() ([]*model.Blog, error) {
    rows, err := d.db.Query("select title, body, coverURL from blogs")
    if err != nil {
        return nil, err
    }
    defer rows.Close()
    var tech []*model.Blog
    for rows.Next() {
        t := new(model.Blog)
        err = rows.Scan(&t.Title, &t.Body, &t.CoverURL)
        if err != nil {
            return nil, err
        }
        tech = append(tech, t)
    }
    return tech, nil
}
func (d PostgresDB) GetBlog(id int) (*model.Blog, error) {
    println(id)
    t := new(model.Blog)
    query := `SELECT id, title, body, coverURL FROM blogs WHERE id = $1`
    err := d.db.QueryRow(query, id).Scan(&t.ID, &t.Title, &t.Body, &t.CoverURL)
    if err != nil {
        return nil, err
    }
    return t, nil
}
func (d PostgresDB) UpdateBlog(id int, blog *model.Blog) error {
    query := `UPDATE blogs SET title = $1, body = $2, coverURL = $3 WHERE id = $4`
    _, err := d.db.Exec(query, blog.Title, blog.Body, blog.CoverURL, id)
    return err
}
func (d PostgresDB) DeleteBlog(id int) error {
    query := `DELETE FROM blogs WHERE id = $1`
    _, err := d.db.Exec(query, id)
    return err
//...
The above snippets run SQL queries to interact with the database to create, read, and update records in the Postgres database using the db.Exec method which executes the queries.
Creating RESTful endpoints
Now that we’ve created the custom services to communicate with the Postgres database, let’s update the RESTful API in the web/app.go file. First, install the Gorilla Mux package to handle the setup of the routes:
go get -u github.com/gorilla/mux
Then import the packages and update the App struct and the NewApp function, like so:
import (
    "encoding/json"
    "log"
    "net/http"
    "my-blog/db"
    "my-blog/model"
    "github.com/gorilla/mux"
    "strconv"
)
type App struct {
    d      db.DB
    router *mux.Router // Use Gorilla Mux's Router
}
func NewApp(d db.DB, cors bool) App {
    app := App{
        d:      d,
        router: mux.NewRouter(),
    }

    // API routes using Gorilla Mux's HandleFunc method
    app.router.HandleFunc("/api/blogs", app.handleGetBlogs).Methods("GET")
    app.router.HandleFunc("/api/blog/{id:[0-9]+}", app.handleGetBlog).Methods("GET")
    app.router.HandleFunc("/api/blog/create", app.handleCreateBlog).Methods("POST")
    app.router.HandleFunc("/api/blog/update/{id:[0-9]+}", app.handleUpdateBlog).Methods("PUT")
    app.router.HandleFunc("/api/blog/delete/{id:[0-9]+}", app.handleDeleteBlog).Methods("DELETE")
    app.router.PathPrefix("/").Handler(http.FileServer(http.Dir("/webapp")))
    return app
}
Here we define the API endpoints to communicate the handler functions we’ll be creating later to talk to our Postgres services using Gorilla Mux HandleFunc method.
Now, update the Serve method to use the disableCors function that was created when the project was generated:
//...
func (a *App) Serve() error {
    log.Println("Web server is available on port 3001")
    return http.ListenAndServe(":3001", disableCors(a.router.ServeHTTP))
}
//...
Next, create the handler methods to communicate with the CRUD services:
//...
func (a *App) handleGetBlogs(w http.ResponseWriter, r *http.Request) {
    w.Header().Set("Content-Type", "application/json")
    blogs, err := a.d.GetBlogs()
    if err != nil {
        sendErr(w, http.StatusInternalServerError, err.Error())
        return
    }
    err = json.NewEncoder(w).Encode(blogs)
    if err != nil {
        sendErr(w, http.StatusInternalServerError, err.Error())
    }
}
func (a *App) handleGetBlog(w http.ResponseWriter, r *http.Request) {
    vars := mux.Vars(r)
    id, err := strconv.Atoi(vars["id"])
    if err != nil {
        sendErr(w, http.StatusBadRequest, "Invalid blog ID")
        return
    }
    blog, err := a.d.GetBlog(id)
    if err != nil {
        sendErr(w, http.StatusInternalServerError, err.Error())
        return
    }
    json.NewEncoder(w).Encode(blog)
}
func (a *App) handleCreateBlog(w http.ResponseWriter, r *http.Request) {
    w.Header().Set("Content-Type", "application/json")
    var b model.Blog
    decoder := json.NewDecoder(r.Body)
    if err := decoder.Decode(&b); err != nil {
        sendErr(w, http.StatusBadRequest, "Invalid request payload")
        return
    }
    defer r.Body.Close()
    if err := a.d.CreateBlog(&b); err != nil {
        sendErr(w, http.StatusInternalServerError, "Error creating the blog")
        return
    }
    json.NewEncoder(w).Encode(b)
}
func (a *App) handleUpdateBlog(w http.ResponseWriter, r *http.Request) {
    vars := mux.Vars(r)
    id, err := strconv.Atoi(vars["id"])
    if err != nil {
        sendErr(w, http.StatusBadRequest, "Invalid blog ID")
        return
    }
    w.Header().Set("Content-Type", "application/json")
    var b model.Blog
    decoder := json.NewDecoder(r.Body)
    if err := decoder.Decode(&b); err != nil {
        sendErr(w, http.StatusBadRequest, "Invalid request payload")
        return
    }
    defer r.Body.Close()
    if err := a.d.UpdateBlog(id, &b); err != nil {
        sendErr(w, http.StatusInternalServerError, "Error updating the blog")
        return
    }
    json.NewEncoder(w).Encode(b)
}
func (a *App) handleDeleteBlog(w http.ResponseWriter, r *http.Request) {
    vars := mux.Vars(r)
    id, err := strconv.Atoi(vars["id"])
    if err != nil {
        sendErr(w, http.StatusBadRequest, "Invalid blog ID")
        return
    }
    if err := a.d.DeleteBlog(id); err != nil {
        sendErr(w, http.StatusInternalServerError, "Error deleting the blog")
        return
    }
    w.WriteHeader(http.StatusOK)
}
//...
The above code snippets define how the server should handle HTTP requests for different CRUD operations to the blogs model table. The handleGetBlogs function retrieves and sends all blogs in JSON format. The handleGetBlog method fetches and returns a specific blog based on an ID from the URL.
The handleCreateBlog function reads a JSON payload from the request, decodes it to a blog object, and attempts to save it. The handleUpdateBlog method updates an existing blog identified by its ID, using the provided JSON payload.
Lastly, the handleDeleteBlog function deletes a specific blog using its ID from the URL. Error handling in each function ensures that proper responses are sent back, depending on the success or failure of the operation.
Creating the React frontend
The server-side setup is complete. Now, let's move on to setting up the React frontend. Begin by modifying the App.js file within the webapp directory using the following code snippet:
import React, { useState, useEffect } from "react";
import "./App.css";
export function App() {
  const [blogs, setBlogs] = useState([]);
  useEffect(() => {
    const getBlogs = async () => {
      try {
        const response = await fetch("http://localhost:3001/api/blogs");
        if (!response.ok) {
          throw new Error("Error loading blogs");
        }
        const blogs = await response.json();
        setBlogs(blogs);
      } catch (error) {
        console.log(error.message);
      }
    };
    getBlogs();
  }, []);
  return (
    <div className="app">
      <header className="header">
        <h2 className="title">Goxxygen Blog</h2>
      </header>
      <main className="main-content">
        {blogs &&
          blogs.map((blog) => (
            <div className="blog-card" key={blog.id}>
              <div className="blog-cover">
                <img src={blog.coverURL} alt={blog.title} />
              </div>
              <h3 className="blog-title">{blog.title}</h3>
            </div>
          ))}
      </main>
    </div>
  );
}
Here we update the functionality to send an API request to the Go server. This fetches all the posts when the component mounts, using the useEffect Hook, and then displays them by iterating through each post.
Next, update the App.css file to style add styling to the component with the code styles:
.app {
    font-family: Arial, sans-serif;
    padding: 20px;
}
.header {
    border-bottom: 2px solid #333;
    padding: 10px 0;
    margin-bottom: 20px;
}
.title {
    margin: 0;
}
.main-content {
    display: flex;
    justify-content: space-between;
    gap: 20px;
}
.blog-card {
    border: 2px solid #333;
    width: 30%;  /* Adjust as needed */
    display: flex;
    flex-direction: column;
    align-items: center;
}
.blog-cover {
    background-color: #e0e0e0;  /* Placeholder background color */
    display: flex;
    justify-content: center;
    align-items: center;
    margin-bottom: 10px;
}
.blog-cover img{
    width: 100%;
}
.blog-title {
    margin: 0;
}
Run the following commands to build the changes we’ve made on the project:
docker-compose build
docker-compose up
Then refresh the browser to see the changes: 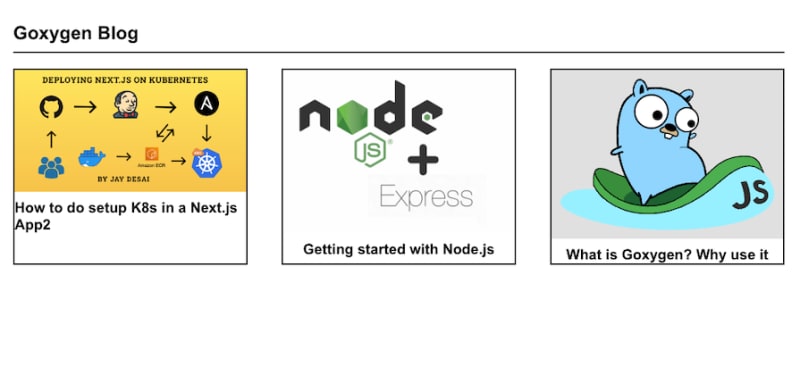
Conclusion
In this tutorial, we demonstrated how to build a full-stack app with React and Goxygen. We introduced Goxygen, compared it to Buffalo, and then showed how to use Oxygen to create a React blog project with data stored in a Postgres database.
Consider if using Goxygen will save you time when building your next full-stack project. Perhaps you can extend the sample React application we created to include a dashboard that will allow users to create, delete, and update blog posts.
Thanks for reading and happy coding!
Get set up with LogRocket's modern React error tracking in minutes:
- Visit https://logrocket.com/signup/ to get an app ID.
- Install LogRocket via NPM or script tag.
LogRocket.init()must be called client-side, not server-side.
NPM:
$ npm i --save logrocket

// Code:

import LogRocket from 'logrocket';
LogRocket.init('app/id');
Script Tag:
Add to your HTML:

<script src="https://cdn.lr-ingest.com/LogRocket.min.js"></script>
<script>window.LogRocket && window.LogRocket.init('app/id');</script>
3.(Optional) Install plugins for deeper integrations with your stack:
- Redux middleware
- ngrx middleware
- Vuex plugin


Top comments (0)