Introduction Displaying charts in mobile apps has always been a great way to offer users a clear overview of numerical data. I want this task to be as easy as writing a few lines of code, but I couldn't find a straightforward way to achieve this. This is why I started exploring SkiaSharp and created Microcharts.
NuGet Package : Xamarin.Forms = search "Microcharts.Forms"
This simple plugin can display Microcharts in Xamarin.Forms.

Available charts Microcharts.Forms Plugin
- Barchart
- PointChart
- LineChart
- DonutChart
- RadialGaugeChart
- RadarChart
Chart Types
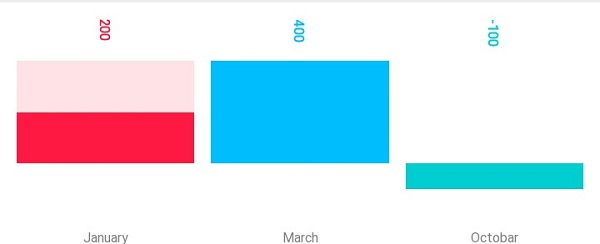
BarChart
Chartview.Chart = new BarChart(){Entries = entries};
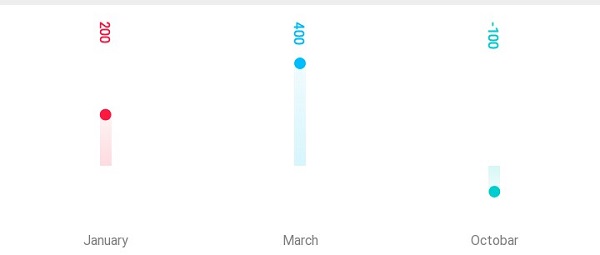
PointChart
Chartview.Chart = new PointChart(){Entries = entries};
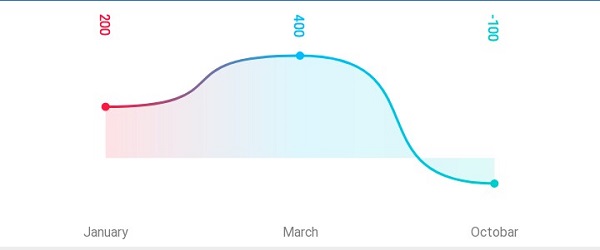
LineChart
Chartview.Chart = new LineChart(){Entries = entries};
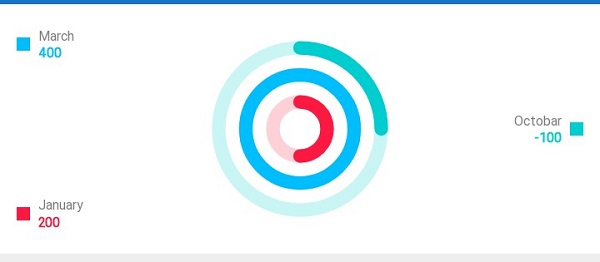
DonutChart
Chartview.Chart = new DonutChart(){Entries = entries};

RadialGaugeChart
Chartview.Chart = new RadialGaugeChart(){Entries = entries};
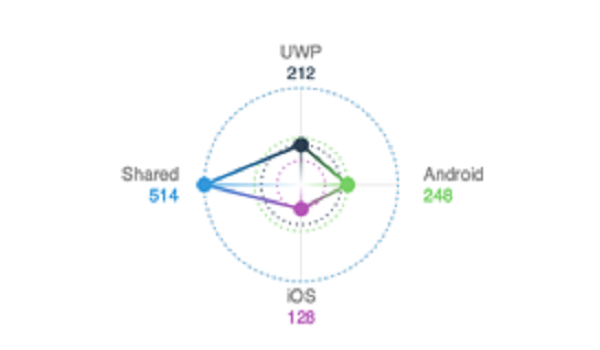
RadarChart
Chartview.Chart = new RadartChart(){Entries = entries};
Step 1 You can create Xamarin.Forms app by going to File >> New >> Visual C# >> Cross Platform >> Cross Platform App (Xamarin.Native or Xamarin.Forms), give the application name and press OK.
(Project name: MicrochartsApp)
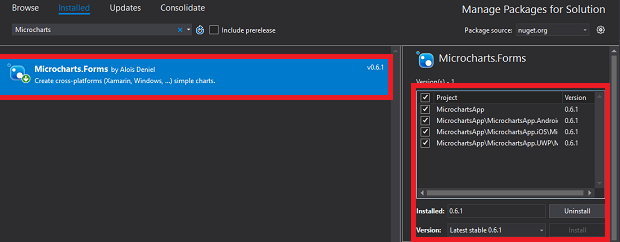
Step 2 Now, add the following NuGet Package for your projects.
- Microcharts.Forms
For that, go to Solution Explorer and select your solution. Right-click and select "Manage NuGet Packages for the Solution". Now, select the following NuGet Package, select your project, and install it.
- Microcharts.Forms
Step 3
To display a chart, we'll need to host it in a ChartView.
After installing NuGet packages, add a ChartView control to your project. For that, go to Solution Explorer \>\> MicrochartsApp(PCL) \>\>\> Double-click on MainPage.xaml. After opening this, you can add assembly and XAML code to your project. Here is the code for this page.
Assembly
- xmlns:forms="clr-namespace:Microcharts.Forms;assembly=Microcharts.Forms"
XAML code
- <?xml version="1.0" encoding="utf-8" ?>
- <ContentPage xmlns="http://xamarin.com/schemas/2014/forms"
- xmlns:x="http://schemas.microsoft.com/winfx/2009/xaml"
- xmlns:local="clr-namespace:MicrochartsApp"
- x:Class="MicrochartsApp.MainPage"
- xmlns:forms="clr-namespace:Microcharts.Forms;assembly=Microcharts.Forms">
- <ScrollView>
- <StackLayout Orientation="Vertical">
- <forms:ChartView x:Name="Chart1"
- HeightRequest="150"/>
- <forms:ChartView x:Name="Chart2" HeightRequest="150" />
- <forms:ChartView x:Name="Chart3"
- HeightRequest="150"/>
- <forms:ChartView x:Name="Chart4"
- HeightRequest="150"/>
- <forms:ChartView x:Name="Chart5"
- HeightRequest="150"/>
- <forms:ChartView x:Name="Chart6" HeightRequest="160"/>
- </StackLayout>
- </ScrollView>
- </ContentPage>
Step 4 In this step, add data entries. For that, open Solution Explorer >> MicrochartsApp(PCL) >>click open MainPage.xaml.cs. This class code is given below.
Every chart displays via Microcharts and consumes a set of data entries. They will always have the same structure regardless of the chart type that you want to display.
Each entry
- Floating number representing it's value is required.
- Label - what your entry is associated with.
- ValueLabel - format your value
- Color - entry
- using Microcharts;
- using SkiaSharp;
- using Microcharts.Forms;
- using System;
- using System.Collections.Generic;
- using System.Linq;
- using System.Text;
- using System.Threading.Tasks;
- using Xamarin.Forms;
- using Entry = Microcharts.Entry;
- namespace MicrochartsApp
- {
- public partial class MainPage : ContentPage
- {
- List<Entry> entries = new List<Entry>
- {
- new Entry(200)
- {
- Color=SKColor.Parse("#FF1943"),
- Label ="January",
- ValueLabel = "200"
- },
- new Entry(400)
- {
- Color = SKColor.Parse("00BFFF"),
- Label = "March",
- ValueLabel = "400"
- },
- new Entry(-100)
- {
- Color = SKColor.Parse("#00CED1"),
- Label = "Octobar",
- ValueLabel = "-100"
- },
- };
- public MainPage()
- {
- InitializeComponent();
- Chart1.Chart = new RadialGaugeChart() { Entries = entries };
- Chart2.Chart = new LineChart() { Entries = entries };
- Chart3.Chart = new DonutChart() { Entries = entries };
- Chart4.Chart = new BarChart() { Entries = entries };
- Chart5.Chart = new PointChart() { Entries = entries };
- //Chart6.Chart = new RadarChart() { Entries = entries };
- }
- }
- }
Step 5
Now, go to "Build" menu and configure your startup project. After configuring, run your project. You will have the result like below.
Finally, we have successfully created Xamarin.Forms Microcharts application.

Top comments (0)