Hello and welcome back to 3rd article of The DevOps Series with Buddy!
In the previous articles, Introduction to DevOps and Managing Team and Roles, we have explored the following concepts:
- What is DevOps?
- What is CI/CD?
- What is a pipeline?
- What are the DevOps Team Structures and Roles?
- How do we manage roles and permissions in Buddy?
For this article, we shall discuss another important concept in DevOps: Automation
Automation in DevOps is Crucial. Here's Why.
Previously in the Introduction to DevOps article, I have explained what a CI/CD Pipeline is. To recap, it is essentially a fully automated and efficient pipeline to continuously test and deliver high-quality products to the user.
Automation in the pipeline can help developers perform tests more frequently without much manual labour and time. It helps speed up communication as well to have automated notifications sent to the team when there is an error or bug fixed in the pipeline.
Having automation is crucial for DevOps because it achieves the following:
- Continuous integration
- Continuous testing
- Continuous monitoring
- Continuous deployment
- Continuous delivery
'Continuous' is a keyword here. It means little to no time is wasted on having to do these tasks manually and that it is routinely performed.
All key processes in the workflow are streamlined and optimized.
With automation, a single push to a code branch can trigger the pipeline to process all its actions automatically. Then, in the event of an error, it will immediately notify team members for instant monitoring and debugging.
Implementing Automated Notifications with Buddy
Buddy CI/CD allows you to add notification actions into your CI/CD pipeline in the simplest way! If you haven't created a Buddy account, go to buddy.works to set up an account.
Read the first article to learn more on how to get started with Buddy.
Step 1: Add an Action
Go to your Pipeline > Actions just like the image below:
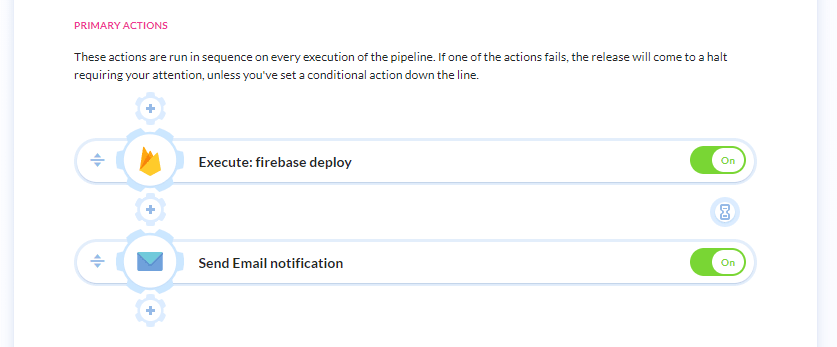
Then, click on the '+' icon under Primary Actions to add a new action before or after an action. In my case, I will add the notification action after the 'firebase deploy' action.
Note: The sequence of actions the pipeline will execute in top-down order.
Step 2: Select a Notification Action
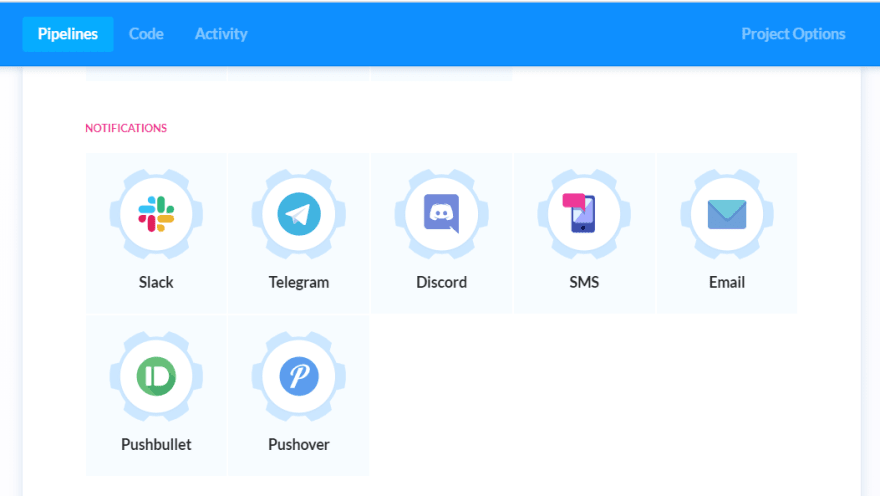
Scroll down to Notification section and select the communication medium your team uses. As seen in the image below, Buddy conveniently provides common channels like Slack and Discord while also providing traditional forms of communication like SMS and email.
For this example, I shall add an Email notification action to my pipeline.
Step 3: Configure Notification
Now we can set up our notification. For an email, we can configure the Sender, Subject, Email Body and Recipients.
By default, the Sender is Buddy and Subject is the pipeline's name and execution ID, represented using Buddy's Environment Variables.
After configuring the details, don't forget to save the action and it will show up in your pipeline like so:
About Environment Variables
In Buddy, environment variables (or ENV VARs) are key-value pairs that can be used in pipelines without manually updating their values. Upon every pipeline execution, Buddy will automatically populate ENV VARs with their respective values. This saves plenty of time for developers, reduce human errors and risks of having sensitive information revealed.
For example, in our Email Notification, our Subject contains 2 ENV VARs: $BUDDY_PIPELINE_NAME and $BUDDY_EXECUTION_ID, which represents the pipeline name and ID.
More examples of these variables in Buddy are:
For more information, visit the Environment Variables page at Buddy.
Step 4: Run Pipeline
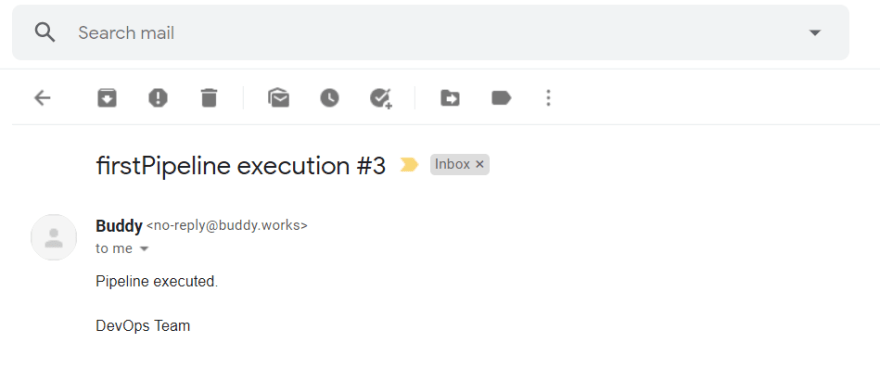
Now we can test if the notification action is working by running the pipeline! If there are no errors, we should see the following email in our inbox:
Cool! We have implemented our notification action successfully. Every time we run the pipeline, this email would be sent to the specified recipient emails. This is helpful for team members to monitor pipeline executions in the project.
Conditional Notifications
To take it a step further, we can have notification actions that only run when there is an error in the pipeline.
To do this, simply add the same Email notification action under the 'Actions Run on Failure' section, below 'Primary Actions'.
Then set the Subject and Email Body to indicate that this is an error notifying email. We can add the environment variable $BUDDY_FAILED_ACTION_LOGS to the Email Body to automatically include the error logs in the email. It is a very helpful feature for efficient team communication and progress monitoring!
More conditional notifications can be set under the 'Condition' tab of the action. These conditions include:
- Changes in the repository since last execution
- Changes to specific paths in the repository since last execution
- If an environment variable has a specific value
- A specified date and time
- A specified pipeline pass with the same revision
Implementing Automated Testing with Buddy
Now that we have implemented automated notifications in our pipeline, let's include an automated testing action too!
Buddy's Testing Actions
What makes Buddy exceptional at automation is its wide variety of testing tools that includes:
For more information of Unit Testing with Mocha and Chai, you may read my article on the topic here.
Step 1: Add an Action
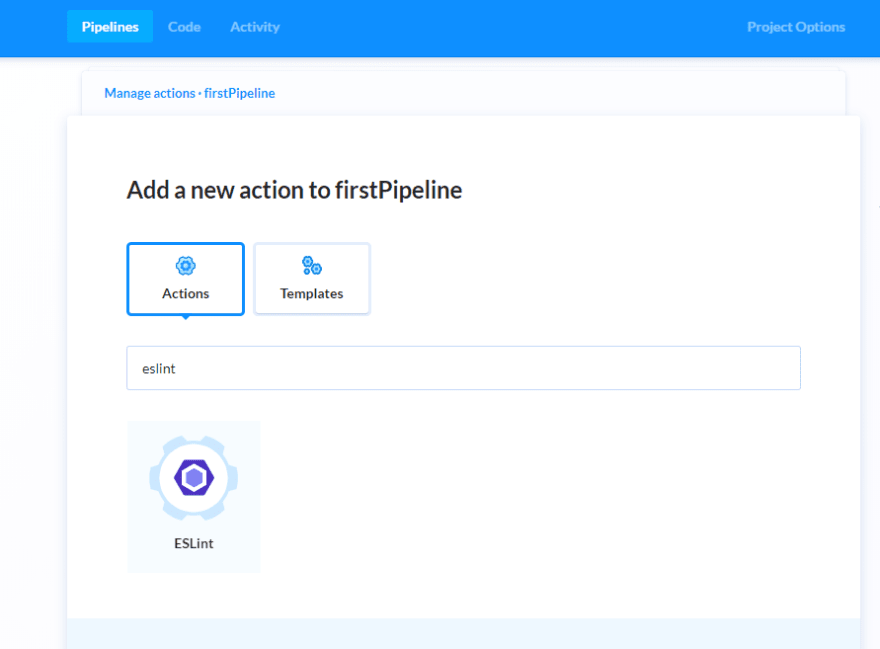
Same as before, go to your Pipeline > Actions and add a new action by clicking the '+' icon before or after an action.
For my example, I'm adding an ESLint action to test and fix any JavaScript code violations before deploying my app to Firebase. I will show you how to use more testing tools with Buddy in the future articles of this series.
Step 2: Configure Action
For this ESLint action, I'm keeping the settings to their default values.
Click 'Add this action' and it will be added to the pipeline.
For more details on each settings in the ESLint action, read the documentation here.
Here's an overview of our pipeline and its actions:
Step 3: Run Pipeline
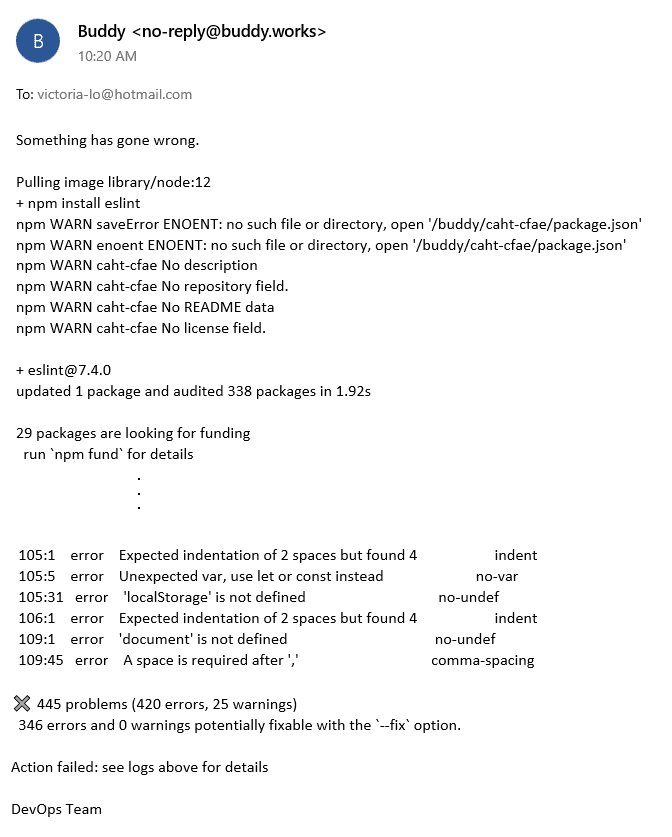
Now let's try running the pipeline to check for errors in our code with our newly added ESLint action. Unfortunately, it looks like my code do have some errors so the pipeline will immediately stop running and send the error notification email under the conditional execution.
Here's what I found in my inbox:
As seen in my example, my code has a lot of errors and so the conditional email notification we implemented earlier will be sent to notify the team member that an error has occurred in the pipeline. It's all automatic and very convenient!
Next Steps
Congratulations! You have learned how automation is crucial for DevOps and how it can be implemented. This simple example serves to demonstrate the simplicity and flexibility of how Buddy CI/CD can easily implement notifications and testing into your pipeline. I hope this article has been helpful in introducing the types of automation processes (i.e. notification and testing) that can integrated into your CI/CD pipeline.
Of course, there are countless useful actions you can add to further automate your pipeline. I'll write more testing actions in future articles so stay tuned! Please visit buddy.works or read their documentation here to learn more.
In the next few articles of this series, I'll be showing you how to implement more automated testing and how to deploy your apps on various platforms like heroku and Netlify! Till next time, cheers!









Top comments (0)