With React, there are many ways that you can build forms. The simplest way that I found is by React Hook Forms. In this article, I'll show you how to create and build a React form easily with React Hook Forms.
Step 1: Build the Form
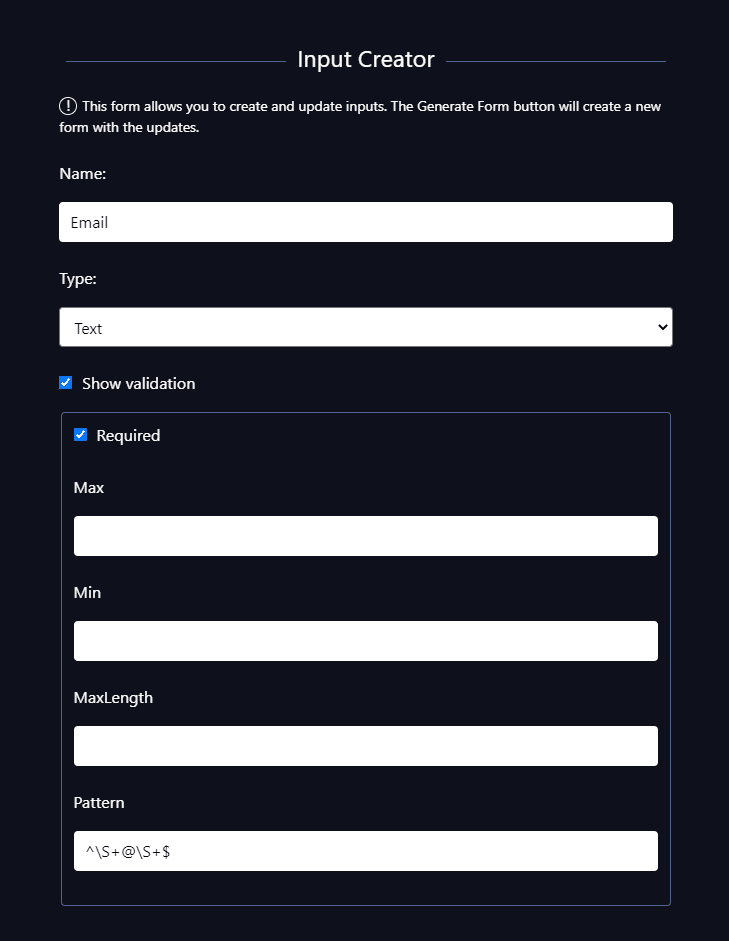
React Hook Forms provides a tool for you to easily create your forms. Then you can copy the code snippet generated for your form and paste it to your project. Head to the Builder to build your own form.
Add Optional Details
In the Builder, you can also customize the input attributes such as if it is required or its max length. Again, the code will be automatically generated so it's very convenient.
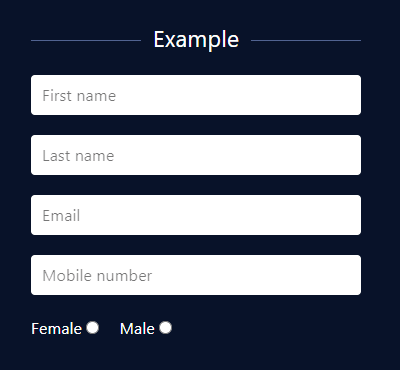
Once you have built your form, you can click 'Generate Form' to see what it looks like. Here's my example:
Step 2: Paste the Code
First, run npm install react-hook-form in your project.
Now that you've generated your form, simply paste it to your project file. For my example, I'll paste it into App.js.
import React from 'react';
import { useForm } from 'react-hook-form';

export default function App() {
  const { register, handleSubmit, errors } = useForm();
  const onSubmit = data => console.log(data);
  console.log(errors);

  return (
    <form onSubmit={handleSubmit(onSubmit)}>
      <input type="text" placeholder="First name" name="First name" ref={register({required: true, maxLength: 80})} />
      <input type="text" placeholder="Last name" name="Last name" ref={register({required: true, maxLength: 100})} />
      <input type="text" placeholder="Email" name="Email" ref={register({required: true, pattern: /^\S+@\S+$/i})} />
      <input type="tel" placeholder="Mobile number" name="Mobile number" ref={register({required: true, minLength: 6, maxLength: 12})} />

      <input name="Gender" type="radio" value="Female" ref={register({ required: true })}/>
      <input name="Gender" type="radio" value="Male" ref={register({ required: true })}/>

      <input type="submit" />
    </form>
  );
}
Step 3: Submit Form
The form is now in our app. All we need to do is to take care of what happens when a user submits the form. To do this, we need to add some code to the onSubmit function.
Currently, the onSubmit code generated for us only returns console.log(data) where data contains the user's submitted form data in JSON format like:
// sample data object
{
  "First name": "Victoria",
  "Last name": "Lo",
  "Email": "victoria@example.com",
  "Mobile number": "9999999999",
  "Gender": "Female"
}
Let's say we want to take this data and POST it to our database.
Our onSubmit function will be as follows:
const onSubmit = data =>{
      //create requestOptions to prepare for post
      const requestOptions = {
        method: "POST",
        headers: { "Content-Type": "application/json" },
        body: JSON.stringify(data), //send the form data
      };

      //post form data to database or something
      fetch(someURL, requestOptions)
      .then(doSomething);
}
And done!
And that's how you can create a form easily with React! It's good to use the Builder tool to create forms fast but I do encourage you to read the documentation more in detail to understand how it works and include more advanced options on your own. Thanks for reading this quick tutorial. I hope you find it helpful! Please feel free to ask any questions in the comments below. Cheers!


Top comments (0)