Originally posted on blog.abhishekprakash.com
Motivation
Few weeks back I tried to create a browser extension as a lab's day project. The idea was to ease the development experience, like filling up a long form for testing purpose or add/remove features without changing the user. Although I was not able to complete it in two day's time, but I gained some insight which may help folks who are new to it.
Problem Statement
I am an Indian living in Sweden and I own USD, SEK (Swedish Krona) and INR (Indian Rupee) and I very often look for the exchange rate. I find it very frustrating to open a new tab to look for the rate. Can we do something about it?
Solution
Sure, we can!
We can create a Currency Converter extension and add it to Chrome and Firefox (I am mostly on Chrome, but use Firefox as a secondary browser). In this case we don't have to open a new tab and google for current rate.
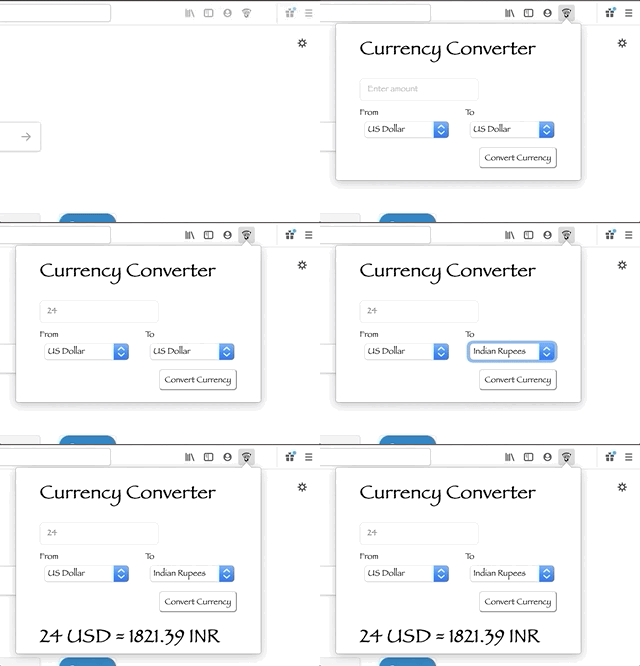
Here is a glimpse of what we are going to build
Why Browser Extension
My sole purpose was to ease the developer/tester experience by providing an extra interface to tweak the behaviour of the application, but there are a lot of interesting things that can be done with browser extensions. But before coming to benefits, let's see what are browser extensions.
What are Browser Extension
An extension adds features and functions to a browser. It’s created using familiar web-based technologies—HTML, CSS, and JavaScript and has its own set of APIs. This means it can leverage all the existing APIs and has access to all new Extension APIs. A great power boost.
Benefits
We can get creative and achieve following.
- Enhance or complement a website
- Add theme to all websites a user visits
- Add/Remove content from web page (AdBlocker)
- Add tools and new browsing features
- Games
- Development Tools
Browser Extension Architecture
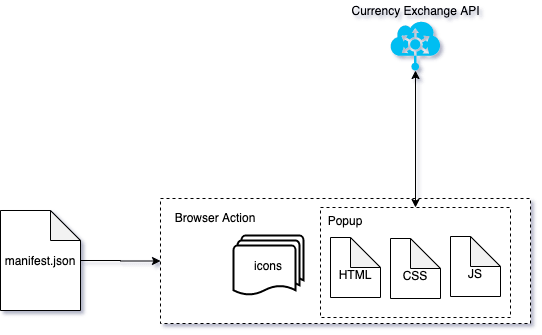
Here's what we will achieve
manifest.json is the heart of our extension. It contains basic metadata such as its name, version and the permissions it requires. It also provides pointers to other files in the extension. In our addon, the manifest file points to a browser action.
The browser action consists of icons and JavaScript, HTML and CSS files.
The Popup or our addon makes a call to the currency exchange endpoint and retrieves the information related to current rate.
Let's dive in
This is our folder structure (not very fancy)
|-- currency-converter
|   |-- manifest.json
|   |-- icons
|   |   |-- currency-32.png
|   |   |-- currency-48.png
|   |-- popup
|   |   |-- currency-converter.html
|   |   |-- currency-converter.js
|   |   |-- currency-converter.css
Manifest File
Every extension has a manifest.json file and so does ours (:)) with below content
{
  "manifest_version": 2,
  "name": "Currency Converter",
  "version": "1.0",

  "description": "Adds a browser action icon to the toolbar, to convert the currency.",
  "icons": {
    "48": "icons/currency-48.png"
  },

  "permissions": [],

  "browser_action": {
    "default_icon": "icons/currency-32.png",
    "default_title": "Currency Converter",
    "default_popup": "popup/currency-converter.html"
  }
}
Most of the keys in the manifest.json file are self explanatory. browser_action points to the html file that will be rendered when the currency converter icon is pressed.
The icons will be used to represent the extension in components such as the Add-ons Manager.
Popup HTML
Next we will create popup/currency-converter.html. This will add markup to the popup and point to css file for styling and js file for adding behaviour.
We are only targeting
- USD (US Dollars)
- INR (Indian Rupee)
- SEK (Swedish Krona)
- GBP (Great British Pound)
But, this could be extended to add more currencies. Below markup is very crude (for the sake of this tutorial) and not very scalable.
<!DOCTYPE html>
<html lang="en">
  <head>
    <meta charset="UTF-8" />
    <link rel="stylesheet" href="currency-converter.css" />
  </head>
  <body>
    <h1>Currency Converter</h1>
    <div>
      <input type="text" placeholder="Enter amount" />
    </div>
    <div class="flex">
      <label for="from-dd">From
        <select name="from" id="from-dd">
          <option value="USD">US Dollar</option>
          <option value="INR">Indian Rupees</option>
          <option value="SEK">Swedish Korona</option>
          <option value="GBP">British Pound</option>
        </select>
      </label>
      <label for="to-dd">To
        <select name="to" id="to-dd">
          <option value="USD">US Dollar</option>
          <option value="INR">Indian Rupees</option>
          <option value="SEK">Swedish Korona</option>
          <option value="GBP">British Pound</option>
        </select>
      </label>
    </div>
    <button class="btn_currency">Convert Currency</button>
    <h2 class="response"></h2>
    <script src="currency-converter.js"></script>
  </body>
</html>
Popup CSS
Next create popup/currency-converter.css file and add below styles for basic styling. Its very basic styling and very straight forward.
html,
body {
  box-sizing: content-box;
  margin: 0 20px;
  display: flex;
  flex-direction: column;
  font-family: fantasy, cursive, Arial, Helvetica, sans-serif;
}

.hidden {
  display: none;
}

.flex {
  display: flex;
}

input[type="text"] {
  background: transparent;
  border-radius: 6px;
  border: 1px solid #dfe1e5;
  color: #70757a !important;
  font-size: 14px !important;
  height: 36px;
  padding: 0 0 0 12px;
  margin-bottom: 10px;
  font-family: inherit;
}

select {
  height: 36px;
  font-size: inherit;
  width: 150px;
  margin-left: 5px;
  font-family: inherit;
}

label {
  margin-right: 10px;
  font-size: 14px !important;
}

label:last-child {
  margin-right: 0;
  margin-left: auto;
}

button {
  height: 36px;
  border-radius: 6px;
  margin-top: 10px;
  display: flex;
  margin-left: auto;
  font-size: 14px;
  margin-bottom: 20px;
  font-family: inherit;
  cursor: pointer;
  line-height: 36px;
  background: white;
}

.response {
  font-size: 2em;
  margin: 0;
}
Popup Js
Last in the line is the popup/currency-converter.js which adds interactivity to the popup. Fetches the latest currencies from https://api.exchangeratesapi.io and calculates the converted amount.
const btn = document.querySelector(".btn_currency");
const fromCurrencyDD = document.querySelector("#from-dd");
const toCurrencyDD = document.querySelector("#to-dd");
const amoutText = document.querySelector('input[type="text"]');
btn.addEventListener("click", fetchCurrency);

function fetchCurrency() {
  const fromCurrency = fromCurrencyDD.value;
  const toCurrency = toCurrencyDD.value;
  fetch(`https://api.exchangeratesapi.io/latest?base=${fromCurrency}&symbols=${fromCurrency},${toCurrency}`)
    .then(res => res.json())
    .then(res => addCurrencyVal(res));
}

function addCurrencyVal(data) {
  console.log(data);
  const responseDiv = document.querySelector(".response");
  const baseAmount = Number(amoutText.value);
  const response = `${baseAmount} ${data.base} = ${(
    baseAmount * data.rates[toCurrencyDD.value]
  ).toFixed(2)} ${toCurrencyDD.value}`;
  responseDiv.textContent = response;
}
Phew!! That was dead simple. This is very similar to a web application with an addon of manifest.json.
Now, how do we test it?
Test web extension
The above extension can be run on both Chrome and Firefox. But, if you are working on a more complex extension there can be situations where its not cross browser compatible. There is an awesome webextension polyfill, thanks to Mozilla.
Chrome
Follow below steps to run the extension on Chrome
- Open
Chromeand navigate tochrome://extensions/. - Enable the
Developer Mode(on the right side). - Click on
Load Unpackedand navigate to the root of web extension build folder (in our case its `currency-converter) and then select.
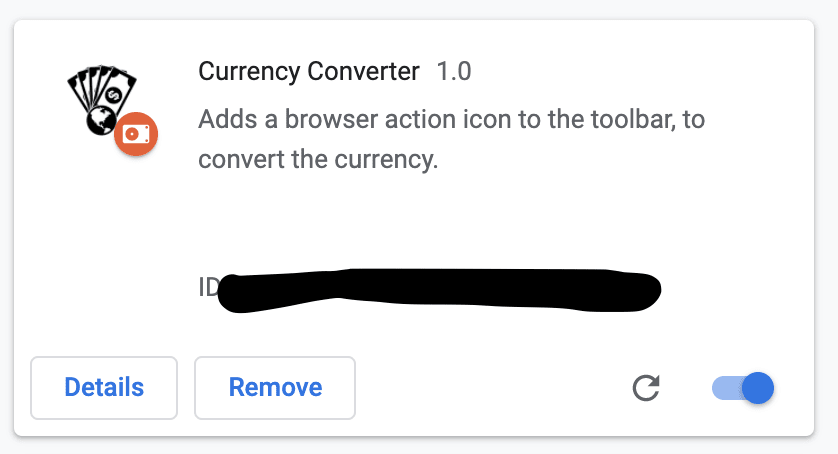
Voila! You should be able to see the extension in the list of extensions.
Whenever the code is updated the extension needs to be reloaded
Firefox
Follow below steps to run the extension on Mozilla
- Open
Firefoxand navigate toabout:debugging. - Click on
This Firefoxon the left hand side. - Click on
Load Temporary Add-on - Navigate to the manifest file (in our case
currency-converter/manifest.json) and select.
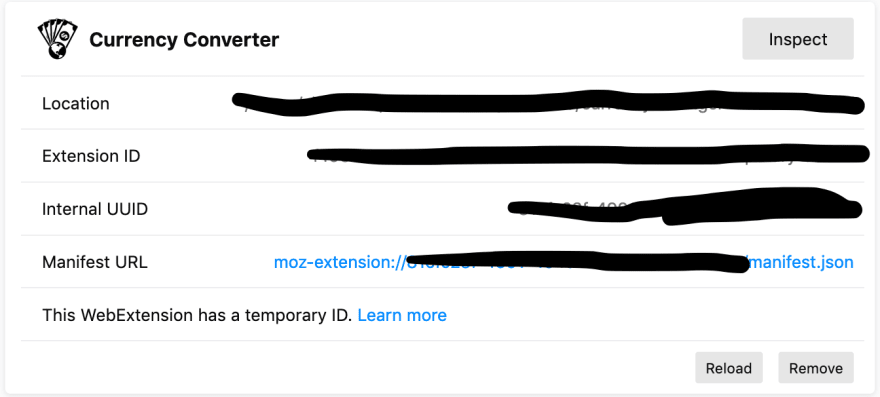
And the extension should be available by now.
Conclusion
By using web technologies we are able to build our own extension.
This is a very basic example, but its enough to move in right direction and create something more complex in nature.
Want to learn more?
When I started working on extension, I was going through Chrome extension documentation, and it was such a pain. I would recommend any one and everyone to start going through MDN docs.
Peace!
If you have any questions or feedback, please feel free to comment below.


Top comments (0)