Today, I bring a simple way to build a VPN you can use yourself using Microsoft Azure and OpenVPN.
There are many ways to use a VPN, my mum is a university professor and she often needs to use Google Scholar as a tool, but it is very difficult to use Google services where she works. So I decided to learn and build a VPN for her to use.
Microsoft Azure has a student discount that gives a $100 limit to set up a virtual machine.
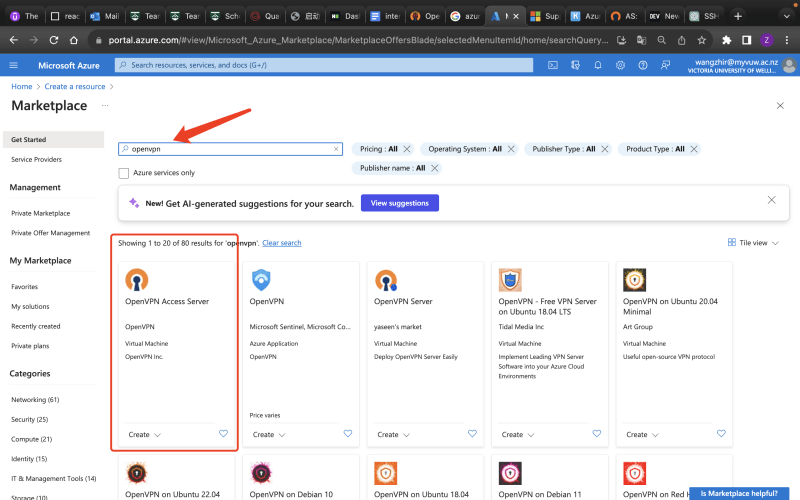
Firstly, search for 'OpenVPN' in Create Resource, select 'OpenVPN Access Server' and create it.

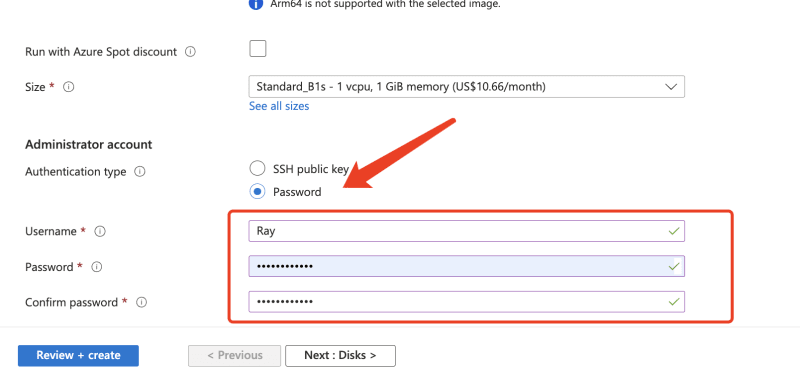
In the Administrator account choose a password as our way to connect to the server, set your username and password, and make sure you remember the password you set. Then you can just click Review + Create. Check your settings are correct then create your virtual machine and wait for Azure to do the set-up.

Note that!
Azure only provides 3 public IP addresses for Education Offer users, so if you've created more than 3 before, please don't click Create directly here, and consider whether you need to delete public IPs that you no longer use to assign to your VPN server.
After checking that there are no problems with the settings, remember the username and the set password and create that server. When Azure finishes the process go to 'resource' and you can see our static IP address, connect via ssh with the username we just used.
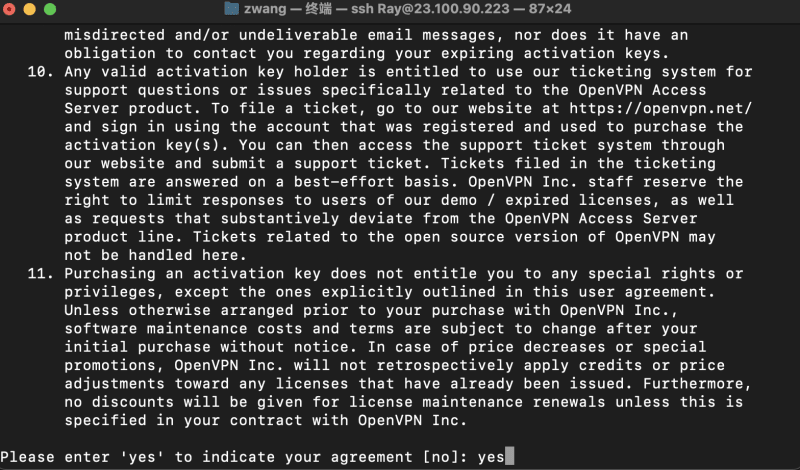
When the connection is successful, it will display 'Are you sure you want to continue the connection', enter yes.
After that, it will show agreements, so we will enter yes again.
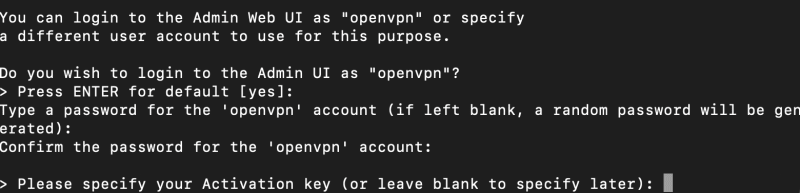
Most of the subsequent settings are selected as default, later there is a setting that will ask you if you want to use 'openvpn' as the default Web UI user account, I choose the default here and set the password. You can also change it to your favourite username and password. I left the Activation key blank.
Once OpenVPN is set up we can use the Web UI username and password we just set up after connecting to the server via ssh.
https://static IP address:943/admin
Open the browser and log in
The first time we login we need to agree to the Agreement, then we remember to go into the Network setting and change the IP address to our static IP address and in the DNS setting change it to "Have clients use specific DNS servers "
I have set the Primary DNS Server to 1.1.1.1.
The second DNS Server set to 1.0.0.1
After all the settings are done you have your own VPN and can add username and password in User Management. Users only need to use https://your IP address, and you can see the OpenVPN client download interface in your browser.

Top comments (0)