Hello, Today we will do working on some advance features of our blogging website that we made 2 week ago. I have added some advance features like -
- Google Authentication Login/Logout
- Dashboard
- User written blogs on dashboard
- Can read/edit/delete the blogs from the dashboard.
- Edit the blog from blog page itself.
- Storing/Displaying Author username.
So as this is a continuous part of previous one. I am using the previous code and file structure.
For demo, code tutorial with explanation and hosting on heroku. You can watch the video below.
Video Tutorial
Tutorial View Aim - If the Video tutorial hits 5K+ views I'll make tutorial on fully working e-commerce site including sellers page, product listing, placing order, paypal gateway, login/logout and much more.
So, without wasting more time let's see how to code this.
Code
So before starting make 4 files inside public folder.
dashboard.htmlcss/dashboard.cssjs/dashoboard.jsjs/nav.js
We need these 4 four files also.
So let's open server.js file and make /admin route.
app.get("/admin", (req, res) => {
    res.sendFile(path.join(initial_path, "dashboard.html"));
})
Thing to notice here is this route will not work if you add this route below /:blog route. Because /:blog means anything after single "/", so it will consider /admin as a blog. So to server dashboard. Make the route above the /:blog route.
Once the route is done. Let's make dashboard page.
In dashboard page, add this css stylesheet.
https://www.gstatic.com/firebasejs/ui/4.8.1/firebase-ui-auth.css
And this JS script
https://www.gstatic.com/firebasejs/ui/4.8.1/firebase-ui-auth.js
From where I got these links. These links are firebase pre built login UI. You can easily find them in the documentation.
After that link all the firebase CDN we were using last time. And make a copy of firestore CDN. And replace the firestore with auth for auth CDN.
And link home.css & dashboard.css file.
<head>
    <link type="text/css" rel="stylesheet" href="https://www.gstatic.com/firebasejs/ui/4.8.1/firebase-ui-auth.css" />
    <link rel="stylesheet" href="css/home.css">
    <link rel="stylesheet" href="css/dashboard.css">
</head>
<body>
    <script src="https://www.gstatic.com/firebasejs/8.9.1/firebase-app.js"></script>
    <script src="https://www.gstatic.com/firebasejs/8.9.1/firebase-firestore.js"></script>
    <script src="https://www.gstatic.com/firebasejs/ui/4.8.1/firebase-ui-auth.js"></script>
    <script src="https://www.gstatic.com/firebasejs/8.10.0/firebase-auth.js"></script>

    <script src="js/firebase.js"></script>
    <script src="js/dashboard.js"></script>
    <script src="js/nav.js"></script>

</body>
You can watch tutorial for better understanding.
Now let's make a login feature. For that
Dashboard.html
<!-- login -->
<div class="login">
    <div id="loginUI"></div>
</div>
Dashboard.css
body{
    background: #ececec;
}

.login{
    position: fixed;
    top: 0;
    left: 0;
    width: 100%;
    height: 100vh;
    display: flex;
    justify-content: center;
    align-items: center;
    z-index: 99;
    background: #fff;
}

/* login hover effect */

.firebaseui-idp-button:hover{
    background: #000 !important;
}

.firebaseui-idp-button:hover .firebaseui-idp-text{
    color: #fff !important;
    transition: .5s;
}
Before going to dashboard.js make sure you do this in firebase.js
let auth = firebase.auth();
dashboard.js
let ui = new firebaseui.auth.AuthUI(auth);
let login = document.querySelector('.login');

auth.onAuthStateChanged((user) => {
    if(user){
        login.style.display = "none";
        getUserWrittenBlogs();
    } else{
        setupLoginButton();
    }
})

const setupLoginButton = () => {
    ui.start("#loginUI", {
        callbacks: {
            signInSuccessWithAuthResult: function(authResult, redirectURL) {
                location.reload();
                return false;
            }
        },
        signInFlow: "popup",
        signInOptions: [firebase.auth.GoogleAuthProvider.PROVIDER_ID]
    })
}
Our Login feature is done.

So, after that let's make a navbar for the dashboard and blog cards.
These elements will be the same as we have home page. So just copy them from there.
<nav class="navbar">
    <img src="img/logo.png" class="logo" alt="">
    <ul class="links-container">
        <li class="link-item"><a href="/" class="link">home</a></li>
        <li class="link-item"><a href="/editor" class="link">editor</a></li>
    </ul>
</nav><!-- dashboard -->
<h1 class="heading">your blogs</h1>

<!-- blog section -->
<section class="blogs-section">
    <div class="blog-card">
        <img src="img/header.png" class="blog-image" alt="">
        <h1 class="blog-title">Lorem ipsum dolor sit amet consectetur.</h1>
        <p class="blog-overview">Lorem ipsum dolor sit amet consectetur adipisicing elit. Sunt incidunt fugiat quos porro repellat harum. Adipisci tempora corporis rem cum.</p>
        <a href="/" class="btn dark">read</a>
        <a href="/" class="btn grey">edit</a>
        <a href="/" class="btn danger">delete</a>
    </div>
</section>
You can see some extra elements that we don't have in home section blog. For that give these styles.
.heading{
    color: rgba(0, 0, 0, 0.5);
    font-size: 60px;
    text-align: center;
    position: relative;
    margin: 100px 0 20px;
}

.btn.grey{
    background: #c5c5c5;
    color: #000;
    margin: 0 10px;
}

.btn.danger{
    background: #f00;
    color: #fff;
}
Output

You can comment the blog card now.
Now let's make navbar dynamic links. For this open nav.js and code this.
const ul = document.querySelector('.links-container');

auth.onAuthStateChanged((user) => {
    if (user) {
        ul.innerHTML += `
        <li class="link-item"><a href="/admin" class="link">Dashboard</a></li>
        <li class="link-item"><a href="#" onclick="logoutUser()" class="link">Logout</a></li>
        `
    } else {
        ul.innerHTML += `
        <li class="link-item"><a href="/admin" class="link">Login</a></li>
        `
    }
});
Just add nav.js and firebase-auth CDN. All of your pages.
Output

If you see the above code you'll see logout function. So, let's create that. Create this inside firebase.js
const logoutUser = () => {
    auth.signOut();
    location.reload();
}
Now our login/logout is done with dynamic links. Let's save/retrieve the author to database now.
Open editor.js and first check for user is logged in or not.
auth.onAuthStateChanged((user) => {
    if (!user) {
        location.replace('/admin');
    }
});
Then change the previous code like this.
db.collection("blogs").doc(docName).set({
            title: blogTitleField.value,
            article: articleFeild.value,
            bannerImage: bannerPath,
            publishedAt: `${date.getDate()} ${months[date.getMonth()]} ${date.getFullYear()}`, // till here we made in last blog
            author: auth.currentUser.email.split('@')[0]
        })
This way we can add author to the database. Now show the author on blog page.
For that open blog.js and add this inside setupBlog function after setting up the publishedAt element. Like this.
publish.innerHTML += data.publishedAt;
publish.innerHTML += ` -- ${data.author}`;
Output

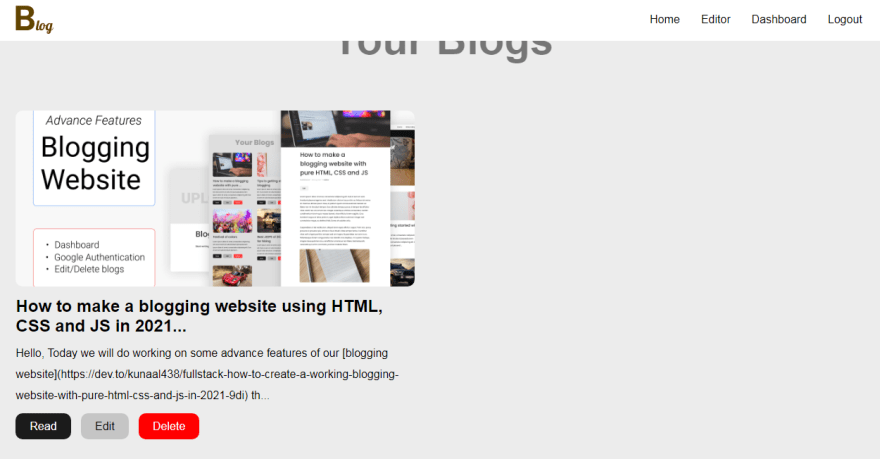
Great! We are 50% done. Now let's fetch/make blog cards in dashboard. Open dashboard.js
// fetch user
const getUserWrittenBlogs = () => {
    db.collection("blogs").where("author", "==", auth.currentUser.email.split('@')[0])
    .get()
    .then((blogs) => {
        blogs.forEach((blog) => {
            createBlog(blog);
        });
    })
    .catch((error) => {
        console.log("Error getting documents: ", error);
    });
}

const createBlog = (blog) => {
    let data = blog.data();
    blogSection.innerHTML += `
    <div class="blog-card">
        <img src="${data.bannerImage}" class="blog-image" alt="">
        <h1 class="blog-title">${data.title.substring(0, 100) + '...'}</h1>
        <p class="blog-overview">${data.article.substring(0, 200) + '...'}</p>
        <a href="/${blog.id}" class="btn dark">read</a>
        <a href="/${blog.id}/editor" class="btn grey">edit</a>
        <a href="#" onclick="deleteBlog('${blog.id}')" class="btn danger">delete</a>
    </div>
    `;
}

const deleteBlog = (id) => {
    db.collection("blogs").doc(id).delete().then(() => {
        location.reload();
    }).catch((error) => {
        console.error("Error removing document: ", error);
    });
}
By this we are now getting user written blogs and able to delete them as well.
Output
Now let's edit button on blog page. Add this button after published element.
<a class="btn" id="edit-blog-btn" href="">edit blog</a>
And style this.
blog.css
#edit-blog-btn{
    background: rgba(0, 0, 0, 0.2);
    display: none;
}
I found some styles issue when I was developing it. So, I recommend you give these style to these elements also.
blog.css
.article *{
    word-break: break-word;
}
home.css
.blogs-section{
    word-break: break-word;
}
And now make edit button visible when the author visiting the page.
blog.js
try{
    if(data.author == auth.currentUser.email.split('@')[0]){
        let editBtn = document.getElementById('edit-blog-btn');
        editBtn.style.display = 'inline';
        editBtn.href = `${blogId}/editor`;
    }
} catch{
    // nothing
}
Add this after publish.innerHTML += -- ${data.author}; in setupBlog function. Why we are using try here because if you don't use that it will give error when no one is log in.
Now everything is done. The last thing make blog edit. Open server.js and make route for editing existing blog.
app.get("/:blog/editor", (req, res) => {
    res.sendFile(path.join(initial_path, "editor.html"));
})
After this is you open the route. You'll see the editor page but it will have no styles on it and no images. Why is that? I don;t know really but I know to fix it. If you know what we call this scenario in JS let me know in discussions.
To fix that open editor.html file. And add ../ before every link. Each and every link. After that your file should look like this.
<head>
    <meta charset="UTF-8">
    <meta http-equiv="X-UA-Compatible" content="IE=edge">
    <meta name="viewport" content="width=device-width, initial-scale=1.0">
    <title>Blog : Editor</title>

    <link rel="stylesheet" href="../css/home.css">
    <link rel="stylesheet" href="../css/editor.css">

</head>
<body>

    <div class="banner">
        <input type="file" accept="image/*" id="banner-upload" hidden>
        <label for="banner-upload" class="banner-upload-btn"><img src="../img/upload.png" alt="upload banner"></label>
    </div>

    <div class="blog">
        <textarea type="text" class="title" placeholder="Blog title..."></textarea>
        <textarea type="text" class="article" placeholder="Start writing here..."></textarea>
    </div>

    <div class="blog-options">
        <button class="btn dark publish-btn">publish</button>
        <input type="file" accept="image/*" id="image-upload" hidden>
        <label for="image-upload" class="btn grey upload-btn">Upload Image</label>
    </div>

    <script src="https://www.gstatic.com/firebasejs/8.9.1/firebase-app.js"></script>
    <script src="https://www.gstatic.com/firebasejs/8.9.1/firebase-firestore.js"></script>
    <script src="https://www.gstatic.com/firebasejs/8.10.0/firebase-auth.js"></script>

    <script src="../js/firebase.js"></script>
    <script src="../js/editor.js"></script>

</body>
Now it'll work. Great! Now let's setup the blog values and make edit functional.
editor.js
// already existing blog setup
let blogId = location.pathname.split("/");
blogId.shift(); // remove first item from the array because first item is empty

if(blogId[0] != 'editor'){
    // means we are in existing blog route
    let docRef = db.collection("blogs").doc(decodeURI(blogId[0]));
    docRef.get().then((doc) => {
        console.log(doc);
        if(doc.exists){
            let data = doc.data();
            bannerPath = data.bannerImage;
            banner.style.backgroundImage = `url(${bannerPath})`;
            blogTitleField.value = data.title;
            articleFeild.value = data.article;
        } else{
            location.replace("/");
        }
    })
}
So this will setup the text fields value. And we can edit them

Now inside the publishBtn click event. Change that like this.
if(articleFeild.value.length && blogTitleField.value.length){
    // generating id

    let docName;
    if(blogId[0] == 'editor'){
        let letters = 'abcdefghijklmnopqrstuvwxyz';
        let blogTitle = blogTitleField.value.split(" ").join("-");
        let id = '';
        for(let i = 0; i < 4; i++){
            id += letters[Math.floor(Math.random() * letters.length)];
        }
        docName = `${blogTitle}-${id}`;
    } else{
        docName = decodeURI(blogId[0]);
    }

    // setting up docName
    let date = new Date(); // for published at info

    //access firstore with db variable;
    db.collection("blogs").doc(docName).set({
        title: blogTitleField.value,
        article: articleFeild.value,
        bannerImage: bannerPath,
        publishedAt: `${date.getDate()} ${months[date.getMonth()]} ${date.getFullYear()}`,
        author: auth.currentUser.email.split('@')[0]
    })
    .then(() => {
        location.href = `/${docName}`;
    })
    .catch((err) => {
        console.error(err);
    })
}
This is the same as previous. Only docName value is changed here.
Output

So we are done. We have all the advance features. You can check this to host the website online.
You can get my all project's source code in just 5$ membership on patreon. Support my work for more awesome and amazing website. This is just a beginning.Source Code
I hope you understood each and everything. If you have doubt or I missed something let me know in the comments.
Articles you may find Useful
- Infinte CSS loader
- Best CSS Effect
- Wave Button Hover Effect
- Youtube API - Youtube Clone
- TMDB - Netflix Clone
I really appreciate if you can subscribe my youtube channel. I create awesome web contents.

Thanks For reading.


Top comments (1)
Please can you write about how we can add video to the blog
And will the image show if it is not in the image folder thanks