
In this article we will create “Contact Us” HTML form that is present on most of websites and integrate it with Jira Service Desk using Kumologica Designer flow running on AWS Lambda.
If you want to learn more about Kumologica, I would highly recommend you to check out the articles or subscribe on the youtube channel
Prerequisites
Jira Service Desk
If you don’t have access to Jira software or Jira Service Desk you can create free account. Once account has been created you will be given your site url (ends with atlassian.net) for your Jira Service Desk Instance.
Next Step is to create API Key. Navigate to: Settings icon (in the top right corner) > Atlassian account settings > Security (in the left panel) > Create and manage API tokens >Create API Token. Enter label for token and press Create, you will be presented API token. Copy it as you will need this token to authenticate from Kumologica flow.

We will be using General service desk (GSD) example project that has been created for us. The GSD is a project id that we will be using in Kumologica flow.
Building orchestration flow
Once we have access to Jira configured we can start building our Kumologica flow.
Create New Project
Open Kumologica Designer, click the Home button and choose Create New Kumologica Project. Enter name (for example jira-demo), select directory for project and switch Source into From Existing Flow …

Copy and Paste the following flow:
[{"id":"main.flow","type":"tab","label":"main","disabled":false,"info":""},{"id":"test.flow","type":"tab","label":"test","disabled":false,"info":""},{"id":"eacbb9ef.69d5c8","type":"EventListener","z":"main.flow","name":"POST /issue","eventSource":"api","dynamodbOperation":"","apiMethod":"post","apiUrl":"/issue","albMethod":"any","albUrl":"","bucketName":"","event":"s3:ObjectCreated:*","x":122.5,"y":140,"wires":[["dcdb6a8a.2ba208"]],"caname":"aws-event-handler","category":"aws"},{"id":"b5fc6ccd.17dd7","type":"EventListener-End","z":"main.flow","name":"Success","statusCode":"200","headers":{"Content-Type":"application/json"},"payload":"{}","x":502.5,"y":140,"wires":[],"caname":"eventlistenerend","category":"aws"},{"id":"3aa032bd.826cae","type":"TestCase","z":"test.flow","name":"Test POST /issue","selectedTargetNode":"eacbb9ef.69d5c8","payload":"{\n \"path\": \"/issue\",\n \"headers\": {\n \"Accept\": \"text/html,application/xhtml+xml,application/xml;q=0.9,image/webp,*/*;q=0.8\",\n \"Accept-Encoding\": \"gzip, deflate, lzma, sdch, br\",\n \"Accept-Language\": \"en-US,en;q=0.8\",\n \"CloudFront-Forwarded-Proto\": \"https\",\n \"CloudFront-Is-Desktop-Viewer\": \"true\",\n \"CloudFront-Is-Mobile-Viewer\": \"false\",\n \"CloudFront-Is-SmartTV-Viewer\": \"false\",\n \"CloudFront-Is-Tablet-Viewer\": \"false\",\n \"CloudFront-Viewer-Country\": \"US\",\n \"Host\": \"wt6mne2s9k.execute-api.us-west-2.amazonaws.com\",\n \"Upgrade-Insecure-Requests\": \"1\",\n \"User-Agent\": \"Mozilla/5.0 (Macintosh; Intel Mac OS X 10_11_6) AppleWebKit/537.36 (KHTML, like Gecko) Chrome/52.0.2743.82 Safari/537.36 OPR/39.0.2256.48\",\n \"Via\": \"1.1 fb7cca60f0ecd82ce07790c9c5eef16c.cloudfront.net (CloudFront)\",\n \"X-Amz-Cf-Id\": \"nBsWBOrSHMgnaROZJK1wGCZ9PcRcSpq_oSXZNQwQ10OTZL4cimZo3g==\",\n \"X-Forwarded-For\": \"192.168.100.1, 192.168.1.1\",\n \"X-Forwarded-Port\": \"443\",\n \"X-Forwarded-Proto\": \"https\"\n },\n \"pathParameters\": {\n \"proxy\": \"issue\"\n },\n \"requestContext\": {\n \"accountId\": \"123456789012\",\n \"resourceId\": \"us4z18\",\n \"stage\": \"test\",\n \"requestId\": \"41b45ea3-70b5-11e6-b7bd-69b5aaebc7d9\",\n \"identity\": {\n \"cognitoIdentityPoolId\": \"\",\n \"accountId\": \"\",\n \"cognitoIdentityId\": \"\",\n \"caller\": \"\",\n \"apiKey\": \"\",\n \"sourceIp\": \"192.168.100.1\",\n \"cognitoAuthenticationType\": \"\",\n \"cognitoAuthenticationProvider\": \"\",\n \"userArn\": \"\",\n \"userAgent\": \"Mozilla/5.0 (Macintosh; Intel Mac OS X 10_11_6) AppleWebKit/537.36 (KHTML, like Gecko) Chrome/52.0.2743.82 Safari/537.36 OPR/39.0.2256.48\",\n \"user\": \"\"\n },\n \"resourcePath\": \"/{proxy+}\",\n \"httpMethod\": \"POST\",\n \"apiId\": \"wt6mne2s9k\"\n },\n \"resource\": \"/{proxy+}\",\n \"httpMethod\": \"POST\",\n \"queryStringParameters\": {\n \"name\": \"me\"\n },\n \"stageVariables\": {\n \"stageVarName\": \"stageVarValue\"\n },\n \"body\": {\n \t\"name\": \"issue\",\n \"message\": \"issue description\",\n \"email\": \"aa@aa.com\",\n \"issueType\": \"Submit a request or incident\"\n }\n}","initialLoad":"false","x":262.5,"y":160,"wires":[["e0721cc7.653eb"]],"caname":"test-case","category":"testing"},{"id":"e0721cc7.653eb","type":"TestCaseEnd","z":"test.flow","name":"TestCaseEnd","x":425,"y":160,"wires":[],"caname":"test-case-end","category":"testing"},{"id":"dcdb6a8a.2ba208","type":"JIRA","z":"main.flow","name":"Create Issue","operation":"Issuecreate","issueNumber":"DP-5","host":"YOURACCOUNT.atlassian.net","password":"API TOKEN","username":"YOUR USERNAME","priority":"","description":"\"From: \" & msg.payload.email & \", Description: \" & msg.payload.message","issuetype":"msg.payload.issueType","project":"GSD","summary":"msg.payload.name","comment":"","commentId":"","transitionName":"Close Issue","x":302.5,"y":140,"wires":[["b5fc6ccd.17dd7"]],"caname":"jira","category":"platforms"}]
press Create Button.
Install Jira Plugin.
Jira node is a contribution node and must be explicitly installed in Kumologica Designer. Press Add more nodes button located in the bottom left corner of designer. You will be presented screen with all contribution nodes that are currently available. Choose JIRA node, press Install button. After few seconds, plugin will be installed and you will be prompted to restart Kumologica Designer. Jira node will be located under new category: Platforms after restart.

Edit flow
After installing JIRA node, the imported flow will look like below:

Click on the Create Issue Jira node to display its properties and change Jira Connection Details section:
Host URL: enter the url that has been created for your Jira service desk instance (ends with atlasian.net)
Username: the user name you setup when creating account or the username you use for your jira instance
API Token: token created in Prerequisites section
Press Save button to return to the flow.
We have put connection details directly into properties for simplicity. We recommend to use AWS Parameter store to store secrets and use Kumologica AWS SSM Node to retrieve them.
Deploy flow to AWS Lambda
Select CLOUD tab on the right panel of Kumologica designer, choose AWS Profile and press Deploy button. This will trigger build and deployment of flow into AWS Lambda. After short while you should see the API gateway url that has been created for your flow in the terminal:

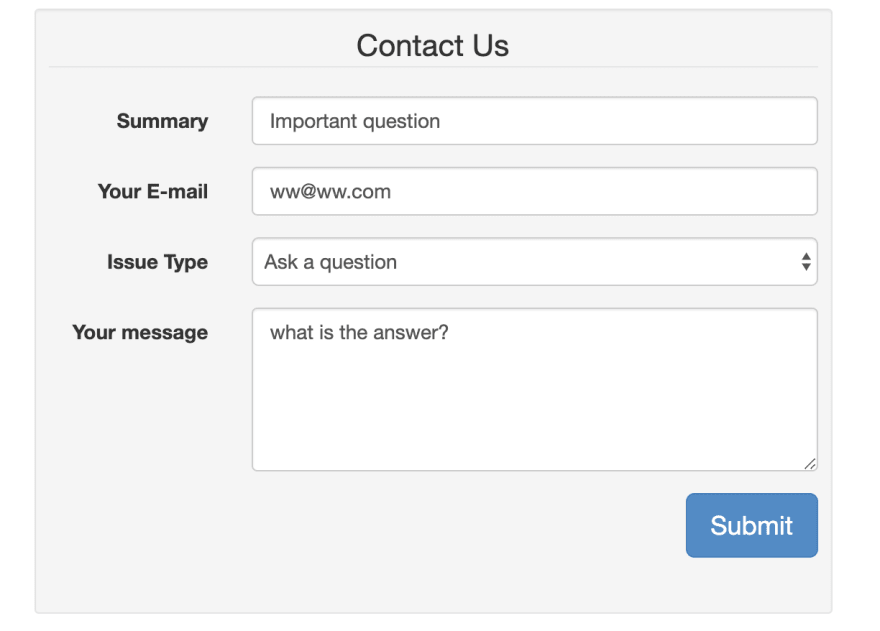
Contact Us HTML form
Below is a sample “Contact Us” html form, save it in local drive. Change line 18 to use the API Url that was displayed in Kumologica Designer terminal after successful deployment to AWS Lambda. Don’t forget to append it with /issue to call right service.
<!-- Original bootsnipp https://bootsnipp.com/snippets/83Br -->
<html>
    <head>
        <link href="http://netdna.bootstrapcdn.com/bootstrap/3.1.0/css/bootstrap.min.css" rel="stylesheet" id="bootstrap-css">
        <script src="http://netdna.bootstrapcdn.com/bootstrap/3.1.0/js/bootstrap.min.js"></script>
        <script src="http://code.jquery.com/jquery-1.11.1.min.js"></script>
        <style>
            body {padding-top:20px;}
        </style>
    </head>
    <body>
        <div class="container">
            <div class="row">
            <div class="col-md-6 col-md-offset-3">
                <div class="well well-sm">
                 <!-- Replace value of action with the url of API that has been displayed in Kumologica Designer console -->
                <form class="form-horizontal"
                      action="https://YOURAPIID.execute-api.YOURREGION.amazonaws.com/test/issue"
                      method="post">
                <fieldset>
                    <legend class="text-center">Contact Us</legend>

                    <div class="form-group">
                        <label class="col-md-3 control-label" for="name">Summary</label>
                        <div class="col-md-9">
                            <input id="name" name="name" type="text" placeholder="Your name" class="form-control">
                        </div>
                    </div>

                    <div class="form-group">
                        <label class="col-md-3 control-label" for="email">Your E-mail</label>
                        <div class="col-md-9">
                            <input id="email" name="email" type="text" placeholder="Your email" class="form-control">
                        </div>
                    </div>

                    <div class="form-group">
                        <label class="col-md-3 control-label" for="issueType">Issue Type</label>
                        <div class="col-md-9">
                        <select class="form-control" id="issueType" name="issueType">
                            <option>Task</option>
                            <option>Ask a question</option>
                            <option>Submit a request or incident</option>
                        </select>
                        </div>
                      </div>

                    <div class="form-group">
                        <label class="col-md-3 control-label" for="message">Your message</label>
                        <div class="col-md-9">
                            <textarea class="form-control" id="message" name="message" placeholder="Please enter your message here..." rows="5"></textarea>
                        </div>
                    </div>

                    <div class="form-group">
                        <div class="col-md-12 text-right">
                            <button type="submit" class="btn btn-primary btn-lg">Submit</button>
                        </div>
                    </div>
                </fieldset>
                </form>
                </div>
            </div>
            </div>
        </div>
    </body>
</html>
Open html file in your browser, fill up details and press Submit button.
The browser should display empty json: {}. When you switch to your Jira Service Desk General service desk project you should see new issue created with following details:

As you can see, the properties set in Kumologica Jira node mapped Summary into Title, Your E-Mail and Your Message got concatenated into Description.
Conclusion
This article presented how easy Kumologica Designer flow orchestrates and integrates with Jira software using Jira node. Within few minutes we have setup Jira Service Desk, created and deployed Kumologica flow and finally created simple contact us html form that calls flow and creates issue in Jira.
Remember Kumologica is totally free to download and use.
In the meantime, if there is any specific use case that you would like to see in a future article please let us know in the comments section.
Resources
Code used in this article is available in Github repository:
Repo link
Feel free to check it out and change for your needs.

Top comments (0)