
When projects and teams are just starting out, testing is usually not the main focus. However, as projects grow and get more users more emphasis is placed on testing, in particular, automated testing which can be reused and can be done as part of development tasks.
In this regard Monokle is not that different from other projects or teams, we needed to hit the ground running and just build something, see where it goes and focus on tests later on. Now we’re in a position where we need to make sure that core functionality is not unintentionally affected as new features get added, so having a baseline integration test that runs with our nightly builds makes total sense.
But hey... better late than never and so our story with Electron and integration tests begins.
Monokle is built using Electron which is used to build desktop applications across multiple platforms using a web framework like react. There are multiple testing frameworks out there but very few which are able to run on multiple OS’s and test Electron applications such as Monokle. We decided to use Playwright - as it is both open-source and seems to have Electron support baked in.
Playwright works similarly to other testing frameworks (Selenium, Cypress); it launches the actual application and mimics the actions a user would do, clicking on elements, writing things in text inputs, going through different flows. Assertions are added to make sure the expected results happen in the UI - for example, the opening of a panel or changing a label. Although more time-consuming, launching an application in this way is preferable to running it from source code, since this more closely mimics the end-user experience. There might be small differences.
Let’s dive into the actual tests
Install dependencies
First, we need to install some dependencies:
npm install –save-dev @playwright/test playwright playwright-core xvfb-maybe asar
- Playwright is the testing library we are using;
- xvfb-maybe is used to run the tests;
- asar is used to parse OS packages.
Create configuration file
Create a playwright.config.ts similar to this:
import {PlaywrightTestConfig} from '@playwright/test';

const config: PlaywrightTestConfig = {

 testDir: './<test-directory>',

 timeout: 60000,

 expect: {

   toMatchSnapshot: {threshold: 0.2},

 },

};


export default config;
Write boilerplate
To find parse and run the electron final build we used the functions (findLatestBuild, parseElectronApp) from here.
The credit for these very useful functions goes to Spaceage who made them.
Copy-paste those functions into an electronHelpers.ts file.
In the same file create a startApp function which will be used in our tests to start the actual app.
/**

* Find the latest build and start monokle app for testing

*/

export async function startApp(): Promise<StartAppResponse> {

 // find the latest build in the out directory

 const latestBuild = findLatestBuild();

 // parse the directory and find paths and other info

 const appInfo = parseElectronApp(latestBuild);

 const electronApp = await electron.launch({

   args: [appInfo.main],

   executablePath: appInfo.executable,

   recordVideo: {

     dir: '<recording-path>',

     size: {

       width: 1200,

       height: 800

     },

   },

 });


/**

 // wait for splash-screen to pass

 await electronApp.firstWindow();

 while (electronApp.windows().length === 2) {

   // eslint-disable-next-line no-await-in-loop

   await pause(100);

 }


 const windows = electronApp.windows();

 if (windows.length !== 1) {

   throw new Error('too many windows open');

 }

 const appWindow: Page = windows[0];

 appWindow.on('console', console.log);


/**

 // Capture a screenshot.

 await appWindow.screenshot({

   path: 'screenshots/initial-screen.png'

 });


 return {appWindow, appInfo, electronApp};

}
In the end, the electronHelpers.ts should look something like this:
export async function startApp(): Promise<StartAppResponse> {

  ...

}


export async function findLatestBuild() {

  ...

}


export async function parseElectronApp() {

  ...

}
Writing actual tests
import {Page} from 'playwright';

import {test} from '@playwright/test';

import {ElectronApplication} from 'playwright-core';

import {ElectronAppInfo, startApp} from './electronHelpers';


let appWindow: Page;

let appInfo: ElectronAppInfo;

let electronApp: ElectronApplication;


test.beforeAll(async () => {

 const startAppResponse = await startApp();

 appWindow = startAppResponse.appWindow;

 appInfo = startAppResponse.appInfo;

 electronApp = startAppResponse.electronApp;

});


test('test click', async () => {

 // Click button.

 await appWindow.click('text=Click me');

// Exit app.

 await electronApp.close();

});


test.afterAll(async () => {

 await appWindow.screenshot({path: 'screenshots/final-screen.png'});

 await appWindow.context().close();

 await appWindow.close();

});
The code snippet above can give a pretty good idea of what can be done with an Electron app which is very similar to testing a website. Also, there is extensive documentation on the playwright website on how to: access elements, click, fill in text input and other values, scroll, and so on.
To execute the tests add a script to your package.json file with this command: xvfb-maybe npx playwright test - and run it with “npm run <script name>”
Using Models for UI Tests
One thing which is not Electron specific but it comes with the Playwright library is using models: https://playwright.dev/docs/test-pom.
Structuring your code around these models will result in: code reusability, lighter tests in terms of code written, and an easier understanding of what a test is supposed to do.
POMs can also help when some UI refactoring comes knocking at the door because the code is structured in a more versatile way.
An example of how a model would look like:
import {Locator, Page} from 'playwright';


export class TestModal {


 private _page: Page;


 private readonly _okButton: Locator;


 constructor(page: Page) {

   this._page = page;


   this._okButton = page.locator('#button-identifier');

 }


 async clickSave() {

   await this._okButton.click();

 }


}
Mocking/Handing OS file selections or different actions between IPCRenderer<>IPCMain
My time using Playwright was really nice until we had to automate a file selection flow, which seems very simple: open a file or a folder from the computer.
This sounds like a breeze. It was difficult to find any documentation on how to do this in a straightforward way.
The way we’re opening file selection windows is using dialog.showSaveDialogSync from the Electron framework and Playwright is not able to click on that window since it is native and not created within the Electron app environment.
To automate opening a specific file or folder in our tests we had to add a new handler for that specific event, but IPC channels cannot be overwritten and they can have only one listener. So we did the following:
- Inject some code in the app which will have a different channel when the app is in automation mode;
- Start the app with an automation flag only in testing(this leaves the app usable for other use cases);
- In tests use the same channel name as when we started the application and override the handler. ```
const name = 'some name';
const chanel = 'select-file-automation';
await electronApp.evaluate(({ ipcMain }, params) => {
ipcMain.handle(params.chanel, () => {
return [params.name];
});
}, { chanel, name });
Using this logic we are able to easily test OS-specific functionalities such as working with folders and files which are crucial for a code editor such as Monokle.
#Automate on GitHub
To get the most of our tests, we’ve added them in our nightly builds so we can see if we’ve broken anything during the day. The reason for not adding them to run on every commit was that it takes ~20 minutes for everything to run, which would have led to extended waiting times in our development cycle.
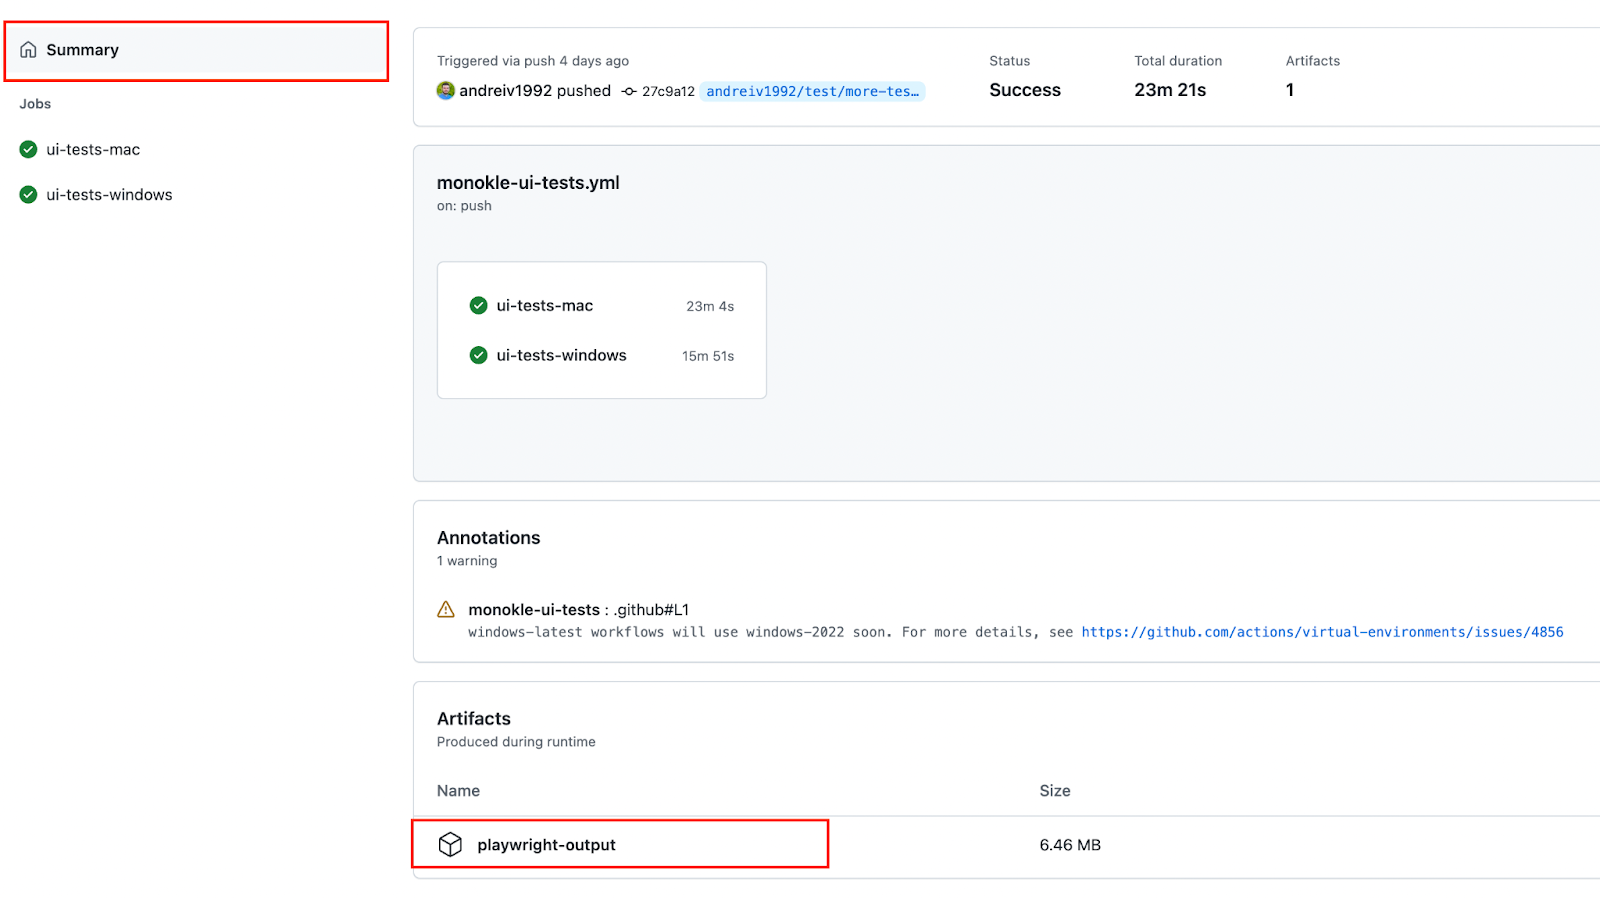
We have set up Playwright to take screenshots and record videos, these files can be accessed from the Github actions as well to get a real-time view of how the tests are working or failing.
Go to: the action => click on it => click on summary => click on output.
Below is a snippet for running Electron tests as part of Github actions. We have a complete flow [here](https://github.com/kubeshop/monokle/blob/main/.github/workflows/monokle-ui-tests.yml).
name: ui-tests
on:
push:
branches:
- test-branch
workflow_dispatch:
jobs:
ui-tests-mac:
runs-on: macOS-latest
steps:
... prepare for tests, install &build
- name: E2E Test for Electron 🧪
run: npm run ui-test
- name: Upload Test Results 🗃
if: always()
uses: actions/upload-artifact@v2
with:
name: playwright-output
path: test-output/**
ui-tests-windows:
runs-on: windows-latest
steps:
... prepare for tests, install &build
- name: E2E Test for Electron 🧪
run: npm run ui-test
- name: Upload Test Results 🗃
if: always()
uses: actions/upload-artifact@v2
with:
name: playwright-output
path: test-output/**
#Future steps
As the Monokle project grows so will our end to end testing, here are a few steps we plan to add in the near future:

Breakout the logic from the [electronHelpers.ts](https://github.com/kubeshop/monokle/blob/main/tests/electronHelpers.ts) file into an npm library which can be maintained and reused independently of our projects;
Breakout specific [antd](https://ant.design/docs/react/customize-theme) logic(modal, tree, pane) models into a library which can be reused for testing by other people;
Expand the tests we have for the general functionality of Monokle.
A complete example of our working tests and how to run them can be found on the Monokle open source repo [here](https://github.com/kubeshop/monokle/tree/main/tests) and in the corresponding [documentation](https://github.com/kubeshop/monokle/blob/main/docs/testing.md).

As always you can download the release from [GitHub](https://github.com/kubeshop/monokle) and get in touch to complain or praise Monokle on our [Discord Server](https://discord.gg/uNuhy6GDyn) - looking forward to hearing from you!


Top comments (0)