
Blockchains have revolutionized how we store data by introducing the concept of immutable records. This feature allowed Ethereum and other blockchains to create smart contracts, which are code that can't be changed. Smart contracts ensured that conditions always execute in the same way, which enabled decentralized applications.
One downside of blockchains is that transactions take time to process. This is the price of guaranteeing the security and immutability of records. Knowing that blockchains will take time to process transactions, it is important to have real-time updates, especially for customer-facing applications.
In this article, I'll show you how to create real-time alerts for blockchain events with AWS and QuickNode.
What to expect
To give a brief overview, you'll deploy AWS infrastructure with AWS SAM, which consists of a webhook that sends email alerts.
Then you'll create a QuickAlert notification on Ethereum mainnet.
Once both are deployed, you will receive an email whenever there are transfers of at least 1 million USDT or USDC.
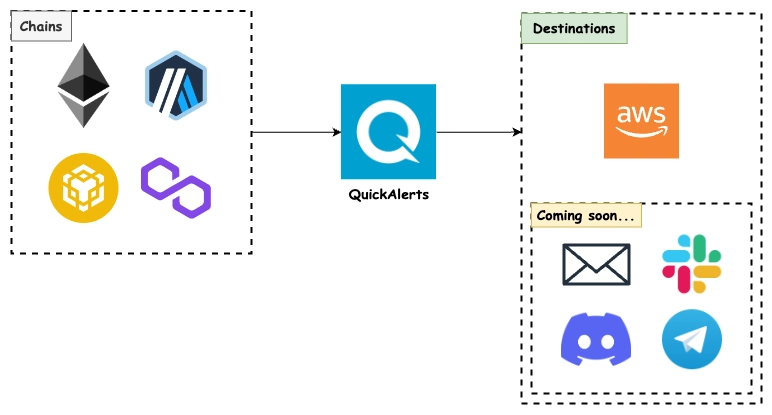
Here's a high-level diagram on how QuickAlert notifications work.
Note: QuickNode only support webhooks as of writing. In the future, they will support email alerts which will make this solution unnecessary.
Though the solution that I'll give you is flexible since we'll be using a Lambda function, which you can customize to fit your own use cases.
Before we start
To follow along with this guide, make sure you have:
Then knowledge of the following is helpful:
With that out of the way, let's continue.
Creating a webhook with AWS Lambda and SNS
Setting up and configuring AWS SAM CLI
Before proceeding, make sure to setup and configure AWS SAM CLI.
Then verify that you have installed AWS SAM CLI by running sam --version on your terminal.
SAM CLI, version 1.105.0
After you've verified AWS SAM CLI, it's time to create your webhook with AWS.
Deploying the sample application
I have provided a sample application in GitHub to help you get started.
The application uses AWS SAM to deploy the following resources:

Then to setup the project:
- Clone the sample application.
- Install Node.js dependencies by running
npm install. -
Add your email to the SNS Topic subscription in the
template.yamlfile.
Resources:
  SnsTopic:
    Type: AWS::SNS::Topic
    Properties:
      TopicName: SnsTopicEmailAlert
      DisplayName: SnsTopicEmailAlert
      Subscription:
        - Endpoint: <YOUR EMAIL HERE>
          Protocol: email
Build the application by running
sam build.Deploy the application by running
sam deploy.
You should be prompted to deploy the changeset, enter y to proceed.
Previewing CloudFormation changeset before deployment
======================================================
Deploy this changeset? [y/N]:
If the deployment is successful, you should see something like this.
CloudFormation outputs from deployed stack
-------------------------------------------------------------------------------------------------
Outputs
-------------------------------------------------------------------------------------------------
Key                 WebEndpoint
Description         API Gateway endpoint URL for Prod stage
Value               https://<redacted>.execute-api.ap-southeast-1.amazonaws.com/Prod/
-------------------------------------------------------------------------------------------------

Successfully created/updated stack - aws-lambda-sns-poc in ap-southeast-1
Copy the endpoint shown in the output. This will be the webhook URL for your QuickAlert notification later.
Note: You can test your webhook with Postman or other API testing tools to make sure it is working.
Creating a QuickAlert notification
Now that you've successfully created a webhook, it's time to create a QuickAlert notification.
Register for a free QuickNode account if you haven't done so already.
Once you have an account, here are the steps for creating your QuickAlert notification.
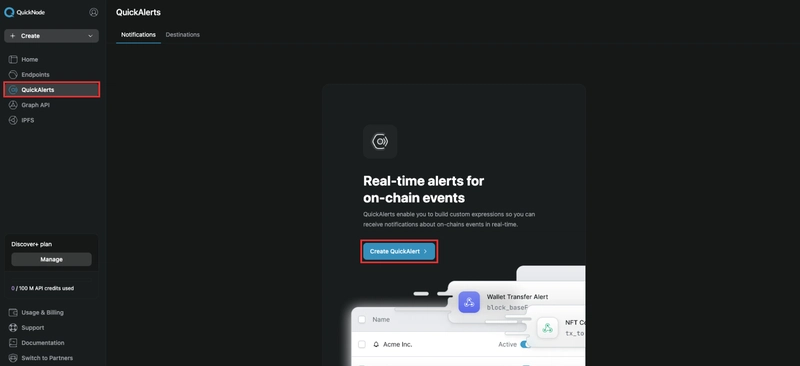
-
Select QuickAlerts on the left sidebar, then click Create QuickAlert.
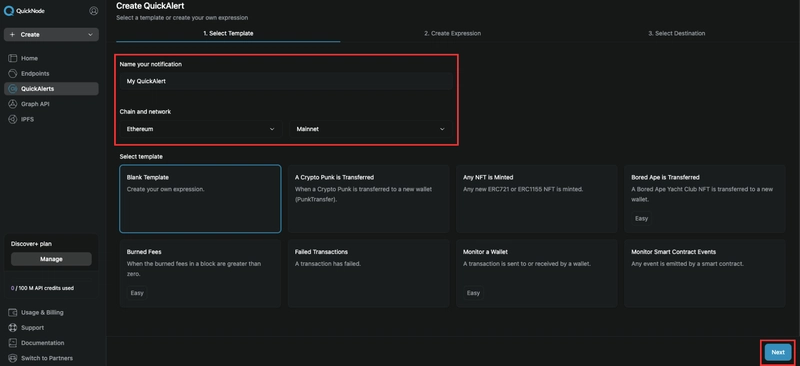
-
Configure the following:
- Name your notification to My QuickAlert or any name you like.
- Select Ethereum and Mainnet for chain and network.
- Select Blank Template.
Then click Next to proceed.
-
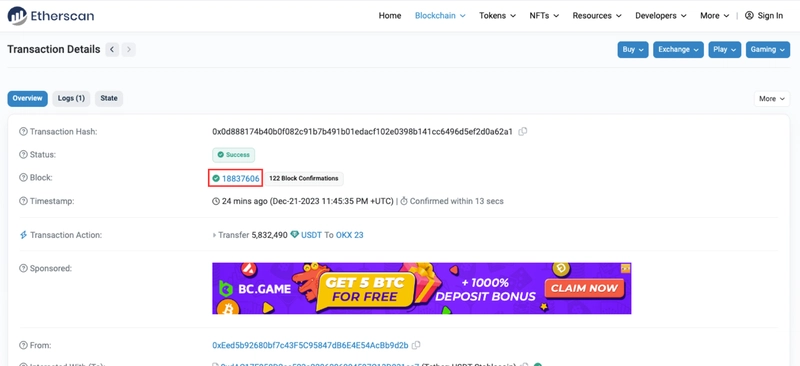
Before continuing, you need to get a block number to test your QuickAlert expression.
Go to Etherscan and choose any transaction you'd like to test.
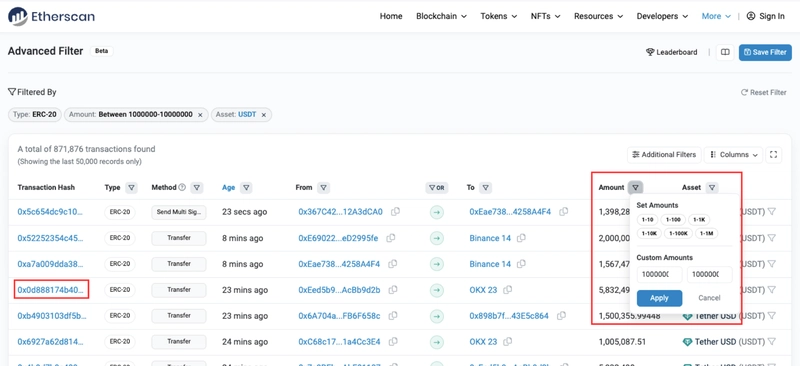
-
Once you've chosen a transaction, copy the block number.
-
After you've copied the block number:
- Paste it on the Target Block.
- Then click Get Data.

-
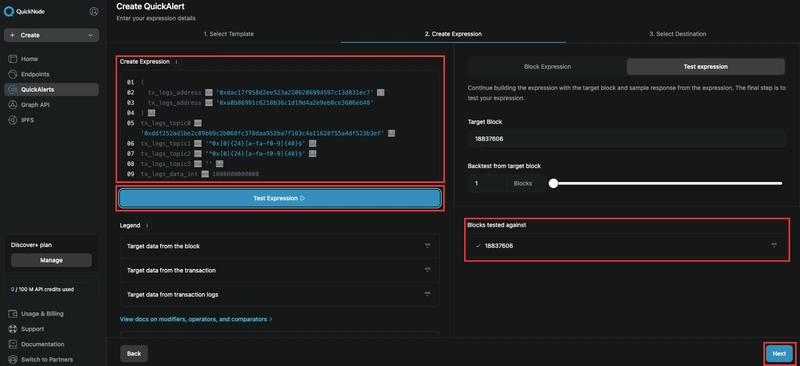
I've created a sample expression to filter out transfers of at least 1 million USDT or USDC.
Copy this expression and paste it into the Create Expression field.
(
  tx_logs_address == '0xdac17f958d2ee523a2206206994597c13d831ec7' ||
  tx_logs_address == '0xa0b86991c6218b36c1d19d4a2e9eb0ce3606eb48'
) &&
tx_logs_topic0 == '0xddf252ad1be2c89b69c2b068fc378daa952ba7f163c4a11628f55a4df523b3ef' &&
tx_logs_topic1 =~ '^0x[0]{24}[a-fa-f0-9]{40}$' &&
tx_logs_topic2 =~ '^0x[0]{24}[a-fa-f0-9]{40}$' &&
tx_logs_topic3 == '' &&
tx_logs_data_int >= 1000000000000
Then click Test Expression.
Note: You should see your block number in the Blocks tested against section.
If there's a check mark, it means that your QuickAlert expression is working.
After testing the expression, click Next to proceed.
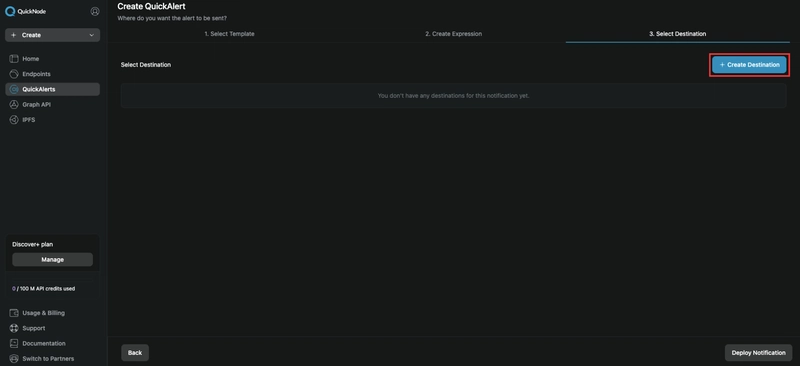
-
Now to create a Destination, click Create Destination.
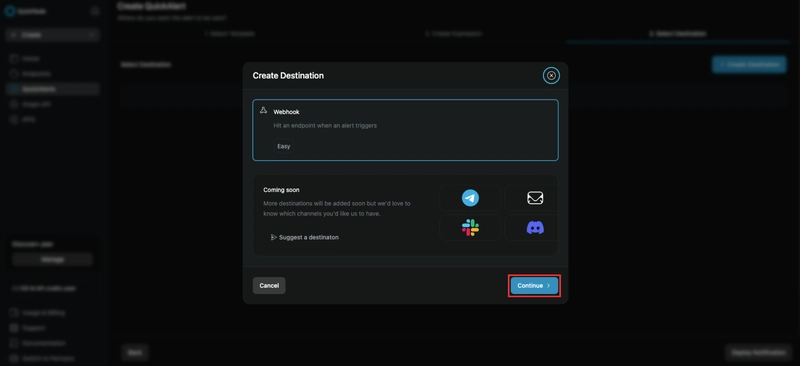
-
Select Webhook, then click Continue.
-
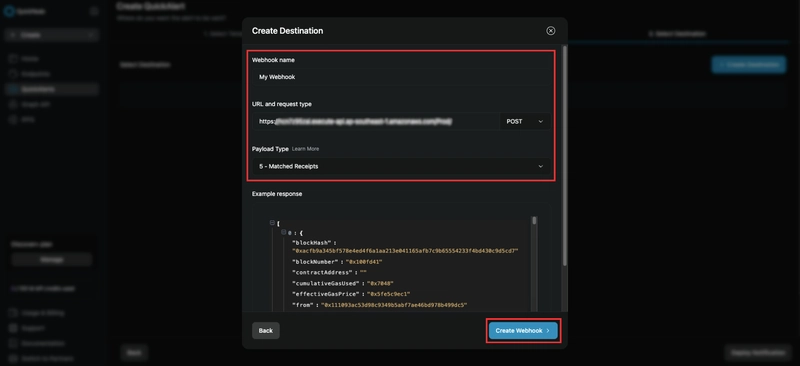
Configure the following for your webhook:
- Webhook name to My Webhook or any name you prefer.
- Paste your webhook from earlier to the URL field.
- Select POST for the request type.
- Select 5 - Matched Receipts for the payload type.
Then Click Create Webhook.
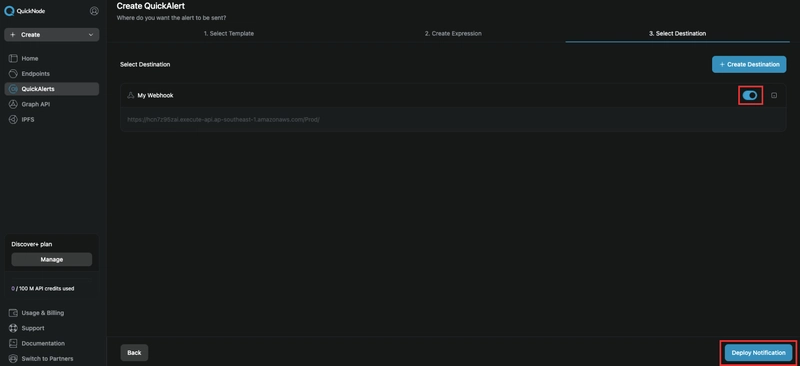
-
Click the slider on the right to enable your webhook.
Then click Deploy Notification.
Testing the QuickAlert Notification
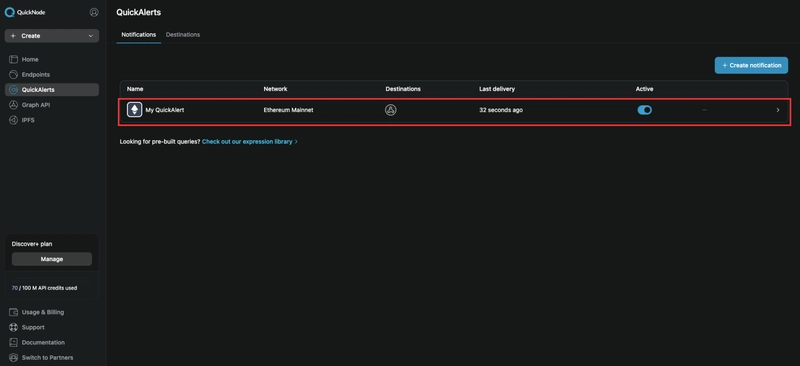
Now that you've created a QuickAlert notification, wait for it to deliver an alert. It usually takes a few seconds up to a few minutes depending on your filter expressions.
After waiting, refresh the page.
You should see changes to the Last delivery, which shows the time since the last notification was triggered.
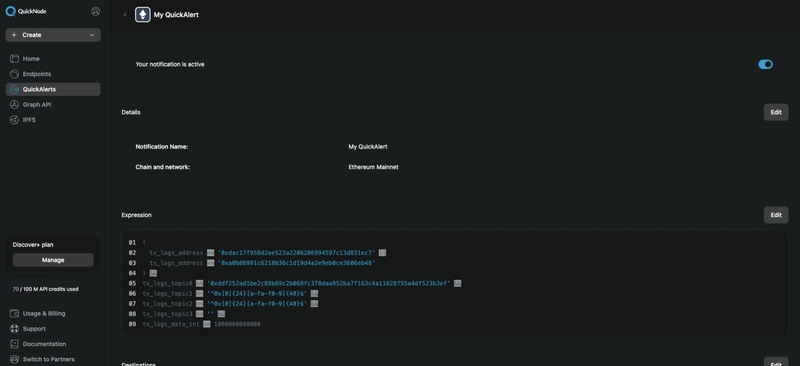
Then click anywhere on your QuickAlert notification to view the settings.
Here, you can edit the following:
- Notification Name
- Expression
- Destinations
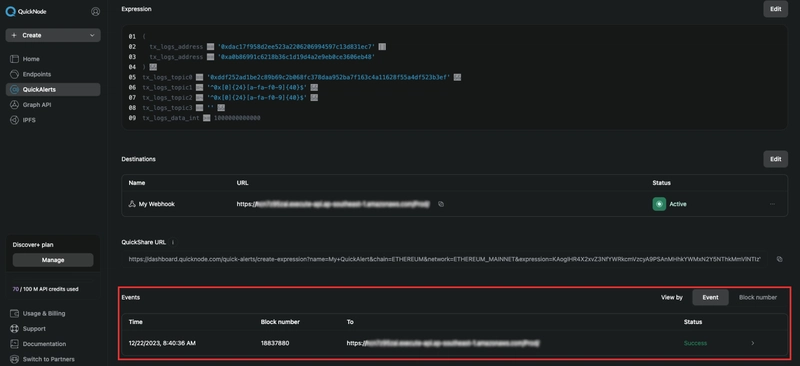
Scroll down to the bottom of the page to see the events.
Once you're at the bottom of the page, you should see the Events section.
This shows all the blockchain events sent by your QuickAlert notification to your webhook.
Checking your email for alerts
Now, check the email you've configured earlier to see if you've received any emails.
You should see something similar.
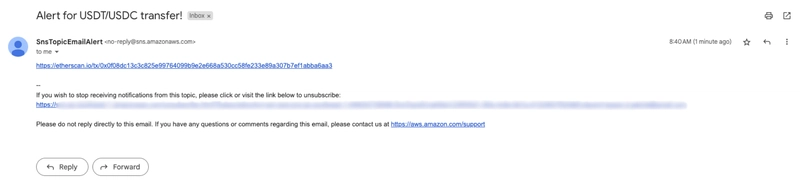
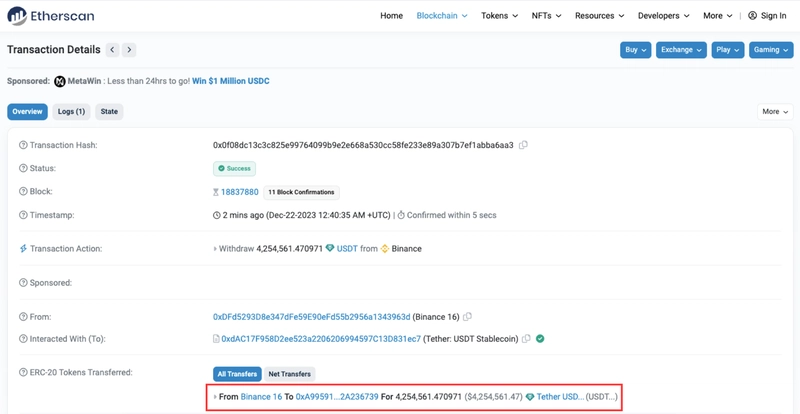
Then click the Etherscan link to view the transaction.
You should see at least 1 million USDT or USDC was transferred.
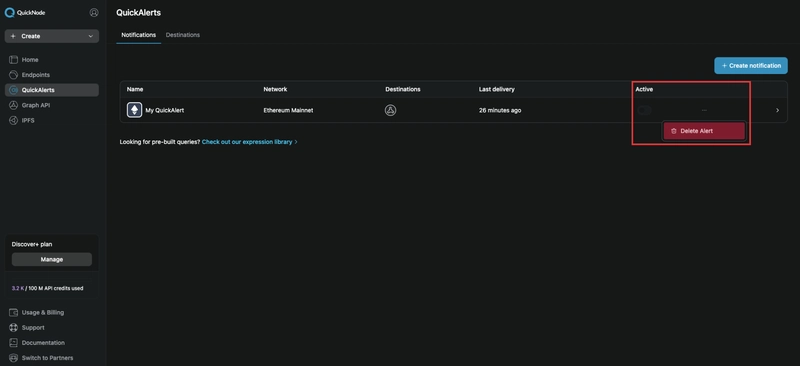
After you're done testing, don't forget to disable or delete your QuickAlert notification to avoid wasting your credits.
Conclusion
To recap, you've successfully created a QuickAlert notification that sends an email whenever there are transfers of at least 1 million USDT or USDC.
I hope this can help you with integrating real-time blockchain event notifications into your applications.
Thank you for reading and if you have any questions or feedback, feel free to comment or connect with me here.

Top comments (2)
Very interesting - thanks for sharing.
I had never heard of QuickNode/QuickAlerts before but find the whole environment about Ethereum fascinating.
Hey Darryl,
Yes blockchain development also fascinates me.
Basically you need JSON-RPC endpoints to interact with blockchains, and QuickNode is one of the providers of those endpoints.
If you don't opt in with a 3rd-party provider, you'll have to setup all the infrastructure yourself (Blockchain nodes, servers, software, and so on).