
Hey good peeps, long time - no hear.
In this quarantine time I bring you something I've been working on lately, CD (continuous deployment) of Springboot apps.
I hope you'll find it useful.
Table Of Contents
- 1. Introduction
- 2. Create a Github repository
- 3. Initialize the Springboot Application
- 4. Create a Heroku account
- 5. Connect with Github & Deploy
- 6. Test & Celebrate
- 7. Conclusion
1. Introduction
In this short little blog we'll initialize the simple Springboot application, connect it with Github, connect it with Heroku and at the end we'll deploy our Spring application with incredible ease and what's most important, absolutely free of charge.
First, make sure you have a Github account and that you're familiar with the basic git commands such as ''git clone'' – ''git commit'' and ''git push''.
Of course, you can use whatever SVC tool you want, but we won't be covering the likes of Gitlab, Bitbucket and similar here.
Second, make sure you have IntelliJ or other Spring IDE where you can build, run and debug your Springboot applications.
Third, have fun!
2. Create a Github repository
First things first, we want to establish a Github -> Heroku connection, so whenever we merge into our master, we'll instantly publish, build and deploy our app on Heroku.
You can have multiple git instances in one folder, because Heroku provides its own git, but that is too troublesome. We'll use our Github repository as a single point of source control.
Here are the steps I've followed:
Another useful information is committing & pushing the data in your repository.
3. Initialize the Springboot Application
To initialize our Springboot application with ease, we'll use https://start.spring.io/ - excellent tool to kickstart your base application settings with dependencies you need.
Feel free to select whatever you like, but for the purposes of this tutorial let’s just go with the basics.
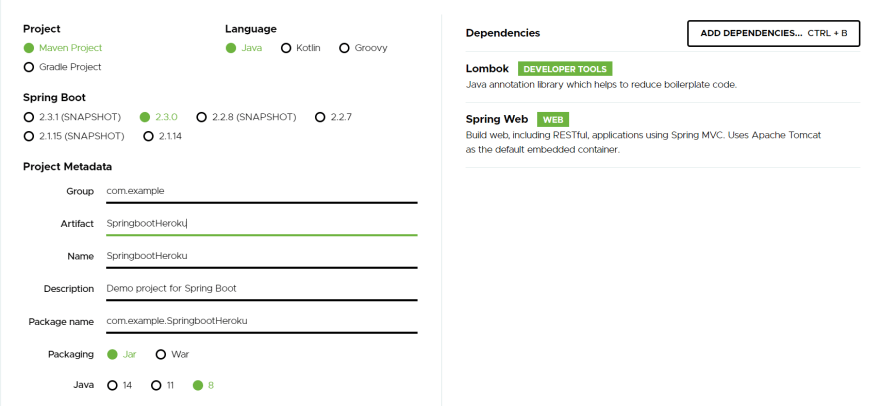
After you have selecting the settings you like or the settings from the picture above, let's click on Generate and save it inside of your git repository we have cloned in the second step.
Before you do anything else, make sure to run your application in the IDE of your choice, mine is IntelliJ, and build it just to make sure everything runs smoothly.
If everything is alright, you should see something like this:

If some of your files are colored red, have no fear, it is due to git being too smart. He recognized new files in the directory and he is letting us know we haven't committed then yet, we'll do that in the moment.
Let's just create a simple controller, something that will display a generic message. That generic message will serve as a confirmation that everything was deployed smoothly.

If your Spring annotations are red, be sure to add this in your pom.xml and update your Maven settings:
        <dependency>
            <groupId>org.springframework</groupId>
            <artifactId>spring-web</artifactId>
            <version>5.0.7.RELEASE</version>
        </dependency>
Before we create a heroku account, let's push the changes to our repository.
You can do it directly from IntelliJ or the IDE of your choice, but this time I'll do it with Git Bash.
Navigate in your working directory, open Git Bash and let's commit!
git add -A

git commit -m "Master: Initial commit"

git push
If everything was successful, you should see the files in your Github repository.

4. Create a Heroku account
First things first, sign up for Heroku: https://signup.heroku.com/
After a successful sign in, your dashboard should look something like this.
I already have one Java project, so just ignore that one.

Even though Heroku provides its own CLI, we'll be using our Heroku dashboard for creating our application and we'll use Github Bash once again for all of our git purposes.
Now let's create our app by click New -> Create new app in the upper right corner.

Then you'll need to provide a name for your app, feel free to name it whatever you like.

And voila! You should see something like this.

5. Connect with Github & Deploy
In this next step we'll continue where we've left off.
On the previous screen, you should see the section Deployment method, by default Heroku Git should be selected.
Since we're be using our Github repository for continuous deployment here, make sure to select Github option like this:
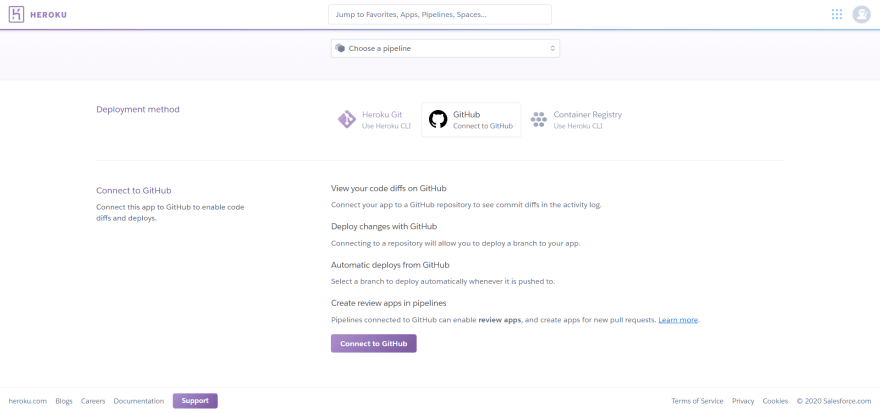
As you may have assumed, to connect Heroku with our Github account, we need to proceed with this step by clicking on Connect to Github button down below.
Once clicked, and you're authorization was successful, you should see a screen like this one:
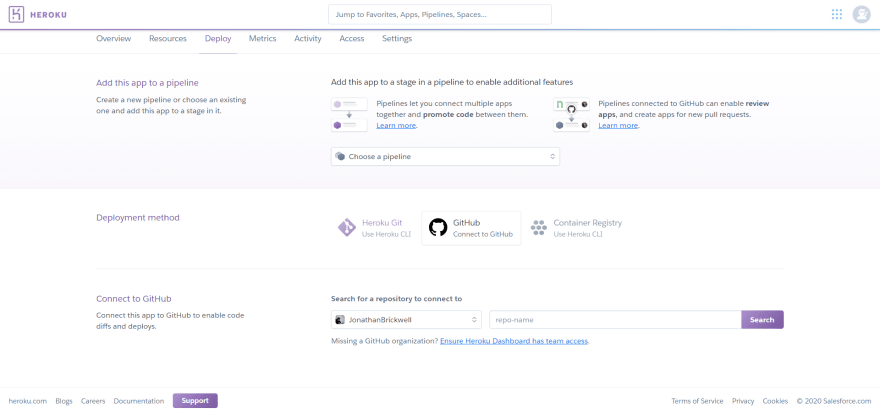
Search for your repository in Search for a repository to connect to section, it should look like something like this:

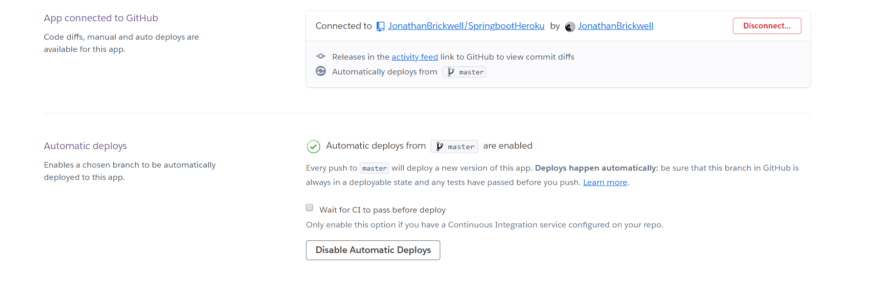
After you successfully connect with the desired repository, make sure to connect master as a deployment branch and click on Enably automatic deploys and voila, our connection is established!
6. Test & Celebrate
The last step in our process is making slight adjustments in our app and publishing to our master branch.
- Head into our app, change the text in our @GetMapping method.
@GetMapping("/")
    String hello() {
        return "This tutorial is the best. All hail the great Kristijan.";
    }
- Now let's repeat our Git Bash commands from before.
git add -A

git commit -m "Master: Text changes"

git push
- Head over to Heroku and click on Open app in the upper right corner of our Heroku Dashboard.

And voila! You should see the message This tutorial is the best. All hail the great Kristijan. displayed on your screen.
7. Conclusion
If you're having any issues with setting this up, feel free to contact me or leave a comment in the comment section, I'll get back to you as soon as possible.
Few to things to keep in mind:
- Your application goes to sleep after 30 minutes of being inactive
- Your app can't be online 24/7, otherwise you'll run out of your free Dyno hours - If you choose to enter your credit card number, you will get extra 400-500 Dyno hours
- Metrics are not available for free users, you'll have to upgrade.
Hosting your Java apps on Heroku, or other apps in general, is simply too easy and amazing. Even the paid plan offers extraordinary options and it would probably cost way more if you were to set it up yourself + considering the maintenance and security of the server.
However, Heroku may not be the tool for every occasion and everyone in the development world. It has its pros and cons, so make sure to weight them in carefully before deciding.
Until next time, stay awesome.

Top comments (0)