The Kong Gateway Rate Limiting plugin is one of our most popular traffic control add-ons. You can configure the plugin with a policy for what constitutes “similar requests” (requests coming from the same IP address, for example), and you can set your limits (limit to 10 requests per minute, for example). This tutorial will walk through how simple it is to enable rate limiting in your Kong Gateway.
Rate Limiting: Protecting Your Server 101
Let’s take a step back and go over the concept of rate limiting for those who aren’t familiar.
Rate limiting is remarkably effective and ridiculously simple. It’s also regularly forgotten. Rate limiting is a defensive measure you can use to prevent your server or application from being paralyzed. By restricting the number of similar requests that can hit your server within a window of time, you ensure your server won’t be overwhelmed and debilitated.
You’re not only guarding against malicious requests. Yes, you want to shut down a bot that’s trying to discover login credentials with a brute force attack. You want to stop scrapers from slurping up your content. You want to safeguard your server from DDOS attacks.
But it’s also vital to limit non-malicious requests. Sometimes, it’s somebody else’s buggy code that hits your API endpoint 10 times a second rather than one time every 10 minutes. Or, perhaps only your premium users get unlimited API requests, while your free-tier users only get a hundred requests an hour.
Mini-Project for Kong Gateway Rate Limiting
In our mini-project for this article, we’re going to walk through a basic use case: Kong Gateway with the Rate Limiting plugin protecting a simple API server. Here are our steps:
- Create Node.js Express API server with a single “hello world” endpoint.
- Install and set up Kong Gateway.
- Configure Kong Gateway to sit in front of our API server.
- Add and configure the Rate Limiting plugin.
- Test our rate limiting policies.
After walking through these steps together, you’ll have what you need to tailor the Rate Limiting plugin for your unique business needs.
Want to set up rate limiting for your API gateway with clicks instead of code? Try Konnect for free >>
Create a Node.js Express API Server
To get started, we’ll create a simple API server with a single endpoint that listens for a GET request and responds with “hello world.” At the command line, create a project folder and initialize a Node.js application:
~/$ mkdir project
~/$ cd project
~/project$ yarn init
// Accept all defaults
Then, we’ll add Express, which is the only package we’ll need:
~/project$ yarn add express
Lastly, let’s create a simple server with our “hello world” endpoint. In your project folder, create an index.js file with these contents:
/* PATH: ~/project/index.js
*/
const express = require('express')
const server = express()
const port = 3000
server.get('/', (req, res) => {
 console.log(req.headers)
 res.status(200).send('Hello world!')
})
server.listen(port, () => {
 console.log(`Server is listening on http://localhost:${port}`)
})
Now, spin up your server:
~/project$ node index.js
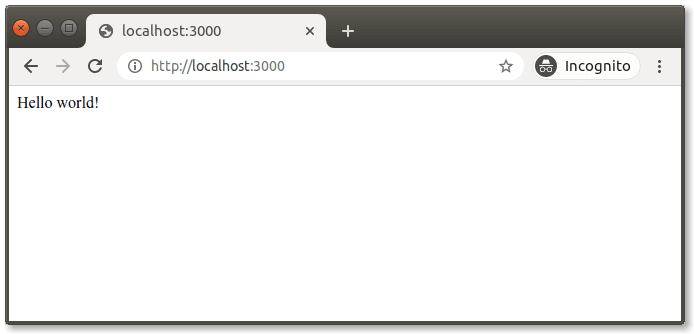
In your browser, you can visit http://localhost:3000. Here’s what you should see:
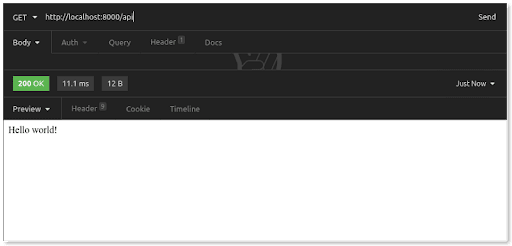
Let’s also use Insomnia, a desktop client for API testing. In Insomnia, we send a GET request to http://localhost:3000.
Our Node.js API server with its single endpoint is up and running. We have our 200 OK response.
Keep that terminal window with the node running. We’ll do the rest of our work in a separate terminal window.
Install and Set Up Kong Gateway
Next, we’ll install Kong Gateway to sit in front of our API server. These steps will vary depending on your local environment.
Simple usage of the Rate Limiting plugin supports configuring Kong in DB-less mode with a declarative configuration. That means, instead of sending configurations to Kong Gateway one step at a time, with those configurations stored in a database, we can use a single declarative .yml file for specifying our entire Kong configuration.
After installing Kong, we generate a starter .yml file:
~/project$ kong config init
~/project$ tree -L 1
.
├── index.js
├── kong.yml
├── node_modules
├── package.json
└── yarn.lock
1 directory, 4 files
We’ll come back to that kong.yml file in a moment.
Now, let’s tell Kong where to look for that declarative configuration file upon startup. In /etc/kong, there is a
kong.conf.default file that we’ll need to copy as kong.conf and then edit:
~/project$ cd /etc/kong
/etc/kong$ sudo su
root:/etc/kong$ cp kong.conf.default kong.conf
Next, we edit the kong.conf file. You’ll likely need root privileges to do this. There are two edits that we need to make:
# PATH: /etc/kong/kong.conf

# line ~839: Uncomment this line and set to off
database = off

# line ~1023, Uncomment this line. Set to absolute path to kong.yml
declarative_config = /PATH/TO/YOUR/project/kong.yml
Configure Kong Gateway With Our Service and Routes
Before we start up Kong, let’s edit the declarative configuration file generated in our project folder. It should look like this:
# PATH: ~/project/kong.yml

_format_version: "2.1"

services:
- name: my-api-server
  url: http://localhost:3000/
  routes:
  - name: api-routes
    paths:
    - /api
Let’s walk through what this configuration does. After setting the syntax version (2.1), we configure a new upstream service for which Kong will serve as an API gateway. Our service, which we name my-api-server, listens for requests at the URL http://localhost:3000.
We associate a route (arbitrarily named
api-routes) for our service with the path /api. Kong Gateway will listen for requests to /api, and then route those requests to our API server at http://localhost:3000.
With our declarative configuration file in place, we start Kong:
~/project$ sudo kong start
Now, in Insomnia, we send a GET request through Kong Gateway, which listens at http://localhost:8000, to the /api path:
Note that, by sending our request to port 8000, we are going through Kong Gateway to get to our API server.
Add the Kong Gateway Rate Limiting Plugin
Now that we have Kong Gateway sitting in front of our API server, we’ll add in the Rate Limiting Plugin and test it out. We will need to add a few lines to our kong.yml declarative configuration file:
# PATH: ~/project/kong.yml

_format_version: "2.1"

services:
- name: my-api-server
  url: http://localhost:3000/
  routes:
  - name: api-routes
    paths:
    - /api
  plugins:
  - name: rate-limiting
    config:
      minute: 5
      hour: 12
      policy: local
We’ve added the entire plugins section underneath our my-api-server service. We specify the name of the plugin, rate-limiting. This name is not arbitrary but refers to the actual rate-limiting plugin in the Kong package.
In this first run, we’ve configured the plugin with minute: 5, which allows for up to five requests per minute. We’ve also added hour : 12, which limits the requests per hour to 12. We’re using the local policy, which has to do with how Kong will store and increment request counts. We’ll talk about this policy configuration more below.
Let’s restart Kong:
~/project$ sudo kong restart
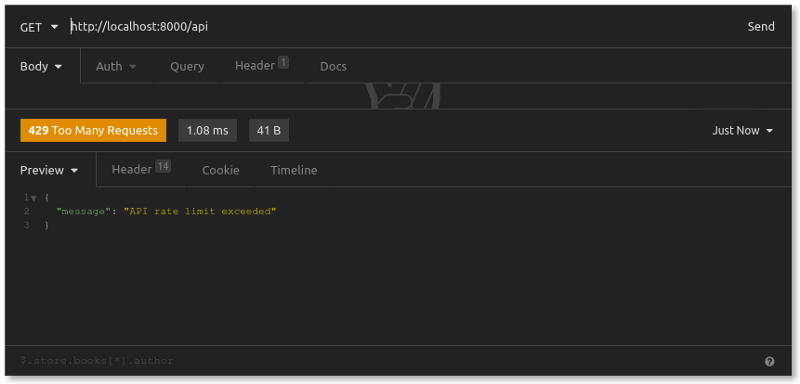
Now, back in Insomnia, we test out sending some requests to our API endpoint. If you send a request every few seconds, you’ll see that the first five requests received a 200 OK response. However, if you exceed five requests within a minute:
The Rate Limiting plugin detects that requests have exceeded the five-per-minute rule. It doesn’t let the subsequent request through to the API server. Instead, we get a 429 Too Many Requests response.
Our plugin works!
If you wait a minute and then try your requests again, you’ll see that you can get another five successful requests until Kong blocks you again with another 429.
At this point, we’ve sent 10 requests over several minutes. But you’ll recall that we configured our plugin with hour: 12. That means our 11th and 12th requests will be successful. However, the system will reject our 13th request even though we haven’t exceeded the five-per-minute rule . That’s because we’ll have exceeded the 12-per-hour rule.
The Rate Limiting plugin allows you to limit the number of requests per second, minute, hour, day, month and year.
Rate Limiting “Similar” Requests
We’ve configured Kong to count (and limit) requests to our server in our simple use case so far. More likely, we’ll want to apply our rate limits to similar requests. By “similar,” we might mean “coming from the same IP address” or “using the same API key.”
For example, let’s say that all users of our API server need to send requests with a unique API key set in headers as x-api-key. We can configure Kong to apply its rate limits on a per-API-key basis as follows:
# PATH: ~/project/kong.yml

_format_version: "2.1"

services:
- name: my-api-server
  url: http://localhost:3000/
  routes:
  - name: api-routes
    paths:
    - /api
  plugins:
  - name: rate-limiting
    config:
      minute: 5
      hour: 12
      policy: local
      limit_by: header
      header_name: x-api-key
The Rate Limiting plugin will apply its limits by grouping requests according to a value found in the x-api-key in the header. Requests with the same x-api-key will be considered “similar” requests.
Let’s restart Kong and see this in action:
~/project$ sudo kong restart
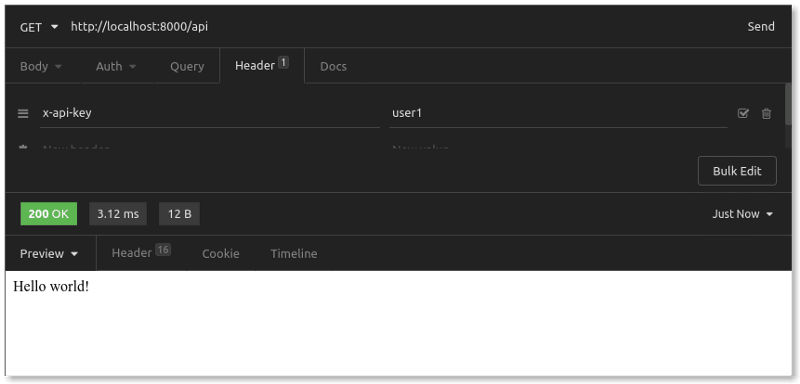
Back in Insomnia, we’ll adjust our GET request slightly by adding a new x-api-key header value. Let’s first set the value to user1. We send the request multiple times. Our first five requests return a 200 OK:
When we exceed the five-per-minute rule, however, this is what we see:
If we change the x-api-key to a different value (for example, user2), we immediately get 200 OK responses:
Requests from user2 are counted separately from requests from user1. Each unique x-api-key value gets (according to our rate limiting rules) up to five requests per minute and up to 12 requests per hour.
You can configure the plugin to limit_by IP address, a header value, request path or even credentials (like OAuth2 or JWT).
Counter Storage “Policy”
In our example above, we set the policy of the Rate Limiting plugin to local. This policy configuration controls how Kong will store request counters to apply its rate limits. The local policy stores in-memory counters. It’s the simplest strategy to implement (there’s nothing else you need to do!).
However, request counters with this strategy are only mostly accurate. If you want basic protection for your server, and it’s acceptable if you miscount a request here and there, then the local policy is sufficient.
The documentation for the Rate Limiting plugin instructs those with needs where “every transaction counts” to use the cluster (writes to the database) or redis (writes to Redis key-value store) policy instead.
Advanced Rate Limiting
For many common business cases, the open source Rate Limiting plugin has enough configuration options to meet your needs. For those with more complex needs (multiple limits or time windows, integration with Redis Sentinel), Kong also offers their Rate Limiting Advanced plugin for Kong Konnect.
Let’s briefly recap what we did in our mini-project. We spun up a simple API server. Then, we installed and configured Kong Gateway to sit in front of our API server. Next, we added the Rate Limiting plugin to count and limit requests to our server, showing how Kong blocks requests once we exceed certain limits within a window of time.
Lastly, we demonstrated how to group (and count) requests as “similar” with the example of a header value. Doing so enabled our plugin to differentiate counts for requests coming from two different users so that you can apply that rate limit to each user separately.
That’s all there is to it. Kong’s Rate Limiting plugin makes protecting your server ridiculously simple. As a basic traffic control defense measure, rate limiting can bring incredible power and peace of mind. You can find more details in the rate limiting plugin doc.
If you have any additional questions, post them on Kong Nation. To stay in touch, join the Kong Community.
Now that you’re successfully protecting services with the Kong Gateway Rate Limiting plugin, you may find these other tutorials helpful:
- Creating Your First Custom Lua Plugin for Kong Gateway
- Getting Started With Kong’s OpenID Connect Plugin
- 4 Steps to Authorizing Services With the Kong Gateway OAuth2 Plugin
- How to Use the Kong Gateway JWT Plugin for Service Authentication
The post Protecting Services With Kong Gateway Rate Limiting appeared first on KongHQ.


Top comments (1)
Some comments may only be visible to logged-in visitors. Sign in to view all comments.