はじめに
GitHubFlowとは
- GitHub Flowは「GitHub」の開発で使用されているワークフローであり、「git-flow」
に比べてシンプルな構成になっています。
- 参考記事
開発の流れ
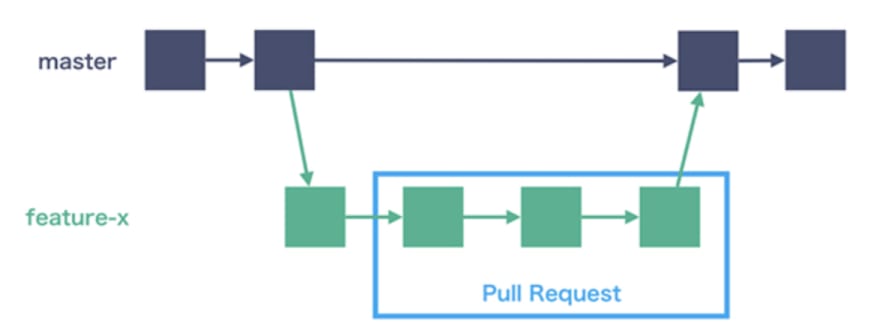
- 作業を開始する際は、mainブランチから開発ブランチを切る。
※ mainブランチは常にリリース可能な状態のこと
- 開発が完了したらリモートへpushし、PRを依頼する。
- PRがOKならば、mainへマージする
実際にやってみる
- リポジトリ作成
- ローカルへclone
- ブランチを切って編集
- 作業内容をpush
- PRを依頼
リポジトリ作成
- リポジトリを作成します。自分のGiuHubへアクセスしてリポジトリを作成しましょう。

$ git clone <コピーしたurl>
- cloneしたら
cdコマンドでcloneしたディレクトリへ移動します。
$ cd git-proactice
ブランチを切って編集
-
feature/add_sample.txtブランチを切リます。
$ git checkout -b feature/add_sample.txt
# ファイル追加
$ touch sample.txt

# ファイル編集
$ vim sample.txt

# 更新されていること確認
$ git status

# ステージングエリアへ追加
$ git add sample.txt

# コミット
$ git commit -m "new file add sample.txt"

# コミットされたことを確認
$ git log --oneline
作業内容をpush
# pushする前にリモートの変更がないか確認します。
$ git pull origin main

# push先はmainではなく、ローカルで作成したブランチです。
# mainは常にリリース可能状態にするためです。
$ git push origin feature/add_sample.txt
PRを依頼

- マージして完了(実際はレビューした人が行います。)


Top comments (0)