
There are many attributes that we use on a daily basis when writing HTML. Attributes such as src for <img> tags which allows us provide a source destination for where our image resides.
These are the kind of attributes that most of us are familiar with. Many of them are necessary for the particular element to function as intended. There are however many other attributes that like me, you might not have even known existed.
Recently I completed a HTML quiz and was surprised at how many attributes I had never seen before. So let's explore some of these attributes together including what they do, when to use them and what elements they suitable with.
1. Available globally
translate
translate is an enumerated attribute meaning we need to explicitly pass translate="yes" or translate="no" as opposed to just translate. It is used to instruct translation tools whether or not the text node of an element and its attribute values that are able to be translated, should be translated.
Think of a situation where your site is being translated to another language but you would prefer if your brand name was not translated. You can instruct these translation tools to not translate it by passing the attribute translate="no".
Furthermore this attribute is respected by major automatic translation technologies such as Google Translate although it is not currently supported by Firefox or Internet Explorer. It could also be picked up by a human's translator tool.
Setting this attribute to translate="yes" is unlikely to ever be required because a lack of any translate attributes on the page signals to the translation tool that everything is to be translated anyway. Although if you need to override this for a particular then maybe you should consider setting this attribute to translate="no".
<a href="/" translate="no">
  My Brand Name
</a>
dir
This attribute is used to change the direction of the elements text content and has three possible states. However it should not be used as a method of aligning text because using dir="rtl" with an dir="ltr" based font will mean your full stops will be in the incorrect position on the left side of the text.
ltr
Left-to-right text direction. This is the default value.rtl
Right-to-left text-direction. Languages such as arabic, hebrew, and pashto are written in this direction.auto
Allows the browser to decide the value based on an algorithm that checks for strong directionality in the elements text characters.
<header>
    <h1>
        dir attribute changes the direction of the elements text content
    </h1>
    <p dir="rtl">
        Text is in english but is aligned to the right without any influence from CSS although punctuation might be out of place.
    </p>
</header>
spellcheck
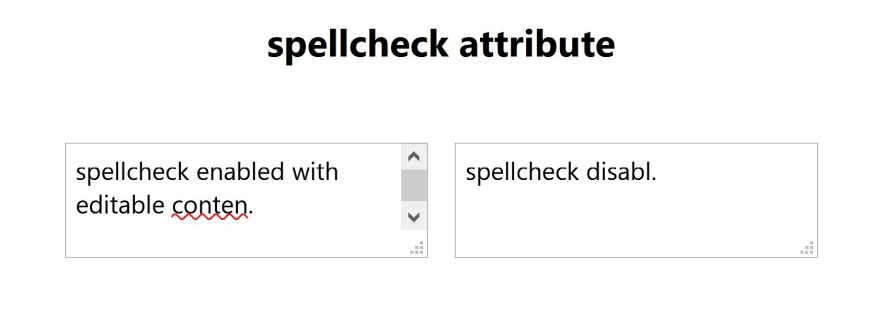
This attribute is used to determine whether or not an elements text content may be checked for spelling and grammar mistakes. It can be applied to any element that contains the contenteditable attribute which allows for its text to be edited by the user.
This however is not recommended especially for production code because. You can however use it on an <input> or <textarea> element as long as the <input> element is not of type password.
It is also an enumerated attribute which means you must explicitly pass spellcheck="true" or spellcheck="false".
<textarea contenteditable="true" spellcheck="true">
    spellcheck enabled with editable conten.
</textarea>
<textarea spellcheck="false">
    spellcheck disabl.
</textarea>
2. <a>
ping
The ping attribute is used on an <a> element and when clicked it sends a POST request with the body "ping" to the url or multiple urls specified which can also be written as a space seperated list of urls.
A use case for this attribute could be analytics where the owner of the site wants to keep a record of the number of clicks on the link.
<a href="https://something.com" ping="https://analytics.com">
  Checkout this content
</a>
download
We can use the download attribute on the <a> tag in combination with the href attribute that we use all the time. When the user clicks on the link the file attributed to the href tag will be downloaded. You can also set a custom filename for the download by assigning a value to the download such as download="my-burger-menu" or just download for the original filename provided by the href attribute.
<a href="my-burger-menu.pdf" download="brand-menu">
  Download our full menu here!
</a>
3. <link>
hreflang & rel
The hreflang attribute is used to instruct the browser as to which language the page is served with allowing its users to be provided with the correct version. It can then provide the site to users during browser searches if they are searching in that specific language. It could be included in either the sitemap, http header or the page markup and you can also target more than one country per page.
To use the hreflang attribute we can pass in the required two letter language code and the optional two letter country code for example for German it would be hreflang="de".
The rel attribute belongs to the link tag that we often use in the head of a HTML document to link things such as stylesheets, icon packages and so on. Its most common job is to inform the search engines about the relationships that exist between your sites pages. When this attribute is set to rel="alternate" in combination with hreflang="de" we are successfully indicating the intended audience of the page.
<link rel="alternate" hreflang="de" href="https://something.de">
4. <ol>
start
If for some reason you would like to start you ordered list from a specific number then we can set the start attribute to an integer.
<ol start="5">
  <li>Five</li>
  <li>Six</li>
  <li>Seven</li>
</ol>

reversed
The reversed attribute will reverse the order of list's item instead sorting the list from the highest to the lowest.
<ol start="5" reversed>
    <li>something</li>
    <li>something else</li>
    <li>something more</li>
</ol>

5. <img>
loading
Images are often the primary reason as to why your web page's initial load could be slow. Perhaps they are not optimized or maybe your page is trying to load all of the images on the page on the initial load. One way we can speed up this initial load speed is by only loading the images which the user will see after the page loads.
There is a native solution in HTML which can help use with this. We can add the loading="lazy" attribute on an <img> element which instructs the browser to defer loading the image until a certain calculated distance from the viewport is reached. The default option for this attribute is loading="eager" which will load the image immediately on page load.
If the user has JavaScript disabled in the browser this lazy loading method will no longer function as a deferred loading method which can be seen here MDN loading attribute
<img alt="a nice descriptive alt" loading="lazy" src="myimage.webp">
decoding
Another attribute for our images is the decoding attribute which allows us to specify how we would like our images decoded with page load. Specifically we can tell the browser whether we want it to decode the images synchronously or asynchronously. It takes three possible values:
auto
This is the default value where the browser will decide what it thinks is best for the decoding.sync
Decode the image synchronously along with the other page content.async
Decode the image asynchronously in parallel with other page content which may help speed up the rendering of the page's other content.
<img decoding="async" alt="a nice descriptive alt" src="myimage.webp">
6. <form>
enctype
The enctype atrribute is used on the element to specify how the data from your form submission should be encoded. There are three states that we can set for this attribute:
application/x-www-form-urlencoded
This is the default setting for the attribute and is suitable for most simple HTML forms. It encodes key-value pairs as tuples where a "&" separates each tuple and a "=" in between each key/ value.multipart/form-data
This value should be specified if your form requires the user to upload a file through the submission processtext/plain
Finally this value sets the encoding to none at all and will just send the data as plain text which is not recommended.
<form enctype="application/x-www-form-urlencoded">
  <label for="country">
  <input id="country" name="country" type="text">

  <input name="submit" type="submit">
</form
novalidate
This is an interesting attribute that allows us to specify whether we would like the data from a form submission to be validated natively on submission. By default it is set as true even if we don't include it and therefore passing novalidate on the form will disable the native validation.
A good use case for setting novalidate on the <form> element is when you want to allow users to save their form progress so they can finish the submission at a later date. It will allow them to save their current form values without running into validation errors preventing them from saving.
<form novalidate>
  <label for="country" >
  <input id="country" name="country" type="text" />

  <input name="submit" type="submit" />
</form
7. <input>
autocomplete
We all despise filling out forms. Despite this there are ways in which we can make it easier for the users of our site to accomplish this quicker. One of them is the autocomplete attribute which tells the browser how it should populate a given form field if auto-completion is set based off the users history.
This attribute can be used with <input> or <form> elements with value differences. When using forms the name on the input element is used to dictate the kind of information that will be used for the auto-completion so make sure you choose an appropriate name for the input (e.g. name, email, city, state, postcode etc...). If used on the <form> element it can have the value of on or off;
A full list of autocomplete options for the <input> can be found here The HTML autocomplete attribute
There are few use cases for turning off this attribute on your forms. One of them might be that you implement your own custom autocomplete or perhaps you have a field which takes some custom data where you don't need to remember previous results. Even if you set it to off there may be cases the where the browser ignores it if it suspects it is a login form (see here MDN How to turn off form autocompletion
<form>
  <label for="country" >
  <input id="country" name="country" type="text" autocomplete="off" />

  <label for="postcode" >
  <input id="postcode" name="postcode" type="text" autocomplete="postal-code" />

  <input type="submit" />
</form
or
<form autocomplete="on" >
  <label for="country" >
  <input id="country" name="country" type="text">

  <label for="postcode" >
  <input id="postcode" name="postcode" type="text">

  <input name="submit" type="submit">
</form
max/min
The max and min attributes can be specified on an <input> element to limit the valid possible value of the element. The value should be less than or equal to the min and greater than or equal to the max. It can be applied to seven different input types which include:
- number
- range
- time
- date
- month
- week
- datetime-local
<form>
  <label for="number">Number</label>
  <input id="number" max="30" min="-30" name="number" type="number">

  <input name="submit" type="submit">
</form>
maxlength
Another way to limit the value of an input field is through the maxlength attribute which we can assign to <input> or <textarea>. It will limit the number of characters that can be entered into the field and it must be an integer that is greater or equal to 0.
We can use this to limit the characters to a username for example although this method should not be relied upon as form validation. It is more a helpful tool to be accompanied by server-side validation of the input.
<form>
  <label for="username">Username</label>
  <input id="username" maxlength="30" name="username" type="text">

  <input name="submit" type="submit">
</form>
pattern
The pattern attribute when applied to an <input> element provides a regular expression(string of characters to define a pattern) that it can use check against the value of its input. It can be applied to the following input types:
- text
- tel
- url
- password
- search
This functionality could be useful if you need some simple validation without needing to resort to JavaScript. The problem with this type of validation though is the ease at which regular expressions can introduce bugs due to its complexity if not understood or tested properly.
Once again relying on front-end validation for form submissions is not recommended and we should always include server-side validation. The example below validates that the input only contains letters or numbers.
<form>
  <label for="username">Username</label>
  <input id="username" name="username" pattern="[A-Za-z0-9]+" type="text">

  <input name="submit" type="submit">
</form>
readonly
Setting the readonly attribute on specific <input> elements check out which elements here, or the <textarea> element disables the ability for the user to edit the input value.
You might think that it sounds the same as the disabled attribute which is commonly used to achieve a similar effect but there a few differences. Unlike to the disabled attribute, when readonly is applied to an input it is still possible to copy the value of the input and users can also focus into the element.
<form>
  <textarea readonly>
    Users will not be able to edit this field but can copy or tab into it
  </textarea>

  <input name="submit" type="submit">
</form>
step
The step attribute specifies a numeric value that the input uses as the stepping interval whenever the user clicks on the increment or decrement buttons. It can be applied to <input> elements of type range, number and the time/date types.
<form>
  <label for="number">Number</label>
  <input id="number" step="5" name="number" type="number">

  <input name="submit" type="submit">
</form>
Conclusion
Thanks for getting this far! I hope you were able to learn something new about HTML to take with you in your web-development journey.
You can follow me @Kieran6dev for more helpful tips as well as my own progress through web development.
If you know of any other lesser-known HTML attributes which I did not include then let me know in the comments below. Thanks!


Top comments (3)
There is one mistake in the article. dir attribute shouldn't be used as text-align. It's a completely different concept. If you use dir="rtl" in a paragraph with ltr font, it will place a dot on the wrong side of the text.
Of course, thanks for the heads up. It's been updated
Any time! Keep up the good content! 👏