Without labels and categories organizing our lives, the world would be chaos. However, what you consider to be a “sensible label” for something may not be the term others would use, and choosing the “correct” terms turns into a game of chance. So how can you guarantee that your project’s content is organized with appropriate and consistent categories?
In this article, I'll demonstrate how to use ML.NET to automate adding taxonomy terms (tags) to content items in the headless CMS Kentico Kontent.
Let’s turn that game of “lucky labeling” into a smarter solution!
No data science or machine learning degree required
I was initially intimidated by the algorithms, statistics, and other mathematical complexities surrounding creating machine learning models, but the fears were quickly dispelled when I discovered Microsoft’s ML.NET Model Builder Extension for Visual Studio. This extension uses automated machine learning to find the best machine learning algorithm for your scenario and data set. Once it chooses the best algorithm, you’re able to select that algorithm, train your model, and evaluate it all within a graphical user interface. The big takeaway: It requires zero machine learning/data science experience.
When is ML.NET categorization helpful in a Kontent project?
Applying machine learning for content categorization is helpful if:
- You have similar taxonomy terms in your project and editors are struggling to decide which term best fits their content.
- There are a lot of taxonomy terms in the project, and you need to identify which ones can be removed.
- You have a large data set and need to identify what terms you should add to your project.
We'll focus on scenario #1: You have similar taxonomy terms in your project, and editors are struggling to decide which term best fits their content.
Categorizing the Chaotic Netflix Catalog
Let's take a look how ML.NET can automate content categorization. We'll aim to automatically suggest Netflix categories for movies based upon their titles, descriptions and ratings using a .NET Core 3.1 console application. Once the application is working, we'll extend the functionality to the headless CMS. For the sake of simplicity, I’ve focused on a non-hierarchical labeling structure where one taxonomy term is assigned to a movie, and have broken the steps down into the following stages:
- Training the model
- Integrating the headless CMS
- Analyzing the content
- Importing the suggested term
Training the model
The first step for creating a ML.NET model is to find a suitable dataset in the supported SQL Database, CSV, or TSV formats. We'll download a CSV file. We need to download and install Microsoft’s ML.NET Model Builder Extension for Visual Studio. Once downloaded, open the console application in Visual Studio, right-click the project, and use “Add” to add “Machine Learning” to the project.
After machine learning has been added, the extension provides six machine learning templates to choose from. Per Microsoft’s scenario examples and descriptions, “Issue Classification” best fits since we are trying to predict labels in 3+ categories, similar to Microsoft's GitHub Issue Classification example.
The next steps are for training the model. Select the CSV mentioned earlier, select the "listed_in" column as the column to predict, and choose the "description", "rating", and "title" columns the model should base its suggestion upon.
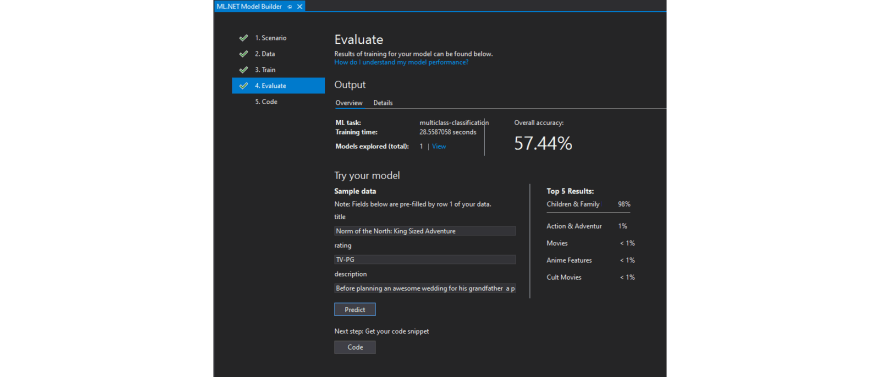
Click the “Train” button at the bottom of the screen. This opens a screen to specify how long to train the model. Microsoft has some training recommendations here: https://docs.microsoft.com/en-us/dotnet/machine-learning/automate-training-with-model-builder#how-long-should-i-train-for. In my project, I chose 120 seconds and it managed a 57.44% accuracy. Clicking “Evaluate” allowed me to test the model against some of the data in the CSV and broke down the top 5 prediction results.
After a few tests, I wasn’t happy with the 57% accuracy results, suggesting that the Microsoft training time recommendation was too short for the seventeen different classification categories in the CSV. That inspired me to re-run the training for 1 hour, which resulted in an improved ~66% accuracy, so don't be afraid to increase the training time.
Click the “Code” button to generate and add two machine learning projects to the project's solution. Once the ML projects are there, consume the model using:
// Add input data
var input = new ModelInput();
input.Title = "The Nightmare Before Christmas";
input.Description = "Jack Skellington, king of Halloween Town, " +
                    "discovers Christmas Town, but his attempts to bring Christmas to his home causes confusion.";
input.Rating = "PG";

// Load model and predict output of sample data
ModelOutput result = ConsumeModel.Predict(input);
Console.WriteLine(result.Prediction);
Run the console application, and it will correctly produce the output “Children & Family Movies,” demonstrating that the ML.NET model is ready to be linked to content in a headless CMS.
Integrating the headless CMS
In a real-world scenario, the project may exist before the need for “Smart” labeling arose, but in our case the demand for machine learning and a headless CMS was driven by some new, fancy Netflix data.
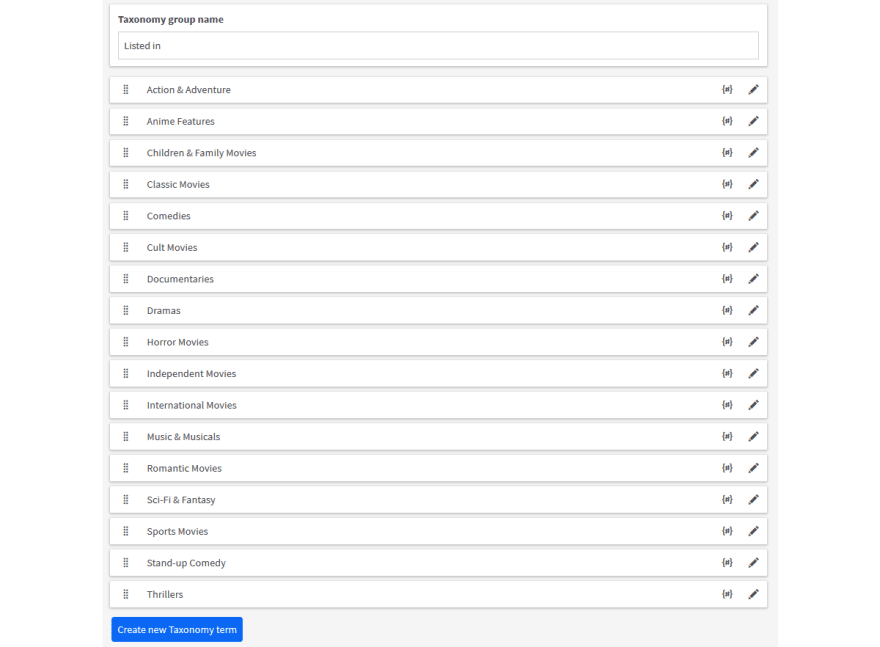
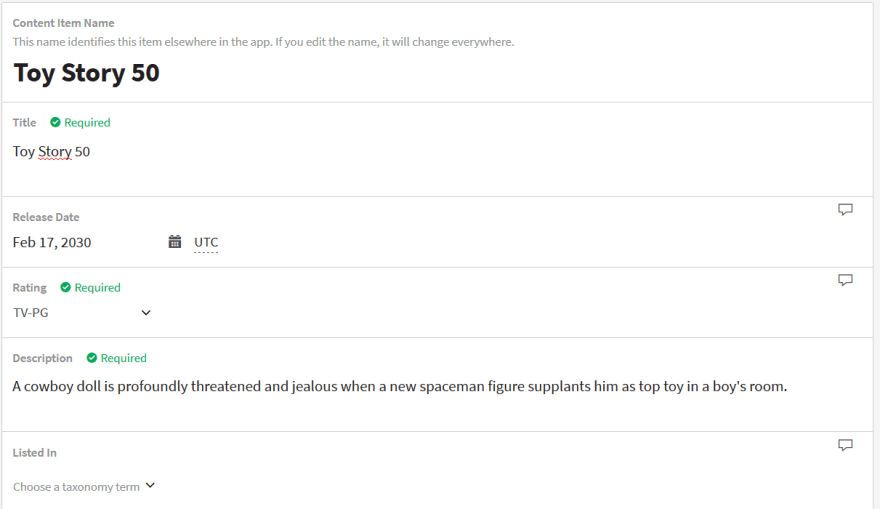
To set up Kontent, create a new project that will contain a single content type named "Movie" and a single taxonomy group called "Listed in." The content type and taxonomy group consist of elements and terms from the CSV used to build the machine learning model:
- Title: a simple text element
- Rating: a multiple-choice element contains all 11 content ratings (rated TV-G to rated R) in the CSV
- Release Date: a date & time element
- Description: a rich text element
- Listed in: a taxonomy group containing all 17 of “Listed in” terms in the CSV
Once the content type and taxonomy terms are present, start making some sample content item variants using not-yet-released movie titles, ratings, and descriptions. I leave them in the “Draft” workflow step to ensure you are able to upsert data to the items from the console application.
Analyzing the content
Now it is time to pull that content from Kentico Kontent and feed it into the console application to make a prediction. For this, install the Kentico Kontent .NET SDK NuGet package, create a class to store your API keys, and a MovieListing Class that returns a strongly typed Movie:
//file location: MLNET-kontent-taxonomy-app/Configuration/KontentKeys.cs
public class KontentKeys
    {
        public string ProjectId { get; set; }
        public string PreviewApiKey { get; set; }
        public string ManagementApiKey { get; set; }
    }
//file location: MLNET-kontent-taxonomy-app/MovieListing.cs
class MovieListing
    {
        IDeliveryClient client;

        public MovieListing(KontentKeys keys)
        {
            client = DeliveryClientBuilder
                .WithOptions(builder => builder
                .WithProjectId(keys.ProjectId)
                .UsePreviewApi(keys.PreviewApiKey)
                .Build())
                .Build();
        }

        public async Task<DeliveryItemListingResponse<Movie>> GetMovies()
        {
            DeliveryItemListingResponse<Movie> response = await client.GetItemsAsync<Movie>(
                new EqualsFilter("system.type", "movie"),
                new ElementsParameter("title", "rating", "description", "listed_in")
                );

            return response;
        }
    }
//file location: MLNET-kontent-taxonomy-app/Models/Movie.cs
public partial class Movie
    {
        public const string Codename = "movie";
        public const string DescriptionCodename = "description";
        public const string ListedInCodename = "listed_in";
        public const string RatingCodename = "rating";
        public const string ReleaseDateCodename = "release_date";
        public const string TitleCodename = "title";

        public string Description { get; set; }
        [JsonProperty("listed_in")]
        public IEnumerable<TaxonomyTerm> ListedIn { get; set; }
        [JsonProperty("rating")]
        public IEnumerable<MultipleChoiceOption> Rating { get; set; }
        [JsonProperty("release_date")]
        public DateTime? ReleaseDate { get; set; }
        public ContentItemSystemAttributes System { get; set; }
        [JsonProperty("title")]
        public string Title { get; set; }
    }
Instantiate this class from the main Program.cs, set and pass the API keys to it, and return a DeliveryItemListingResponse to loop through. Set up the ML.NET consumption logic in a separate class for easier maintainability and a cleaner main program:
//file location: MLNET-kontent-taxonomy-app/TaxonomyPredictor.cs
//generated using: https://github.com/Kentico/kontent-generators-net
class TaxonomyPredictor
    {
        public string GetTaxonomy(Movie movie)
        {
            // Add input data
            var input = new ModelInput();

            input.Title = movie.Title;
            input.Rating = movie.Rating.ToList().First().Name;
            input.Description = movie.Description;

            // Load model and predict output of sample data
            ModelOutput result = ConsumeModel.Predict(input);
            Console.WriteLine("Listing best match: " + result.Prediction);

            //formatting to meet Kontent codename requirements
            //ex: Children & Family Movies => children___family_movies
            var formatted_prediction = result.Prediction.Replace(" ", "_").Replace("&", "_").ToLower();

            return formatted_prediction;
        }
    }
Instantiate a "predictor" from Program.cs. The TaxonomyPredictor.GetTaxonomy(Movie) method can now be used to suggest “listed in” terms when looping through the list of movies returned by MovieListing.GetMovies().
//file location: MLNET-kontent-taxonomy-app/Program.cs

MovieListing movieListing = new MovieListing(keys);
TaxonomyPredictor predictor = new TaxonomyPredictor();

var movies = movieListing.GetMovies();

foreach (Movie movie in movies.Result.Items)
{
    if (movie.ListedIn.Count() < 1)
    {
        string formatted_prediction = predictor.GetTaxonomy(movie);

        Console.WriteLine(formatted_prediction);
    }
}
This will produce the “best match” taxonomy term in the console when run.
Importing the suggested term
Finally, it is time to automate upserting the suggested taxonomy terms to the headless CMS. Use the Kentico Kontent .NET Management SDK in a separate class called TaxonomyImporter:
//file location: MLNET-kontent-taxonomy-app/TaxonomyImporter.cs
class TaxonomyImporter
    {
        ManagementClient client;

        public TaxonomyImporter(KontentKeys keys)
        {
            ManagementOptions options = new ManagementOptions
            {
                ProjectId = keys.ProjectId,
                ApiKey = keys.ManagementApiKey,
            };

            // Initializes an instance of the ManagementClient client
            client = new ManagementClient(options);
        }

        public async Task<string> UpsertTaxonomy(Movie movie, string listing_prediction)
        {

            MovieImport stronglyTypedElements = new MovieImport
            {
                ListedIn = new[] { TaxonomyTermIdentifier.ByCodename(listing_prediction) }
            };

            // Specifies the content item and the language variant
            ContentItemIdentifier itemIdentifier = ContentItemIdentifier.ByCodename(movie.System.Codename);
            LanguageIdentifier languageIdentifier = LanguageIdentifier.ByCodename(movie.System.Language);
            ContentItemVariantIdentifier identifier = new ContentItemVariantIdentifier(itemIdentifier, languageIdentifier);

            // Upserts a language variant of your content item
            ContentItemVariantModel<MovieImport> response = await client.UpsertContentItemVariantAsync(identifier, stronglyTypedElements);

            return response.Elements.Title + " updated.";
        }
    }
Instantiate the importer in Program.cs to use the UpsertTaxonomy method when looping through the list of movies. Create a strongly typed MovieImport model that inherits from Movie in order to accommodate what the Kentico Kontent Management SDK expects when upserting content item variants:
//file location: MLNET-kontent-taxonomy-app/Models/MovieImport.cs
public partial class MovieImport : Movie
    {
        [JsonProperty("listed_in")]
        public new IEnumerable<TaxonomyTermIdentifier> ListedIn { get; set; }
        [JsonProperty("rating")]
        public new IEnumerable<MultipleChoiceOptionIdentifier> Rating { get; set; }
    }
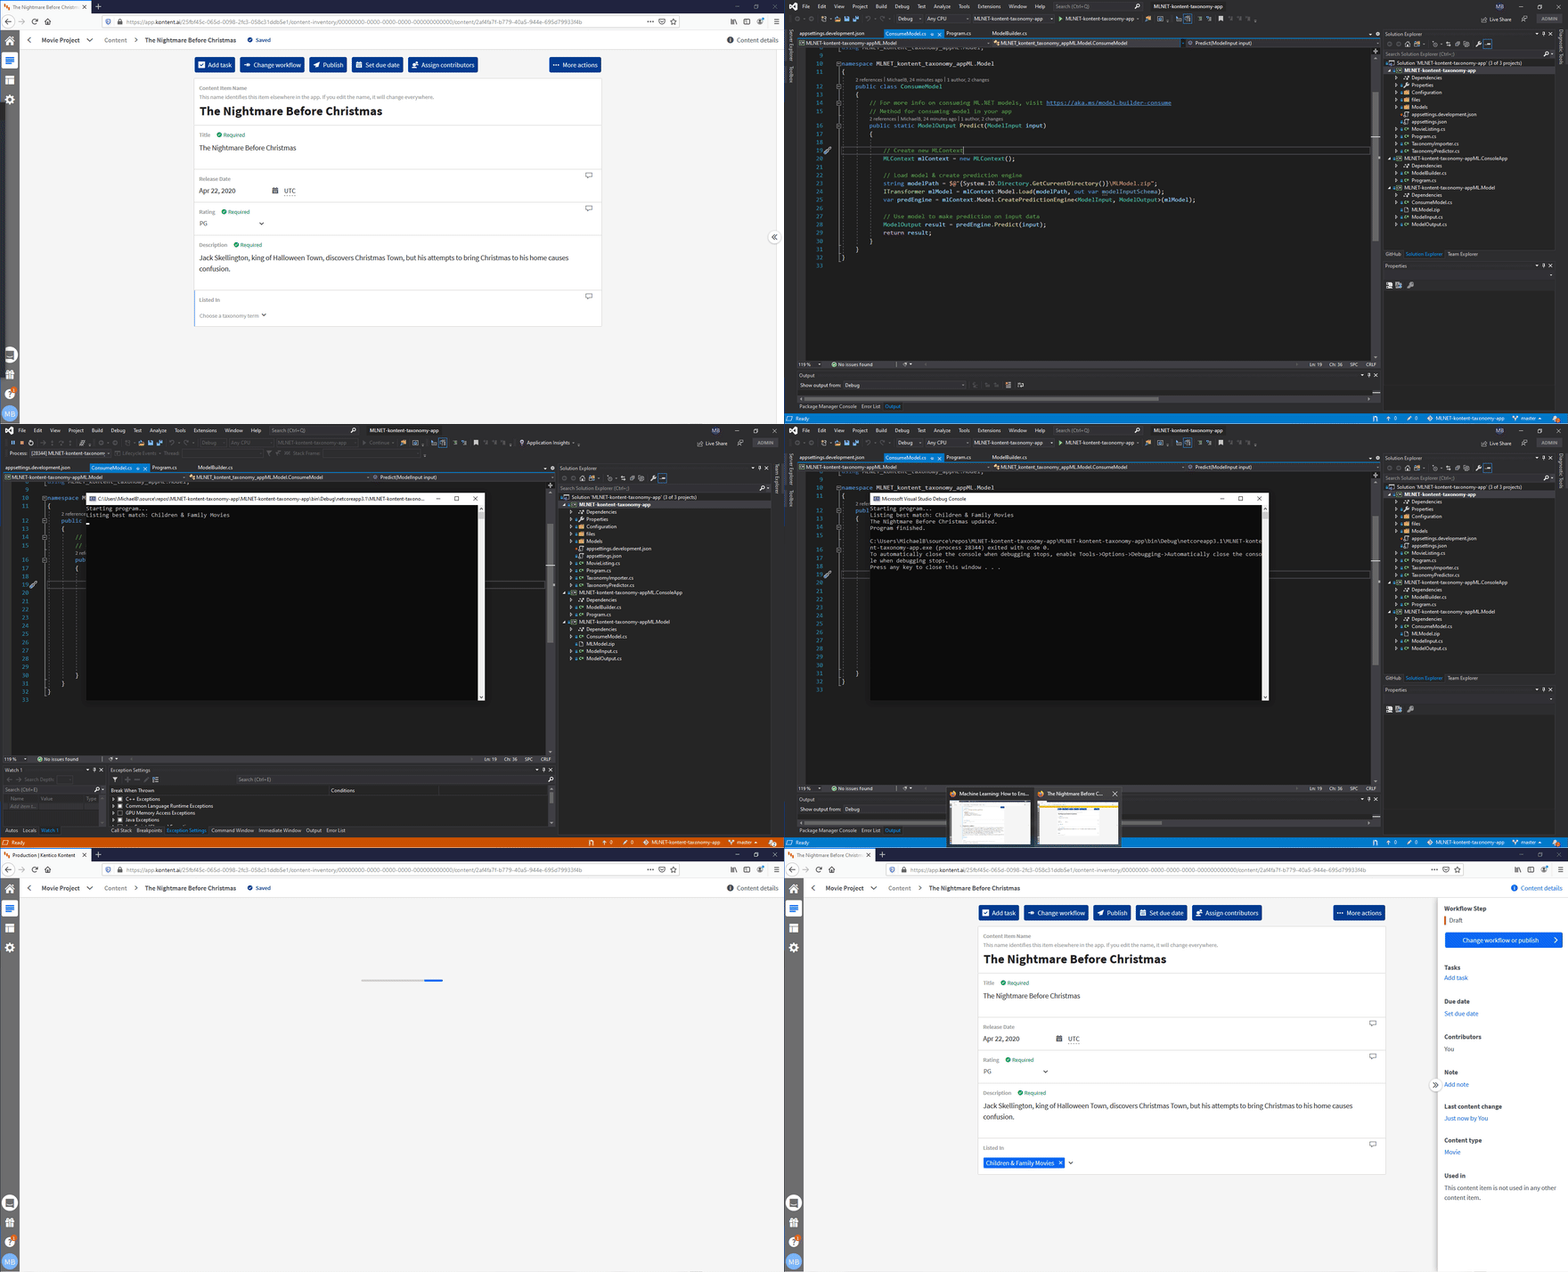
Once this is done, add logic to use environment variables, appsettings.json, and configuration binding using a combination of .NET Core configuration options make your API keys hidden and secure! Below is the completed Program.cs file, configuration files, and result of running the program:
//file location: MLNET-kontent-taxonomy-app/Program.cs
class Program
{
    static void Main(string[] args)
    {
        Console.WriteLine("Starting program...");

        var environmentName = Environment.GetEnvironmentVariable("ASPNETCORE_ENVIRONMENT");

        var configuration = new ConfigurationBuilder()
            .AddJsonFile("appsettings.json", optional: true, reloadOnChange: true)
            .AddJsonFile($"appsettings.{environmentName}.json", optional: true, reloadOnChange: true)
            .Build();

        //file location: MLNET-kontent-taxonomy-app/Configuration/KontentKeys.cs
        var keys = new KontentKeys();

        ConfigurationBinder.Bind(configuration.GetSection("KontentKeys"), keys);

        MovieListing movieListing = new MovieListing(keys);
        TaxonomyPredictor predictor = new TaxonomyPredictor();
        TaxonomyImporter importer = new TaxonomyImporter(keys);

        var movies = movieListing.GetMovies();

        foreach (Movie movie in movies.Result.Items)
        {
            if (movie.ListedIn.Count() < 1)
            {
                string formatted_prediction = predictor.GetTaxonomy(movie);
                var upsertResponse = importer.UpsertTaxonomy(movie, formatted_prediction).Result;

                Console.WriteLine(upsertResponse);
            }
        }

        Console.WriteLine("Program finished.");
    }
}
//file location: MLNET-kontent-taxonomy-app/Configuration/KontentKeys.cs
public class KontentKeys
    {
        public string ProjectId { get; set; }
        public string PreviewApiKey { get; set; }
        public string ManagementApiKey { get; set; }
    }
//file location: MLNET-kontent-taxonomy-app/appsettings.json
{
  "KontentKeys": {
    "ProjectId": "<YOUR PROJECT ID>",
    "PreviewApiKey": "<YOUR PREVIEW API KEY>",
    "ManagementApiKey": "<YOUR MANAGEMENT API KEY>"
  }
}
Imagine the possibilities
In this article, I solved inconsistent content tagging using the ML.NET Model Builder, a .NET Core console application, and a Kentico Kontent project.
In my project, I focused on a flat taxonomy structure and straightforward classification scenario, but this is just one of almost endless machine learning possibilities. For example, combining machine learning with webhook notifications will allow automatic improvements to created content. With this combination, it's possible to automatically write descriptions for uploaded assets or suggest the best SEO keywords for blog posts.
You can find the full source code for my application, supporting data files, and instructions on how to test your own copy of the project here:
I hope this inspired you to stop being lucky, and start being consistent using machine learning! 😃


Top comments (1)
Whenever this is finished, add rationale to utilize climate factors, appsettings.json, and design restricting utilizing a blend of .NET Center setup choices make your Programming interface keys stowed away