
State 0: The Setup
To follow up this tutorial, you'll need this:
[ ] A text editor
[ ] GTK
[ ] glade, and
[ ] Gjs
Stage 1: The Algorithm
We're going to use a pretty simple algorithm to generate passwords based in some character collections group by type.
First, let's create the collections:
lowerCase = 'qwertyuiopasdfghjklzxcvbnm'.split('');
upperCase = 'QWERTYUIOPASDFGHJKLZXCVBNM'.split('');
numbers = '1234567890'.split('');
specialSymbols = `!@#$%^&*-_+=`.split('');
ambiguousSymbols = `{}[]()/\\'"?,.:;~\`|<>`.split('');
Note I'm creating arrays from the strings since it's quicker that way.
Now, lets move to our main problem: Generate a Password.
function generate(
    length = 16,
    useLower = true,
    useUpper = true,
    useNumbers = true,
    useSpecials = false,
    useAmbiguous = false
    ) {

    const source = [];
    const password = [];

    if (useLower) {
        source.push(...lowerCase);
    }
    if (useUpper) {
        source.push(...upperCase);
    }
    if (useNumbers) {
        source.push(...numbers);
    }
    if (useSpecials) {
        source.push(...specialSymbols);
    }
    if (useAmbiguous) {
        source.push(...ambiguousSymbols);
    }

    for (let i = 0; i < length; i++) {
        const char = source[Math.floor(Math.random() * (source.length - 1))];
        password.push(char);
    }

    return password.join('');
}
Done! Yeah! That's it!
You can test the generator in this codepen.
Stage 2: The GUI
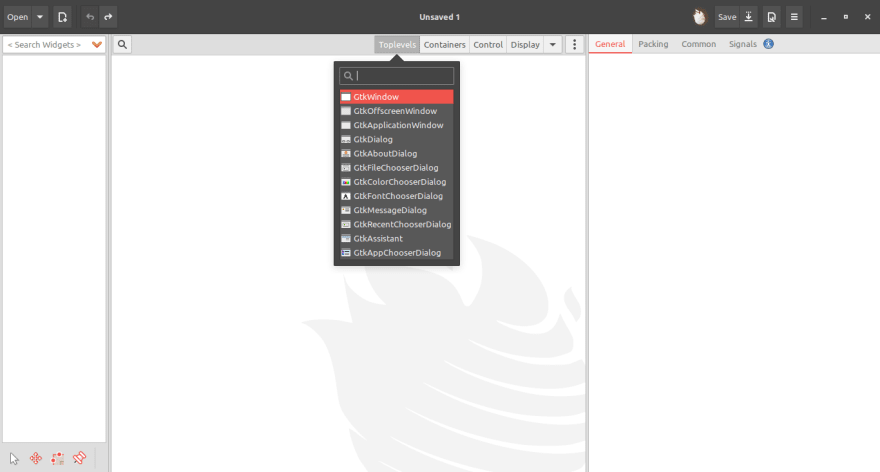
Now, that we have a working logic for our little tool, let's create the GUI with glade.
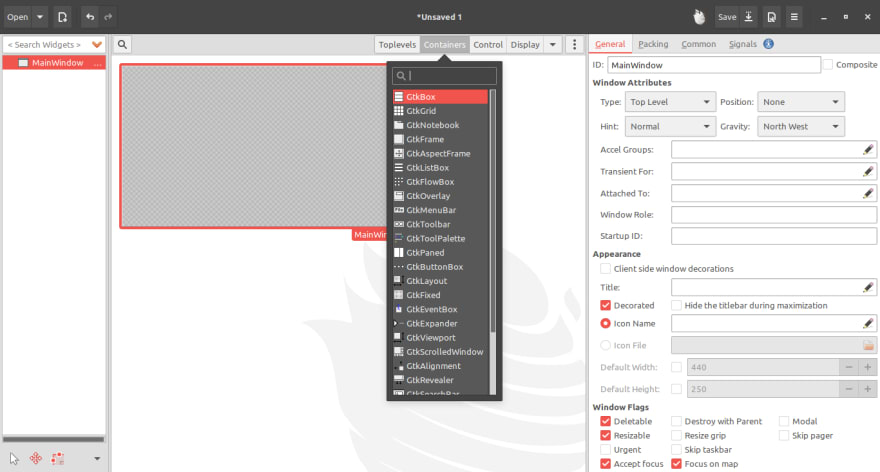
- Start creating a window and set an ID to it, mine is
MainWindow:

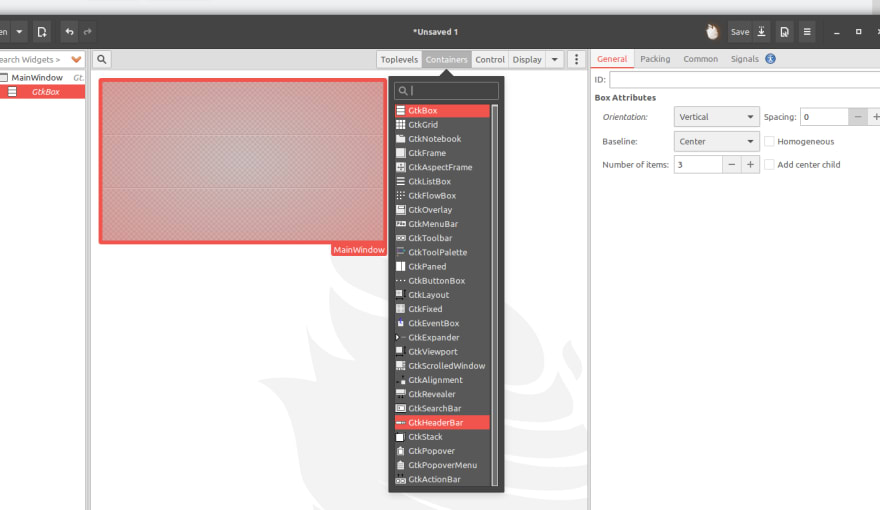
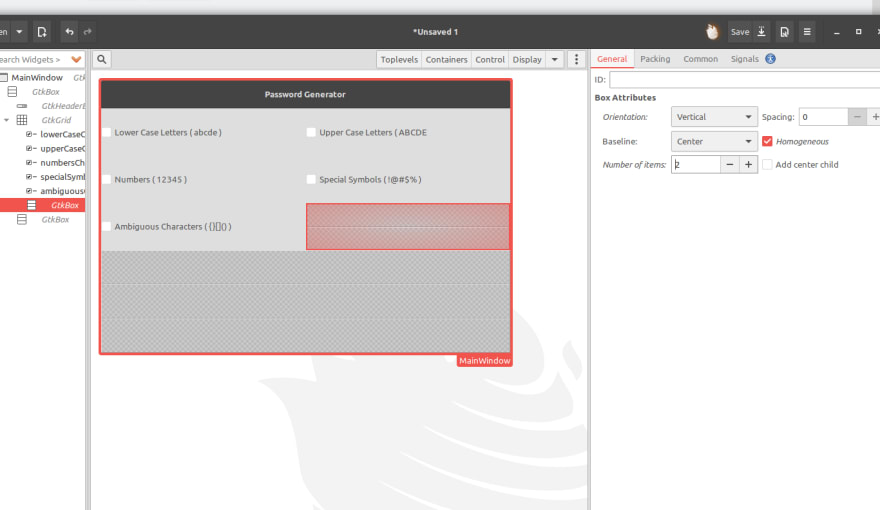
- Add a
GtkBoxand set the following properties: - Orientation: Vertical
- Spacing: 0
- Baseline: Center
- Homogeneous => on
- Number of items: 3
- Add a
GtkHeaderBarand set it up like this: (General) - Title: Password Generator
- Reserve space for subtitle => off
- Spacing: 6
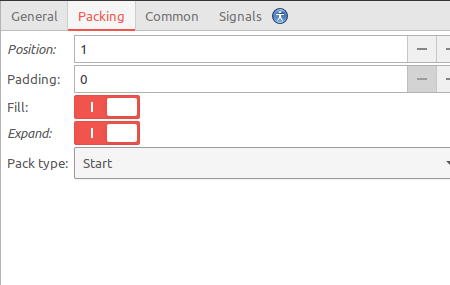
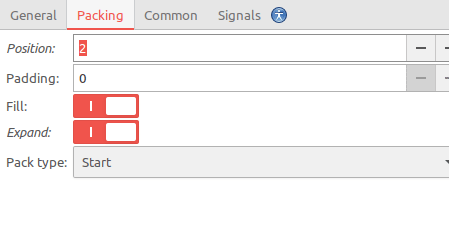
- Number of items: 0 (Packing)
- Position: 0
- Padding: 0
- Fill => on
- Expand => on
- Pack type: Start
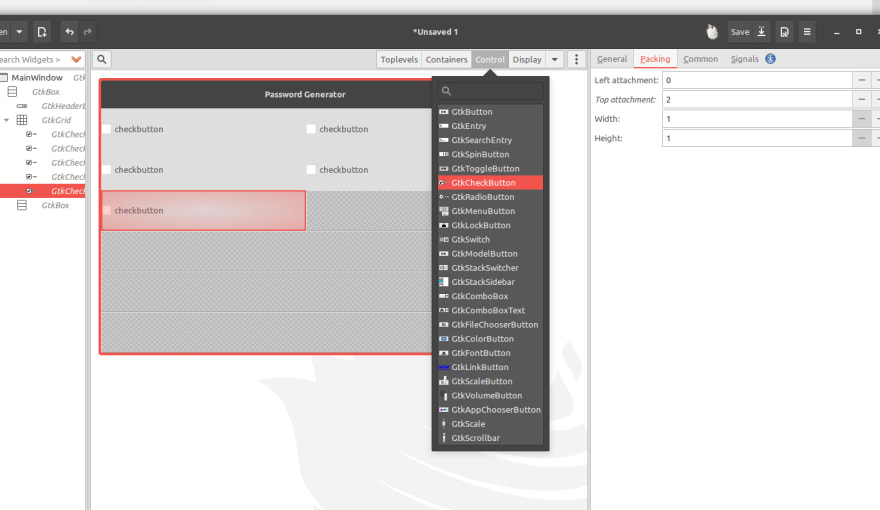
- A
GtkGridfor some checkboxes:

General Properties:

Packing Properties:
- Another
GtkBoxat the bottom:

Packing Properties:
- Add, customize 5
GtkCheckButtonand give a unique ID to each one:

Mine have those ID's:
- lowerCaseCheck
- upperCaseCheck
- numbersCheck
- specialSymbolsCheck
- ambiguousCharsCheck
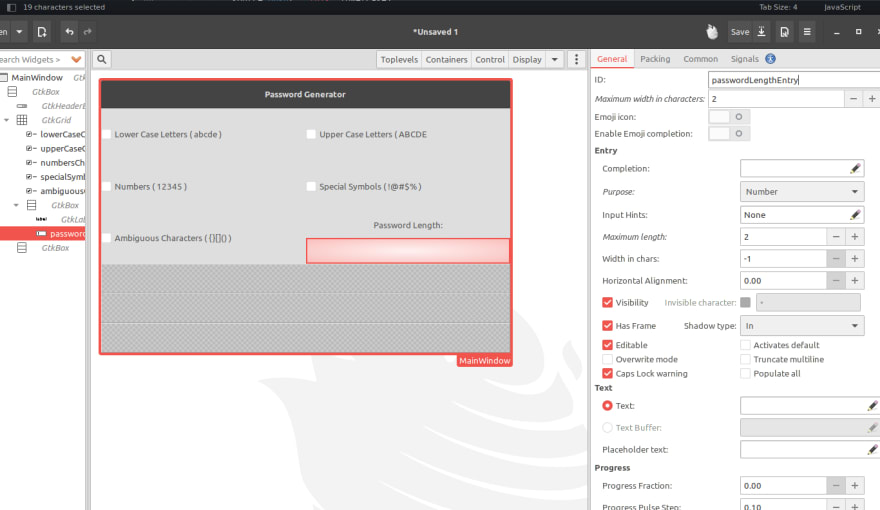
- Add a
GtkLabeland aGtkEntryinside aGtkBox:
- Add A
GtkButtonto call the password generator:

- Two more
GtkLabelto show the generated password:

Leave the second one without text and make it selectable to allow user to copy the password. Don't forget to assign it an ID, in my case is 'generatedPasswordLabel'.
Now just save your new GUI in the project folder. You can save it as a .ui or a .glade file. Any way remember to call it exactly as it is. In my case is mainWindow.ui
Stage 3: Wrapping it up
Ok! Now all we need to do is make this two things work together.
- Import the Gtk functions. Create a new file and save it with this content as
main.js.
#!/usr/bin/gjs

imports.gi.versions.Gtk = '3.0';
const Gtk = imports.gi.Gtk;
Here the first line tells the interpreter we want to use to run this program, Gjs.
Next we ensure we are working with GTK+ v3.0 and import it as Gtk.
- Using OOP Now is time to add our logic, you can work this with a functional programming workflow, but we're going to use a OOP approach:
class PasswordGenerator {
  constructor() {
    this.app = new Gtk.Application();
    this.app.connect('activate', this._onActivate.bind(this));
    this.app.connect('startup', this._onStartup.bind(this));
  }

  _onActivate() {
    this._window.show_all();
  }

  _onStartup() {
    const builder = new Gtk.Builder();
    builder.add_from_file('mainWindow.ui');
    this._window = builder.get_object('mainWindow');
    this.app.add_window(this._window);
  }
}

const generator = new PasswordGenerator();

generator.app.run(ARGV);
If you run this, you're going to see your previously designed GUI, but no actions except quit.
Ok, But... What's going on here?
Well, here, we create a Gtk Application in the class constructor, and connect two events, (activate, and startup) to our methods, _onActivate and _onStartup.
Inside _onStartup we just show up our GUI.
Inside _onActivate we create a builder object, so we can just 'require' our .ui file to charge the GUI. Then we get the UI from the file and save it to a property: _window. Lastly, we add the window to the app. This method will be called before _onStartup, so _window will be set just before be used.
- Linking the Widgets.
Now, we're going to load all the other widgets we neet to collect the info to generate a password.
Let's modify the constructor and the _onActivate methods:
constructor() {
  this.app = new Gtk.Application();
  this.app.connect('activate', this._onActivate.bind(this));
  this.app.connect('startup', this._onStartup.bind(this));
  this._lowerCase = 'qwertyuiopasdfghjklzxcvbnm'.split('');
  this._upperCase = 'QWERTYUIOPASDFGHJKLZXCVBNM'.split('');
  this._numbers = '1234567890'.split('');
  this._specialSymbols = `!@#$%^&*-_+=`.split('');
  this._ambiguousSymbols = `{}[]()/\\'"?,.:;~\`|<>`.split('');
}

_onStartup() {
  const builder = new Gtk.Builder();
  builder.add_from_file('mainWindow.ui');
  this._window = builder.get_object('mainWindow');
  this._generateButton = builder.get_object('generateButton');
  this._generateButton.connect('clicked', this._generatePassword.bind(this));
  this._lowerCaseCheck = builder.get_object('lowerCaseCheck');
  this._upperCaseCheck = builder.get_object('upperCaseCheck');
  this._numbersCheck = builder.get_object('numbersCheck');
  this._specialSymbolsCheck = builder.get_object('specialSymbolsCheck');
  this._ambiguousCharsCheck = builder.get_object('ambiguousCharsCheck');
  this._passwordLengthEntry = builder.get_object('passwordLengthEntry');
  this._generatedPasswordLabel = builder.get_object('generatedPasswordLabel');
  this.app.add_window(this._window);
}
- Add the logic:
Now, all we need to do is add a new version of our generator:
_generatePassword() {
  const source = [];
  const password = [];
  const length = +this._passwordLengthEntry.text;

  if (this._lowerCaseCheck.active) {
    source.push(...this._lowerCase);
  }
  if (this._upperCaseCheck.active) {
    source.push(...this._upperCase);
  }
  if (this._numbersCheck.active) {
    source.push(...this._numbers);
  }
  if (this._specialSymbolsCheck.active) {
    source.push(...this._specialSymbols);
  }
  if (this._ambiguousCharsCheck.active) {
    source.push(...this._ambiguousSymbols);
  }

  for (let i = 0; i < length; i++) {
    const char = source[Math.floor(Math.random() * (source.length - 1))];
    password.push(char);
  }

  this._generatedPasswordLabel.label = password.join('');
}
DONE!
Go to your terminal and run this:
chmod +x ./main.js # this make the file executable
./main.js # this executes the program
Resources
Here is the full project, including a .desktop file and a simple icon. Check it out.

Top comments (0)