Bot Framework Composer is powerful GUI tool to create your bot. This is somewhere between coding and low-coding solution.
Today, I demonstrate how to create bot to get pictures and videos from Instagram by using BotFramework Composer.
Setup
First thing first. Follow instruction here to install all the prerequisites and run the composer.
Make sure you use stable branch.
Create bot from template
1. I can create bot from template. I use "Empty Bot" template this time as I already know what to do.
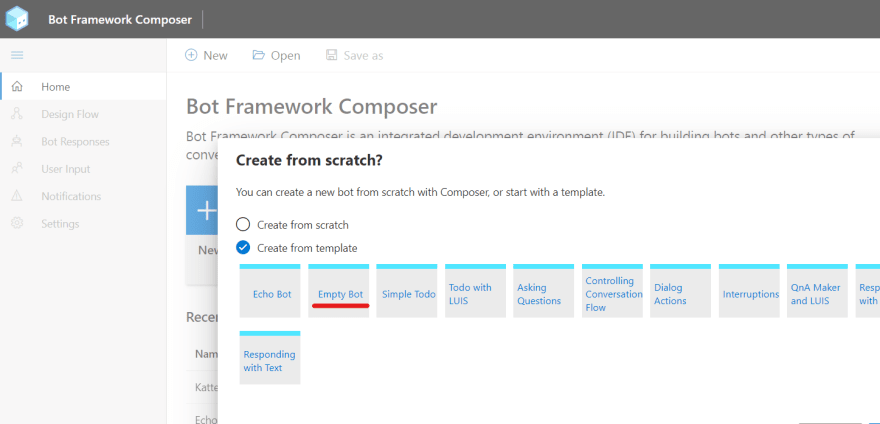
2. I set "MyInstaBot" as it's name and create the bot.
Publish to Azure and set authentication
I can publish the bot by using publish feature.
1. Go to settings menu and click Publish, then click "Create Azure Resources".

2. Specify name, password and others.
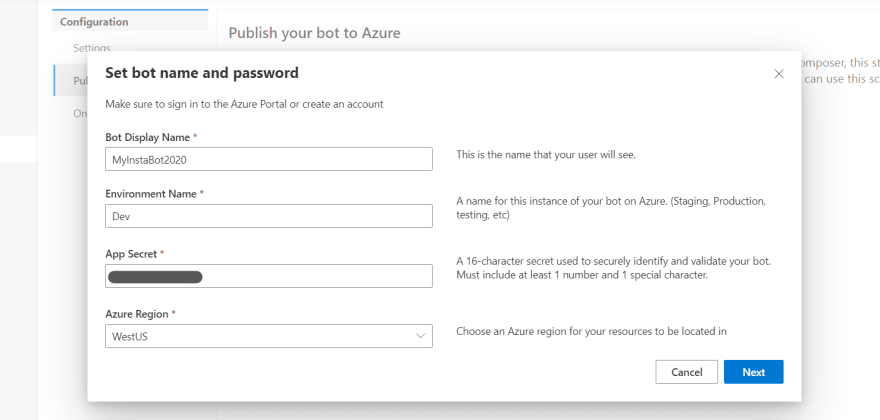
3. The wizard shows you PowerShell script to setup resource. Copy and paste to PowerShell 6+ to provision the resource. This takes 5-10 minutes (mainly due to Cosmos DB setup).

4. After the Azure resource provisioning completed, copy Application Id and password. Go to next. I get publish script which is handy to publish the bot to Azure. Run it and complete the wiard.
Setup Instagram/Facebook Application
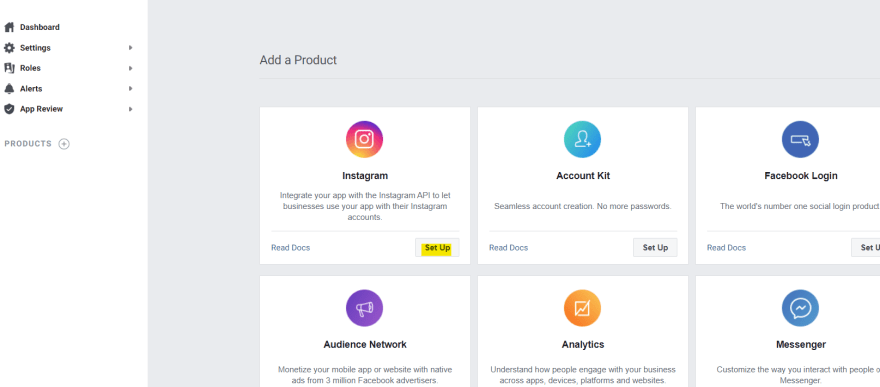
Instagram is under Facebook, thus I need to create Facebook App and setup Instagram application.
1. Go to https://developers.facebook.com and create new app. I couldn't use "Insta" as part of application name, so I just name it "MyMediaBot"

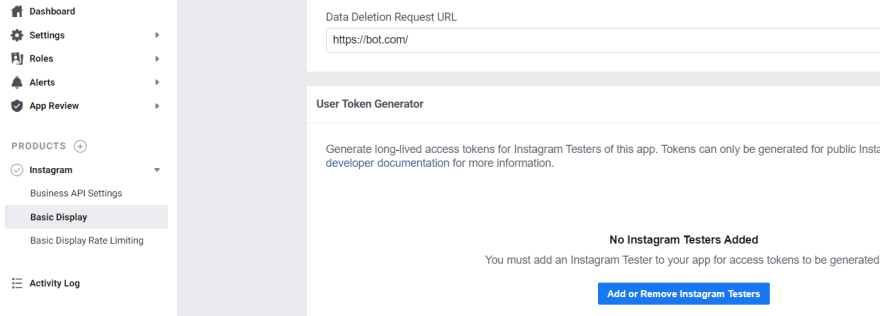
3. Go to "Basic Display" and create new Instagram app.
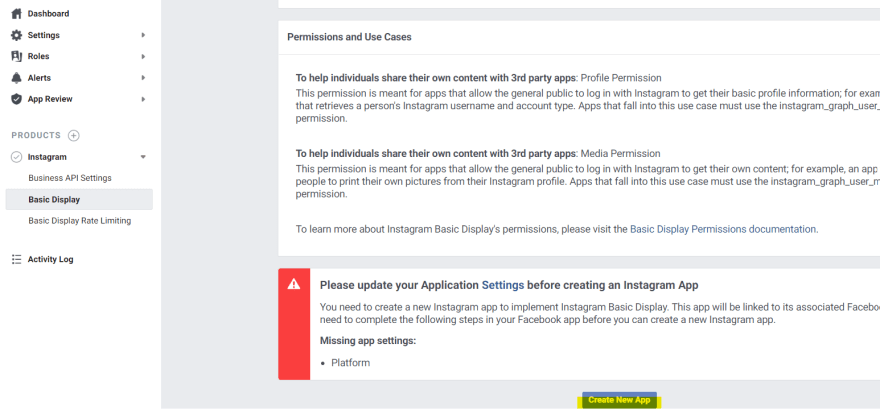
4. Enter "https://token.botframework.com/.auth/web/redirect" as it's redirect URL. Also copy App ID and App Secret.

5. Fill other required fields and save.
7. Add "Instagram Testers" (not Facebook testers). I added my own account. Status becomes "pending" so that I need to accept it.

8. Go to the Instagram account. From "Edit Profile", accept to be a tester.

Configure OAuth for Instagram
Bot Framework Composer takes an advantage of Bot Registration authentication feature.
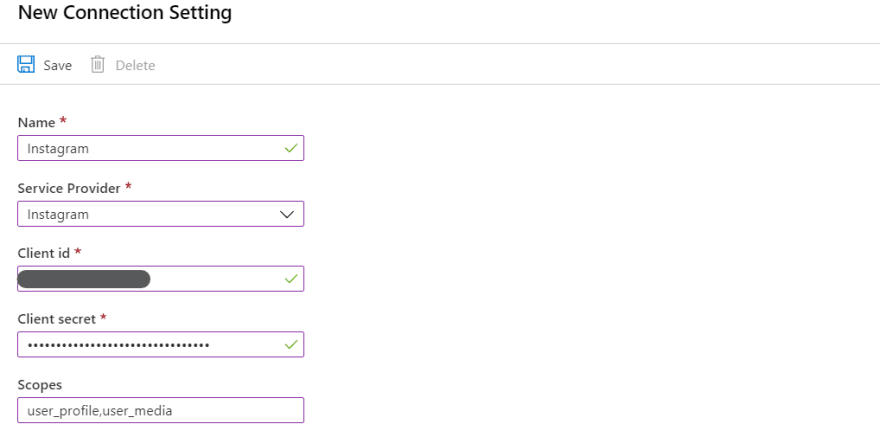
1. Go to Azure Portal and open "Bot Channels Registration". Go to settings and click "Add Settings" under "OAuth Connection Strings".

2. Add "Instagram" settings. I use "user_profile,user_media" as its scope. For more detail, check out Instagram Basic Display Getting Started.
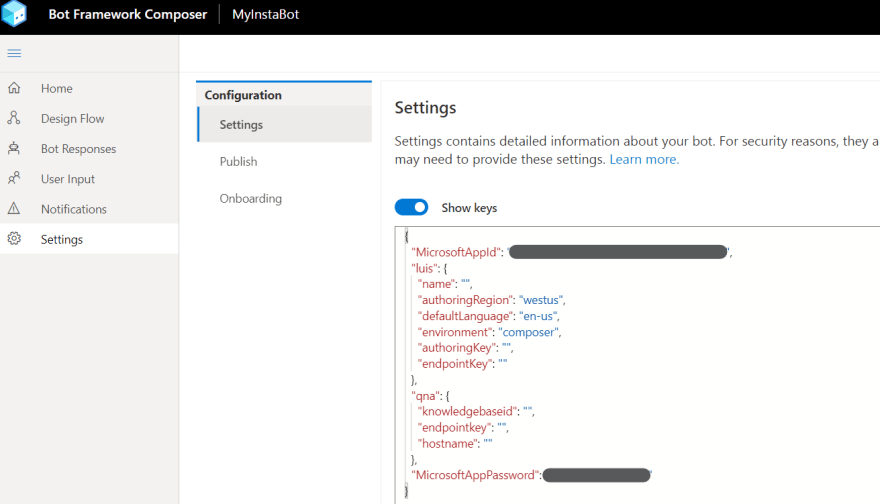
3. Go back to Bot Framework Composer and edit settings. Update "MicrosoftAppId" and "MicrosoftAppPassword", which you can get from Azure Resource Provision setup result.
Configure Dialog
Finally, create dialog to get Instagram media.
1. Add new Dialog and name it "GetInstagram".

2. In "BeginDialog" trigger, add "OAuth login" action.

3. Use Exactly same string value of Instagram connector created above. I also set user.oauth to store authentication result. user is one of memory object I can use to store/get data from bot. See Conversation flow and memory for more detail.

4. Add "Send an HTTP request" action.

5. Use "Get" method and send request to https://graph.instagram.com/me?fields=id&access_token=${user.oauth.token} where I can get my own id.

6. Store the result to dialog.response. The response will be stored in the property and I can get result by accessing dialog.response.statusCode, dialog.response.headers, or dialog.response.content. See Sending an HTTP request and using OAuth for more detail.

7. Add another http request action and send get request to https://graph.instagram.com/${dialog.response.content.id}/media?access_token=${user.oauth.token} which returns array of media ids. I overwrite the result to dialog.response.

8. Add loop condition as the result is array of ids.

9. In the loop, get media detail via get http request to https://graph.instagram.com/${dialog.foreach.value.id}?fields=media_type,media_url,caption,thumbnail_url&access_token=${user.oauth.token}. I can access loop item via dialog.foreach.value. Store thre response to dialog.image

10. Add response action after the http request and add "send media" as placeholder for now.
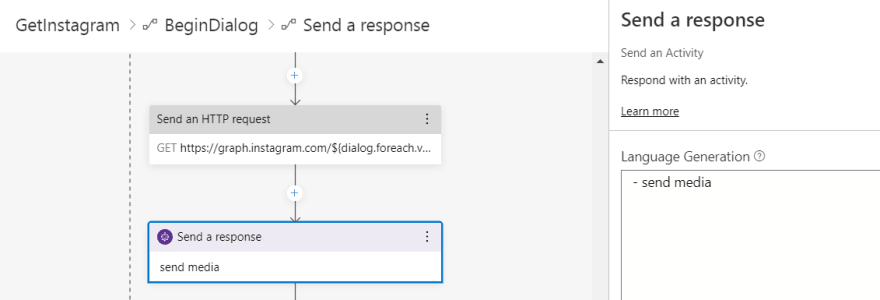
11. Go to "Bot Response" menu where I can tweak response by using Language Generation capabilities.

12. Add following functions to create card.
# GetPictureCard ()
[HeroCard
  title=${if(dialog.image.content.caption==null,'',dialog.image.content.caption)}
  image=${dialog.image.content.media_url}
]

# GetVideoCard ()
[VideoCard
  title=${if(dialog.image.content.caption==null,'',dialog.image.content.caption)}
  image=${dialog.image.content.thumbnail_url}
  media=${dialog.image.content.media_url}
]
13. Call functions depending on metadata from original response.
- IF: ${dialog.image.content.media_type== 'IMAGE'}
    - ${GetPictureCard()}
- ELSE:
   - ${GetVideoCard()}
Create Trigger
I somehow need to "trigger" the dialog. I use "Regex" recognizer this time but I can use "LUIS recognizer" for more rich scenario. See Language Understanding for more detail.
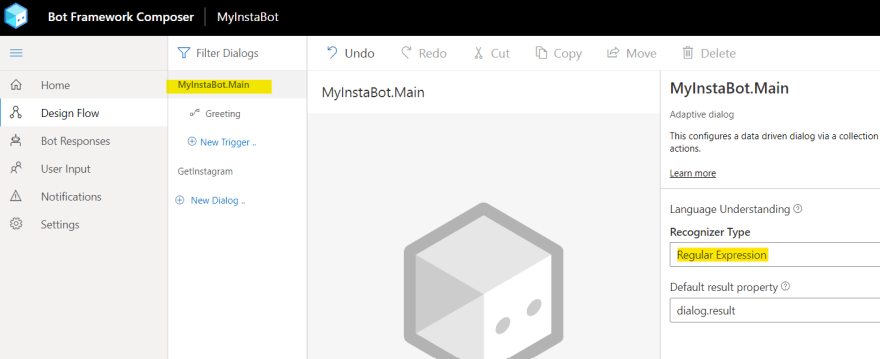
1. Specify "Regular Expression" in main dialog.
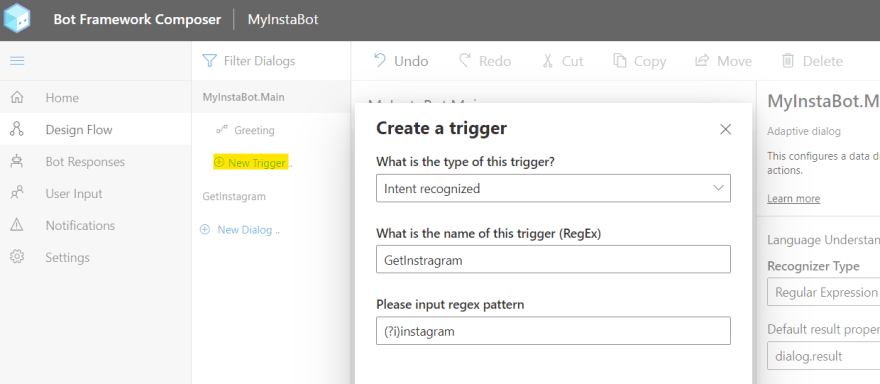
2. Create new trigger. Regex (?i)instagram means case-insensitive to recognize "instagram".
3. In the triggered flow, start new dialog and call GetInstagram dialog.

Test via emulator
Let's test the bot now.
1. Click "Start Bot" on the right upper corner. Once the bot is started, I can launch emulator by clicking " Test in Emulator".

2. Send "Instagram" to bot. I get sign-in action returned. Sign-in by following wizard.

3. The sign-in flow varies depending on how you setup your security. I do MFA so obviously more steps involved.

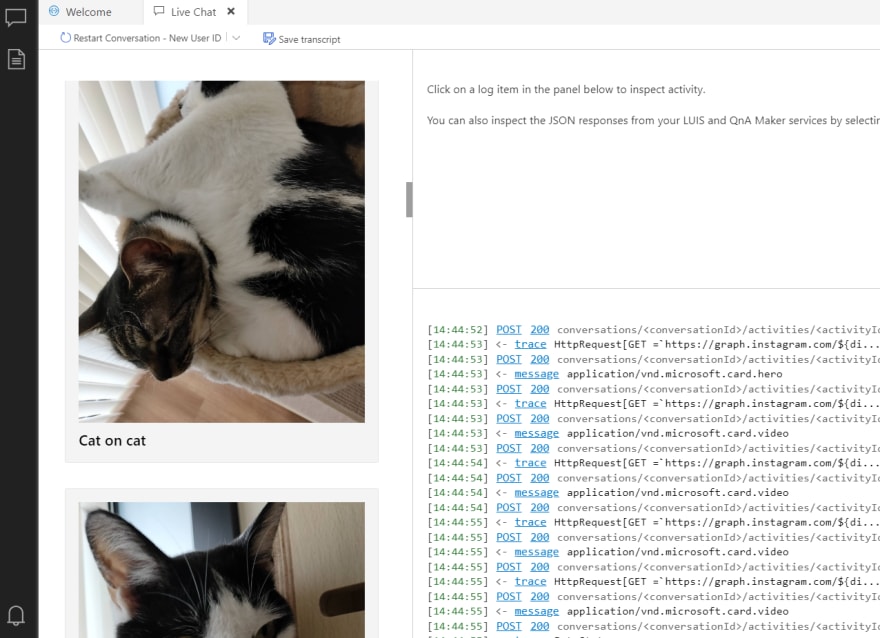
4. Once authentication completed, it gets media from Instagram.
What's next?
I can publish and connect to any channel such as Facebook Messenger, Teams, Slack. See Publish a bot for more detail.
Summary
I could do the same by using BotBuilder/C# or any other supported language. But this is easier. The composer actually generates code behind so I can still do CI/CD, version management, and any other great stuff when I "develop" the bot.
Enjoy!



Top comments (0)