
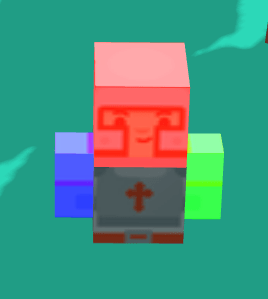
This is my first attempt to create a kitbashed scene from tiling assets. I have used assets by Kenney and his Asset Forge Deluxe as an editor to create the scene. Result was exported to OBJ files and then converted into ready-to-use buffers with vertex data and indices.
Scene has a distinct stylized look with no textures used except for animated characters — knights and birds. To add depth to the scene, a simple linear vertex fog and real-time shadows are applied.
Total scene polycount with both static and dynamic objects is 95k triangles.
Static geometry
All static objects in the scene are merged into 2 large meshes to reduce the amount of draw calls. These assets don’t use textures, instead vertex colors are used. These colors are stored as indices which allows for an easier customization of color themes. Shaders accept up to 32 colors set via uniforms.
The stride for static objects vertex data is 12 bytes — 3 FP16 values are used for position, 3 normalized signed bytes for normals, and 1 unsigned byte for color. 2 unused bytes are used for 4-byte alignment of data:
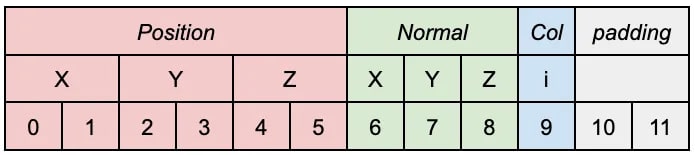
I also tried using a more compact packed GL_INT_2_10_10_10_REV type for vertex positions to fit data in 8 bytes. Unfortunately, its precision was just not enough for this purpose. This data type provides precision of roughly 1 meter per 1 km. And since the scene uses quite large geometries batched into 2 meshes this precision was clearly not enough.
Shadow maps
Lighting in the scene is not baked — shadow maps are used for all objects to cast dynamic shadows. Shadow maps have no cascades since the scene is rather small. However, the detail of shadows is adjusted in a different way. The light source FOV is slightly adjusted per each camera to have more detailed shadows for close-up scenes and less detailed for overviews.
Shadow map resolution is 2048x2048 which is sufficient to create detailed enough shadows.
To smooth out hard shadow edges, the hardware bilinear filtering of shadow map is used. Please note that OpenGL ES 3.0+ / WebGL 2.0 is required for this. OpenGL ES 2.0 supports only unfiltered sampling from shadow maps which results in boolean-like comparison whether a fragment is in shadow or not. Hardware filtering is combined with 5-tap sub-texel percentage closer filtering (PCF). This results in smooth shadow edges with a relatively small amount of texture samples.
I also considered a more expensive 9-tap PCF which improved image quality in case of unfiltered shadow texture but with the filtered texture improvement over 5-tap one was negligible. So according to the golden rule of real-time graphics programming “it looks good enough”, the final filtering used in the app is 5-tap PCF with hardware filtering.
Here you can see comparison of different shadow filtering modes:
Performance
To improve performance, a couple of optimizations are used.
First is a quite typical, simple and widely used one — shadow map is updated at half framerate. This is almost unnoticeable since nothing in the scene moves too fast. For cases when the camera and light direction is about to switch to a new position it is rendered at full framerate to prevent 1-frame flickering of shadow map rendered with the old light source.
The second trick is that the PCF is not applied for distant fragments — instead a single sample of shadow texture is used. It is impossible to spot any difference in image quality in the distance because shadows are still hardware-filtered but the performance and efficiency are improved. But isn’t it considered a bad practice to use branching in the shaders? Yes and no. In general, it is not so bad on modern hardware — if used properly and not in an attempt to create some all-in-one uber-shader. Actually, it is quite often used in raymarching where it can provide a measurable performance improvement by branching out empty/occluded parts. In this particular case branching helps to save one of the most critical resources on mobile GPUs — memory bandwidth.
So how can we test if this branching actually improved things or only unnecessarily complicated shaders?
First, let’s perform a static analysis of shaders. To do this, I use the Mali Offline Compiler tool. Here are results:
Non-optimized:
Work registers: 25
Uniform registers: 16
Stack spilling: false
16-bit arithmetic: 66%
                              FMA     CVT     SFU      LS       V       T    Bound
Total instruction cycles:    0.31    0.14    0.06    0.00    1.00    1.25        T
Shortest path cycles:        0.31    0.11    0.06    0.00    1.00    1.25        T
Longest path cycles:         0.31    0.14    0.06    0.00    1.00    1.25        T

FMA = Arith FMA, CVT = Arith CVT, SFU = Arith SFU, LS = Load/Store, V = Varying, T = Texture
Conditional PCF:
Work registers: 21
Uniform registers: 16
Stack spilling: false
16-bit arithmetic: 68%
                              FMA     CVT     SFU      LS       V       T    Bound
Total instruction cycles:    0.31    0.22    0.06    0.00    1.00    1.50        T
Shortest path cycles:        0.17    0.11    0.06    0.00    1.00    0.25        V
Longest path cycles:         0.31    0.20    0.06    0.00    1.00    1.25        T

FMA = Arith FMA, CVT = Arith CVT, SFU = Arith SFU, LS = Load/Store, V = Varying, T = Texture
So according to these results, the new version is no longer texture-bound in the shortest path and still has the same cycles for the longest path. Also, the number of used registers is reduced. Looks good on paper, isn’t it?
But of course both versions of shaders perform identically in the Android app on my Pixel 7a — it always runs at stable 90 fps. So to see if GPU is less loaded, let’s run Android GPU Inspector on two versions of app and compare some metrics from profiles:
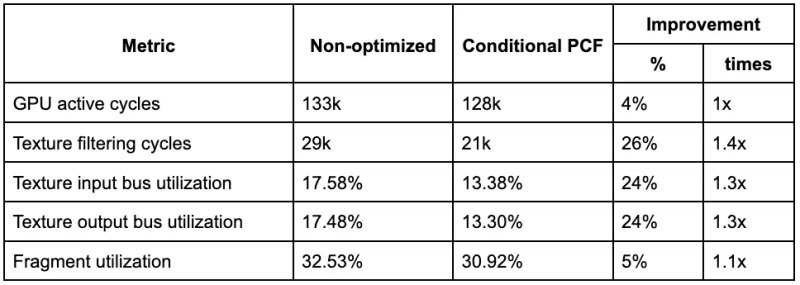
As expected, it doesn’t affect overall GPU cycles much but reduces load on texture units. As a result, the GPU now is less busy — it consumes less power and has more free resources to smoothly render home screen UI on top of live wallpaper.
Animation
All animated objects in the scene are animated procedurally. No baked skeletal or vertex animations are used. The simple shapes of these objects allow them to be animated in vertex shaders relatively easily.
I have found some inspiration for procedural animations of rats in the “King, Witch and Dragon” (https://torchinsky.me/shader-animation-unity/) and fish ABZU (https://www.youtube.com/watch?v=l9NX06mvp2E). Animations in our scene are of course simpler than the ones in these games because animated objects have stylized boxy look and therefore movements are also stylized and simplified.
Knights
Scene has 16 knights with each model made of just 48 triangles.
Animation is done in the KnightAnimatedShader.ts. Let’s take a look at how it animates the model. To do this, first it needs to detect vertices belonging to different body parts of the knight. But the vertex data doesn’t have a special “bone id” attribute for this. This cannot be done by testing vertex positions because some body parts overlap. For example, the head has 4 bottom coordinates identical to the body. Some texture coordinates also overlap so we cannot rely on them too as in the case of rats animation in the “King, Witch and Dragon” game. So I grouped the vertices for each body in the buffer, and the vertex shader determines body parts simply by comparing their gl_VertexID. Of course this is not optimal because it introduces branching but it is not overly excessive and it is done in a vertex shader for a very low-poly model. Model is grouped to have first body vertices, then head and then arms:

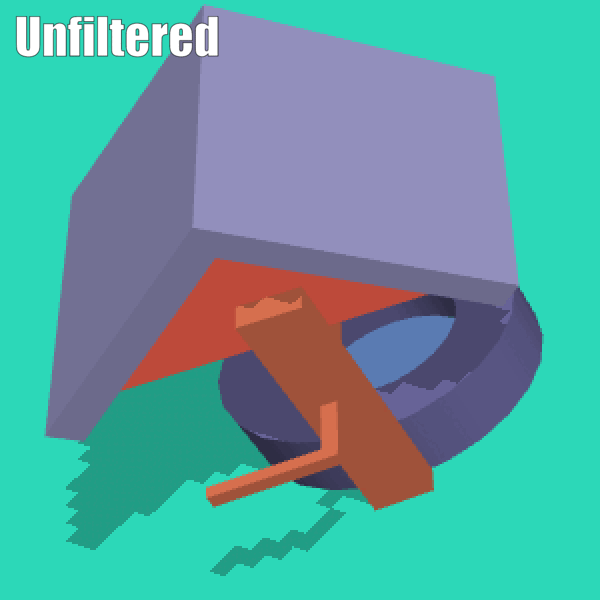
And here is the knight model with applied test coloring to visualize body parts:
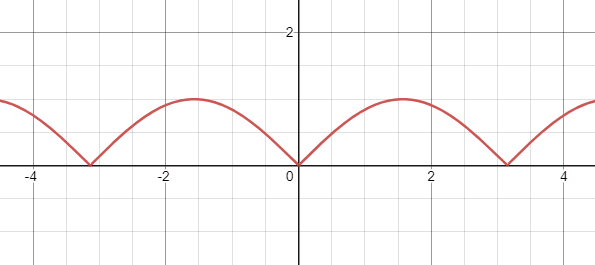
Now that shader knows which vertex belongs to which body part it applies rotations to them provided via uniforms. Rotation pivot points are hard-coded in shader. You may notice that only the head and arms are animated. Because models don’t have separate legs they are not animated. Instead a bobbing is applied to the whole model to add a rather convincing effect of “walking”. The bobbing is simply an absolute value of the sine wave:
Birds
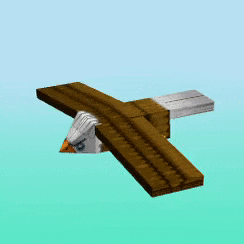
There are 6 eagles soaring in the sky, each model made of 70 triangles. They are flying in different circular paths.
Birds are rendered with EagleAnimatedShader.ts. Animations are done in the same way as for knights but they are simpler since only wings are animated and they are rotated synchronously. So only a single rotation timer is passed into the shader via uniform to control animation.
Flags
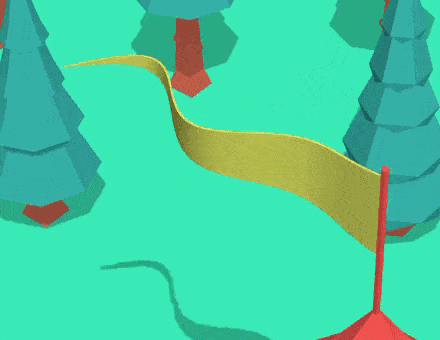
Scene has 3 different flags, all animated with the same FlagSmShader.ts. Technique is inspired by the wavy animation of the fish in ABZU. The simple sine wave is applied to vertices, reducing amplitude closer to the flagpole and increasing near the end of the flag. To correctly apply lighting, normals are also bent. To bend them the cosine wave of the same frequency is used since it is derivative of sine.
Wind Stripes
A small detail added to the scene as a last touch is mostly inspired by the Sea Of Thieves wind effect. In the Sea Of Thieves these stripes serve a purpose of showing wind direction to align sails so they are more straight. In our scene they are purely for the looks so they bend and twist much more.
Let’s take a look at the shader to draw them — WindShader.ts. It is even “more procedural” than the ones used for animated objects. It doesn’t use geometry buffers at all and generates triangles based on gl_VertexID. Indeed, as you can see in the source of its draw() method it doesn’t set up any buffers with vertex data. Instead it uses the hard-coded VERTICES array for two triangles declaring a single square segment. So if we need to draw 50 segments, we issue a glDrawArrays call with 50 * 3 * 2 triangle primitives. The vertex shader offsets each segment based on the gl_VertexID and tapers both ends of a final stripe using smoothstep. Then the coordinates of a resulting spline shape are shifted by an offset timer so they appear moving. Next, the shape is deformed by two sine wave noises in world-space. Color is animated to fade in and out, and offset is animated to move the stripe. All this results in a random snake-like movement of the stripes but keeps them aligned to the world-space path.
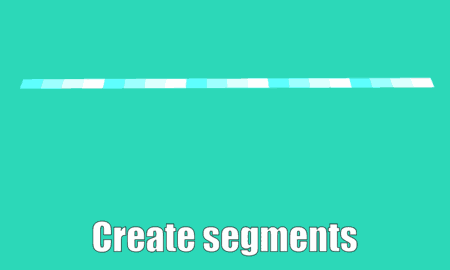
Here is a breakdown of rendering of a short 20-segments wind stripe with test coloring of segments to clearly visualize geometry:
Depth-only shaders
All objects in the scene except wind stripes cast shadows so they have to be rendered to a depth map texture using the light source camera. For this, the simplified versions of corresponding animated and static shaders are used. They perform all the same vertex transformations but don’t calculate lighting.
For example, let’s take a look at the KnightDepthShader.ts. It performs all the same vertex transformations to animate head and arms but does not calculate lighting based on normals. Even more than that, you may notice that its fragment shader is empty — it provides no color output at all. These are perfectly valid shaders in GLSL ES 3.00 since their only purpose is to write to the depth (shadow map) attachment.
Results and possible additional optimizations
Live web demo: https://keaukraine.github.io/webgl-stylized-castle/index.html
Source code: https://github.com/keaukraine/webgl-stylized-castle
Android live wallpaper app - https://play.google.com/store/apps/details?id=org.androidworks.livewallpaper.cartooncastle3d
Final web demo is ~2.2 MB which is not quite optimal because all objects are exported as 2 huge batched meshes. And there are a lot of repetitive objects like trees and cannons which are good candidates for instanced rendering.

Top comments (0)