If you have ever entered information into an app that was persisted (existed across app launches) and that wasn’t stored on a server online, chances are it was saved using Core Data.
Core Data allows saves, edits, and deletions of data within your app, which lives inside of a data store. Information is stored in Core Data as objects - these can have multiple attributes of different types, as well as having relationships to other objects that can determine their behavior.
There is a lot you can do with Core Data, but this tutorial will focus on the basics - creating a data model, a managed object context, and persistent store, then saving, editing, and deleting data. We will create a very simple app that allows you to enter a name, which it will use to provide a customized greeting.
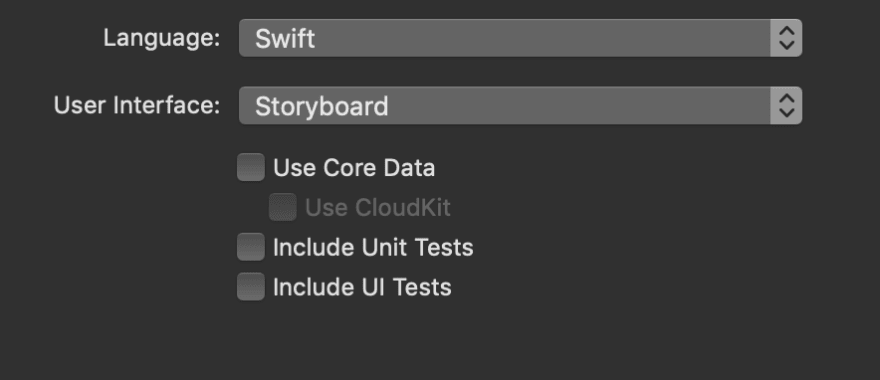
Start by creating a new single-view project, but be sure to leave the ‘Use Core Data’ box unchecked. We’re going to write our own code so we don’t want that boilerplate.
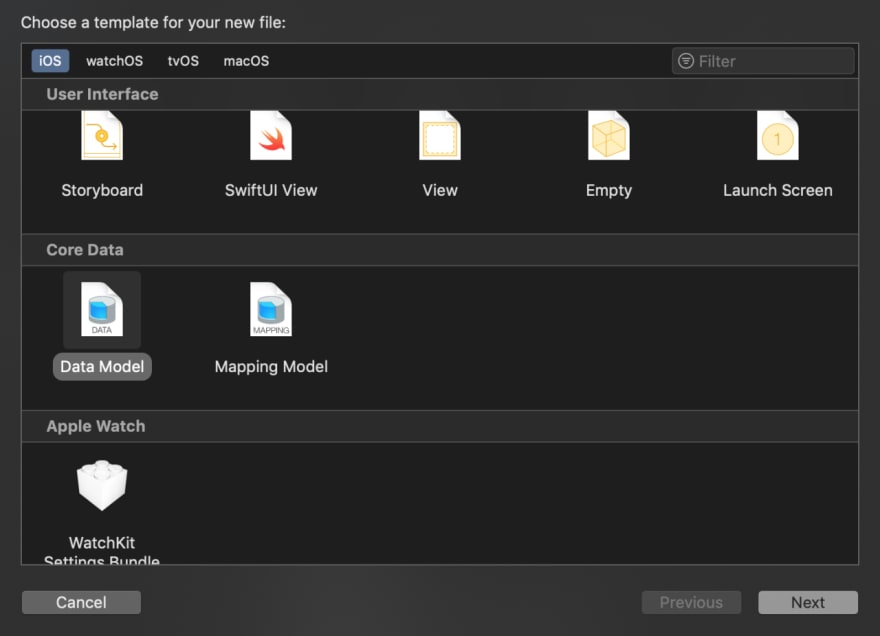
Now that you have your project, let’s create the data model. Create a new file and select data model as the type (scroll down to find it):
With the data model created, you should be taken to a screen where you can add entities to the model. Click ‘Add Entity’ at the bottom.

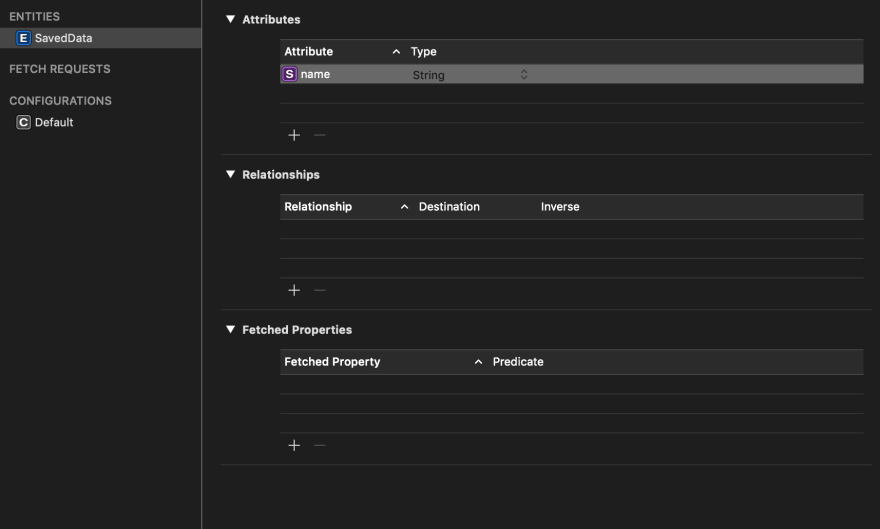
There will now be an entity in the list on the left. Double click its name and change it to something meaningful. I’m going to name mine SavedData. Now our entity needs an attribute - just like structs have attributes, the Core Data entity needs a way to hold values.
Click the plus sign under the empty attributes list, or the one down at the bottom of the view. A blank attribute will be added to your entity. We plan to save a name here, so give the attribute a proper title, and a type of String. Here is our work so far:
Our entity is very bare-bones so this step is complete. Time to add a manager to handle the managedObjectContext and persistentContainer. These allow our code to connect to the Core Data model and actually use it.
Let’s add a new Swift file called CoreDataManager. At the top of the file, be sure to import CoreData. We’ll create a class with the same name.
class CoreDataManager {
      static var shared = CoreDataManager()
}
Shared makes this object a singleton, which guarantees it exists as only one object and can be accessed anywhere. Now add the managedObjectContext and persistentContainer inside the CoreDataManager class, both declared as lazy variables so they aren’t instantiated until they are needed.
lazy var managedObjectContext: NSManagedObjectContext = { [unowned self] in
        var container = self.persistentContainer
        return container.viewContext
        }()

    private lazy var persistentContainer: NSPersistentContainer = {
        var container = NSPersistentContainer(name: "Model")

        container.loadPersistentStores() { storeDescription, error in
            if var error = error as NSError? {
                fatalError("unresolved error \(error), \(error.userInfo)")
            }

            storeDescription.shouldInferMappingModelAutomatically = true
            storeDescription.shouldMigrateStoreAutomatically = true
        }

        return container
}()
Note that the container name matches the name of the data model - if you chose a different name, be sure to use it here instead. The NSPersistentContainer handles accessing the model and context, while the NSManagedObjectContext handles changes. The managedObjectContext is declared with [unowned self] to prevent a reference cycle.
With the CoreDataManager created, we can set the rest of our code. First we’ll create a struct that will hold the loaded data.
struct Name {
    static var loaded: SavedData?
}
The static variable is an optional of the entity type created earlier, SavedData. When loading from the managedObjectContext, if an instance of SavedData exists, we will add it to this static variable. By then checking whether loaded is nil or not, we’ll know if there is a name that was loaded.
The save code added to the ViewController places the loaded data, should it exist, into loaded, and changes the greeting label to use the name. The fetch request uses the entity name to know what to retrieve, in this case our SavedData entity. Because the fetch request returns data in an array, we have to access the first item to get the SavedData object. This is where we first use the loaded variable in the Name struct too.
func loadName() {
          var managedContext = CoreDataManager.shared.managedObjectContext
          var fetchRequest = NSFetchRequest(entityName: "SavedData")

          do {
              var result = try managedContext.fetch(fetchRequest)
              if let data = result.first {
                  Name.loaded = data
                  updateGreeting()
              }
              print("loaded")

          } catch let error as NSError {
              // handle error
          }
     }
By calling loadName in viewDidLoad we check right away if there is a save, and update the greeting label. The save button title is altered too, to indicate that there is an existing name, and any newly entered name will overwrite the previous. With the first app launch, however, there will be no name information to load, and there won’t be until the user makes an entry.
To be able to load something, we have to perform a save operation after the user has entered a name, and tapped the save name button. Here is the code I am using, including the above mentioned function to update the greeting, which will be run whenever the name is changed:
func updateGreeting() {
     if let name = Name.loaded?.name {
          greetingLabel.text = "Hello \(name)!"
              saveButton.setTitle("   Resave Name   ", for: .normal)
     } else {
          greetingLabel.text = "Hello!"
          saveButton.setTitle("   Save Name   ", for: .normal)
     }
}

  func saveName() {
          var managedContext = CoreDataManager.shared.managedObjectContext

          // if there is no text in the textField, don't continue
          guard let enteredText = textField.text else { return }

          guard let currentName = Name.loaded else {
              let nameSave = SavedData(context: managedContext)

              nameSave.name = enteredText
              Name.loaded = nameSave

              do {
                  try managedContext.save()
                  print("saved")
              } catch {
                  // handle errors
              }

              updateGreeting()
              textField.text = nil
              return
          }

          currentName.name = enteredText
          Name.loaded = currentName

          do {
              try managedContext.save()
              print("saved")
          } catch {
              // handle errors
          }

          updateGreeting()
          textField.text = nil
}
This save function checks first that the textField has valid text - if it is blank, we want to return and quit the save process. The function then checks if Name.loaded is nil using a guard statement. If it is, it creates a new SavedData entity (since no entity will currently exist in this case) and saves it, then exits at the return. If Name.loaded is not nil (ie currentName has a value) then currentName has the name reassigned, and is then resaved. At the end of both of these paths, the greeting is updated and the textField text is reset so another name can be entered easily.
Lastly, we need a function that will delete the name entirely.
func deleteName() {
          var managedContext = CoreDataManager.shared.managedObjectContext

          guard let toDelete = Name.loaded else { return }
          managedContext.delete(toDelete)

          do {
              try managedContext.save()
              print("delete successful")
          } catch {
              print("Failed to save")
          }

          Name.loaded = nil
          updateGreeting()
}
This function is called when the delete button is pressed. If Name.loaded doesn’t have a value, then the function exits at the return, as there is nothing to delete. Once the deletion has completed, Name.loaded is reset to nil, since there is no longer an existing save.
If you run the app, and have set up all the interface as I have, you will see that entering a name changes the label, and you can enter a new name, which will overwrite the previous one, or delete it (have no name shown). Entering a name, saving it, then relaunching the app will cause it to be loaded and the greeting with the name will be shown on the screen.
This is part of the power of Core Data - its persistence. With some of your own, you can learn to create even more complex models and take advantage of object relationships and more! Happy coding!

Top comments (0)