前提条件
IntelliJ をインストール済み
Web の Ktor Project Generator で Ktor プロジェクトを作成する
start.ktor.io のサイトにアクセス

このサイトから生成できる
Project 名を決定するとプロジェクト作成が始まる。
Website と Artifact をテキトーに決める

Website と Artifact? のサイト URL? を求められる。
example.com, example.com.ktor1
にする。なんなのか不明なのでそのままにする。
--
Plugins をなしで決定してプロジェクトファイルを DL
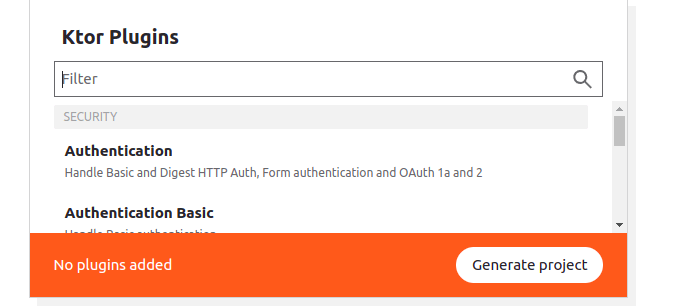
plugin はなしで作成。

すると、zip ファイルで DL される。
DL された Ktor プロジェクトの構成を見てみる
とりあえず解凍して構成を tree でみてみる。
$ tree
.
├── build.gradle.kts
├── gradle.properties
├── settings.gradle.kts
└── src
    ├── main
    │   ├── kotlin
    │   │   └── com
    │   │       └── example
    │   │           ├── Application.kt
    │   │           └── plugins
    │   │               └── Routing.kt
    │   └── resources
    │       └── logback.xml
    └── test
        └── kotlin
            └── com
                └── example
                    └── ApplicationTest.kt
gradle での通常設定ファイル、ビルド設定ファイル、プロパティファイル
これらが root に入っていて
実際のアプリのコードや、ルーティングファイルは
src/main/kotlin/com/example/
Application.kt
plugins/Routing.kt
ここに入っている。
ktor アプリを実行する
ktor アプリを IntelliJ で開いて実行する
~/source/ に ktor1/ のディレクトリを作った。
その中に先程の zip ファイルを exract して展開。
IntelliJ で Kotlin プロジェクトとして開く。

左上のタブの Run をクリックするとモーダルが開いて
今のアプリ、Application.kt の ApplicationKt を実行できる。
2022-06-20 00:50:43.738 [main] INFO  ktor.application -
Autoreload is disabled because the development mode is off.
2022-06-20 00:50:43.765 [main] INFO  ktor.application -
Application started in 0.067 seconds.
2022-06-20 00:50:43.918 [DefaultDispatcher-worker-1] INFO
ktor.application - Responding at http://0.0.0.0:8080
サーバーの起動ログがみれた。
実際に 8080 をみてみると

Hello World が表示されていた。
Application.kt をみてみる
package com.example

import io.ktor.server.engine.*
import io.ktor.server.netty.*
import com.example.plugins.*

fun main() {
    embeddedServer(Netty, port = 8080, host = "0.0.0.0") {
        configureRouting()
    }.start(wait = true)
}
website で設定して com.example という名前空間が
プロジェクトのルート扱いになると推測。
ktor の server ライブラリの engine と netty を import
../plugins からルーティングを import
main の内部で
Netty のサーバーライブラリを使って
port を 8080 に設定して
host を 0.0.0.0 に設定して
ルーティングに ../plugins/ の中身の定義を持ってくる
そしてサーバーをスタートする。
テキストは Routing ファイルにあるようだ。
embeddedServer(Netty, port = 8081, host = "0.0.0.0")
port を一つ上げて再起動すると
2022-06-20 01:03:03.100 [DefaultDispatcher-worker-1] INFO ktor.application - Responding at http://0.0.0.0:8081

ちゃんと 8081 で動く。
plugins/Routings.kt をみてみる
これがルーティングファイル。
package com.example.plugins

import io.ktor.server.routing.*
import io.ktor.http.*
import io.ktor.server.application.*
import io.ktor.server.response.*
import io.ktor.server.request.*
最初の package は名前空間の現在地の宣言と推測。
ktor の server のライブラリを使用する。
routing と application と response を使用。
http と request はまだ使わない。
fun Application.configureRouting() {

    // Starting point for a Ktor app:
    routing {
        get("/") {
            call.respondText("Hello World!")
        }
    }
    routing {
    }
}
Application に入れる形で configureRouting を定義
routing を使って、 root へのアクセスで
レスポンドのテキストとして "Hello World" が返ってくる。
call.respondText("Hello from Kotlin Ktor")

テキストを変更すると、ちゃんと反映された。

型が灰色の四角で出てくるのが便利。
なお、これもコードだと間違えて最初は消そうとしていた。
まとめ
Web で ktor のプロジェクトのジェネレーターを使えば
無料版の IntelliJ でも ktor プロジェクトを DL することができた。
そのプロジェクトは無料版でもキチンと開いて、
ハイライトも動いて、実行もできた。
ktor のプロジェクトは
websiteName/Application.kt
websiteName/plugins/Routing.kt
この2つに動作コードが書かれている。
App では port と host の番号の定義と
Routing ファイルを使った Netty サーバーの起動
Routing では path と対応するレスポンド
これらが書かれていた。
そして、IntelliJ から実行すると、
指定のポートからアクセスできた。
次にやること
https://ktor.io/docs/testing.html#overview
TDD ってことで、テストを書いていきます!
IntelliJ 先生の機能で、実際のファイルからさくっとテストを作れるらしい!
後半やること
https://blog.takehata-engineer.com/entry/how-about-using-ktor
この記事を参考に一通りやる

Top comments (0)