Most Visual Studio Users use the GIT GUI interface built into Team Explorer. While this feature is nice, there's another way to control Git within Visual Studio.
The Git Command Line Interface
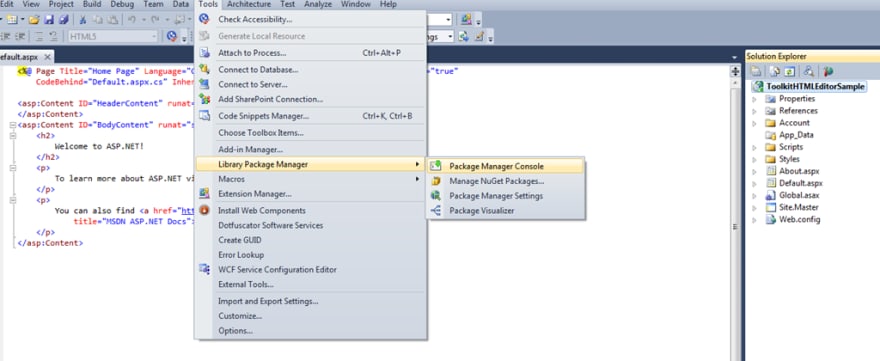
The Nuget package manager console exposes a command line within Visual Studio. Every morning, it's a good idea to assess your git status. Open the command line of nuget pacakage manager
Open Nuget Package Manager Console
This gets us to a command line within Visual Studio
Nice, we can now issue Git Commands!

A Good Daily Routine
Your code base is often worked on by many people; this means each day, there's a number of potential changes you want to pick up. Why? Because some of those changes may cross over into the code you are working on. We want to merge their changes, while preserving ours.
git status

git status tells you which branch you are on, current changes staged and not staged as well as new files.
git stash
It's best to preserve your current changes as we are wanting to pull down other changes from the day before. The git stash removes current changes from the code base and stores them to be recalled later. Let's try to stash our current changes.

Woops! If you see this message, "click no to all" and save all your files. Once saved; try git stash again, followed by git status
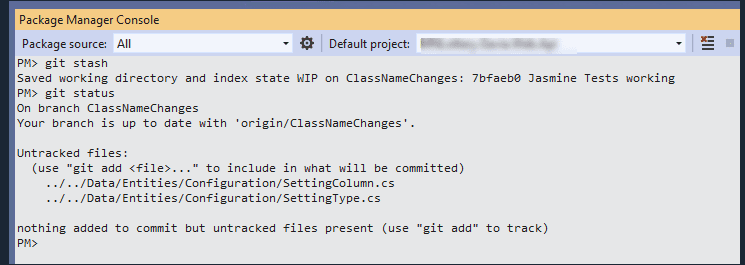
Guess what? Git Stash does not stash any new files. They need to be staged before we can commit.
git add
I usually don't use git add because Visual Studio Code and Visual Studio allow you to add multiple files with a few clicks, this is how you would do it manually.

Now that these files are staged lets stash again.
git stash (again)
Now that we've added the new files, lets stash the changes again. You should see "Saved working directory and index state WIP..."
Sync up with merged code
In Git there are different (layers) of code. 1) Global and local level master 2) Global and local level branches. Each day; we want to update our local master and branches to get the previous day's commits. We've already stashed our local branch changes and now we are going to merge in yesterday's changes.
git checkout master
If you have committed changes on your local branch then you will see the message "Your branch is ahead...." which will be true but doesn't impact us, yet.

git pull
Now we have synched master to our local version of master.
git checkout branchname
Switch back to your branch and then type in
git merge master

git stash pop
Now that you are back on your local branch and have merged the master branch changes, its time to overlay your changes onto you refreshed base branch.
Oh yes, we stashed twice we need to pop the next stash too. git stash pop
merge conflicts
A conflict happens when code could be overwritten. You will have to pick between the incoming changes or stay with the existing changes.
We'll talk about merge conflicts later...
Summary
You will want to get the latest changes every morning merged into you local work.
Run a git status, stash all changes (don't forget to add new files to the commit), switch branch to master, pull changes. Switch back to your local branch, merge the master changes into your branch, then pop the stash to overlay your latest code changes.
In a subsequent article we'll discuss the concept of merging things into master from "committed" branches. This article is merely getting the changes from other branches that already merged into master.
Want to dive a bit deeper?

JWP2020


Top comments (0)