
Hey! I'm on a mission to make 100 React.js projects ending March 8th. Please follow my dev.to profile or my twitter for updates and feel free to reach out if you have questions. Thanks for your support!
Link to today's deployed app: Link
Link to the repo: github
Still just vibing with Firebase backends and getting used to the syntax and important functions. Today I followed this Baylor Breaks It Down tutorial where he builds a time tracking application with React Hooks and a basic no-auth Firestore setup. I changed it up just a bit so that it became a run tracker to record the times and distances of my runs.
In this project we have minimal CSS so that we can focus on the code. I'm sure you noticed. It's ugly, but it works, and frankly this is probably the best tutorial on a beginner React project I've seen. It just makes sense.
Project Summary
This Firebase Firestore project has the following steps. I'd like to summarize them so that you can understand how easy it is.
Part I. Start Firebase
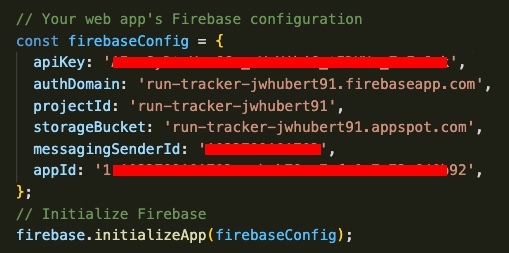
Log into the Firebase console and create a new Firebase project for web. Copy the credentials object it gives you at the end of this process.
In the Firebase project dashboard initialize Firestore.
Part II. Set up your project directory
Use
create-react-appto generate a React project and get rid of the styles in App.css and the JSX in App.js other than the container div.Run
npm i firebaseoryarn add firebaseto download the npm package to your project. This take a little while so you can skip to the next step while it downloads.Create a
firebase.jsfile in your React project'ssrcdirectory. Paste in the environment variables that Firebase gave you in step I-2 above. It will look like this:
Part III. Import and Initialize Firebase
In the firebase.js file above your config object, import firebase from
firebaseand importfirebase/app.Below the config object call the
firebase.initializeApp()method and give the name of your config object (usually calledfirebaseConfig) to it as an argument.Export
firebaseas default from the firebase.js file. You can now import all the firebase you need anywhere in your app with a reference to the file. For me, that looks likeimport firebase from "./firebase".
It's a good practice to test your Firebase connection in App.js by sending a test object to the database. Let's test with the record of a fake run sent to a collection I'd like to call 'runs'.
firebase.firestore().collection('runs').add({
  title: 'Run 1',
  time_minutes: 20,
  distance: 2.2,
});
Head over to your Firebase console and click into Firestore. If you now have a 'runs' collection with a record in it, your application works!
Part IV. Setup Your Form to Send Data
In the next part, I set up a simple form with some inputs to take in info about my run. I used a text input and two number inputs for the name of the run, the distance, and length in minutes, respectively. Store all of their values in state. I used the
useStatehook because I like functional components.Create a form handler function that (a) halts the form's default submit behavior with
e.preventDefault()and then send your form data to Firebase. I did it like this:
  const handleSubmit = (e) => {
    e.preventDefault();
    firebase
      .firestore()
      .collection('runs')
      .add({
        title,
        time_minutes: parseInt(time),
        distance,
        dateTime: Date.now(),
      })
      .then(() => {
        setTitle('');
        setDistance(0);
        setTime(0);
      });
  };
...Now if you submit this form you should see that record in your "runs" collection in Firestore. The .then() function sets all of my state variables back to their defaults and clears the form.
Part V. Display Your Firestore Data
Before jumping into the steps, let's catch up on syntax.
When you make a request to Firebase, it sends back an object with a lot of data. This is called a 'snapshot' of your Firestore collection. It's called that (I believe) because it represents a snapshot of the data you requested at the time you requested it. Your db could change after you request it, so the term snapshot is representative of what you've received. Just wanted to clear that up because I didn't understand that when I was first starting. Okay, back to the code...
Create a list, or a place where you're going to store your new data. I followed the tutorial and used an
olelement. Create a child element (in my case anli) and test how it looks with a line of data.Import the
useEffecthook from React and create your custom hook function at the root-level of your file. Here we're going to write a useEffect hook to listen to changes in state. You can use an empty array as the second argument of youruseEffectfunction so it's not constantly refreshing the component.
function useRuns() {
  useEffect(() => {
    ...
  }, [])
}
- Within the useEffect hook we'll create a callback function that accesses Firestore so that we can grab our data and store it in state. This is really simply done by chaining pre-built Firebase methods from the firebase npm package.
firebase
  .firestore()
  .collection('runs')
  .onSnapshot(snapshot => {
    const myData = snapshot.docs.map((doc) => ({
      id: doc.id,
      ...doc.data()
    }))
    setTimes(myData)
  })
Above, we loop through the snapshot documents (records for this DB collection) and for each document we create an object with an id and all of its data via the .data() method for documents, all destructured into the same object. We then store than object in an array, and store the array in state! That's all of your collection data in state right there! Woo!
For each record stored in state, you can now loop through and display them in your list object. Here's how I did it:
<ol>
        {runs.map((run) => {
          const currentDate = new Date(run.dateTime).toDateString();
          return (
            <li key={run.id}>
              <div className='run-entry'>
                {run.title}
                <code className='date'>{currentDate}</code>
                <code className='distance'>{run.distance} miles</code>
                <code className='time'>{run.time_minutes} minutes</code>
              </div>
            </li>
          );
        })}
</ol>
That's it! You now have a working application that stores your form data to Firestore, and displays that info on screen when you need it.
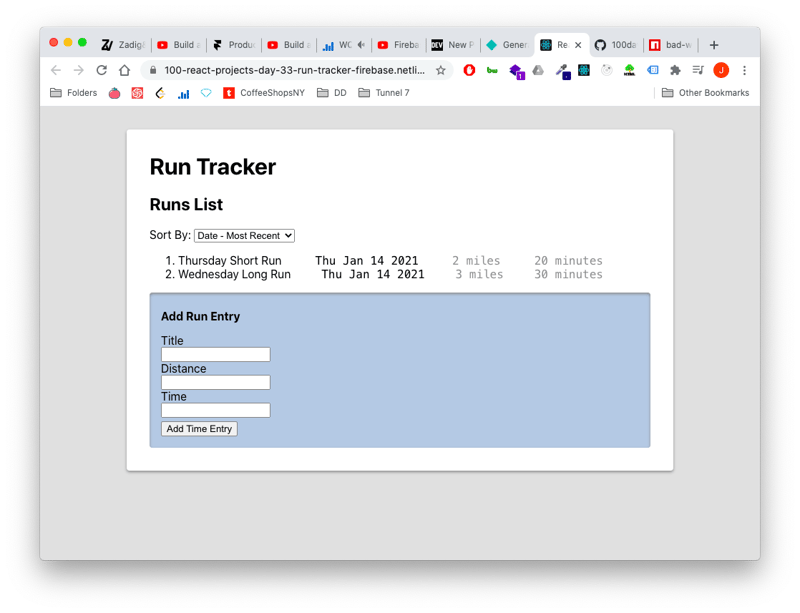
Here's my end product (pretty spiffy I know):
Last Notes
If you're interested in this project- once again- I highly recommend you follow along with the Youtube tutorial. Here is the link. This is by far the best introductory Firebase video I've seen, and I've seen a lot. Go pay the guy homage and like the video so he'll make more.
Happy coding :)


Top comments (0)