
Firebase is a service provided by Google where the back end is provided as a service for use in applications. Its database (Firebase Realtime Database) is a NoSQL database where data is stored in JSON like documents. In this tutorial, you'll learn how to build an Angular application using Firebase as backend. So, let's get started.
Setting up Firebase
Let's start by setting up Firebase by signing into the Firebase console.
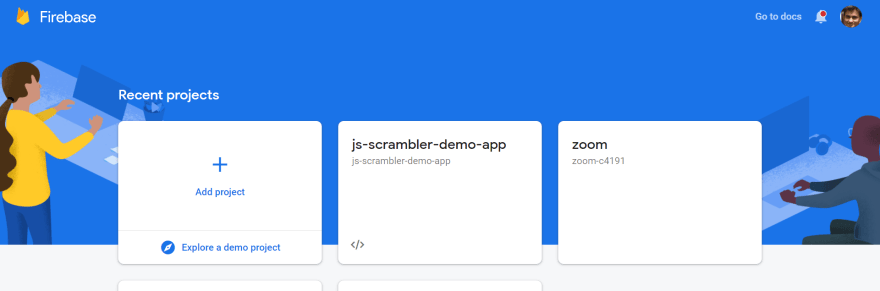
Click on the Add project to create a new project.
You'll be prompted to enter a name for your project. We'll be naming our project js-scrambler-demo. Next, it'll ask you whether to enable Google Analytics for this project or not. We’ll disable it since it's not required for this tutorial and click on Create project.

Click on the continue button and you will be able to view the following screen.

Now since we are creating a web app, we’ll click on the web icon. It'll ask you to register an app. Enter an app name and click on register.
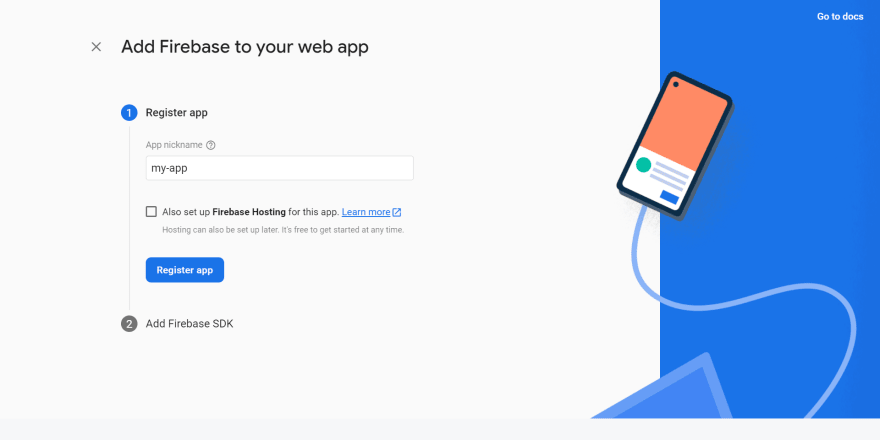
Once you click register app you will be able to see the Firebase app configurations.

We'll be using the above configurations in our Angular app to connect to the Firebase database.
Click on the Firestore Database link from the left side menu from the application home.

Click on the Create database button to create a new database in firestore. Once inside the Cloud firestore data tab, click on the Start collection button to create a new collection.

Enter the name of the collection as shown in the above screenshot. Click next to add a new document to the collection.

We are planning to have two fields to save the name and personal information of the user, hence the fields name and personalInfo.
Next, let's try to connect Firebase to the Angular app.
Connecting Angular to Firebase
Let's start by creating an Angular app using Angular CLI.
ng new angular-firebase
Install @angular/fire and firebase to the Angular project.
npm install firebase @angular/fire
Go to your Angular app, then on the app.module.ts file import the AngularFireModule and the AngularFirestoreModule.
import { AngularFireModule } from  '@angular/fire';
import { AngularFirestoreModule } from  '@angular/fire/firestore';
Using the AngularFireModule initializes the app using the configuration keys from the Firebase console. Here is how the app.module.ts file looks:
import { NgModule } from '@angular/core';
import { BrowserModule } from '@angular/platform-browser';

import { AppRoutingModule } from './app-routing.module';
import { AppComponent } from './app.component';
import { AngularFireModule } from '@angular/fire';
import { AngularFirestoreModule } from '@angular/fire/firestore';
import { FormsModule } from '@angular/forms';

@NgModule({
  declarations: [
    AppComponent
  ],
  imports: [
    BrowserModule,
    AppRoutingModule,
    FormsModule,
    AngularFireModule.initializeApp({
      apiKey: "xxxxxxxxxxxxxxxxxxxxxxxxxxxxx",
      authDomain: "js-scrambler-demo-app.firebaseapp.com",
      projectId: "js-scrambler-demo-app",
      storageBucket: "js-scrambler-demo-app.appspot.com",
      messagingSenderId: "xxxxxxxxxx",
      appId: "xxxxxxxxxxxxxxxxxxxxxxxxxxx"
    }),
    AngularFirestoreModule
  ],
  providers: [],
  bootstrap: [AppComponent]
})
export class AppModule { }
From the app.component.ts file, import AngularFirestore and create an instance of it in the constructor method.
import { AngularFirestore } from  '@angular/fire/firestore';

constructor(private  store: AngularFirestore){}
Define a method called getAll to get all the collected data from Firebase.
  ngOnInit(){
    this.getAll();
  }

  getAll(){
    this.store.collection('userInfo').snapshotChanges().subscribe((response) => {
      console.log('reponse ', response);
    })
  }
As seen in the above method, we are subscribing to the collection's snapshot changes which gives us the full collection information. You can use the response to parse the collection information.
Save the above changes and run the application and you'll be able to get the collection userInfo details in the browser console. So, that means we are able to connect to the database. Now let's see how to implement basic CRUD operations on Firebase from Angular.
Adding Bootstrap to Angular
Install Bootstrap and the required dependencies to the Angular project.
npm install bootstrap jquery popper.js
Add the following to the script references to the angular.json file under architect -> build key.
"styles": [
    "src/styles.css",
    "node_modules/bootstrap/dist/css/bootstrap.min.css"
],
"scripts": [
    "node_modules/jquery/dist/jquery.min.js",
    "node_modules/popper.js/dist/umd/popper.min.js",
    "node_modules/bootstrap/dist/js/bootstrap.min.js"
]
Fetching the Data
So, we already fetched the data from the collection using the getAll method. But you need to parse the data and render it to the user interface.
Inside the app.component.ts file, define a variable called dataSource which we'll use to render the collection info in tabular form.
dataSource : any;
From the response received from the collection snapshotChanges you need to iterate over each data and collect the required info. You'll be requiring the unique document ID, name, and personal Info from each document. Each document's payload.doc has the required information which we can parse as shown,
  getAll(){
  this.store.collection('userInfo').snapshotChanges().subscribe((response) => {
      this.dataSource = response.map(item =>
        Object.assign({id : item.payload.doc.id}, item.payload.doc.data())
      );
    })
  }
Now once you have the data, let's render the data to the UI. For the rendering of the data add the following HTML to app.component.html.
<div class="container m-100 main">
  <div>
    <svg data-bs-toggle="modal" (click)="openDialog()" xmlns="http://www.w3.org/2000/svg" width="32" height="32" fill="currentColor" class="bi bi-cloud-plus-fill" style="cursor: pointer;" viewBox="0 0 16 16">
      <path d="M8 2a5.53 5.53 0 0 0-3.594 1.342c-.766.66-1.321 1.52-1.464 2.383C1.266 6.095 0 7.555 0 9.318 0 11.366 1.708 13 3.781 13h8.906C14.502 13 16 11.57 16 9.773c0-1.636-1.242-2.969-2.834-3.194C12.923 3.999 10.69 2 8 2zm.5 4v1.5H10a.5.5 0 0 1 0 1H8.5V10a.5.5 0 0 1-1 0V8.5H6a.5.5 0 0 1 0-1h1.5V6a.5.5 0 0 1 1 0z"/>
    </svg>
  </div>
  <table class="table">
    <thead>
      <tr>
        <th scope="col">#</th>
        <th scope="col">Name</th>
        <th scope="col">Personal Info</th>
        <th>

        </th>
      </tr>
    </thead>
    <tbody>
      <tr *ngFor="let item of dataSource; let i = index;">
        <th scope="row">{{i+1}}</th>
        <td>{{item.name}}</td>
        <td>{{item.personalInfo}}</td>
        <td class="action">
          <svg (click)="edit(item.id)" xmlns="http://www.w3.org/2000/svg" width="16" height="16" fill="currentColor" class="bi bi-pencil-fill" viewBox="0 0 16 16">
            <path d="M12.854.146a.5.5 0 0 0-.707 0L10.5 1.793 14.207 5.5l1.647-1.646a.5.5 0 0 0 0-.708l-3-3zm.646 6.061L9.793 2.5 3.293 9H3.5a.5.5 0 0 1 .5.5v.5h.5a.5.5 0 0 1 .5.5v.5h.5a.5.5 0 0 1 .5.5v.5h.5a.5.5 0 0 1 .5.5v.207l6.5-6.5zm-7.468 7.468A.5.5 0 0 1 6 13.5V13h-.5a.5.5 0 0 1-.5-.5V12h-.5a.5.5 0 0 1-.5-.5V11h-.5a.5.5 0 0 1-.5-.5V10h-.5a.499.499 0 0 1-.175-.032l-.179.178a.5.5 0 0 0-.11.168l-2 5a.5.5 0 0 0 .65.65l5-2a.5.5 0 0 0 .168-.11l.178-.178z"/>
          </svg>
          <svg (click)="delete(item.id)" xmlns="http://www.w3.org/2000/svg" width="16" height="16" fill="currentColor" class="bi bi-trash-fill" viewBox="0 0 16 16">
            <path d="M2.5 1a1 1 0 0 0-1 1v1a1 1 0 0 0 1 1H3v9a2 2 0 0 0 2 2h6a2 2 0 0 0 2-2V4h.5a1 1 0 0 0 1-1V2a1 1 0 0 0-1-1H10a1 1 0 0 0-1-1H7a1 1 0 0 0-1 1H2.5zm3 4a.5.5 0 0 1 .5.5v7a.5.5 0 0 1-1 0v-7a.5.5 0 0 1 .5-.5zM8 5a.5.5 0 0 1 .5.5v7a.5.5 0 0 1-1 0v-7A.5.5 0 0 1 8 5zm3 .5v7a.5.5 0 0 1-1 0v-7a.5.5 0 0 1 1 0z"/>
          </svg>
        </td>
      </tr>
    </tbody>
  </table>
</div>
As seen in the above code, we are iterating over the dataSource to render it in tabular form. Add the following CSS to the app.component.css file.
.m-100{
    margin: 100px;
}

.main{
    padding: 1.5rem;
    border: 1px solid #dee2e6;
    border-top-left-radius: .25rem;
    border-top-right-radius: .25rem;
}

.action svg{
    margin: 0px 5px 0px 5px;
}
Save the changes and run the Angular application. You can add some data to the collection from the Firebase console and you should be able to see it in the Angular application.

Adding New Data
In the app.component.html code append the following HTML code to show an add/edit modal popup.
<button #btnShow style="display: none;" id="btnShow" type="button" class="btn btn-primary" data-bs-toggle="modal" data-bs-target="#exampleModal" ></button>

<div id="exampleModal" #myModal class="modal" tabindex="-1">
  <div class="modal-dialog">
    <div class="modal-content">
      <div class="modal-header">
        <h5 class="modal-title">Add New User</h5>
        <button #btnClose id="btnClose" type="button" class="btn-close" data-bs-dismiss="modal" aria-label="Close"></button>
      </div>
      <div class="modal-body">
        <div class="mb-3">
          <label for="exampleFormControlInput1" class="form-label">Name</label>
          <input type="text" [(ngModel)]="name" class="form-control" id="exampleFormControlInput1" placeholder="enter name">
        </div>
        <div class="mb-3">
          <label for="exampleFormControlTextarea1" class="form-label">Personal Info</label>
          <textarea class="form-control" [(ngModel)]="personalInfo" placeholder="enter some personal info" id="exampleFormControlTextarea1" rows="3"></textarea>
        </div>
      </div>
      <div class="modal-footer">
        <button type="button"  class="btn btn-secondary" data-bs-dismiss="modal">Close</button>
        <button type="button" (click)="add()" class="btn btn-primary">Save changes</button>
      </div>
    </div>
  </div>
</div>
Define name and personalInfo in app.component.ts. Create a method called add which will add a new document to the userInfo collection based on the data entered in the popup.
add(){
      this.store.collection('userInfo').add({name : this.name, personalInfo : this.personalInfo});
  }
Inside the app.component.ts add a reference to the buttons to open and close the popup using ViewChild. Also define two methods for opening and closing the modal popup using the button references.
@ViewChild('btnShow')
btnShow!: ElementRef;

@ViewChild('btnClose')
btnClose!: ElementRef;

openDialog(){
  this.btnShow.nativeElement.click();
}

closeDialog(){
  this.btnClose.nativeElement.click();
}
In the app.component.html file you have already added a click reference to the add method. Now go ahead and also add the closeDialog method call inside the add method to close popup after adding the document.
add(){
      this.store.collection('userInfo').add({name : this.name, personalInfo : this.personalInfo});
      this.closeDialog();
  }
Save the changes and click on the add icon to add a new record. You will be able to add a new record from the Add New User pop-up screen.

Updating Existing Record
For updating an existing record you need to have the unique document ID. So when the user clicks on the edit icon, let's keep the id and other details in a variable.
editObj : any;
Now let's define a method called edit and pass document ID to it. Using the ID let's fetch the document information and populate the popup.
  edit(id : string){
    this.store.collection('userInfo').doc(id).get().subscribe((response) => {
      this.editObj = Object.assign({id : response.id}, response.data());
      this.name = this.editObj.name;
      this.personalInfo = this.editObj.personalInfo;
      this.openDialog();
    })
  }
Save the changes and click on the edit icon of any existing record and the details will get populated.
Next, let's modify our add method to update in case of an existing record.
  add(){
    if(this.editObj){
      this.store.collection('userInfo').doc(this.editObj.id).update({name : this.name, personalInfo : this.personalInfo});
    } else {
      this.store.collection('userInfo').add({name : this.name, personalInfo : this.personalInfo});
    }
    this.closeDialog();
  }
As seen in the above code, if an editObj exists we update the particular document records, and if not we add a new one.
Save the changes and click on the edit icon to edit an icon. Make some changes and click save. You will be able to update the existing information to Firebase.
Add a clearEdit method to clear the editObj and reset variables. You can call it on the close button click.
clearEdit(){
  this.editObj = null;
  this.name = "";
  this.personalInfo = "";
}
Add the clearEdit method on the close button in app.component.html
<button type="button" (click)="clearEdit()" class="btn btn-secondary" data-bs-dismiss="modal">Close</button>
Deleting Record
For deleting a document from Firebase you need to call the delete method on a document fetched with a document ID. Here is how the delete method looks:
delete(id : string){
  this.store.collection('list').doc(id).delete();
}
The method call is already added in the app.component.htmlfile. Save the changes and click on the delete icon corresponding to a record and you will be able to delete an existing record.
Wrapping it Up
In this tutorial, you learned how to build a basic CRUD app using Angular and Firebase. For detailed information related to Firebase and its APIs, you can refer to the official documentation.
The source code from this tutorial is available on GitHub.
Lastly, if you want to learn how you can secure your Angular source code against theft and reverse-engineering, be sure to check our guide.

Top comments (0)