
Let's explore how to fulfill your image editing needs right in the terminal.
You are a software developer and spend a lot of your time with command line programs inside a terminal. Then once in a while you have to leave the comfort of your text-based world, go make coffee while waiting for Photoshop to load up, only to then make a quick change on some graphic. Wouldn't it be great if there would be a quick and easy way to do this from the comfort of your terminal? Drinking this much coffee is not healthy for you in any case.
Enter GraphicsMagick — "the swiss army knife of image processing".
You might not have heard of GraphicsMagick before, but maybe you heard of ImageMagick, its older cousin. It knows a few more things. Or just different things. Also it is mostly slower. In any case you can switch switch between them pretty easily and all commands below should still sort of work.
Let's get started. First make sure you have GraphicsMagick installed. You can do so easily by running brew install graphicsmagick or apt-get install graphicsmagick or something similar for your operation system.
Don't get scared by the project's archaic website. The documentation in there is in fact pretty decent. Of course you can also avoid opening a web browser and use man gm in your terminal instead. The binary to use GraphicsMagick for the command line is named gm.
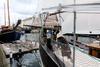
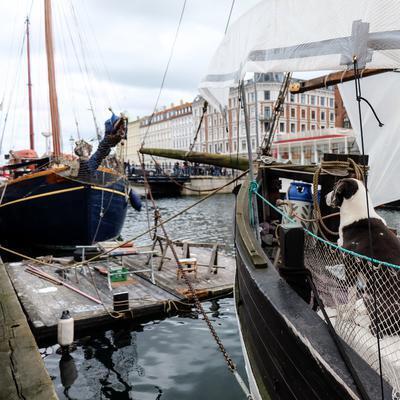
For all examples we will use this image from Unsplash:

Resizing
Before we start, gm provides different sub-commands and those take flags and arguments for configuration.
To do resizing we will use the gm convert command. Note that you can use gm mogrify with basically the same options, but mogrify overwrites
the given file while convert saves the results into a new file, which is definitely saver for our experiments.
As @mudasobwa pointet out, GraphicsMagick also provides binaries to access its commands directly from the command line. So in the examples below we will simply use convert instead of gm convert, but they do the same thing.
To follow along, you can find the images in this folder.
First we run the following which tells us the dimensions of 600 by 400 pixels:
$ file captain-dog.jpg
captain-dog.jpg: JPEG image data, JFIF standard 1.01, resolution (DPI), density 72x72, segment length 16, baseline, precision 8, 600x400, frames 3
The simplest way to resize an image is to specify a new width. The height scales proportionally:
convert -resize 100 captain-dog.jpg dog-100.jpg
Alternatively you can specify a width and a height, then the program will resize the images to fit into the new dimensions without changing the proportions:
convert -resize 200x100 captain-dog.jpg dog-200-100.jpg

convert -resize 100x200 captain-dog.jpg dog-100-200.jpg

You can also use percentage instead:
convert -resize 50% captain-dog.jpg dog-half.jpg

Instead of changing the original image, you can also extend it to fill out the given dimensions:
convert -extent 100 -background red
  dog-100-200.jpg dog-extend-100.jpg

Note that I also specified a background color. The color format is pretty similar to the way you might already know from CSS or other places. You can also set it to transparent.
If you need the image in the center you can do this by setting the gravity, but make sure to set it before setting -extent since GraphicsMagick applies the options in order:
convert -gravity center -extent 100
  -background red dog-100-200.jpg dog-extend-center.jpg

Note that if you like to use a faster resizing algorithm you can use -scale instead of -resize.
Cropping
Closely related to resizing, we often need to cut out a certain part of an image.
Let's crop the image to a square:
convert -crop 400x400 captain-dog.jpg dog-square.jpg
Now the dog is cut off on the right side. Let's place the square in the center. To do this we need to do the calculation on our own and specify the offset in the crop dimensions:
convert -crop 400x400+150
  captain-dog.jpg dog-square-center.jpg

This looks about right. Note that the different options can be combined and even repeated. The order is important:
convert -resize 200 -crop 400x400+150
  captain-dog.jpg dog-square-center-error.jpg

This didn't work, but if we switch the arguments order, it looks correct:
convert -crop 400x400+150 -resize 200
  captain-dog.jpg dog-square-center-small.jpg
Alternatively you can leave the order and change the dimensions instead:
convert -resize x200 -crop 200x200+75
  captain-dog.jpg dog-square-center-small2.jpg

Mirror Images
You can mirror images on both axes:
convert -flop captain-dog.jpg dog-flop.jpg

convert -flip captain-dog.jpg dog-flip.jpg

Create a Montage by Combining Multiple Images Into One
Images can be combined by using the montage command. You need to specify the result dimensions:
montage -geometry 600x400
  captain-dog.jpg dog-flop.jpg dog-montage.jpg

You can also leave a margin around the images:
montage -geometry 600x400+10+10 -background blue
  captain-dog.jpg dog-flop.jpg dog-montage-margin.jpg

And you can modify the grid in which the images are places:
montage -tile 1x -geometry 300x200
  captain-dog.jpg dog-flip.jpg dog-montage-vertical.jpg

Combine Images Into a PDF
GraphicsMagick gives you a really quick way to combine a few images into a PDF:
convert captain-dog.jpg dog-flop.jpg dog-flip.jpg
  dog.pdf
There is not just PDF but over 88 supported formats from which and to which you can easily convert your graphic files.
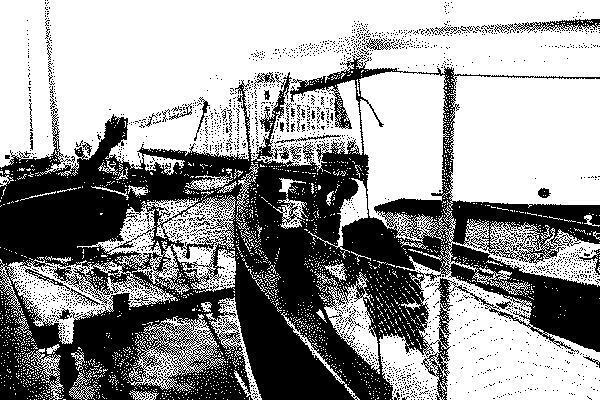
Change Images to Black & White
As last example, let's convert the image to black & white:
convert -monochrome captain-dog.jpg dog-bw.jpg
We can also convert it to greyscale by setting the saturation to zero:
convert -modulate 100,0 captain-dog.jpg dog-grey.jpg

As a bonus for Mac users, add the following function to your .bashrc file so you can simply type ql captain-dog.jpg to preview files:
# View file with Quick Look
ql() {
  qlmanage -p "$1" &>/dev/null
}
This is just the beginning. You can do many more things with GraphicsMagick such as rotating images, blending images with many options such as opacity, adjust the colors of images to your liking with options such as -blur, -sharpen, -gamma and -modulate, batching commands to run many edit operations in one go or even create animated GIF images.
Of course now you also have the power to automate all your editing needs. You can write reusable shell scripts to edit many images at once or you can even use GraphicsMagick for all your production image editing jobs. There are bindings for every popular programming language — for example in Node.js.
Let me know about your favorite tools and your setup for editing images, both, manually and automated!

Top comments (1)
Oh nice! I didn't know about this. Updated the article to use the simpler commands now.
Although on MacOS it seems like the GraphicsMagic I installed via Homebrew is not creating those links, I do have the commands available from an ImageMagick installation.
Since this tutorial is about developer productivity, I prefer to use the simple commands. After all everyone still has to figure out the details of their installation.