
A community member (@juh9870) posted a very cool Mini Micro program to our Discord this week. The core algorithm is simple: it randomly selects a pixel of an image, and then applies that color to a 3x3 area around that point. Repeat as long as desired.
The effect is mesmerizing.
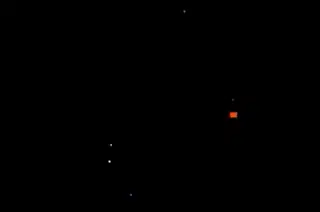
The program was initially written as a mold simulation. Instead of giving it an image, you can have it initialize with some random spots of color; then, as the algorithm proceeds, these spots grow and eventually compete for space.
But the real fun, in my view at least, comes from running it on images.
The core of this program is beautifully simple MiniScript code:
    while true
        x = floor(rnd * w)
        y = floor(rnd * h)
        col = g.pixel(x, y)
        alpha = col[7:]
        rawColor = col[:7]
        if rawColor != color.black and alpha == "FF" then
            g.drawImage mask, x - mw2, y - mh2, mw, mh,
              0, 0, mw, mh, col
        end if
    end while
It just repeatedly grabs a random point, and if it's an opaque pixel with a nonblack color, draws the mask (our 3x3 square) at that point, tinted by the pixel color.
Want to try it yourself? Download Mini Micro, unpack it, and run it (you may need to right-click and "open" it, as the current build is not code-signed). Use the edit command to bring up the code editor. Then paste in the following code.
(Twist this triangle open to see the complete code.)
clear
display(5).mode = displayMode.pixel
g = display(5)
display(6).mode = displayMode.pixel
bg = display(6)
w = 256
h = 256
black = "#00000000"
maskSource = "square"
initializer = null
noExpand = false
puncture = false

mask = function(mask)
    outer.maskSource = mask
end function

// Initializes field using an image as a source
fromImage = function(src)
    outer.initializer = function
        img = resolveImage(src)
        setSize img.width, img.height
        size = getSize
        ox = (size.w - img.width) / 2
        oy = (size.h - img.height) / 2
        g.drawImage img, ox, oy
    end function
end function

// Initializes field using random points
seed = function(size, seeds = 1, colors = null)
    outer.initializer = function
        if size isa number then locals.size = {"w": size, "h": size}
        if size isa list then locals.size = {"w": size[0], "h": size[1]}
        w = size.w
        h = size.h
        setSize w, h
        size = getSize
        ox = size.w - w
        oy = size.h - h
        if colors == null then colors = [color.red, color.green,
          color.maroon, color.orange, color.yellow, color.blue]
        seed = colors.len * seeds
        while seed > 0
            x = floor(rnd * w) + ox / 2
            y = floor(rnd * h) + oy / 2
            g.setPixel x, y, colors[seed % colors.len]
            seed = seed - 1
        end while
    end function
end function

// Starts the simulation
play = function(maxSteps = null)
    text.clear
    mask = resolveImage(maskSource)
    g.clear
    initializer
    stepsDone = 0
    startTime = time

    bg.clear color.black
    mw = mask.width
    mh = mask.height
    mw2 = floor(mw / 2)
    mh2 = floor(mh / 2)
    while true
        x = floor(rnd * w)
        y = floor(rnd * h)
        col = g.pixel(x, y)
        alpha = col[7:]
        rawColor = col[:7]
        if rawColor != color.black and alpha == "FF" then
            if noExpand then col = rawColor + "FE"
            if puncture then g.setPixel x, y, black

            g.drawImage mask, x - mw2, y - mh2, mw, mh,
              0, 0, mw, mh, col
        end if
        stepsDone = stepsDone + 1
        if stepsDone == maxSteps then return
        if key.available then
            key.get; key.get  // pause; unpause
        end if
    end while
end function

// Hides the field
hide = function
    g.clear
    bg.clear
end function

resolveImage = function(src)
    img = null
    if src == "square" or src == "hole" then
        g.fillRect 0, 0, 3, 3, color.white
        if src == "hole" then g.setPixel 1,1, color.black
        img = g.getImage(0, 0, 3, 3)
        g.clear
    else if src == "diagonal" then
        g.line 0, 0, 3, 3, color.white
        img = g.getImage(0, 0, 3, 3)
        g.clear
    else if src isa Image then
        img = src
    else if src[:4] == "http" then
        img = http.get(src)
    else
        img = file.loadImage(src)
    end if
    return img
end function

fit = function
    sw = PixelDisplay.width / w
    sh = PixelDisplay.height / h
    scale = 0
    if sw < sh then
        scale = sw
    else
        scale = sh
    end if
    outer.w = floor(PixelDisplay.width / scale)
    outer.h = floor(PixelDisplay.height / scale)
    g.clear black, w, h
    g.scale = scale
end function

setSize = function(w, h)
    outer.w = w
    outer.h = h
    fit
end function

getSize = function
    return {"w": w, "h": h}
end function

hide
seed 128
Then press the green "exit" button in the top-left corner (or press F5) to exit the code editor. run the program. This sets up the environment, including some new commands ready for you to tell it what to do. For starters, just enter
play
This runs the default mold simulation. Press Control-C when you've watched this enough. Now let's try giving it an image to work on! You do this with the fromImage command, and can supply the image in any of several formats. You can, for example, try a Mini Micro file path:
fromImage "/sys/pics/Wumpus.png"
play
And you should quickly get a result that looks something like this:

Or you can give it a path to a file. The chinchilla images at the top of this article were produced by:
fromImage "https://miniscript.org/img/Icon.png"
play
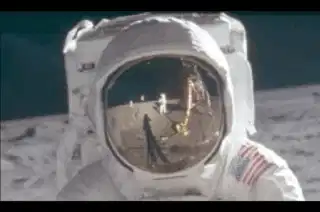
You can also change the shape of the fill done at every point, referred to in this program as a "mask." There are several built-in masks; "square" is the default, a simple 3x3 square applied at each point. But try "diagonal", and you should get something like this:
fromImage "https://miniscript.org/img/Icon.png"
mask "diagonal"
play

Incidentally, if you want to save out a nice clean (transparent) image of your result after hitting Control-C, you can use a command like this:
file.saveImage "output.png", gfx.getImage
That's how I created the above transparent speedy-chinchilla image.
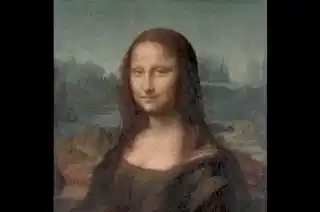
The last built-in mask is called "hole": a 3x3 square with a black center. It produces in interesting sort of dithered effect:

But you can also give the mask command a URL or file path to any image you choose. Try a star shape, or an elongated oval. What do you get?
I think it's beautiful when such simple code can produce such artistic results. What do you think? Let me know in the comments below!

Latest comments (0)