Welcome to forms pt 2! Is there an end in sight? Who knows! Ok, I do. Yes, and this is it.
So, there are text areas that can be created for larger inputs. The user can adjust them as needed, and sometimes they're limited in how big they can get.
The tags used are <textarea></textarea>, and the are used with attributes within the opening tag - the "cols" attribute, and the "rows" attribute - each has a value of pixels to define their size. If you add text in between the text area tags, you would be adding placeholder text! That's just how they work, and I'm looking forward to finding out how exactly they work that way.
Here is an example:
<form>
     <p>What's your favorite food?</p>
     <textarea cols="50" rows="10">
     Describe your favorite food here!
     </textarea>
</form>
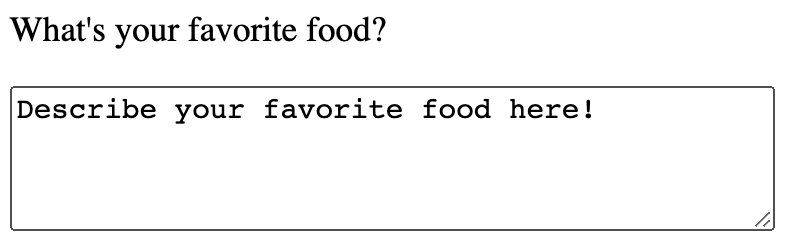
Funny thing... When you have the placeholder text in a separate line of the code, you will find that its alignment in the text field is centered.
Example:

If you want it to be at the very start of the text field, you'll have to put it directly against the text area tags. Example:
<form>
     <p>What's your favorite food?</p>
     <textarea cols="50" rows="10">Describe your favorite food here!</textarea>
</form>
Photo:
Radio inputs are next!
You can give people options for them to select just one, and for this, we'd use radios. To use radios, you have to use the input tags, and make them the type "radio". Here is an example:
<form>
     <p>What are planning on doing tonight?</p>
     <input type="radio">
     Hang with my family at home
     <input type="radio">
     Pig out on a bucket of Popeye's chicken
     <input type="radio">
     Play a game on my phone
     <input type="radio">
     Learn HTML and make blog posts about it
     <input type="submit">
</form>
I wrapped each input tag and the accompanying text with paragraph tags to make it a vertical list like so:

Notice anything? I could select multiple things at once. Apparently, radio buttons are supposed to be for one selection, not multiple. And of course, the recorded lesson will show me how to implement this restriction on the radio buttons.
The "name" attribute will label the data as a specific type of data when sent to the server. If I add the name tag with the name "time spent", then each of the options to choose from will send data labeled as "time spent", regardless of the value of the option that is chosen. With this attribute, we can now restrict the radio buttons to select one option: Using the same name in each name attribute will link the options together, and allow you only one choice.
Next is the "value" attribute, which is the content of the data that is sent to the server once submitted. This attribute along with the "name" attribute are necessary to send data to a server. The "name" attribute will label the type of data being sent, and the "value" attribute will designate the content of the data being sent.
One way to confirm this is to submit one of the options and look at the URL above. Just now, I chose the option "Pig out on a bucket of Popeye's chicken", because yeah buddy!!! When I look at the URL, I see the following at the end:
[...]?Time+spent=Fried+Chicken+Feast Notice that the type of data is "Time spent", and the value is "Fried Chicken Feast" When sent to the server, the data will be placed in a table where the column is named "Time spent", and the value will be placed in the next empty cell in that column.
Example:
<form>
    <p>What are you planning on doing tonight?</p>
    <input type="radio" name="Time spent" value="Family Night">
    Hang with my family at home
    <p><input type="radio" name="Time spent" value="Fried Chicken Feast">
    Pig out on a bucket of Popeye's chicken</p>
    <p><input type="radio" name="Time spent" value="Mobile Gaming">
    Play a game on my phone</p>
    <p><input type="radio" name="Time spent" value="HTML Blog">
    Learn HTML and make blog posts about it</p>
    <p><input type="submit"></p>
</form>
If you want to choose multiple options (like I do - I intensely enjoy the time I spend doing the things I listed in the code!!), the checkbox attribute can be used instead:
<form>
     <p>What are planning on doing tonight?</p>
     <input type="checkbox">
     Hang with my family at home
     <input type="checkbox">
     Pig out on a bucket of Popeye's chicken
     <input type="checkbox">
     Play a game on my phone
     <input type="checkbox">
     Learn HTML and make blog posts about it
     <input type="submit">
</form>
This is what it looks like:

Another way of submitting data from a form is to use a dropdown menu. We do this using the select tags <select></select> and the option tags <option></option>. This attribute is different than the others, as you don't need to give the attribute "name" to each individual option. You just need to give it once, in the opening select tag. However, you should keep in mind that the value attribute is still necessary for each individual option. Also, when displayed on the browser, one of the options in the dropdown is always selected. By default, it is the first option, but you can choose which one by adding the word "select" after the value attribute of the option you want selected, like so:
<form>
    <p>What are planning on doing tonight?</p>
    <select name="Time spent">
    <option value="Family Night" selected>Hang with my family at home</option>
    <option value="Fried Chicken Feast">Pig out on a bucket of Popeye's chicken</option>
    <option value="Mobile Gaming">Play a game on my phone</option>
    <option value="HTML Blog">Learn HTML and make blog posts about it</option>
    </select>
    <input type="submit">
</form>
Personally, I'm curious about how to get placeholder text in the dropdown menu... Thanks to google, I found the information I needed! And thanks to VS Code, I know what the attributes in the element mean!
So, to add an option that is placeholder, you have to set the value to nothing with a pair of quotations: "", and you have to use the attributes "disabled" and "selected". "disabled" makes the option something that you can't select. If you select one of the options, then select the placeholder, it won't be selected. It will go back to the option you selected before. As you know, "selected" makes the placeholder be the first thing displayed in the drop down so that it's showing constantly. In addition to these, you can add the "hidden" attribute, which will hide the placeholder from visibility in the dropdown completely. It will still show on the drop down when the page loads, but it won't be listed. I chose to not use "hidden", and instead use the other two.
Here is the code!
<p>What are planning on doing tonight?</p>
<select name="Time spent">
<option value="Family Night">Hang with my family at home</option>
<option value="Fried Chicken Feast">Pig out on a bucket of Popeye's chicken</option>
<option value="Mobile Gaming">Play a game on my phone</option>
<option value="HTML Blog">Learn HTML and make blog posts about it</option>
<option value="" disabled selected>Choose your path...</option>
</select>
<input type="submit">
</form>
Here is what the drop down looks like when the page loads:

Lastly, here is what it looks like when the dropdown is expanded:
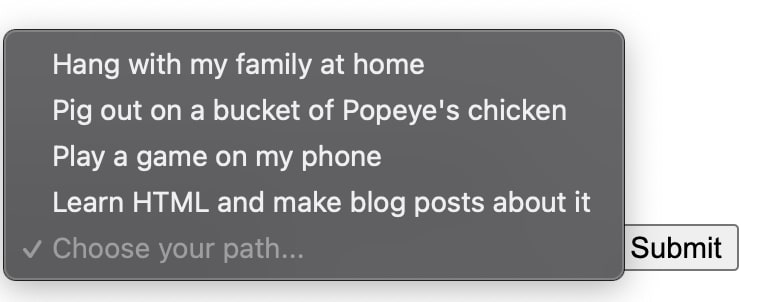
Curiosity satisfied!
Sleep time! Good night!

Top comments (0)