
Intro
In a previous post, we started to prepare the build pipeline for a new library, using NUKE. In this post, we're going to continue that work, setting up continuous integration, running the build with GitHub Actions when changes arrive.
Note that NUKE does have built-in support for GitHub actions (and other CI systems), but as I wanted to explore GitHub Actions, didn't take advantage of such support.
This won't be a particularly complex setup, but should be enough to understand the basic features of GitHub Actions.
Creating a a new GitHub Action
To create a new GitHub Action, we don't even need to go to GitHub.
In our repository, we need to create a couple of nested folders: .github/workflows. Inside the newly created workflows folder, we create a new YAML file where we'll define the build. In this case, I created a ci.yml, as it will be the action that'll take care of continuous integration.
In the newly created file, in the first line I added name: CI, so when we go to GitHub that will be the name associated with this action.
Triggering the build
In a simple build setup like this, there are two main things to it: what triggers a new build and a the build job itself.
We have a bunch of choices, from which we can choose one or more events that trigger our build. Again, as this is a simple setup we're going for, I chose the build to be triggered from a push to any branch (we can filter the branches we allow to trigger builds) and manually (in case I want to troubleshoot something and don't want to be doing garbage commits).
name: CI

on:
  workflow_dispatch: # a button will appear in GitHub Actions UI to trigger the build
  push:
If we wanted to allow only specific branches to trigger the build, we could do:
on:
  push:
    branches:
    - main
Besides filtering with branch names, we could also use patterns (e.g. release/**), tags, changes in given directories and more, so for more options, check out the docs 🙂.
Initial build job
With the initial pieces in place, let's get to the main part, the build job itself. Even if we weren't using NUKE, it wouldn't be very complex, but with NUKE already in place, it's even simpler.
For this first jab at it, we'll have:
- Running in the latest version of Ubuntu.
- Checkout the code.
- Setup a couple of .NET SDKs, namely for .NET 5 and .NET Core 2.1. That's because the library is targeting .NET Standard 2.0, for broader compatibility, and .NET Standard 2.1, for more features, namely to be able to use nullable reference type annotations. Using .NET and .NET Core 2.1, we run the tests with both .NET standard compatibility levels (remember to target both in the unit test project, having the two SDKs installed doesn't do anything by itself).
- Add execution permissions to NUKE's bootstrapper script.
- Execute the build, using the test target we defined with NUKE, as we don't want to pack anything yet.
In terms of the GitHub action, this translates to:
# ...

jobs:
  build:
    runs-on: ubuntu-latest

    steps:
    - uses: actions/checkout@v2

    - name: Setup .NET Core SDK - latest
      uses: actions/setup-dotnet@v1.7.2
      with:
        dotnet-version: '5.0.*'

    - name: Setup .NET Core SDK - 2.1
      uses: actions/setup-dotnet@v1.7.2
      with:
        dotnet-version: '2.1.x'

    - name: set shell script permissions
      run: chmod +x ./build.sh

    - name: build and test
      run: ./build.sh test
Building in multiple operating systems
Considering we're creating a generic library that can be used in a multitude of different kinds of projects, maybe it's a good idea to also ensure the build succeeds in multiple operating systems.
Realistically, given the kind of tasks the library performs, it's unlikely there will be issues across operating systems, but since we're at it, why not do it anyway? 🙃
To do this with GitHub Actions, we can use a matrix. A matrix allows us to create multiple jobs by performing variable substitution.
Let's add the matrix and tweak the steps a bit:
# ...

jobs:
  build:
    runs-on: ${{ matrix.os }}
    strategy:
      matrix:
        os: [ubuntu-latest, windows-latest, macos-latest]

    steps:

    # checkout and SDK setup are the same

    - name: set shell script permissions
      if: ${{ matrix.os != 'windows-latest'}}
      run: chmod +x ./build.sh

    - name: build and test (Unix)
      if: ${{ matrix.os != 'windows-latest'}}
      run: ./build.sh test

    - name: build and test (Windows)
      if: ${{ matrix.os == 'windows-latest'}}
      run: .\build.ps1 test
As we can see above, we replace the runs-on value with a variable that'll be replaced when the workflow executes.
Just below runs-on, we have the matrix definition, where we're setting the multiple possible values for the os variable.
As for the steps, there were some tweaks.
The already existing permission and build steps now execute conditionally, with the addition of the if line, so when we're running on Windows, we skip these steps.
Below, there's a new step which only runs on Windows, invoking NUKE's PowerShell bootstrapper instead of the Shell Script one.
Seeing it in action
With everything in place, as soon as we commit and push, we'll see things pop-up on GitHub, in the Actions tab.
When we first click the Actions tab, we get an overview of past and current running workflows:

If we click a specific workflow, in this case the one we created, named CI, we see the option to manually run it.

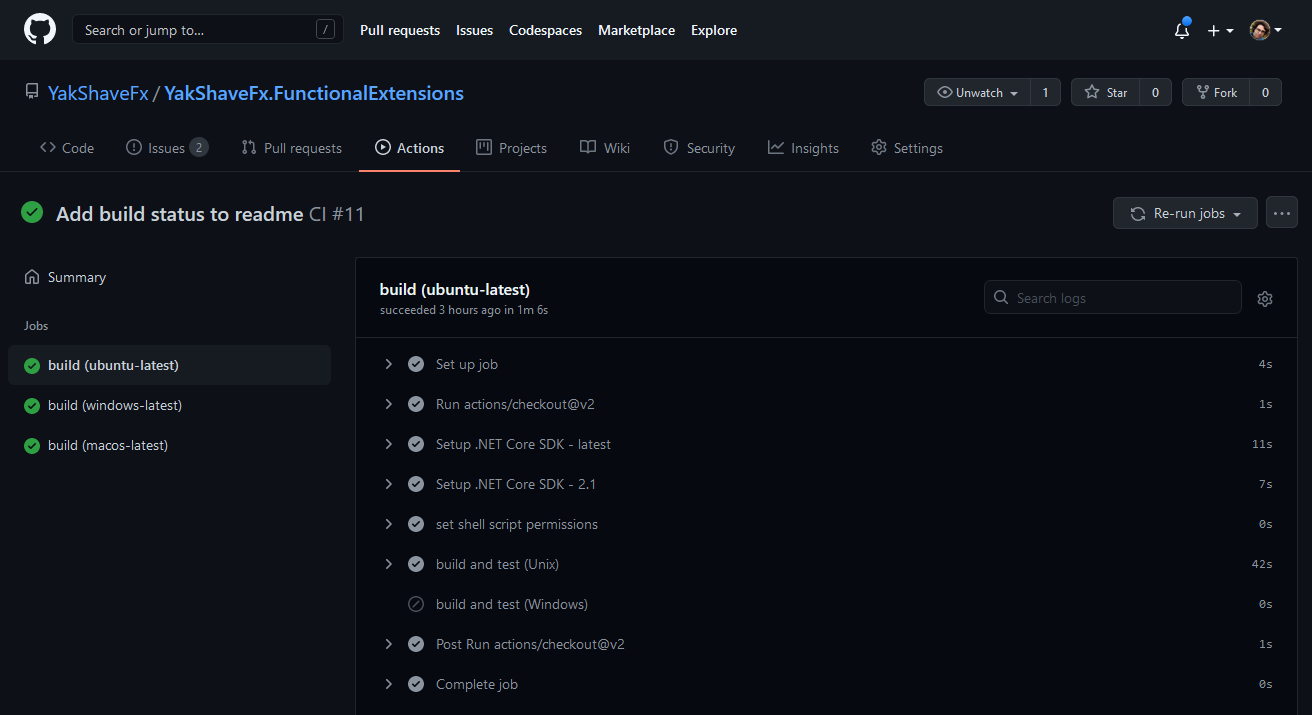
Click on an instance of a workflow run, we see its summary, including its jobs.

And clicking on a job will show us more details on it and its steps.
Outro
That does it for this quick look at GitHub Actions, setting up continuous integration for this library.
We looked at:
- Creating a new workflow
- Setting up what triggers a new workflow run
- Setting up the steps to build our library, using the NUKE build definition prepared earlier
- Have the workflow run in multiple operating systems
In a follow-up post we'll do more with NUKE and GitHub Actions, as we publish the library as a NuGet package. We also need to consider versioning the library, so that's probably coming before looking into publishing the library.
Links in the post:
- GitHub Actions
- Events that trigger workflows
- Workflow syntax for GitHub Actions
- NUKE - CI Integration
- Setting up a build with NUKE
The source code for this post is in the YakShaveFx.FunctionalExtensions repository, tagged as github-actions.
Thanks for stopping by, cyaz!

Top comments (0)