This page contains tips and resources for using Eclipse with Adobe Experience Manager (AEM). The first tip covers how to setup a simple Sling Content project and use it to transfer files between the local file system and AEM's Java Content Repository (JCR).
Requirements
Download and install Eclipse IDE for Java EE Developers (Eclipse Kepler or newer), eclipse.org/downloads/packages/release
Install AEM Developer Tools For more information, helpx.adobe.com/experience-manager/6-4/sites/developing/using/aem-eclipse.html
Setup
-
AEM Perspective
From the menu, select Window > Perspective > Open Perspective > AEM -
Create New Sling Content Project
From the menu, select File > New > Project > Sling > Sling Content Project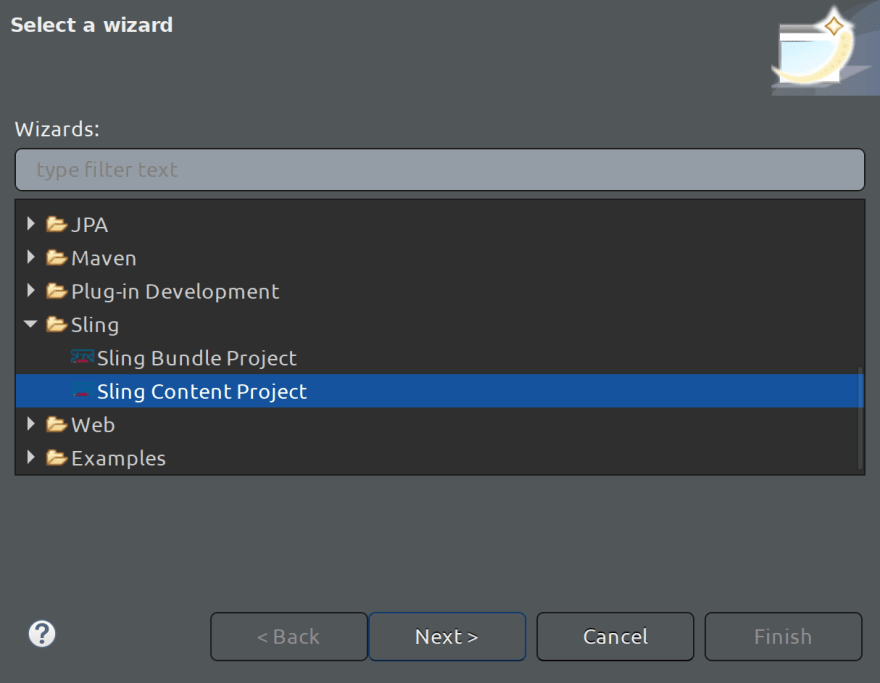
check "Show All Wizards" if needed -
Select or Create the AEM Server when prompted, or right click in the Servers panel and select New > Server > Adobe Experience Manager. The defaults should work fine for a localhost AEM server instance using the default admin account credentials.
If your AEM instance is running in a Virtual Machine (VM), you may want to update your hosts file to map a hostname to the machines IP address. For example,
192.168.122.111 aem-box -
Resources
If you did not add a server during the project creation wizard, or need to add a project resource.
In the Servers panel,
Right-click on the server,
Select Add and Remove,
Drag the available resource to the configured column,
e.g., addmyproject -
AEM Console
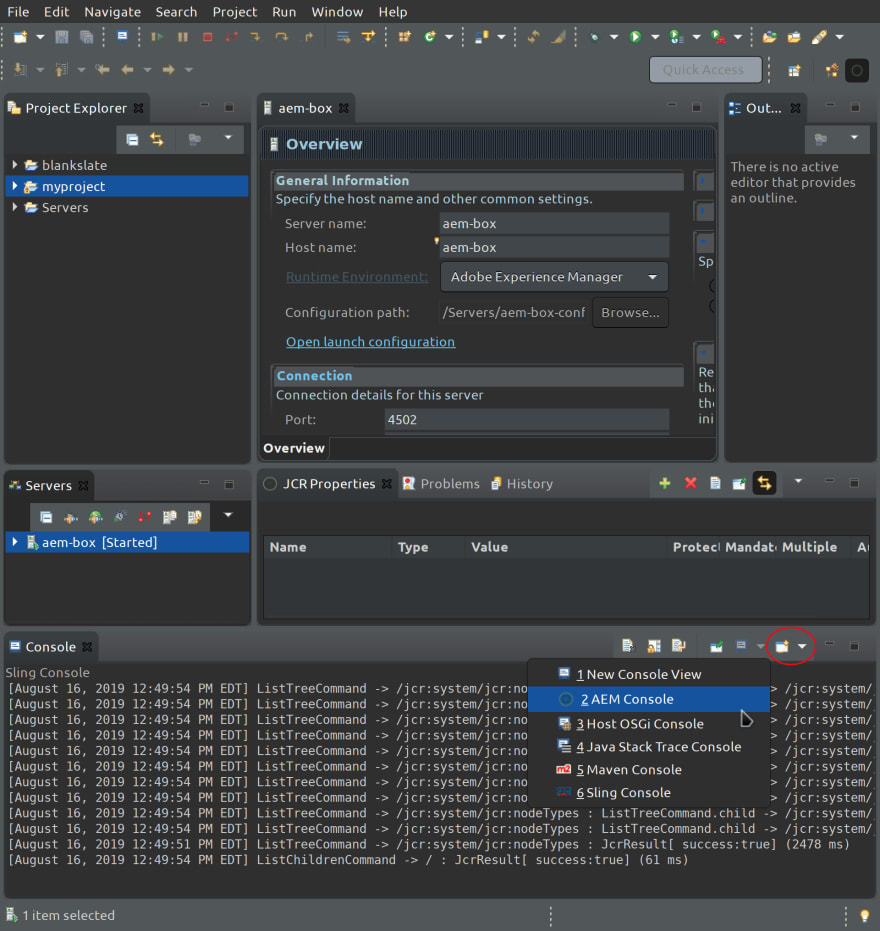
From the Open Console menu (red circle in image below), select AEM Console to monitor the server startup synchronization and subsequent file transfers.
In the Servers panel, right click on the server to start or stop as needed.
Navigator
By default, the Project Workspace tab neglects to show .content.xml files imported from the JCR. This can be changed using the Menu dropdown within the panel. Select Filters and Customization to open the dialog to configure what files to show.
I prefer to add the Navigator panel to the perspective and use it instead since it will show all of my files and folders without any modifications.
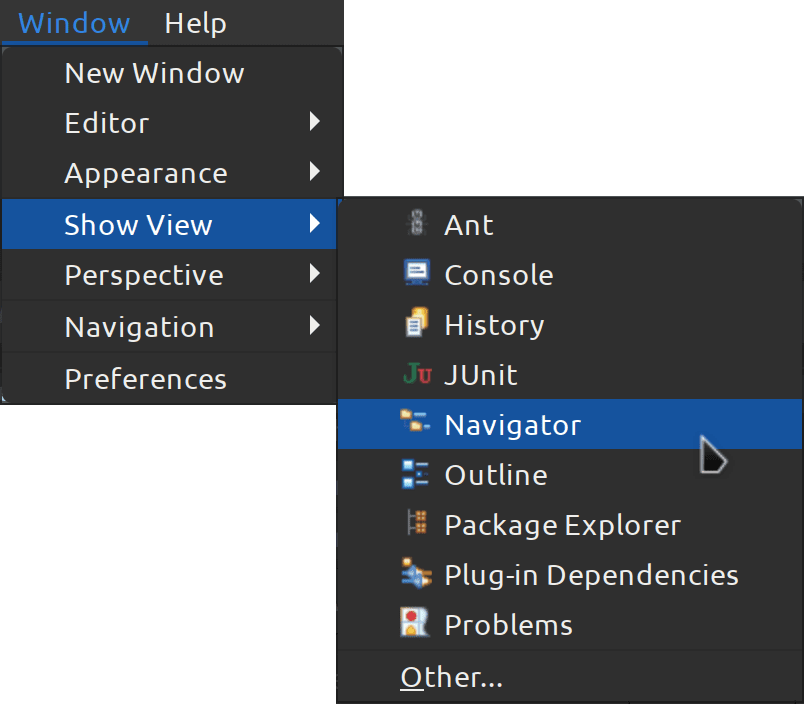
Adding Navigator to the Perspective
Transfer Files
To transfer files and folders to the AEM Server, right-click the file or folder and select Export to server. This can be done in either the Navigator or Project panels. The Sling Repository Export dialog will prompt you for the Repository to export content to. Typically this will match the name of the configured AEM server.
To transfer files and folders from the AEM Server, right-click the file or folder and select Import from server.
If you receive this error when you attempt to import/export \
No valid filter found in this project! \
Delete the project from workspace using the Project Explorer in Eclipse. Then re-create it using the wizard. Ignore the message that ajcr_rootalready exists if your project is linked, it is a symlink.
To automatically transfer saved file changes to the server, check the Server Publishing settings. Options are:
- Never publish automatically
- Automatically publish when resources change
- Automatically publish after build event
Importing
Folders and Files Created with CRXDE Lite
For folders, files and nodes that have been created within CRXDE Lite and do not yet have a respective Sling Content poject in Eclipse. Here are some tips on how to import these from the JCR.
Create New Sling Content Project as described under Setup > Step 2 above.
-
Edit the
filter.xmlfile inMETA-INF/vaultto include the JCR repository folder paths as needed. e.g.,
<workspaceFilter vesion="1.0">
  <filter root="/apps/myproject"/>
  <filter root="/content/my-project"/>
</workspaceFilter>
In the New Sling Content Project
jcr_rootfolder, rename theexamplefolders underappsandcontentwith the names used in your CRXDE Lite project as needed.You should now be able to right-click on the folders and select Sling > Import from server...
Project Linking
You may have an existing AEM repo and/or project folder that you prefer not to move into the eclipse workspace. These steps will show you how to link them to the new Sling Content Project created above.
When creating your project using the wizard, consider giving it the same name as the existing AEM project folder you are linking. If you rename the project created by the wizard, you may need to re-attach it to the server. Right-click in the Servers panel and select Add and Remove.
- To link an existing AEM project which should already have its own
jcr_rootandMETA-INFfolders. Remove thejcr_rootandMETA-INFfolders created by the wizard if they already exist in the source project. For example,
cd ~/eclipse-workspace/myproject
rm -rf jcr_root
rm -rf META-INF
- Symlink the new
eclipse-workspaceproject to the existing AEM projectjcr_root. For example, if your existing projectjcr_rootis in/home/dinesh/dev/aem/myproject/src/main/content/jcr_root
cd ~/eclipse-workspace/myproject

ln -sv /home/dinesh/dev/aem/myproject/src/main/content/jcr_root jcr_root
- Repeat for
META-INF
ln -sv /home/dinesh/dev/aem/myproject/src/main/content/META-INF META-INF
Components
This example shows how to create components.
In the Project panel, expand the myproject > jcr_root[nt:folder].
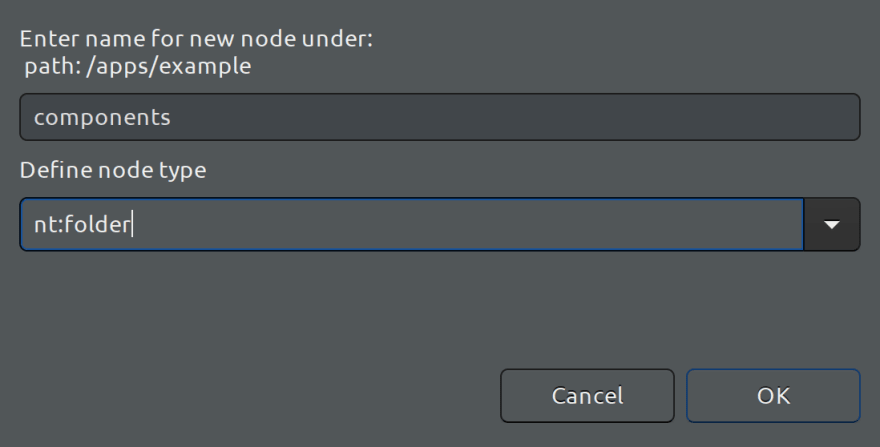
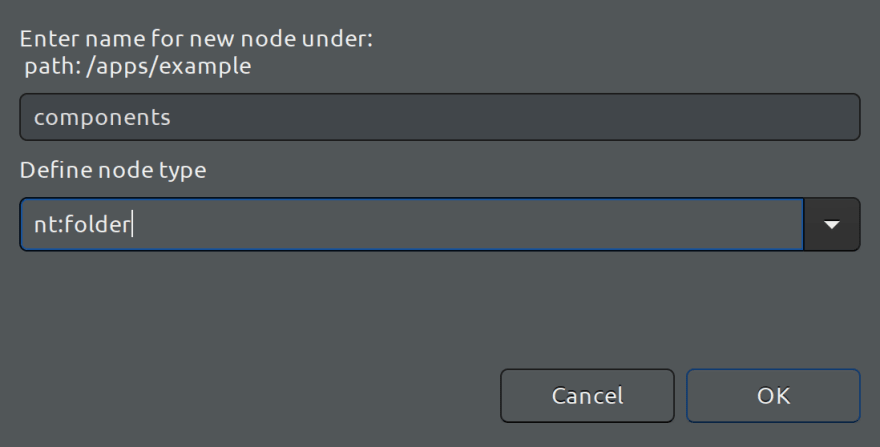
Right click on the /apps/example folder and select New > node.
name: components
If you get this error: Unable to validate node types since project myproject is not associated with a server or the server is not started. Start the server and/or verify the project is a configured resource.
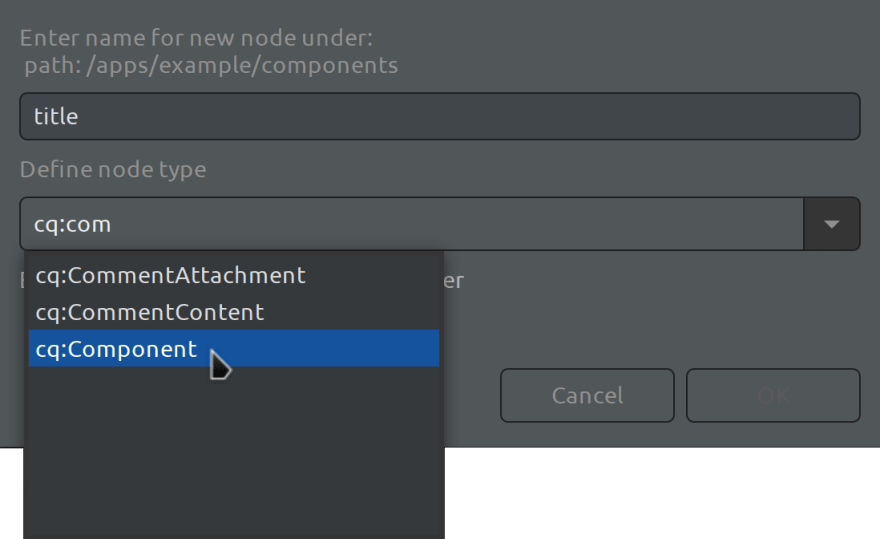
Right-click on the new components folder and select New > node.
name: title
Proxy Components
For the new title component, we're going to use the Proxy Component Pattern. For more info, Create Proxy Components contains further documentation on using core components.
Select the title component to enable its context in the JCR Properties panel. Select the green plus sign to insert a property.

JCR Properties panel - insert a property
Add following property to use the title core component version v1 with the super-type.
Name: sling:resourceSuperType
Value: core/wcm/components/title/v1/title
Periodically export to the AEM JCR to verify and test your code changes.
Originally published at jimfrenette.com/aem/eclipse-developer-tools


Top comments (0)