One day my boss informed me that we are moving towards developing our software on the cloud. As a developer, this is one of my pet peeves as I hate spending time setting up complicated environments and prefer to focus on writing code and quickly releasing their software. And then I immediately got my first assignment to create a new software product using the CI/CD pipeline on the cloud. The questions that immediately arose were: When? How? And Why do we need it?
Since then I have learned many lessons and would like to share them with you on how to prepare and configure your environment to achieve DevOps automation in the cloud for your containerized secured applications using a CI/CD pipeline in Kubernetes.
Why go to the cloud?
Let’s first look at the main reasons for going to the cloud:
Achieve unlimited scalability:
Setting up your environment on the cloud provides unlimited scalability allowing you to grow according to your needs and is easily achieved by using cloud storage providers (Amazon S3, Google GCS or Microsoft Azure) in your environment.
Hardware costs are no longer an issue:
A huge advantage of going to cloud computing is the decrease in hardware costs whereby you pay only for exactly what you use. Instead of purchasing in-house equipment, hardware needs are now left to the cloud vendor. Adding new hardware every release or every quarter to meet your increasing needs can be very expensive and inconvenient, on the other hand, cloud computing alleviates these issues because resources can be acquired quickly and easily.
Gain redundancy:
And the most important thing you gain is redundancy. A number of cloud storage providers can ensure your data is stored on multiple machines and complies with any regulations that need to be applied (like keeping two copies of all the data in two different regions).
This blog post shows you how to prepare and configure a cloud-based environment to achieve an automated CI/CD pipeline for your containerized secured applications using Kubernetes.
So let’s get started.
Configuring a cloud-based automated CI/CD pipeline
Before you start, prepare the following:
- A version control system (such as Git)
- Kubernetes to deploy and manage your containerized applications
- A CI/CD pipeline tool like Jenkins, TeamCity, Bamboo etc.
- A Binary repository manager
- A Compliance auditor
Step 1: Setting up your cloud environment
Let's start by creating a Kubernetes cluster. You can easily choose one of the available Kubernetes platforms in the cloud. Then isolate your environment by creating separate environments for development, staging, and production as displayed in the following diagram:
We recommend applying the "shift left” principle, whereby you move back tasks typically performed at later stages to earlier stages in the pipeline. For example, when running security testing or selecting the FOSS license. As mentioned earlier, the aim is to move faster to reduce delivery time while improving the quality of each release. At the same time, you are also faced with increasing pressure to reduce testing, so it means that the developer’s team needs to be integrated with the testing cycle earlier.
Step 2: Configuring the VCS server
When you finish developing the app, proceed to configure the VCS server VCS server in order to trigger the build after a successful pull request.
Step 3: Running the build
Run the build on your CI server (for example Jenkins), to create the application’s Docker image and proceed to run the unit test against the Docker container.
Step 4: Testing the build
After the builds tested, create a Docker image that will be uploaded to your private Docker registry and private helm repository, then run a number of tests against the running Docker container including integration tests.
Step 5: Scanning the build
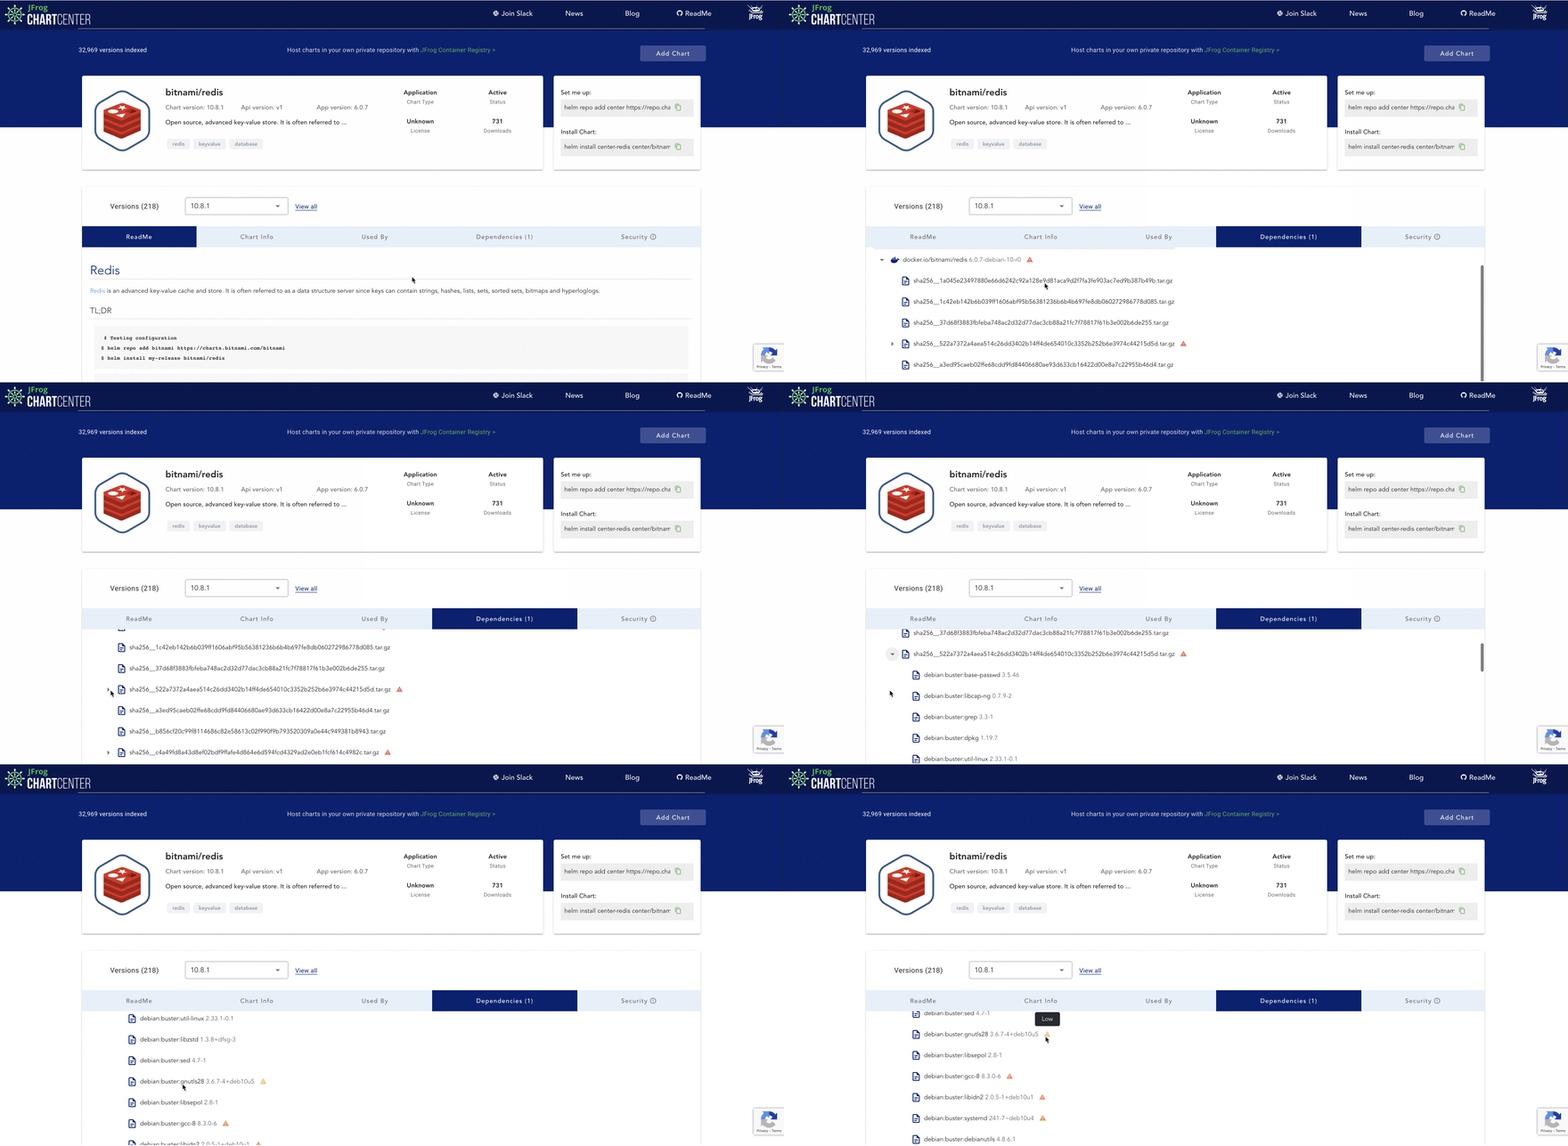
Approximately three decades ago, Richard Stallman changed the developer’s world forever, by introducing the GNU Project, the first open-source coding project that included requirements for scanning external code. In that case, I recommend using the ChartCenter as our new source for our helm chart, when checking the chart view, in that case let’s talk about our DB we can easily get the chart information for the dependencies like the following:
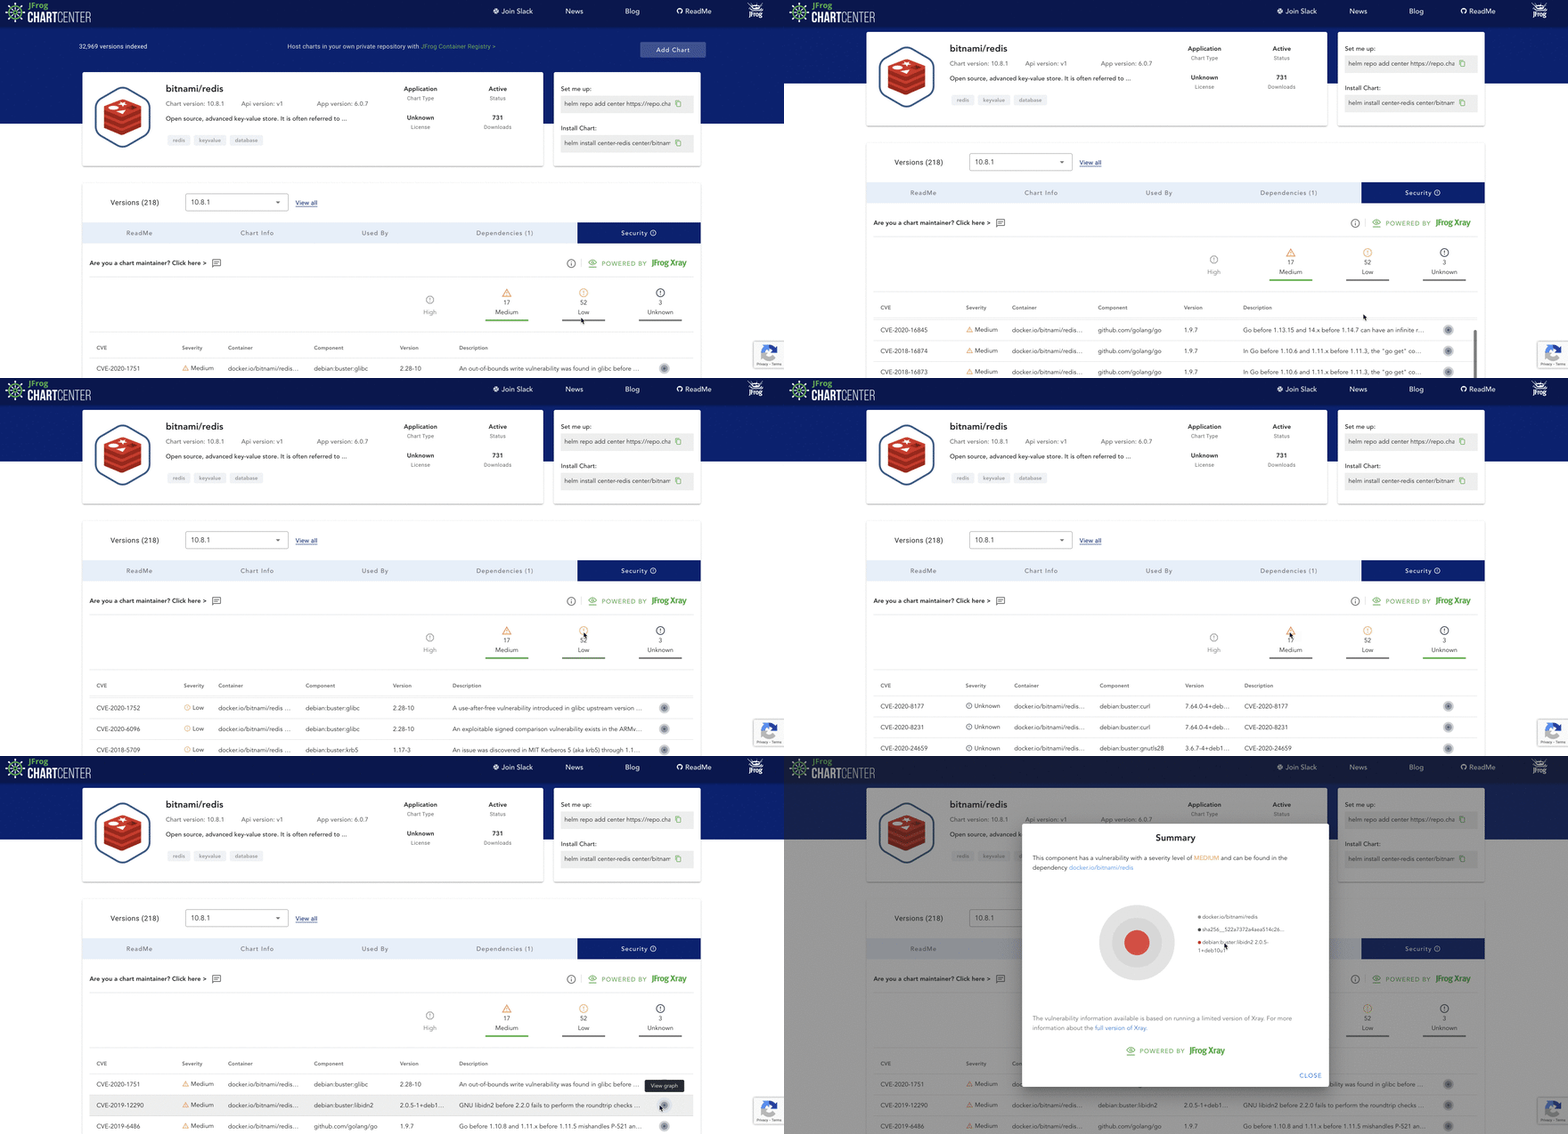
Afterward, I can check the security report very easily and calculate the risk on this specific version

Step 6: Deploying to development
Now we can proceed to deploy your app to the staging environment and perform additional tests against this cluster.
Add the Chartcenter Helm repository
helm repo add center https://repo.chartcenter.io
Step 7: Deploying to staging
After running a full test cycle in the development environment, deploy the application to the isolated Kubernetes staging cluster, run the staging tests, and proceed to the next step.
Step 8: Deploying to production
Run a set of sanity tests and deploy them to the isolated production cluster. Be ready to perform a fast rollback, if necessary.
It’s time to have some fun!
So you see it ain’t that scary and the steps are out there, so go ahead and develop your next app in the cloud. To make it even easier, follow our 6-step CI/CD pipeline for a simple static website application based on of official nginx Docker image.


Top comments (1)
Some comments may only be visible to logged-in visitors. Sign in to view all comments.