
It’s not a clickbait title. I really did it. And it’s not just a web experience. No. It’s a real game, freely explorable, in 3D, right in your browser ! Don’t you believe me ?
TLDR
Ho, i know your time is precious. Here’s the condensed version.
I built a free 3D browser game, freely explorable, across infinite universes procedurally generated in JavaScript. The goal? Go from universe to universe and discover the origin of everything.
It’s a four chapter story with an epic reveal at the end.
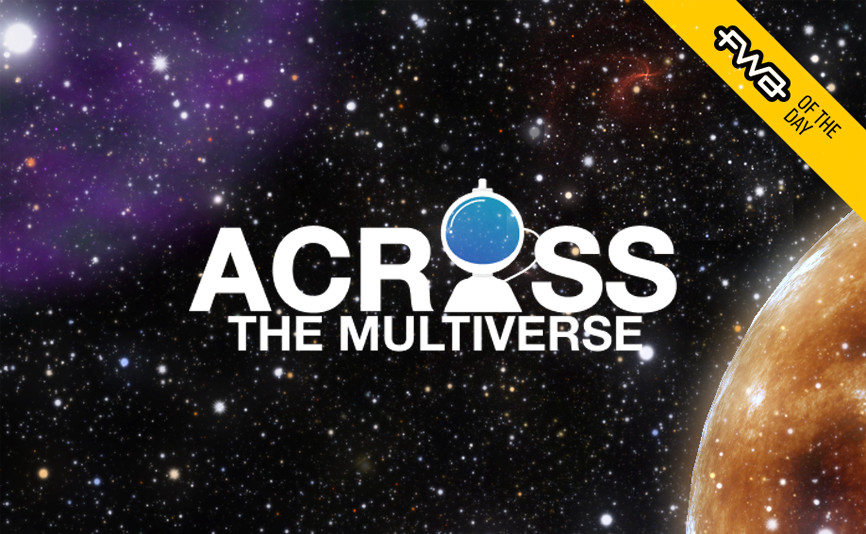
Before going further in reading this article, stop everything, put yourself in full screen, take some popcorn and play ACROSS THE MULTIVERSE !

No time to play?
You prefer to enjoy it on a PC and not on a mobile phone ?
Or do you just want to see more before playing it?
I got you.
I made a launch trailer on YouTube! It’s only 3 minutes long. It shows a lot of things.
But beware, it’s extremely spectacular!
I put a lot of my time, my soul and my skills in the creation of this free game for the internet.
If you have five seconds to share it, that would be wonderful.
Meanwhile, it’s time to talk about the flashing elephant in the middle of the room.
How the fuck i did that?
Talk is cheap. Show me the code
I know that many of you prefer to dive right into the code. Even before reading my beautiful explanations. And I totally understand this.
For the most impatient, here is the full source code of the game.
 jesuisundev
/
acrossthemultiverse
jesuisundev
/
acrossthemultiverse
An in-browser, freely explorable, 3D game across infinite universes procedurally generated. Go from universe to universe and discover the origin of everything. A four chapter story with an epic revelation at the end.
Across The Multiverse
An in-browser, freely explorable, 3D game across infinite universes procedurally generated Go from universe to universe and discover the origin of everything A four chapter story with an epic revelation at the end.
https://across-multiverse.com/
A blog post explaining how everything works is available here !
License
Source Code
Under BSD 3-Clause License.
Music
All musics are owned by artists (see list below) and are used here under Attribution-NonCommercial-ShareAlike 3.0 Unported (CC BY-NC-SA 3.0) license
You can't use the musics for commercial use and/or without mentioning the following artists
- Transcendent - Joel Nielsen
- I Walk With Ghosts - Scott Buckley
- Discovery - Scott Buckley
- Celestial - Scott Buckley
- Omega - Scott Buckley
- Into the Night - Melodysheep
Footage
Under Attribution 4.0 International (CC BY 4.0)
You can use footage of the game for any use but you must mention this project with the following link : https://across-multiverse.com/
It is of course open source under MIT license (for the code).
I still recommend following the story of the project’s gradual creation via this article. It will give more context. And most importantly make a lot more sense.
How to build the universe?
Before I even start, you should know that I use the Three.js JavaScript library. This library allows you to use the WebGL api via JavaScript to do 3D rendering in the browser.
It It is possible that you don’t understand the sentence before and/or that you don’t know Three.js.
Fortunately I thought of everyone.
I made an article dedicated to Three.js and 3D rendering in JavaScript.
This article will allow you to immediately understand the basis of the project in only 5 minutes.
Anyway, back to the point.
How to build the universe?
Clearly the problem is too big.
I couldn’t tackle this problem head on. And that’s not how you do it when you’re a developer. There is only one reflex to have when faced with a huge and complex problem.
Reducing complexity
Building the universe? Too complicated. I don’t even know where to start. Okay, then let’s narrow it down.
Building the Milky Way? Still too complicated, let’s reduce it.
Building our solar system? No. It’s too complicated. Let’s reduce it.
Building an empty space filled with stars?
Ha! That sounds doable! A simple starfield in the darkness of space.
Thinking about it a little bit, I think this problem is really simple. That means I’ve reduced the complexity enough.
It’s time to get started.
How to build a simple starfield?
From then on, I always used a reference image. A photo or a real representation of what I wanted to recreate. An image to look at to get as close as possible to a realistic rendering.
For the starfield, I had decided to take a picture from the Hubble satellite.

I figure I just need to display random white dots in a black space.
It is very easy.
Let’s start by creating an empty, black space and put a camera in it.
const scene = new THREE.Scene()
const renderer = new THREE.WebGLRenderer({ powerPreference: "high-performance", antialias: false, stencil: false, depth: false })
renderer.setSize(window.innerWidth, window.innerHeight)
renderer.setClearColor(0xffffff, 0)
renderer.domElement.id = 'starfield'
document.body.appendChild(renderer.domElement)
const camera = new THREE.PerspectiveCamera(75, window.innerWidth / window.innerHeight, 0.1, 1000)
camera.position.set(0, 10, 0)
camera.lookAt(0, 0, 0)
function animate(time) {
    renderer.render(scene, camera)
    requestAnimationFrame(animate)
}
animate()

OKAY. Great stuff. All this to display a black screen?!
Yes. Let’s be patient. We have to start somewhere.
Now, harder.
Let’s display white dots randomly in this black space. Can you do it? I didn’t know how. So I look at to the documentation.
And i fount it !
There is a class dedicated to this : Points.
Perfect, let’s follow the doc and write this down.
function getStarsGeometry() {
    const geometry = new THREE.BufferGeometry()
    geometry.setAttribute('position', new THREE.Float32BufferAttribute(getStarsRandomVertices(), 3))
    return geometry
}
function getStarsRandomVertices(verticesNumber = 10000) {
    const vertices = []
    for (let i = 0; i < verticesNumber; i++) {
        const x = 2000 * Math.random() - 1000;
        const y = 2000 * Math.random() - 1000;
        const z = 2000 * Math.random() - 1000;
        vertices.push(x, y, z);
    }
    return vertices
}
function getStarsMaterial() {
    const starSprite = new THREE.TextureLoader().load('../images/star.png');
    const starMaterial = new THREE.PointsMaterial({ size: 5, sizeAttenuation: true, map: starSprite, alphaTest: 0.5, transparent: true });
    return starMaterial
}
function getStars() {
    const stars = new THREE.Points(getStarsGeometry(), getStarsMaterial())
    return stars
}
scene.add(getStars())

In this piece of code, what will really do the magic is the getStarsRandomVertices function.
Our starfield (here represented by new THREE.Points) needs two things.
1 : The coordinates of each point to be displayed
2 : The material of each of the points. That is to say what we will display (to simplify) for each of the points.
The coordinates are managed by getStarsRandomVertices.
Our camera is placed at coordinates 0,0,0. We want stars all around us. So our points should be placed between the coordinates -1000 and 1000. All around us.
To do this, we will do a simple calculation.
2000 * Math.random() – 1000
This very simple piece of math gives us a random value (math.random is not really random but let’s admit it) between -1000 and 1000. We put this calculation in each axis (x, y, z) and that’s it!
The material is managed by getStarsMaterial
Not much to say here. We’ll just use an image of a white circle as a texture and apply it. For the moment we don’t need much.
We put the two together in the getStars function and we have solved our problem.
Well, for the moment it just gives an image with static white dots in 2D.
It’s kind of lame. We can do better.
It’s time to iterate on this result.
Improvement via iteration
Let’s just start by bringing things to life.
The idea right now is to just move the camera in relation to the movement of the mouse. When I did that, I just wanted to make sure I was aware that I was doing 3D now.
Let’s write this down.
document.body.addEventListener('pointermove', onPointerMove);
function onPointerMove(event) {
    if (event.isPrimary === false) return
    mouseX = event.clientX - windowHalfX
    mouseY = event.clientY - windowHalfY
}
function animate(time) {
    renderer.render(scene, camera)
    camera.position.x += (mouseX - camera.position.x) * 0.05
    camera.position.y += (-mouseY - camera.position.y) * 0.05
    requestAnimationFrame(animate)
}
OK it’s cool, it moves, it’s 3D, we are happy.
Now let’s make it even more interactive. What I’d like to do is walk around in there. Freely. Like in an FPS game, with the mouse and the keyboard.
At that point, I had two choices:
- Either I rewrote a whole FPS navigation system myself.
- Either I took a FPS control class already made by Three.js.
I obviously chose to use the code already done.
It is tested and used by many people. I advise you to do the same thing when this situation happens to you. Unless you are in a learning process, there is no point in reinventing the wheel.
However, the features offered by the module were not enough for me.
I wanted more.
I wanted a velocity system. Give the players that feeling of acceleration and deceleration. So I had to use the existing module and extend those possibilities in my own class.
OK, let’s write this down.
import { PointerLockControls } from './PointerLockControls.js'
import * as THREE from 'three'

export default class Controls {
  constructor (camera, parameters) {
    this.parameters = parameters
    this.camera = camera
    this.pointerLockControls = new PointerLockControls(this.camera, document.body)

    this.velocity = new THREE.Vector3()
    this.direction = new THREE.Vector3()

    this.moveForward = false
    this.moveBackward = false
    this.moveLeft = false
    this.moveRight = false
  }

  onKeyDown (event) {
    if (this.pointerLockControls.isLocked) {
      switch (event.code) {
        case 'ArrowUp':
        case 'KeyW':
        case 'KeyZ':
          this.moveForward = true
          break
        case 'ArrowLeft':
        case 'KeyA':
        case 'KeyQ':
          this.moveLeft = true
          break
        case 'ArrowDown':
        case 'KeyS':
          this.moveBackward = true
          break
        case 'ArrowRight':
        case 'KeyD':
          this.moveRight = true
          break
      }
    }
  }

  onKeyUp (event) {
    if (this.pointerLockControls.isLocked) {
      switch (event.code) {
        case 'ArrowUp':
        case 'KeyW':
        case 'KeyZ':
          this.moveForward = false
          break
        case 'ArrowLeft':
        case 'KeyA':
        case 'KeyQ':
          this.moveLeft = false
          break
        case 'ArrowDown':
        case 'KeyS':
          this.moveBackward = false
          break
        case 'ArrowRight':
        case 'KeyD':
          this.moveRight = false
          break
      }
    }
  }


  handleMovements (timePerf, prevTimePerf) {
    const delta = timePerf - prevTimePerf

    this.direction.z = Number(this.moveForward) - Number(this.moveBackward)
    this.direction.x = Number(this.moveRight) - Number(this.moveLeft)

    if (this.moveForward || this.moveBackward) {
      this.velocity.z -= this.direction.z * this.parameters.controls.velocity * delta
    }

    if (this.moveLeft || this.moveRight) {
      this.velocity.x -= this.direction.x * this.parameters.controls.velocity * delta
    }

    this.pointerLockControls.moveRight(-this.velocity.x * delta)
    this.pointerLockControls.moveForward(-this.velocity.z * delta)
  }
}
And just like that, we built a starfield that can be explored like in a FPS.
Here you go, I’ll put a codesandbox, you can play live in it.
You just have to click in the stars to switch to FPS mode.
Not bad, right?
It’s not bad.
But it’s time to get down to business.
How to simulate infinity?
So far we have just placed dots around the player. But all he has to do is move a little bit and he sees the trickery. It’s a bit lame again.
So how do we get this scaled?
How do you do it in a way that makes sense?
And above all, how do you do it without blowing up the memory and/or without going below 60FPS.
Now the real project begins.
The grid
** At that point, I stopped touching my keyboard.**
To code a solution for this kind of problem, you can’t “feel your way to it”. No. You have to solve the problem conceptually -on paper- before doing anything.
Otherwise you are wasting your time.
And I hate wasting my time.
It’s time to make drawings.
One of the first ideas that came to mind was the concept of a grid to represent space.
Concretely, the space would be an infinite grid. The player would go from square to square to see what it contains. And in each square you put what you want.
Stars, nebulae, galaxies, suns, black holes, whatever you want!
To better understand what I’m talking about, I’ll draw you a little picture.
Solve the problem
Let’s start by representing our existing code. Right now, we have our player in the original 0,0,0 square, surrounded by stars. If he moves away a little he is in complete darkness.
Conceptually, it looks like this.
- The little dude represents our player.
- The blue stars represent the points already randomly placed around him.
- The numbers in red are the coordinates of each square in space.

So far, nothing complex.
And that’s the goal! I want to keep it simple at all costs. It’s complex to keep it simple. Let’s try to keep it simple in the algorithm for updating the grid.
We need two main functions.
The initialization function.
This function will create the material in the original square and in all the squares around the player.
The advantage of the initialization phase is that you can afford expensive actions. As long as the player is not in a gameplay phase, you are quite free.
Conceptually, it looks like this.
- The green stars represent the points dynamically created by the initialization function

The update function.
This function will update the grid only when the player crosses the border between two squares.
With this function we want two things:
- Delete the content of the squares which are too far from the player
Create the content of the squares where the player is most likely to go
Conceptually, it would look like this.The blue stars represent the points already placed
The green stars represent the points we create dynamically
The red stars represent the points that are deleted

And just like that, we managed the infinity simulation.
The player can go anywhere he wants. In the direction and the way he wants. He will not see the trickery. Wherever he goes, there will be wonderful things to look at.
I like this solution because it has several advantages.
- It is relatively efficient
The fact that the contents of the squares are created on the fly and, above all, that they are deleted at the same time, relieves the memory a lot. In addition, only the minimum number of squares necessary is created each time.
- We don’t have to manage the player’s direction
No matter which direction the player is going, the algorithm will be the same. Indeed, we don’t need to know what are the squares in front of the player. We just want to know which squares around the player are empty ! So he can go in the direction he wants, our algorithm will do exactly the same thing.
- It’s easy to manage
No need for a data structure straight from hell like a graph or a tree like an octree. No, no. Fuck that, leave me alone. One array, two hashmaps and that’s enough. No headaches. Keep it simple.
Well, let’s write this down.
Coding the solution
We are going to create this famous class which will manage the grid. For the sake of length and simplification, I don’t explain everything. And above all, I don’t show everything.
You have the full source code if you want to see everything.
We’re just looking at the important parts today.
import MultiverseFactory from '../procedural/MultiverseFactory'

export default class Grid {
  constructor (camera, parameters, scene, library) {
    this.camera = camera
    this.parameters = parameters
    this.scene = scene
    this.library = library
    this.activeClusters = new Map()
    this.queueClusters = new Map()

    this.multiverseFactory = new MultiverseFactory(this.scene, this.library, this.parameters)
  }

  getCurrentClusterPosition () {
    const currentCameraPosition = this.getCurrentCameraPosition()
    const xCoordinate = Math.trunc(currentCameraPosition.x / this.parameters.grid.clusterSize)
    const yCoordinate = Math.trunc(currentCameraPosition.y / this.parameters.grid.clusterSize)
    const zCoordinate = Math.trunc(currentCameraPosition.z / this.parameters.grid.clusterSize)
    const currentClusterPosition = `${xCoordinate},${yCoordinate},${zCoordinate}`

    return currentClusterPosition
  }

  getCurrentCameraPosition () {
    this.camera.updateMatrixWorld()

    return this.camera.position
  }

  getClustersStatus (currentCluster) {
    const clustersNeighbour = this.getNeighbourClusters(currentCluster)
    const clustersToPopulate = this._getEmptyClustersToPopulate(clustersNeighbour)
    const clustersToDispose = this._getPopulatedClustersToDispose(clustersNeighbour, currentCluster)

    return {
      clustersNeighbour,
      clustersToPopulate,
      clustersToDispose
    }
  }

  getNeighbourClusters (currentCluster) {
    const neighbourClusters = [currentCluster]
    const currentClusterArray = currentCluster.split(',')
    const x = currentClusterArray[0]
    const y = currentClusterArray[1]
    const z = currentClusterArray[2]

    // forward
    neighbourClusters.push(`${x},${y},${Number(z) - 1}`)

    // backward
    neighbourClusters.push(`${x},${y},${Number(z) + 1}`)

    // right
    neighbourClusters.push(`${Number(x) + 1},${y},${z}`)

    // left
    neighbourClusters.push(`${Number(x) - 1},${y},${z}`)

    // forward right
    neighbourClusters.push(`${Number(x) + 1},${y},${Number(z) - 1}`)

    // forward left
    neighbourClusters.push(`${Number(x) - 1},${y},${Number(z) - 1}`)

    // backward right
    neighbourClusters.push(`${Number(x) + 1},${y},${Number(z) + 1}`)

    // backward left
    neighbourClusters.push(`${Number(x) - 1},${y},${Number(z) + 1}`)

    return neighbourClusters
  }

  disposeClusters (clustersToDispose) {
    for (const clusterToDispose of clustersToDispose) {
      let matter = this.activeClusters.get(clusterToDispose)

      matter.dispose()
      matter = null

      this.activeClusters.delete(clusterToDispose)
    }
  }

  addMattersToClustersQueue (matters, type = 'starfield', subtype = null) {
    for (const clusterToPopulate of Object.keys(matters)) {
      this.queueClusters.set(clusterToPopulate, {
        type: type,
        subtype: subtype,
        data: matters[clusterToPopulate]
      })
    }
  }

  populateNewUniverse () {
    const clusterStatus = this.getClustersStatus('0,0,0')

    this.buildMatters(clusterStatus.clustersToPopulate)
  }


  renderMatters (position, cluster) {
    const matter = this.multiverseFactory.createMatter(cluster.type)

    matter.generate(cluster.data, position, cluster.subtype)
    matter.show()

    this.queueClusters.delete(position)
    this.activeClusters.set(position, matter)
  }

  _getEmptyClustersToPopulate (neighbourClusters) {
    const emptyClustersToPopulate = []

    for (const neighbourCluster of neighbourClusters) {
      if (!this.activeClusters.has(neighbourCluster)) {
        emptyClustersToPopulate.push(neighbourCluster)
      }
    }

    return emptyClustersToPopulate
  }

  _getPopulatedClustersToDispose (neighbourClusters, currentCluster) {
    const populatedClustersToDispose = []

    for (const activeClusterKey of this.activeClusters.keys()) {
      if (currentCluster !== activeClusterKey && !neighbourClusters.includes(activeClusterKey)) {
        populatedClustersToDispose.push(activeClusterKey)
      }
    }

    return populatedClustersToDispose
  }
}
And it works!
The contents of the boxes are added on the fly as the player approaches. The illusion is almost perfect. I say almost because unfortunately we have a big problem.
I know it doesn’t show much in the video.
The performances when updating the grid are disastrous.
It freezes the image, it’s just disgusting and unplayable as is.
It is therefore time to diagnose and optimize.
Diagnose & Optimize
When a performance problem occurs in an application, the first reflex is to diagnose before doing anything.
Diagnose
In the case of a web application like ours, we will do this with the chrome dev tools. F12, tab “Performance” then CTRL+E to record what happens. Then we use the application normally before stopping the recording and analyzing the results.
By doing this, I quickly understood what was going on.

We have big FPS drops because we try to do too many things at the same time.
We do too many things for JavaScript. JavaScript being single-threaded, it is not forgiving. Too much is required, in too little time, for a single thread.
Remember the simple calculation I told you about at the beginning?
2000 * Math.random() – 1000
We do this 300,000 times for each stars. In one frame.
Multiply by 3 for each axis (x, y x) of the coordinates.
Again multiplied by 3 for the three new squares that are created each time the player moves from square to square.
And right now, we’re just doing simple math for starfield. When we’ll create nebulae or galaxies later, the math will be much more intensive.
It’s expensive. Very expensive. So expensive that we exceed the limit of 16ms allowed per frame for a fluid image. We go up to 33ms. It blocks the event loop, it freezes the image and it becomes unplayable.
If we leave it like that, our player will also leave the game in 33ms.
Optimize
To avoid this, I have two solutions.
- First, we will free ourselves from the single thread limit of JavaScript.
We will do it using the Web Workers of the browser. I’m not going to do a lecture on this, it’s very well known, and the MDN page is extremely well done to understand them.
Concretely, we will send to Web Workers all the heavy calculations of the game.
These calculations will then be done in the background, by the browser. The goal is not to disturb our main thread. It must be in charge of only one thing: displaying things in a fluid way to the players.
Once the heavy calculations are done, the Web Workers return the results in events. Our main thread just has to display them !
// in worker.js

self.onmessage = messageEvent => {
  const heavyMath = _getHeavyMath()

  self.postMessage(heavyMath)
}

function _getHeavyMath () {
  const positions = []
  const colors = []

  // heavy math to process positions and colors of particles

  return {
    positions: new Float32Array(positions),
    colors: new Float32Array(colors)
  }
}


// in main.js

worker.onmessage = messageEvent => this.showData(messageEvent.data)
And just like that, we divide the load by ten!
But that’s not enough. In order to have excellent performances, we will relieve the event loop a little more.
- Secondly, we are going to spread out the display phases of the squares in time.
As it is, the heavy calculations are well done in the web workers. But it is very possible that the display of the three squares are requested at exactly the same time. We want to avoid this to have a perfectly smooth image.
To do this, we will use a little trick.
We will allow only one display of star fields at the same time via a boolean. Then we will spread out in time the display phases of each square via a setTimeout. This means that the display of each square will not be instantaneous. It will be spaced out by 50ms. One by one.
50ms is huge in terms of relief for the event loop.
And it is imperceptible to the player.
Exactly what we need.
isRenderingClusterInProgress = true

const clusterTorender = grid.queueClusters.keys().next().value

setTimeout(() => {
  grid.renderMatters(clusterTorender,
  grid.queueClusters.get(clusterTorender))
  isRenderingClusterInProgress = false
}, parameters.global.clusterRenderTimeOut)
Et voilà !
Infinite starfields in your browser.
Isn’t life beautiful?
And the rest?
If you have played the game and/or seen the trailer, you can see that 90% of the content is missing in this article.
Nebulae, suns, black holes, red giants, fucking wormholes between universes, four different universes and the incredible finale!
Yes, it is. But this project is huge. Too huge to be written about in one article.
A lot of articles (at least four) on the subject is coming. We’ll take a look at each of the topics to talk about them.
- How to build Nebulae in JavaScript ?
- How to build Red Giant in JavaScript ?
- How to build Black Hole in JavaScript ?
- How to build Worm Hole in Javascript ?
So stay tuned folks !
I’m just getting started.
Epilogue
It was the biggest personal project I’ve ever done. It was incredible to do. There were ups, downs, distress and wonder. I’ll let you enjoy the game. I’m not sure I’ll be doing a project this big again anytime soon.
Please share it with others. It would mean a lot to me.
I’m going to get some sleep now.

Latest comments (17)
This is mind blowing!! How you write it is so commendable, too!
Will you be interested to collaborate with us and write a tutorial for our businesses? Happy to pay! You can either DM me on twitter at twitter.com/AndrewPierno or fill out this little airtable form airtable.com/shrN6S3NMZ7oxRXTt.
Really love the minimalist theme on your WP blog, did you built the theme yourself? I'm starting that's why
Once in, had to play till the end. I'm more eager to three.js
Just an amazing job!
This is not just a personal project. This is a work of Art. I have never been so impressed with someone's Project this much. This project is such an inspiration.
Gread Job
Thank you Pratik ! I appreciate !
It's fantastic! Amazing work.
brilliant work
Very nice , it's become my goto if I need a couple minutes break from coding at work
This is incredible, probs for the superb work.
Also, I loved reading through your thought process, probably my favourite part!
Wow! This piece of work is amazing!