Overview
With Celo-Composer, building fullstack dApps on celo blockchain network is extremely easy and quick. In this tutorial, you will learn how to
- setup metamask
- add Celo Alfajores Testnet network to metamask
- fund your testnet account
- generate a React.js template
- run your frontend on localhost and connect wallet
A look at the output on localhost
Prerequisite
To fully follow up with this tutorial, you will need to have
- Node or Nvm installed on your system
- general understanding on running commands on the terminal
- good knowledge on React
Setting up Metamask and connecting to Celo
I'd recommend going through this, 3-simple steps to connect your metamask wallet to celo for a detailed explanation to this, which is from the Celo documentation tutorials.
- After setting up metamask extension, to easily connect to the Celo Alfajores network, go to chainlist which is a site that has a list of EVM networks.
- Tick on the checkbox, Include Testnets and search for Celo Alfajores Tesnet. Connect your wallet and then select Add to Metamask.
- To fund your wallet address, visit celo-faucet, copy your wallet address from metamask and paste it in the Account Address so that your account can get funded with Celo.
Generate React template
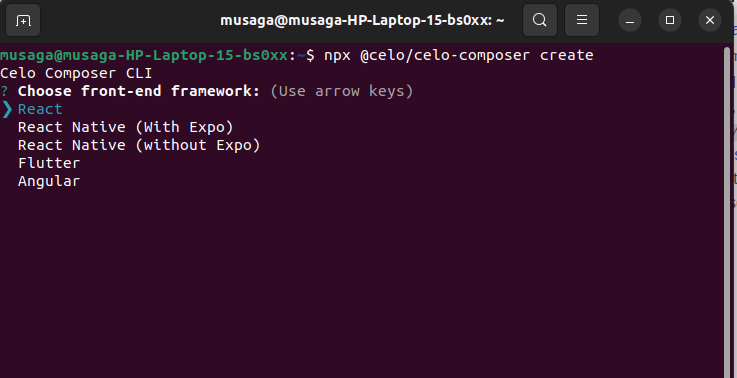
- Open the terminal and paste this command
npx @celo/celo-composer createThis is a command line tool which will help us in quickly generating a template for dApp development and in this tutorial, we will be opting for React, which is the frontend framework we will be using.
- After selecting React, we will be opting for Rainbowkit-celo which is a component that makes it easy for us to integrate wallet connection into any dApps.
- After selecting Rainbowkit-celo, you can either opt for Hardhat or Truffle which will be for smart contract development or you could just opt for None.
- Next, we will be selecting either No or Yes to creating a subgraph, which will help in querying data from the celo blockchain.
Next, You'll be providing a project name for the dApp and voila, your React template will be generated and you can start building your dApp.
On your terminal, navigate to your project's directory using this command
cd [project-name]/packages/react-appand
runyarnto install all the dependencies needed to run the application.
When the installation is successful, you will get an output like this
- Next up, run this command
yarn run devto start up the server in your localhost
- Copy the local host url http://localhost:3000 and open it up on the browser. And there you have it.


Top comments (0)