RESTful APIs offer a straightforward way for businesses to work with external data and offer access to their own data. With more than 24,000 public APIs providing access to limitless data and the typical enterprise leveraging more than 200 applications, teams and developers need more efficient ways to query API data. With the CData API Driver, it is easier than ever to integrate with APIs at scale for data analytics and application development.
Why use the API Driver?
Use simple SQL to access and work with data anywhere there’s an API. Like all CData Drivers, the CData API Driver makes it easier to work with your data. With the API Driver and the available API Profiles, you can instantly and codelessly query dozens of APIs (including any APIs built using the CData API Server) from BI, data integration, and custom applications.
Thanks to its extensible design, organizations and developers can modify API Profiles from API Server to customize integrations and even create their own API Profiles. Easily expand the connectivity offered by API Driver to any RESTful API.
Editing an API Profile
By default, existing API Profiles grant read access to APIs. We can edit the API Profiles to gain write access to APIs (where supported).
Unzip the Existing Profile
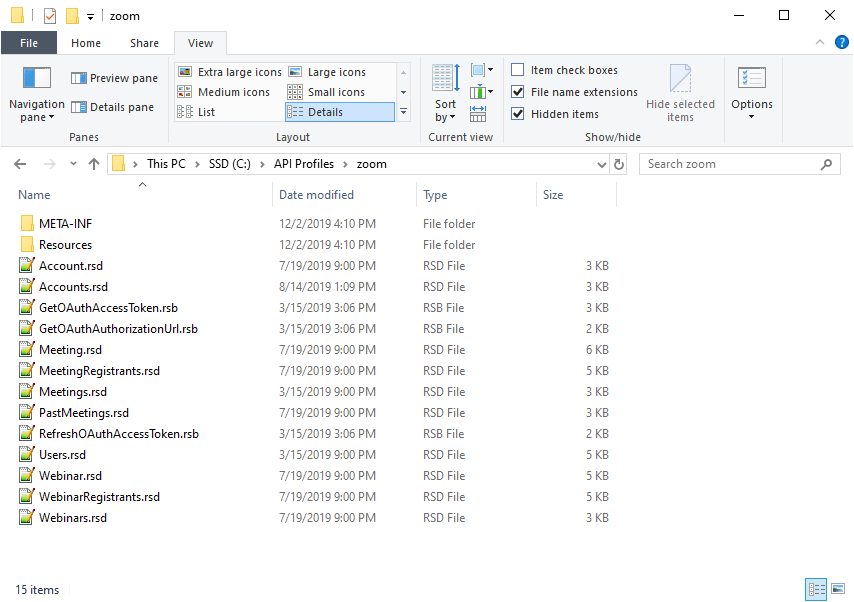
API Profiles (.apip files) are compressed folders that contain a collection of schema files representing the endpoints available for the API. When you decompress (unzip) the file, you can edit the schema files individually to extend the functionality.
Open the Schema File
Once the Profile is decompressed, open the schema file for the API endpoint you wish to modify (in your preferred text editor). Each schema file has several parts that define how SQL access is enabled for an API endpoint.
api:info: This keyword maps API fields to table columns through scripted column definitions.
attr: This element represents a column definition (details are below).
api:set attr="...": This keyword (attribute) sets various parameters for the API integration, including paging functionality and information on how to parse the API response (via the RepeatElement attribute).
api:script method="...": This keyword defines how read and write functionality is implemented for the API endpoint, including which internal operation is called and how specific functionality like filtering is managed.
Below are the full contents of a the schema file for retrieving Zoom Meetings.
Meetings.rsd
Update Column Definitions
If we are going to implement write functionality, we need to modify the schema to allow write permissions to the appropriate columns. Before we update a column definition for the Profile, let's examine a single column definition and discuss the different attributes.
Id Column Definition
Column Definition Attributes
name: The name of the column in the SQL interface for the API endpoint
xs:type: The data type associated with the column (e.g.: string, datetime, int, etc.)
readonly: Whether the column allows writes (by default, this is always true)
key: Whether a column is intended to be a unique identifier for the elements in a table/view
other:xPath: The path (exact or relative to theRepeatElement) in the API response to the column value
We can see from the schema file that most of the columns (which correspond to various API fields) are flagged as read-only. The first edit we need to make is to change those columns so the API Driver can write to them (based on the API specification) by removing the read-only flags:
...
...
Add INSERT Functionality
In this section, we walk through modifying the Schema file to support INSERT statements like the following:
INSERT INTO Meetings
(Topic,Type,StartTime,Duration,TimeZone,UserId)
VALUES
('Test Meeting',2,'2019-12-31T00:00:00',60,'EST','user@domain.com')
NOTE: Topic, Type, StartTime, Duration, and TimeZone are all columns in our schema. The UserId attr is a pseudocolumn, which behaves like a table column but is not actually stored in the table. In this case, the UserId is used to POST the new meeting to a specific user account.
In the schema file, the SELECT functionality is implemented in the element:
To implement INSERT functionality, we need to modify the element, setting the method attribute value to "POST", setting the input values in a data attribute and calling the appropriate operation (apisadoExecuteJSONGet in this case).
Setting the method Attribute
Setting the data Attribute
The Zoom Meetings API endpoint allows you to create a new meeting by submitting a JSON object with various fields for the new meeting. Values from an INSERT statement are mapped to corresponding fields in an _input object and are used to create the data attribute, which will be POSTed to the Zoom API.
{
"topic": "[_input.Topic]",
"type": [_input.Type],
"start_time": "[_input.StartTime]",
"duration": "[_input.Duration]",
"timezone": "[_input.TimeZone]"
}
Calling the apisadoExecuteJSONGet Operation
Once the data attribute is set, call the apisadoExecuteJSONGet operation using an api:call keyword and push the operation to the API Driver with an api:push keyword.
...
Using the Edited Profile
With the edits made to the schema file, you are ready to start INSERTing Meetings to a Zoom account. Save the schema file, recompress (zip) the schema files, and change the extension of the compressed file to .apip. Use an application that supports standard connectivity to connect to the API Profile using the API Driver, then submit your INSERT statement.
INSERT Statement
INSERT INTO Meetings
(Topic,Type,StartTime,Duration,TimeZone,UserId)
VALUES
('Test Meeting (Edited Profile)',2,'2019-12-31T00:00:00',60,'EST','user@domain.com')
Meeting in Zoom
More Information
The CData API Drivers simplify data connectivity for a wide range of popular data tools. Connect BI, Reporting, & ETL tools to live data from any application, database, or Web API. Built on the same robust SQL engine that powers other CData Drivers, the CData API Driver enables simple codeless query access to APIs through a single client interface.


Top comments (0)