Node deletion was a basic method that I at first struggled with while learning how to manipulate Binary-Search Trees (or BSTs). Already knowing how to delete nodes in a Linked List, I thought I could apply the same concepts and processes to a BST, but in cases deleting a node wasn't as intuitive as I expected it to be.
In this blog, I'm going to compare deleting nodes in a Linked List and in a Binary-Search Tree and discuss how the processes are similar, and where they differ. I'll also code a class method and a function that removes nodes, and I'll explain the code as I write it.
Review: Deleting a Node from a Linked List
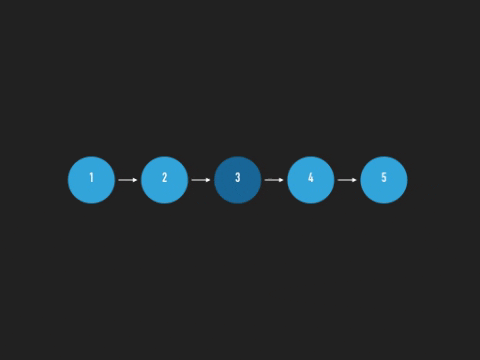
For those of you who are familiar with Linked Lists, the process for deleting a node from one is simple. You traverse through the list until you find the node that you want to delete. If that node happens to be at the end of the list, just delete it by pointing the previous node to null. And, poof, gone. It's as simple as that.
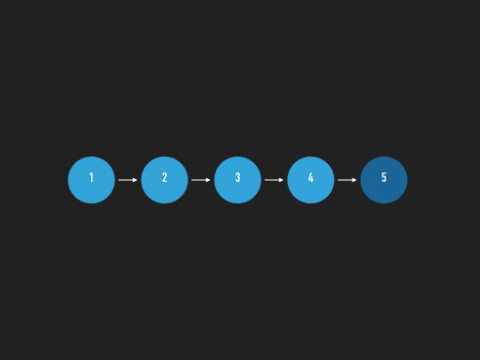
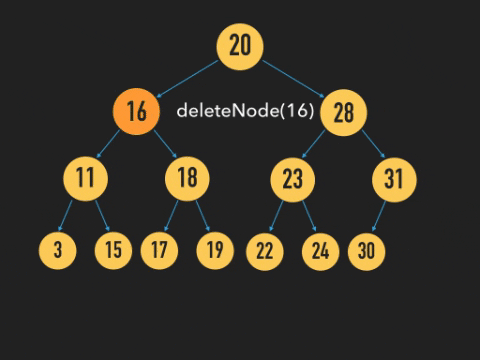
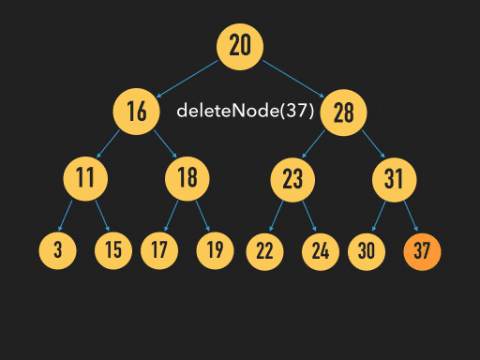
Deleting a node in the middle of a list, however, requires a little more effort. If the target node falls in the middle of the list, we can't simply delete it because if we do, we also end up trashing the remaining successive nodes that it points to. That would be a massively unfortunate mistake whether you did that with a Linked List or with a BST. Here's a dramatized example of what that could look like in a BST.
So, to avoid losing the rest of a Linked List, we point its previous node to its next node. By re-directing the previous node's pointer this way, we cut off any reference to the target node, essentially deleting it.
The Challenge: Deleting a Node from a BST
Knowing what I knew about Linked Lists, I assumed that it'd be just as simple to delete nodes in a BST. And in most cases, I was right.
Deleting a Node with 1 or Fewer Children
In the case that the target node was a leaf at the end of a branch, we'd just delete it.
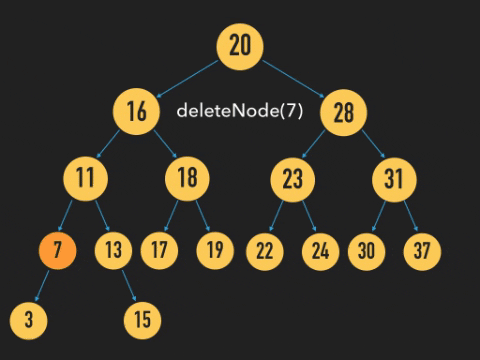
And if the target node were to have only one child, we would just connect that node's parent to its child.
But, here's where my assumptions were wrong and insufficient. Unlike a Linked List, BSTs don't follow a linear sequence where one node is followed another, which is then followed by another. Nodes in a BST branch out and could have as many as two node children, a left and a right. So you might ask some questions like,
1) How would we choose which of the node's children to connect to its parent? And after choosing,
2) How would we reattach and restructure the other child subtree so that we maintain the hierarchical rules of BSTs?
Thankfully, we don't have to worry about either of these questions because there's a special, yet straightforward approach to handling this problem.
Deleting a Node with 2 Children

What we do is after we find the target node, we mark its place, and we continue traversing down the branch, first by moving to the first right child, and then continuing to move down the branch, moving as far leftwards as possible until we reach a leaf node.
The leaf we visit would have the smallest value of all the target node's right and larger-valued descendants, which makes it a perfect substitute for the target node we're about to delete. As the target's replacement, it keeps everything in order as it already is. Its left descendants still have smaller values than it, and its right descendants also still have values greater than it, and it maintains the bridge between upper and lower levels of the branch.
Write Code: deleteNode()
In my previous blog, we learned how to get started coding BSTs (creating Node and BST classes, insert and find methods). We'll continue from where we left off last time and write the deleteNode method step by step.
Setting Up: Create Remove Method and a Helper Function
  remove(value) {
    const removeNode = (node, value) => {
      // EVALUATING NODE
      // REMOVING VALUE
    }

    this.root = removeNode(this.root, value);
  }
Create a method called remove that takes a target value as an argument.
And inside of our method, we'll create a helper function called removeNode. It'll be responsible for actually removing the node value in the tree, and we'll be using it recursively. This function will take in two arguments, a node and a value (the same value as the target value or the value of the node we want to remove). We'll call the function inside the remove method, and it will take in our root node as its first argument.
Compare Target and Node Values
const removeNode = (node, value) => {
  // if no node exists, return null
  if (!node) {
    return null;
  }

  // *** COMPARE TARGET AND NODE VALUES BELOW***

  if (value == node.value) { // if they match,
  // REMOVE VALUE HERE

  } else if (value < node.value) { // if target value is lesser than node value,
    // search and remove target in left subtree
    node.left = removeNode(node.left, value);
    // return updated node after removal
    return node;

  } else { // if target value is greater than node value
    // search and remove target in right subtree
    node.right = removeNode(node.right, value);
    // return updated node after removal
    return node;
  }
}
Inside of remove node, we're going to check first if the node is even valid. If it isn't, then the tree doesn't exist, and we just return null.
Following that, compare this node's value against the target value. We want to check to see if it matches or not. If it does, we'll take further steps to start the removal. If it doesn't, we see if the target value is lesser or greater than the current node's. If it's lesser, we move to the left child, and if it's greater, then we move to the right. Either way, we'll call removeNode again using our child node. And we'll recursively continue this search cycle until there's a match.
Finding a Match: Delete Node with One or No Children
const removeNode = (node, value) => {
  // previous code

  if (value == node.value) {
    // the node is a leaf,
    if (!node.left && !node.right) {
      // delete the node
      return null;
    }

    // if there isn't a left child,
    if (!node.left) {
      // then replace node with right child
      return node.right;
    }

    // if there isn't a right child,
    if (!node.right) {
      // then replace node with left child
      return node.left;
    }
  }
}
Now, let's focus on what to do when there's a match. First, we'll check if the node has any children. If it doesn't, that means it's a leaf node and we can safely delete it by giving it a value of null.
But if the node does, in fact, have one child, then we can replace it with its child node.
At this point, we've covered all the simple steps of deleting a leaf node and replacing the node with the only available child.
Finding a Match: Delete Node with Two Children
And now this is where it gets fun. And by fun, I mean messy. Maybe you'll want to take a brief brain break before we continue.
  const removeNode = (node, value) => {
    // previous code
    if (value == node.value) {
      // previous code

      // assigning right child node to temp
      let temp = node.right;

      // while there is a left child,
      while(!temp.left) {
        // traverse along left branches
        temp = temp.left;
      }

      // replace node value with temp value
      node.value = temp.value;
      // delete leaf
      node.right = removeNode(node.right, temp.value);
    }
  }
Continuing the logic from here, we're assuming that the node has two children, but we're only going to work with the right child subtree.
From the root of this subtree, we're going to traverse all the way down the branch, as far left as we can go until we reach a leaf. When we reach that destination, we replace the node value with the leaf (temp) value.
Great! We've successfully deleted the target value from the node by replacing it with another already existing value.
But we're not done! Now we need to delete the leaf node so that we're not left with doubles of the same value.
We'll call the function removeNode again, this time to remove the leaf node value of the same right child subtree.
And now, we're done.
Here's the full code.
remove(value) {
  const removeNode = (node, value) => {
    if (!node) {
      return null;
    }

    if(value == node.value) {
      if (!node.left && !node.right) {
        return null;
      }

      if (!node.left) {
        return node.right;
      }

      if (!node.right) {
        return node.left;
      }

      let temp = node.right;

      while(!temp.left) {
        temp = temp.left;
      }

      node.value = temp.value;

      node.right = removeNode(node.right, temp.value);

    } else if (value < node.value) {
      node.left = removeNode(node.left, value);
      return node;

    } else {
      node.right = removeNode(node.right, value);
      return node;
    }
  }
  this.root = removeNode(this.root, value)
}
Conclusion
That's it for now with BSTs and object methods. Next week, we dive into Binary Tree Traversals!
For more information on binary trees, check out these other blogs from my 5-part binary tree series!


Top comments (3)
Hi Jenny,
Excellent and very useful explanation.
I think there is a typo in the loop:
I think it should be "while(temp.left) ..." (without the bang symbol) to check that there is still a left child.
I tested the code for the below binary tree:
let tree = new BinarySearchTree();
tree.insert(10)
tree.insert(5)
tree.insert(13)
tree.insert(11)
tree.insert(2)
tree.insert(16)
tree.insert(7)
which yields the below tree:
When trying to use the method to remove 13, I expected the minimum successor of 13, that is, 16, to replace 13 and get the below tree:
with a resulting depth-first-search inOrder(DFSInOrder) array of:
[2,5,7,10,11,16]
However, the actual result I get from calling the function is:
with a DFSInOrder array of [2,5,7,10]; that is, the function removes the 13 node with all of its children (instead of replacing its value with its minimum successor and deleting the minimum successor). I'll try to come back to this problem if I find a solution that returns the expected DFSInOrder array of [2,5,7,10,11,16].
hi Jenny,
Thanks for this great article.
And here is a slight different solution for BST deleteNode()
The idea is once you find the target node, there is no need to start a new recursion
node.right = removeNode(node.right, temp.value); to delete the duplicate node.
Instead you can just delete it using the the target node's parent.
deleteNode(key) {
const removeNode = (node, value) => {
if (!node) {
return null;
}
}
This article deserves more attention. Was literally in the process of writing something like this before I found yours. Always great to see recursion driven impls illustrated so nicely.